2020 CHRYSLER PACIFICA uconnect settings
[x] Cancel search: uconnect settingsPage 400 of 516

398MULTIMEDIA
Privacy of any wireless and wired
communications cannot be assured. Third
parties may unlawfully intercept information
and private communications without your
consent. For further information, refer to “Data
Collection & Privacy” in your Uconnect Owner’s
Manual Supplement or “Onboard Diagnostic
System (OBD II) Cybersecurity” in “Getting To
Know Your Instrument Panel”.
UCONNECT SETTINGS
The Uconnect system uses a combination of
buttons on the touchscreen and buttons on the
faceplate located on the center of the
instrument panel. These buttons allow you to
access and change the Customer
Programmable Features. Many features can
vary by vehicle.
Buttons on the faceplate are located below
and/or beside the Uconnect system in the
center of the instrument panel. In addition,
there is a Scroll/Enter control knob located on
the right side. Turn the control knob to scroll
through menus and change settings. Push the
center of the control knob one or more times to
select or change a setting.
Your Uconnect system may also have Screen
Off and Mute buttons on the faceplate. Push the Screen Off button on the faceplate to
turn off the Uconnect screen. Push the button
again or tap the screen to turn the screen on.
Push the Back Arrow button to exit out of a
Menu or certain option on the Uconnect system.
Customer Programmable Features —
Uconnect 4 Settings
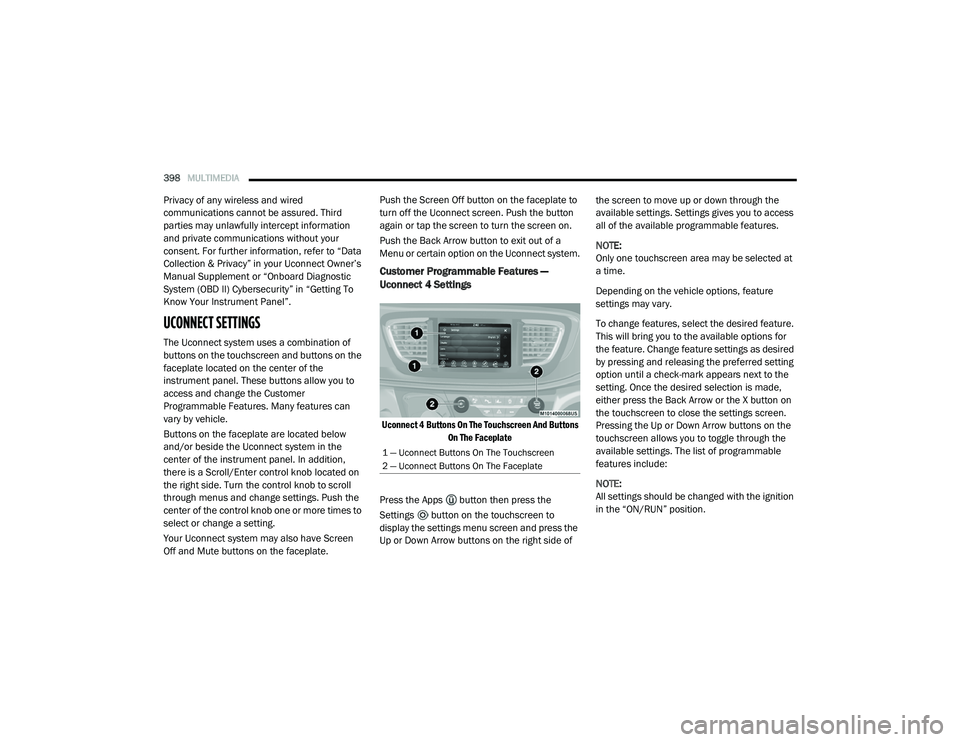
Uconnect 4 Buttons On The Touchscreen And Buttons
On The Faceplate
Press the Apps button then press the
Settings button on the touchscreen to
display the settings menu screen and press the
Up or Down Arrow buttons on the right side of the screen to move up or down through the
available settings. Settings gives you to access
all of the available programmable features.
NOTE:
Only one touchscreen area may be selected at
a time.
Depending on the vehicle options, feature
settings may vary.
To change features, select the desired feature.
This will bring you to the available options for
the feature. Change feature settings as desired
by pressing and releasing the preferred setting
option until a check-mark appears next to the
setting. Once the desired selection is made,
either press the Back Arrow or the X button on
the touchscreen to close the settings screen.
Pressing the Up or Down Arrow buttons on the
touchscreen allows you to toggle through the
available settings. The list of programmable
features include:
NOTE:
All settings should be changed with the ignition
in the “ON/RUN” position.
1 — Uconnect Buttons On The Touchscreen
2 — Uconnect Buttons On The Faceplate
20_RU_OM_EN_US_t.book Page 398
Page 413 of 516

MULTIMEDIA411
Key Off Options
After pressing the Engine Off Options button on the touchscreen, the following settings will be available:
Setting Name Selectable Options
Key Off Power Delay — If Equipped 0 sec
45 sec
5 min 10 min
NOTE:
When the “Engine Off Power Delay” feature is selected, the power window switches, radio, Uconnect phone system (if equipped), DVD video system
(if equipped), power sunroof (if equipped), and power outlets will remain active for up to 10 minutes after the ignition is placed in the OFF position.
Opening either front door will cancel this feature.
Headlight Off Delay 0 sec
30 sec
60 sec 90 sec
NOTE:
When the “Headlight Off Delay” feature is selected, it allows the adjustment of the amount of time the headlights remain on after the engine is shut off. Easy Exit Seat — If Equipped OnOff
NOTE:
When the “Easy Exit Seat” feature is selected, it provides automatic driver seat positioning to enhance driver mobility when entering and exiting the
vehicle.
9
20_RU_OM_EN_US_t.book Page 411
Page 415 of 516

MULTIMEDIA413
Phone/Bluetooth®
After pressing the Phone/Bluetooth® button on the touchscreen, the following settings will be available:
SiriusXM® Setup — If Equipped
After pressing the SiriusXM® Setup button on the touchscreen, the following settings will be available:
Setting Name Selectable Options
Phone Pop-ups Displayed in Cluster OnOff
Do Not Disturb List of Settings
NOTE:
Press “Do Not Disturb” to access the available settings. The following settings are: Auto Reply (Both, Text, Call), Auto Reply Message (Custom, Default),
and Custom Auto Reply Message (Create Message). Paired Phones and Audio Devices List of Paired Phones
NOTE:
This feature shows which phones are paired to the Phone/Bluetooth® system. For further information, refer to the Uconnect Owner’s Manual Supplement.
Setting Name Selectable Options
Tune StartOnOff
Channel Skip List of Channels
NOTE:
SiriusXM® can be programmed to designate a group of channels that are the most desirable to listen to or to exclude undesirable channels while
scanning. This feature allows you to select the channels you would like to skip. Subscription Information Sirius ID
9
20_RU_OM_EN_US_t.book Page 413
Page 417 of 516

MULTIMEDIA415
Customer Programmable Features —
Uconnect 4C/4C NAV Settings
Uconnect 4C/4C NAV Buttons On The Touchscreen And
Buttons On The Faceplate
Press the Apps button, then press the
Settings button on the touchscreen to
display the menu setting screen. In this mode
the Uconnect system allows you to access all of
the available programmable features.
NOTE:
Only one touchscreen area may be selected
at a time.
Depending on the vehicles options, feature
settings may vary.
When making a selection, press the button on
the touchscreen to enter the desired mode.
Once in the desired mode, press and release
the preferred setting option until a check-mark
appears next to the setting, showing that setting
has been selected. Once the setting is
complete, either press the Back Arrow button
on the touchscreen to return to the previous
menu, or press the X button on the touchscreen
to close out of the settings screen. Pressing the
Up or Down Arrow button on the right side of the
screen will allow you to toggle up or down
through the available settings.
1 — Uconnect Buttons On The Touchscreen
2 — Uconnect Buttons On The Faceplate
9
20_RU_OM_EN_US_t.book Page 415
Page 433 of 516

MULTIMEDIA431
Audio
After pressing the Audio button on the touchscreen, the following settings will be available:NOTE:
When the “Engine Off Power Delay” feature is selected, the power window switches, radio, Uconnect phone system (if equipped), DVD video system
(if equipped), power sunroof (if equipped), and power outlets will remain active for up to 10 minutes after the ignition is cycled to OFF. Opening either
front door will cancel this feature.
Headlight Off Delay 0 sec
30 sec
60 sec 90 sec
NOTE:
When the “Headlight Off Delay” feature is selected, it allows the adjustment of the amount of time the headlights remain on after the engine is shut off.
Setting Name Selectable Options
Setting NameSelectable Options
Balance/Fade Speaker Icon
NOTE:
When in this display you may adjust the “Balance/Fade” of the audio by pressing and dragging the Speaker Icon toward any location in the box. Equalizer BassMid Treble
NOTE:
When in this display you may adjust the “Bass”, “Mid”, and “Treble” settings. Adjust the settings with the + and – setting buttons on the touchscreen
or by selecting any point on the scale between the + and – buttons on the touchscreen. Bass/Mid/Treble also allow you to simply slide your finger up
or down to change the setting, as well as press directly on the desired setting. Speed Adjusted Volume Off123
Surround Sound — If Equipped OnOff
9
20_RU_OM_EN_US_t.book Page 431
Page 434 of 516

432MULTIMEDIA
Phone/Bluetooth®
After pressing the Phone/Bluetooth® button on the touchscreen, the following settings will be available:AUX Volume Offset — If Equipped
+-
NOTE:
This feature provides the ability to tune the audio level for portable devices connected through the AUX input. Auto Play OnOff
Setting Name Selectable Options
Setting NameSelectable Options
Phone Pop-ups Displayed in Cluster OnOff
Do Not Disturb List Of Settings
NOTE:
Press “Do Not Disturb” to access the available settings. The following settings are: Auto Reply (Both, Text, Call), Auto Reply Message (Custom, Default),
and Custom Auto Reply Message (Create Message). Paired Phones And Audio Devices List Of Paired Phones
NOTE:
This feature shows which phones and audio devices are paired to the Phone/Bluetooth® system. For further information, refer to the Uconnect
Owner’s Manual Supplement. Smartphone Projection Manager OnOff
20_RU_OM_EN_US_t.book Page 432
Page 440 of 516

438MULTIMEDIA
5. Controls
Press the Controls button on the touch -
screen to adjust the heated and vented
seats or heated steering wheel (If
Equipped).
6. Phone Press the Phone button on the touchscreen
to access the Uconnect Phone feature.
7. Settings Press the Settings button on the touch -
screen to access the Uconnect Settings
menu.Drag & Drop Menu Bar
The Uconnect features and services in the main
menu bar are easily changed for your
convenience. Simply follow these steps:
Uconnect 4 Main Menu
1. Press the Apps button to open the App screen.
2. Press and hold, then drag the selected App to replace an existing shortcut in the main
menu bar. The new app shortcut, that was dragged down
onto the main menu bar, will now be an active
App/shortcut.
NOTE:
This feature is only available if the vehicle is in
PARK.
Radio Mode
Radio Controls
The radio is equipped with the following modes:
AM
FM
SiriusXM® Satellite Radio – If Equipped
Press the Radio button on the touchscreen,
bottom left corner, to enter the Radio Mode. The
different tuner modes, AM, FM, and SXM, can
then be selected by pressing the corresponding
buttons in the Radio mode.
20_RU_OM_EN_US_t.book Page 438
Page 450 of 516

448MULTIMEDIA
AUX Mode
Overview
AUX (Auxiliary Mode) is entered by inserting an
AUX device using a cable with a 3.5 mm audio
jack into the AUX port or by pressing the AUX
button on the left side of the display.
Inserting Auxiliary Device
Gently insert the Auxiliary device cable into the
AUX Port. If you insert an Auxiliary device with
the ignition and the radio on, the unit will switch
to AUX mode and begin to play when you insert
the device cable.
Controlling The Auxiliary Device
The control of the auxiliary device (e.g.,
selecting playlists, play, fast forward, etc.)
cannot be provided by the radio; use the device
controls instead. Adjust the volume with the
Volume/Mute rotary knob, or with the volume of
the attached device.
NOTE:
The radio unit is acting as the amplifier for audio
output from the Auxiliary device. Therefore, if the volume control on the Auxiliary device is set
too low, there will be insufficient audio signal for
the radio unit to play the music on the device.
Media Mode
Press the Media button on the touchscreen to
select the desired audio source: AUX.
Audio
Refer to Radio Mode for adjusting the audio
settings.
BLUETOOTH® MODE
Overview
Bluetooth® Streaming Audio (BTSA) or
Bluetooth® Mode is entered by pairing a
Bluetooth® device, containing music, to the
Uconnect System.
Before proceeding, the Bluetooth® device must
be paired to the Uconnect Phone to
communicate with the Uconnect System.
NOTE:
See the pairing procedure in the Uconnect
Phone section for more details.To access Bluetooth® mode, press the Select
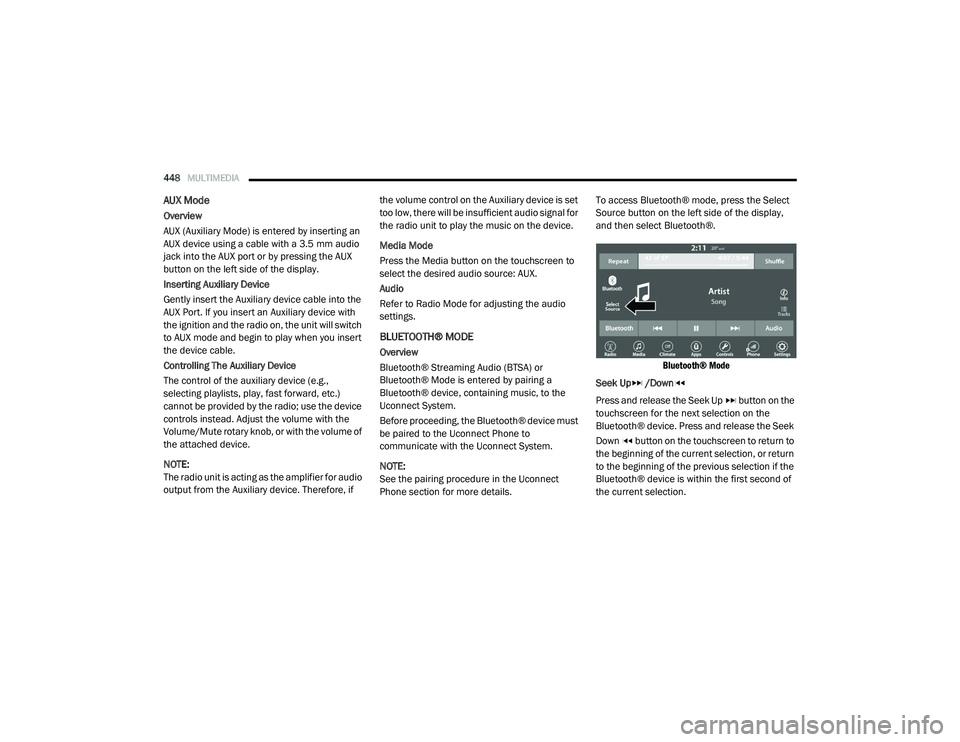
Source button on the left side of the display,
and then select Bluetooth®.
Bluetooth® Mode
Seek Up /Down
Press and release the Seek Up button on the
touchscreen for the next selection on the
Bluetooth® device. Press and release the Seek
Down button on the touchscreen to return to
the beginning of the current selection, or return
to the beginning of the previous selection if the
Bluetooth® device is within the first second of
the current selection.
20_RU_OM_EN_US_t.book Page 448