2020 CHRYSLER 300 ignition
[x] Cancel search: ignitionPage 48 of 328
46GETTING TO KNOW YOUR VEHICLE
TURN SIGNALS
Move the multifunction lever up or down and
the arrows on each side of the instrument
cluster display flash to show proper operation of
the front and rear turn signal lights.
NOTE:
If either light remains on and does not flash,
or there is a very fast flash rate, check for a
defective outside light bulb. If an indicator
fails to light when the lever is moved, it would
suggest that the indicator bulb is defective.
A “Turn Signal On” message will appear in the
instrument cluster display and a continuous
chime will sound if the vehicle is driven more
than 1 mile (1.6 km) with either turn signal on.
LANE CHANGE ASSIST — IF EQUIPPED
Tap the multifunction lever up or down once,
without moving beyond the detent, and the turn
signal (right or left) will flash three times then
automatically turn off.
INTERIOR LIGHTS
The interior lights come on when a door is
opened.
To protect the battery, the interior lights will turn
off automatically 10 minutes after the ignition is
placed in the OFF position. This will occur if the
interior lights were switched on manually or are
on because a door is open. The Battery
Protection also includes the glove compartment
light and the trunk light. To restore interior light
operation after automatic battery protection is
enabled (lights off), either place the ignition in
the ON/RUN position, or cycle the light switch.
COURTESY LIGHTS
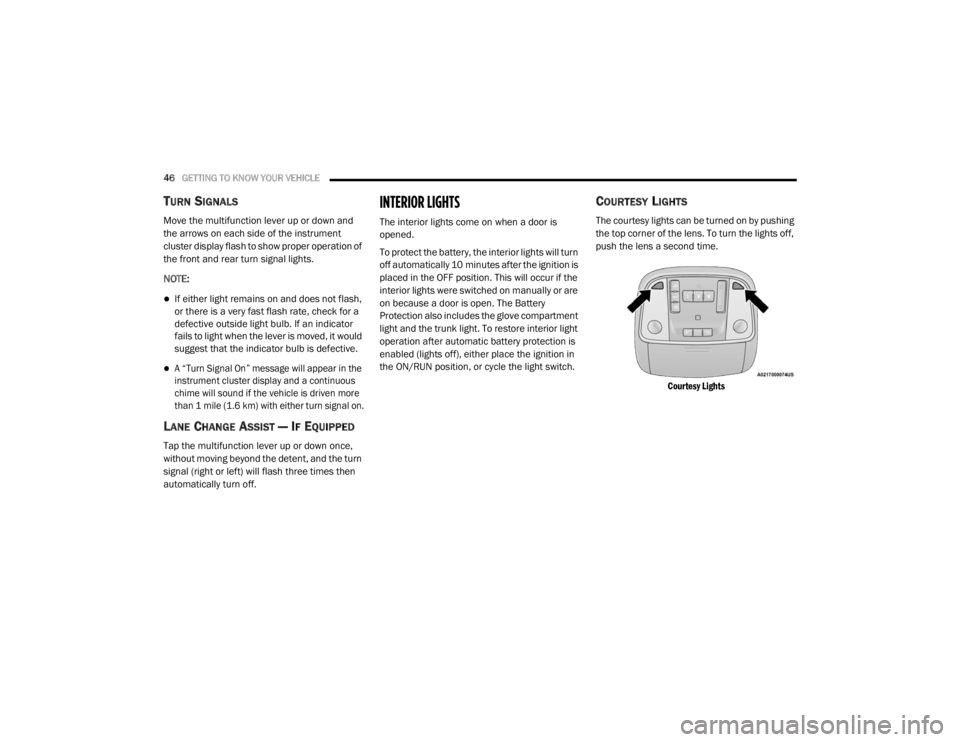
The courtesy lights can be turned on by pushing
the top corner of the lens. To turn the lights off,
push the lens a second time.
Courtesy Lights
20_LX_OM_EN_USC_t.book Page 46
Page 50 of 328
48GETTING TO KNOW YOUR VEHICLE
(Continued)
Dimmer Controls
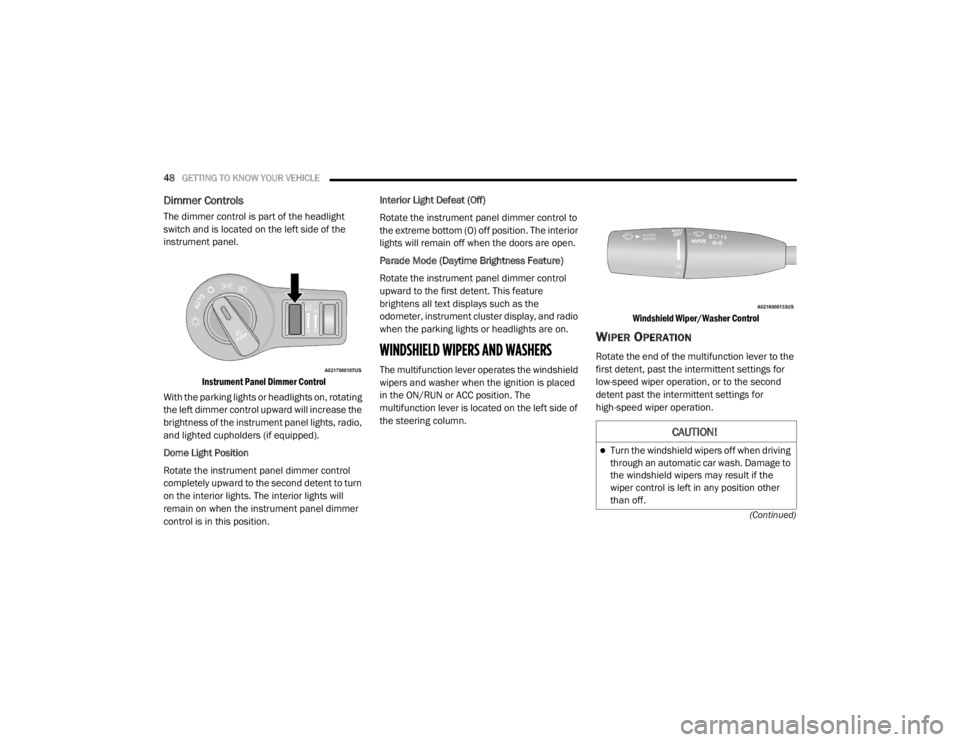
The dimmer control is part of the headlight
switch and is located on the left side of the
instrument panel.
Instrument Panel Dimmer Control
With the parking lights or headlights on, rotating
the left dimmer control upward will increase the
brightness of the instrument panel lights, radio,
and lighted cupholders (if equipped).
Dome Light Position
Rotate the instrument panel dimmer control
completely upward to the second detent to turn
on the interior lights. The interior lights will
remain on when the instrument panel dimmer
control is in this position. Interior Light Defeat (Off)
Rotate the instrument panel dimmer control to
the extreme bottom (O) off position. The interior
lights will remain off when the doors are open.
Parade Mode (Daytime Brightness Feature)
Rotate the instrument panel dimmer control
upward to the first detent. This feature
brightens all text displays such as the
odometer, instrument cluster display, and radio
when the parking lights or headlights are on.
WINDSHIELD WIPERS AND WASHERS
The multifunction lever operates the windshield
wipers and washer when the ignition is placed
in the ON/RUN or ACC position. The
multifunction lever is located on the left side of
the steering column.
Windshield Wiper/Washer Control
WIPER OPERATION
Rotate the end of the multifunction lever to the
first detent, past the intermittent settings for
low-speed wiper operation, or to the second
detent past the intermittent settings for
high-speed wiper operation.
CAUTION!
Turn the windshield wipers off when driving
through an automatic car wash. Damage to
the windshield wipers may result if the
wiper control is left in any position other
than off.
20_LX_OM_EN_USC_t.book Page 48
Page 52 of 328

50GETTING TO KNOW YOUR VEHICLE
desires less wiper sensitivity. Setting 4 can be
used if the driver desires more sensitivity. The
rain sensing wipers will automatically change
between an intermittent wipe, slow wipe and a
fast wipe depending on the amount of moisture
that is sensed on the windshield. Place the
wiper switch in the OFF position when not using
the system.
The Rain Sensing feature can be turned on and
off using the Uconnect system, refer to
“Uconnect Settings” in “Multimedia” for further
information.
NOTE:
The Rain Sensing feature will not operate
when the wiper speed is in the low or high
position.
The Rain Sensing feature may not function
properly when ice or dried salt water is
present on the windshield.
Use of Rain-X or products containing wax or
silicone may reduce rain sensor perfor -
mance. The Rain Sensing system has protective
features for the wiper blades and arms. It will
not operate under the following conditions:
Low Temperature Wipe Inhibit
— The Rain
Sensing feature will not operate when the
ignition is placed in the ON/RUN position, the
vehicle is stationary and the outside
temperature is below 32°F (0°C), unless the
wiper control on the multifunction lever is
moved, the vehicle speed becomes greater
than 0 mph (0 km/h) or the outside tempera -
ture rises above freezing.
Neutral Wipe Inhibit — The Rain Sensing
feature will not operate when the ignition is
placed in the ON/RUN position, the auto -
matic transmission gear selector is in the
NEUTRAL position and the vehicle speed is
less than 3 mph (5 km/h), unless the wiper
control on the multifunction lever is moved or
the gear selector is moved out of the
NEUTRAL position.
Remote Start Mode Inhibit — On vehicles
equipped with Remote Starting system, Rain
Sensing wipers are not operational when the
vehicle is in the remote start mode. Once the
operator is in the vehicle and has placed the ignition switch in the ON/RUN position, rain
sensing wiper operation can resume, if it has
been selected, and no other inhibit condi
-
tions (mentioned previously) exist.
CLIMATE CONTROLS
The Climate Control system allows you to
regulate the temperature, air flow, and direction
of air circulating throughout the vehicle. The
controls are located on the touchscreen (if
equipped) and on the instrument panel below
the radio.
AUTOMATIC CLIMATE CONTROL
O
VERVIEW
Uconnect 4C/4C NAV Automatic Climate Controls
20_LX_OM_EN_USC_t.book Page 50
Page 59 of 328
GETTING TO KNOW YOUR VEHICLE57
Cabin Air Filter
The climate control system filters out dust and
pollen from the air. Contact an authorized
dealer to service your cabin air filter, and to
have it replaced when needed.
Operating Tips Chart
WINDOWS
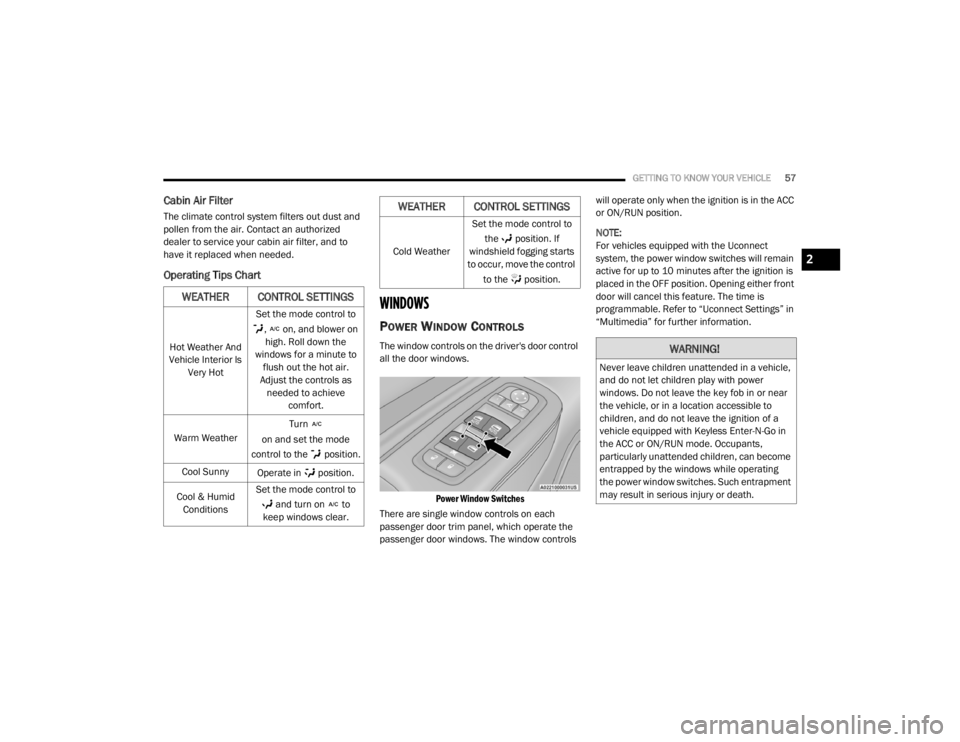
POWER WINDOW CONTROLS
The window controls on the driver's door control
all the door windows.
Power Window Switches
There are single window controls on each
passenger door trim panel, which operate the
passenger door windows. The window controls will operate only when the ignition is in the ACC
or ON/RUN position.
NOTE:
For vehicles equipped with the Uconnect
system, the power window switches will remain
active for up to 10 minutes after the ignition is
placed in the OFF position. Opening either front
door will cancel this feature. The time is
programmable. Refer to “Uconnect Settings” in
“Multimedia” for further information.
WEATHER CONTROL SETTINGS
Hot Weather And
Vehicle Interior Is Very Hot Set the mode control to
, on, and blower on high. Roll down the
windows for a minute to flush out the hot air.
Adjust the controls as needed to achieve comfort.
Warm Weather Turn
on and set the mode
control to the position.
Cool Sunny Operate in position.
Cool & Humid Conditions Set the mode control to
and turn on to
keep windows clear.
Cold Weather Set the mode control to
the position. If
windshield fogging starts
to occur, move the control
to the position.
WEATHER CONTROL SETTINGS
WARNING!
Never leave children unattended in a vehicle,
and do not let children play with power
windows. Do not leave the key fob in or near
the vehicle, or in a location accessible to
children, and do not leave the ignition of a
vehicle equipped with Keyless Enter-N-Go in
the ACC or ON/RUN mode. Occupants,
particularly unattended children, can become
entrapped by the windows while operating
the power window switches. Such entrapment
may result in serious injury or death.
2
20_LX_OM_EN_USC_t.book Page 57
Page 61 of 328
GETTING TO KNOW YOUR VEHICLE59
(Continued)
WIND BUFFETING
Wind buffeting can be described as the
perception of pressure on the ears or a
helicopter-type sound in the ears. Your vehicle
may exhibit wind buffeting with the windows
down, or the sunroof (if equipped) in certain
open or partially open positions. This is a normal
occurrence and can be minimized. If the
buffeting occurs with the rear windows open,
open the front and rear windows together to
minimize the buffeting. If the buffeting occurs
with the sunroof open, adjust the sunroof
opening to minimize the buffeting or open any
window.
PANORAMIC SUNROOF — IF EQUIPPED
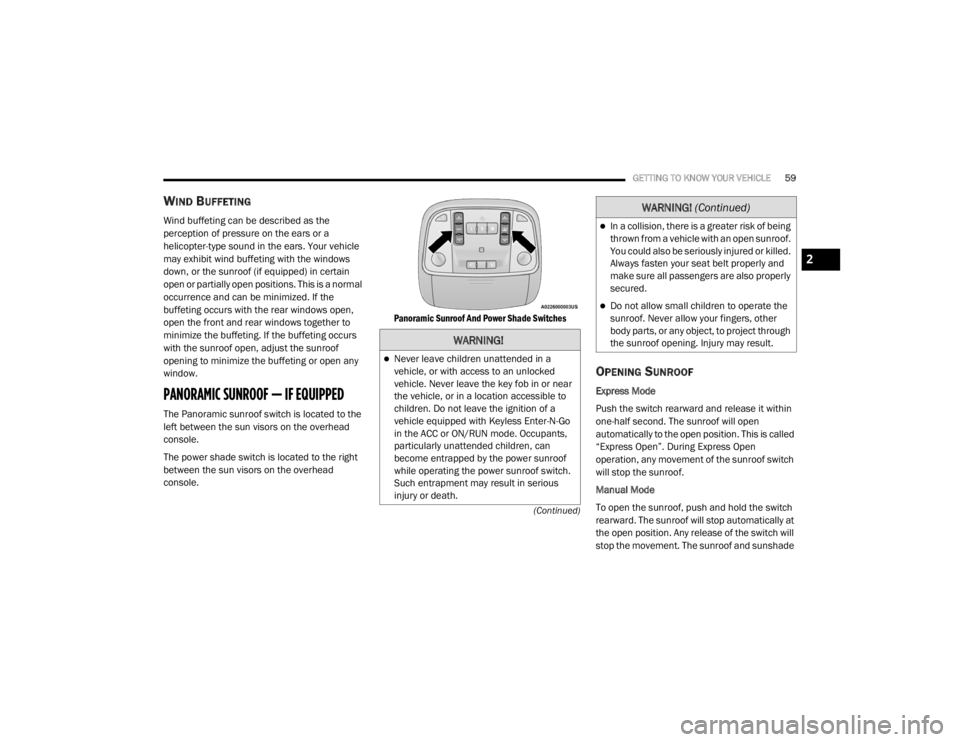
The Panoramic sunroof switch is located to the
left between the sun visors on the overhead
console.
The power shade switch is located to the right
between the sun visors on the overhead
console.
Panoramic Sunroof And Power Shade Switches
OPENING SUNROOF
Express Mode
Push the switch rearward and release it within
one-half second. The sunroof will open
automatically to the open position. This is called
“Express Open”. During Express Open
operation, any movement of the sunroof switch
will stop the sunroof.
Manual Mode
To open the sunroof, push and hold the switch
rearward. The sunroof will stop automatically at
the open position. Any release of the switch will
stop the movement. The sunroof and sunshade
WARNING!
Never leave children unattended in a
vehicle, or with access to an unlocked
vehicle. Never leave the key fob in or near
the vehicle, or in a location accessible to
children. Do not leave the ignition of a
vehicle equipped with Keyless Enter-N-Go
in the ACC or ON/RUN mode. Occupants,
particularly unattended children, can
become entrapped by the power sunroof
while operating the power sunroof switch.
Such entrapment may result in serious
injury or death.
In a collision, there is a greater risk of being
thrown from a vehicle with an open sunroof.
You could also be seriously injured or killed.
Always fasten your seat belt properly and
make sure all passengers are also properly
secured.
Do not allow small children to operate the
sunroof. Never allow your fingers, other
body parts, or any object, to project through
the sunroof opening. Injury may result.
WARNING!
(Continued)
2
20_LX_OM_EN_USC_t.book Page 59
Page 63 of 328
GETTING TO KNOW YOUR VEHICLE61
CLOSING POWER SHADE
Express Mode
Push the switch forward and release it within
one-half second and the shade will close
automatically from any position. If the sunroof is
completely closed the shade will close fully and
stop automatically. This is called “Express
Close”. During Express Close operation, any
movement of the switch will stop the shade.
NOTE:
If the sunroof is open, the shade will close to the
half-open position. Pushing the shade close
button again will automatically close both the
sunroof and shade completely.
Manual Mode
To close the shade, push and hold the switch in
the forward position. Any release of the switch
will stop the movement and the shade will
remain in a partially closed condition until the
switch is pushed again.
PINCH PROTECT FEATURE
This feature will detect an obstruction in the
closing of the sunroof during the Express Close
operation. If an obstruction in the path of the sunroof is detected, the sunroof will
automatically retract. Remove the obstruction if
this occurs.
NOTE:
If three consecutive sunroof close attempts
result in Pinch Protect reversals, Pinch Protect
will disable and the sunroof must be closed in
Manual Mode.
SUNROOF MAINTENANCE
Use only a non-abrasive cleaner and a soft cloth
to clean the glass panel. Periodically check for
and clear out any debris that may have
collected in the tracks.
IGNITION OFF OPERATION
NOTE:
The power sunroof switch can remain active
in Accessory Delay for up to approximately
10 minutes after the vehicle’s ignition is
placed in the OFF position. Opening either
front door will cancel this feature.
This feature is programmable using the
Uconnect system. Refer to “Uconnect
Settings” in “Multimedia” for further informa
-
tion.
HOOD
TO OPEN THE HOOD
Two latches must be released to open the hood.
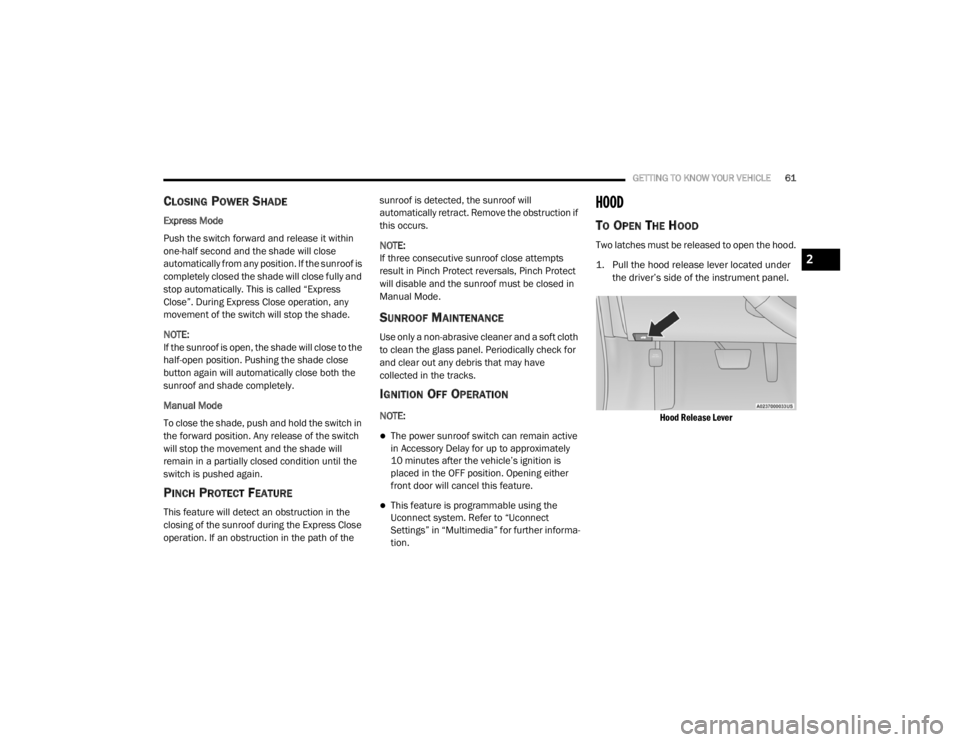
1. Pull the hood release lever located under
the driver’s side of the instrument panel.
Hood Release Lever
2
20_LX_OM_EN_USC_t.book Page 61
Page 64 of 328
62GETTING TO KNOW YOUR VEHICLE
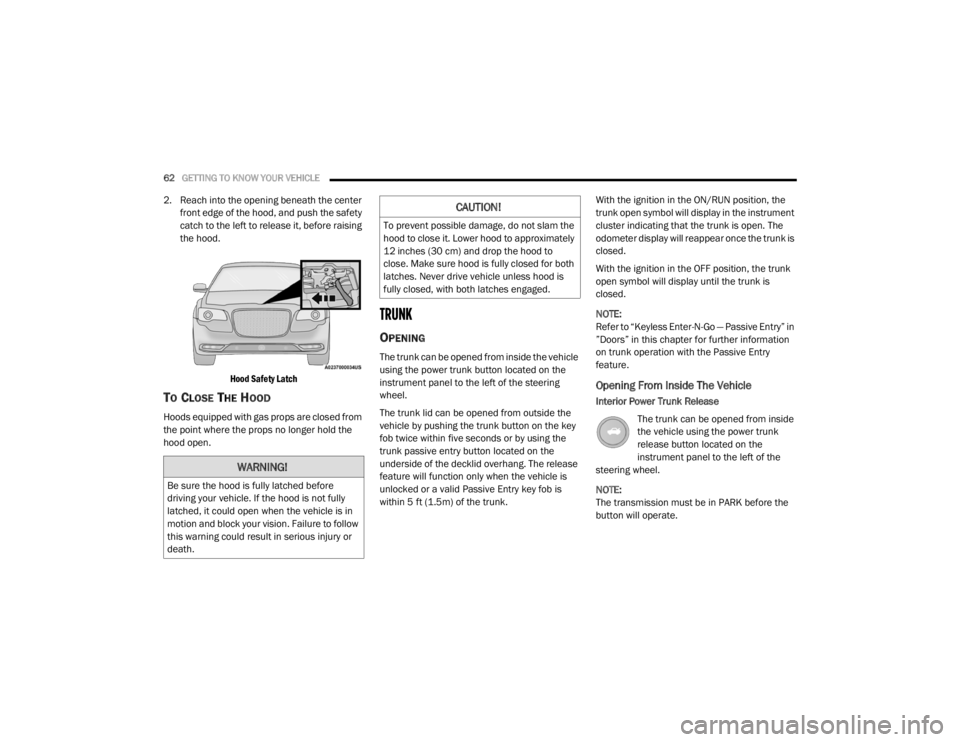
2. Reach into the opening beneath the center
front edge of the hood, and push the safety
catch to the left to release it, before raising
the hood.
Hood Safety Latch
TO CLOSE THE HOOD
Hoods equipped with gas props are closed from
the point where the props no longer hold the
hood open.
TRUNK
OPENING
The trunk can be opened from inside the vehicle
using the power trunk button located on the
instrument panel to the left of the steering
wheel.
The trunk lid can be opened from outside the
vehicle by pushing the trunk button on the key
fob twice within five seconds or by using the
trunk passive entry button located on the
underside of the decklid overhang. The release
feature will function only when the vehicle is
unlocked or a valid Passive Entry key fob is
within 5 ft (1.5m) of the trunk. With the ignition in the ON/RUN position, the
trunk open symbol will display in the instrument
cluster indicating that the trunk is open. The
odometer display will reappear once the trunk is
closed.
With the ignition in the OFF position, the trunk
open symbol will display until the trunk is
closed.
NOTE:
Refer to “Keyless Enter-N-Go — Passive Entry” in
”Doors” in this chapter for further information
on trunk operation with the Passive Entry
feature.
Opening From Inside The Vehicle
Interior Power Trunk Release
The trunk can be opened from inside
the vehicle using the power trunk
release button located on the
instrument panel to the left of the
steering wheel.
NOTE:
The transmission must be in PARK before the
button will operate.
WARNING!
Be sure the hood is fully latched before
driving your vehicle. If the hood is not fully
latched, it could open when the vehicle is in
motion and block your vision. Failure to follow
this warning could result in serious injury or
death.
CAUTION!
To prevent possible damage, do not slam the
hood to close it. Lower hood to approximately
12 inches (30 cm) and drop the hood to
close. Make sure hood is fully closed for both
latches. Never drive vehicle unless hood is
fully closed, with both latches engaged.
20_LX_OM_EN_USC_t.book Page 62
Page 68 of 328
66GETTING TO KNOW YOUR VEHICLE
GARAGE DOOR OPENER — IF EQUIPPED
HomeLink® replaces up to three hand-held
transmitters that operate devices such as
garage door openers, motorized gates, lighting
or home security systems. The HomeLink® unit
is powered by your vehicle’s battery.
The HomeLink® buttons, located on either the
overhead console, headliner or sunvisor,
designate the three different HomeLink®
channels. The HomeLink® indicator is located
above the center button.
Overhead Console HomeLink® Buttons
NOTE:
HomeLink® is disabled when the Vehicle Secu -
rity Alarm is active.
BEFORE YOU BEGIN PROGRAMMING
H
OMELINK®
Be sure that your vehicle is parked outside of
the garage before you begin programming.
For more efficient programming and accurate
transmission of the Radio Frequency (RF) signal
it is recommended that a new battery be placed
in the hand-held transmitter of the device that is
being programmed to the HomeLink® system.
To erase the channels, place the ignition in the
ON/RUN position, and push and hold the two
outside HomeLink® buttons (I and III) for up to
20 seconds or until the orange indicator
flashes.
NOTE:
Erasing all channels should only be
performed when programming HomeLink®
for the first time. Do not erase channels when
programming additional buttons.
If you have any problems, or require assis -
tance, please call toll-free 1-800-355-3515
or, on the Internet at HomeLink.com for infor -
mation or assistance.
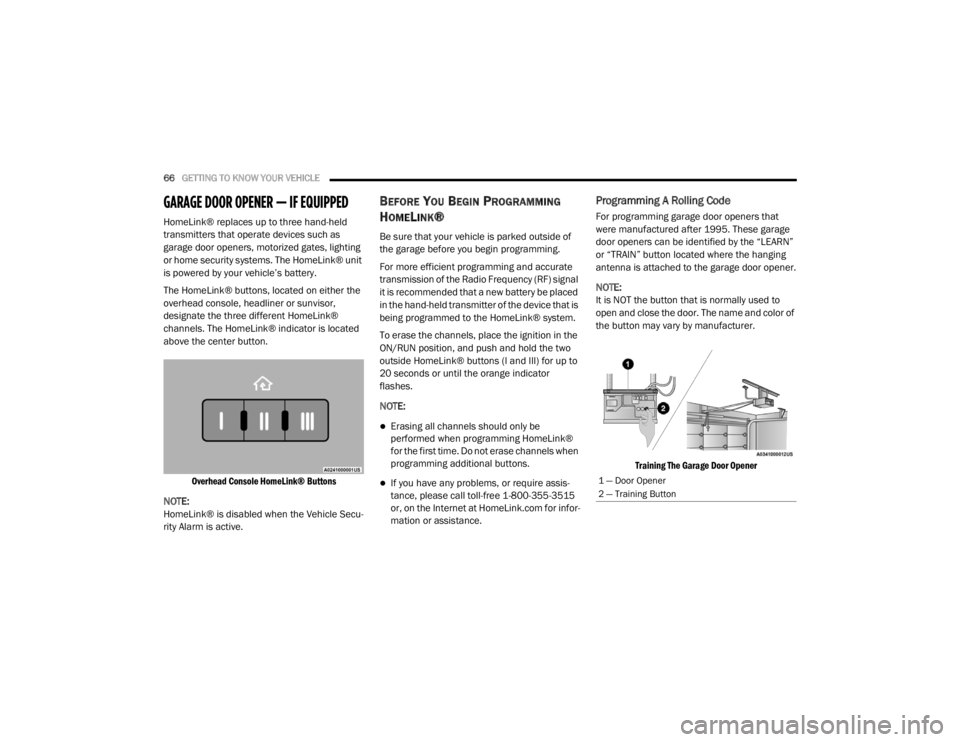
Programming A Rolling Code
For programming garage door openers that
were manufactured after 1995. These garage
door openers can be identified by the “LEARN”
or “TRAIN” button located where the hanging
antenna is attached to the garage door opener.
NOTE:
It is NOT the button that is normally used to
open and close the door. The name and color of
the button may vary by manufacturer.
Training The Garage Door Opener
1 — Door Opener
2 — Training Button
20_LX_OM_EN_USC_t.book Page 66