2020 CHRYSLER 300 driver seat adjustment
[x] Cancel search: driver seat adjustmentPage 4 of 328

2
INTRODUCTION
HOW TO USE THIS MANUAL .................................. 9
Essential Information .................................... 9
Symbols .......................................................... 9
WARNINGS AND CAUTIONS ................................. 9
VEHICLE MODIFICATIONS/ALTERATIONS ........... 9
GETTING TO KNOW YOUR VEHICLE
VEHICLE USER GUIDE — IF EQUIPPED ...............10
KEYS ......................................................................11
Key Fob......................................................... 11
IGNITION SWITCH .................................................16
Keyless Push Button Ignition ...................... 16
Vehicle On Message ................................... 17
REMOTE START — IF EQUIPPED .........................18
How To Use Remote Start — If Equipped ... 18
Remote Start Abort Message On The
Instrument Cluster Display — If Equipped .. 19 To Enter Remote Start Mode ...................... 19
To Exit Remote Start Mode Without
Driving The Vehicle ..................................... 19 To Exit Remote Start Mode And Drive
The Vehicle ................................................... 19 Remote Start Comfort Systems —
If Equipped ................................................... 20 General Information .................................... 20 SENTRY KEY.......................................................... 21
Key Programming ....................................... 21
Replacement Keys....................................... 21
General Information .................................... 22
VEHICLE SECURITY ALARM — IF EQUIPPED .... 22
To Arm The System ...................................... 22
To Disarm The System ................................ 23
Rearming Of The System............................. 23
Tamper Alert................................................. 23
DOORS .................................................................. 23
Manual Door Locks...................................... 23
Power Door Locks ....................................... 24
Keyless Enter-N-Go — Passive Entry .......... 24
Automatic Unlock Doors On Exit ................. 27
Automatic Door Locks — If Equipped ......... 28
Child-Protection Door Lock System —
Rear Doors .................................................. 28
DRIVER MEMORY SETTINGS — IF EQUIPPED ... 28
Programming The Memory Feature............ 29
Linking And Unlinking The Remote Keyless
Entry Key Fob To Memory ........................... 29 Memory Position Recall............................... 30
SEATS ................................................................... 30
Manual Adjustment (Rear Seats) ............... 30
Power Seats ................................................ 31
Heated Seats — If Equipped ....................... 33
Front Ventilated Seats — If Equipped ........ 35 HEAD RESTRAINTS ..............................................35
Reactive Head Restraints — Front Seats .. 35
Rear Head Restraints ................................. 36
Front Head Restraint Removal ................... 37
STEERING WHEEL.................................................37
Manual Tilt/Telescoping Steering Column —
If Equipped .................................................. 37 Power Tilt/Telescoping Steering Column —
If Equipped .................................................. 38 Heated Steering Wheel — If Equipped ...... 38
MIRRORS ..............................................................39
Automatic Dimming Mirror — If Equipped . 39
Outside Mirrors ............................................ 39
Driver's Outside Automatic Dimming Mirror —
If Equipped ................................................... 39 Outside Mirrors With Turn Signal And
Approach Lighting — If Equipped ................ 40 Power Mirrors............................................... 40
Power Folding Outside Mirrors —
If Equipped ................................................... 40 Heated Mirrors — If Equipped ..................... 41
Tilt Side Mirrors In Reverse —
If Equipped ................................................... 41 Illuminated Vanity Mirrors —
If Equipped .................................................. 42
20_LX_OM_EN_USC_t.book Page 2
Page 32 of 328

30GETTING TO KNOW YOUR VEHICLE
5. Push and release the lock button on the key
fob within 10 seconds.
NOTE:
Your key fobs can be unlinked from your
memory settings by pushing the set (S) button,
and within 10 seconds, pushing the unlock
button on the key fob.
MEMORY POSITION RECALL
NOTE:
If a recall is attempted when the vehicle is not in
PARK, a message will be displayed in the instru -
ment cluster display.
To recall the memory settings for driver one or
two, push the desired memory button number
(1 or 2) or the unlock button on the key fob
linked to the desired memory position.
A recall can be canceled by pushing any of the
memory buttons during a recall (S, 1, or 2), or by
pushing any of the seat adjustment switches.
When a recall is canceled, the driver's seat and
power tilt and telescopic steering column (if
equipped) stop moving. A delay of one second
will occur before another recall can be selected.
SEATS
Seats are a part of the Occupant Restraint
System of the vehicle.
MANUAL ADJUSTMENT (REAR SEATS)
Folding Rear Seat
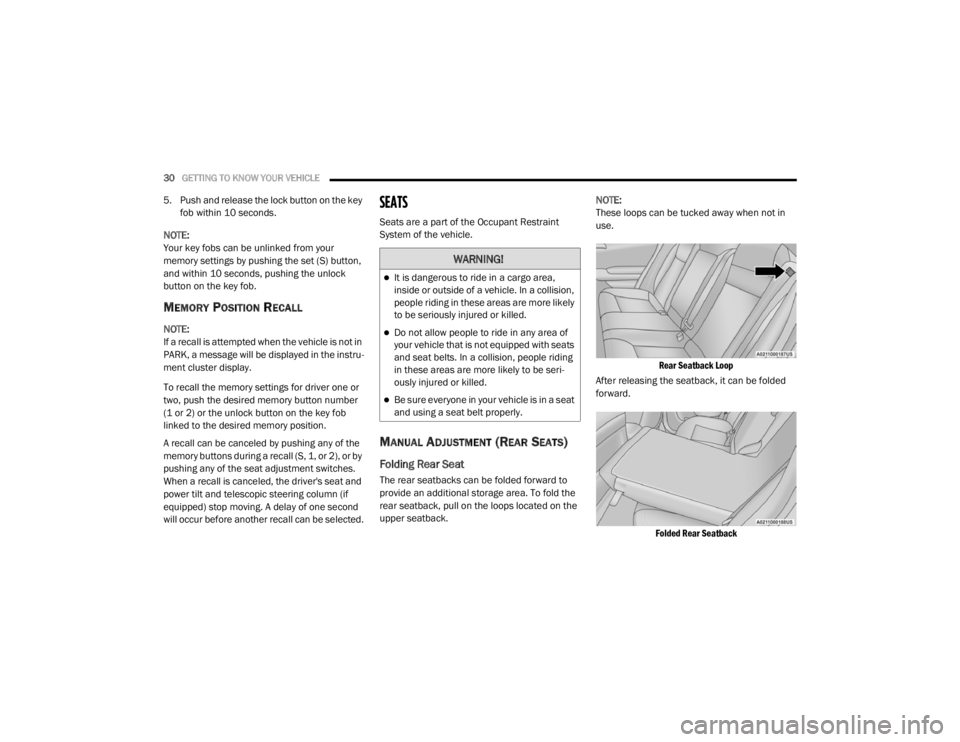
The rear seatbacks can be folded forward to
provide an additional storage area. To fold the
rear seatback, pull on the loops located on the
upper seatback. NOTE:
These loops can be tucked away when not in
use.
Rear Seatback Loop
After releasing the seatback, it can be folded
forward.
Folded Rear Seatback
WARNING!
It is dangerous to ride in a cargo area,
inside or outside of a vehicle. In a collision,
people riding in these areas are more likely
to be seriously injured or killed.
Do not allow people to ride in any area of
your vehicle that is not equipped with seats
and seat belts. In a collision, people riding
in these areas are more likely to be seri -
ously injured or killed.
Be sure everyone in your vehicle is in a seat
and using a seat belt properly.
20_LX_OM_EN_USC_t.book Page 30
Page 38 of 328

36GETTING TO KNOW YOUR VEHICLE
(Continued)
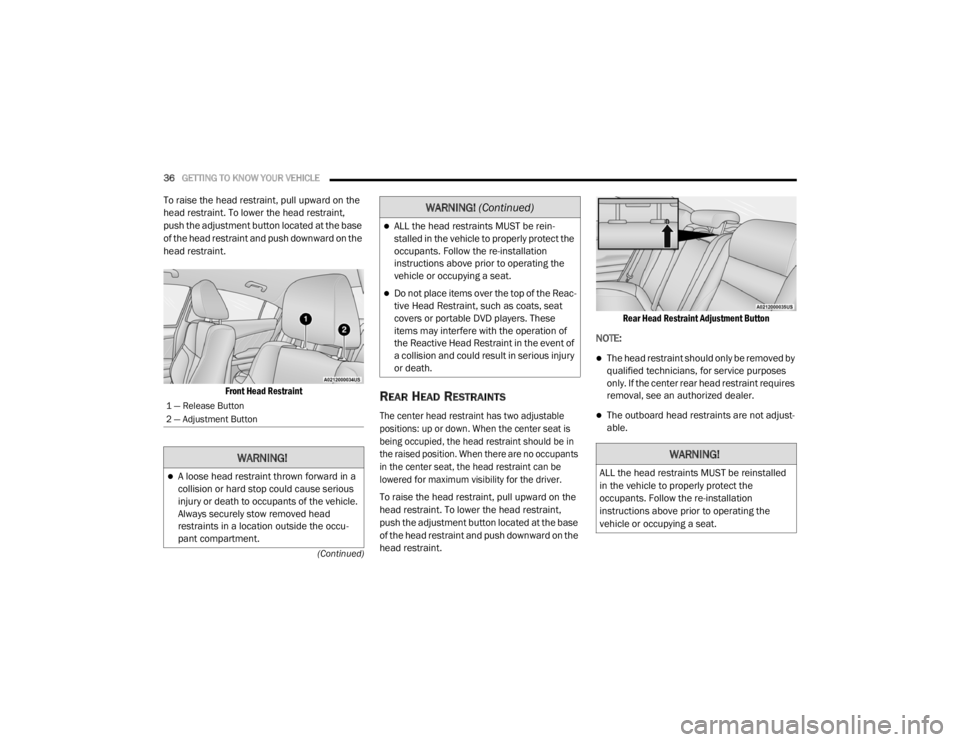
To raise the head restraint, pull upward on the
head restraint. To lower the head restraint,
push the adjustment button located at the base
of the head restraint and push downward on the
head restraint.
Front Head Restraint
REAR HEAD RESTRAINTS
The center head restraint has two adjustable
positions: up or down. When the center seat is
being occupied, the head restraint should be in
the raised position. When there are no occupants
in the center seat, the head restraint can be
lowered for maximum visibility for the driver.
To raise the head restraint, pull upward on the
head restraint. To lower the head restraint,
push the adjustment button located at the base
of the head restraint and push downward on the
head restraint.
Rear Head Restraint Adjustment Button
NOTE:
The head restraint should only be removed by
qualified technicians, for service purposes
only. If the center rear head restraint requires
removal, see an authorized dealer.
The outboard head restraints are not adjust -
able.1 — Release Button
2 — Adjustment Button
WARNING!
A loose head restraint thrown forward in a
collision or hard stop could cause serious
injury or death to occupants of the vehicle.
Always securely stow removed head
restraints in a location outside the occu -
pant compartment.
ALL the head restraints MUST be rein -
stalled in the vehicle to properly protect the
occupants. Follow the re-installation
instructions above prior to operating the
vehicle or occupying a seat.
Do not place items over the top of the Reac -
tive Head Restraint, such as coats, seat
covers or portable DVD players. These
items may interfere with the operation of
the Reactive Head Restraint in the event of
a collision and could result in serious injury
or death.
WARNING! (Continued)
WARNING!
ALL the head restraints MUST be reinstalled
in the vehicle to properly protect the
occupants. Follow the re-installation
instructions above prior to operating the
vehicle or occupying a seat.
20_LX_OM_EN_USC_t.book Page 36
Page 39 of 328

GETTING TO KNOW YOUR VEHICLE37
FRONT HEAD RESTRAINT REMOVAL
To remove the head restraint, raise it up as far
as it can go. Then, push the adjustment button
and the release button at the base of each post
while pulling the head restraint up. To reinstall
the head restraint, put the head restraint posts
into the holes. Then, adjust it to the appropriate
height.
NOTE:
Do not reposition the head restraint 180 degrees
to the incorrect position in an attempt to gain
additional clearance to the back of the head.
STEERING WHEEL
MANUAL TILT/TELESCOPING STEERING
C
OLUMN — IF EQUIPPED
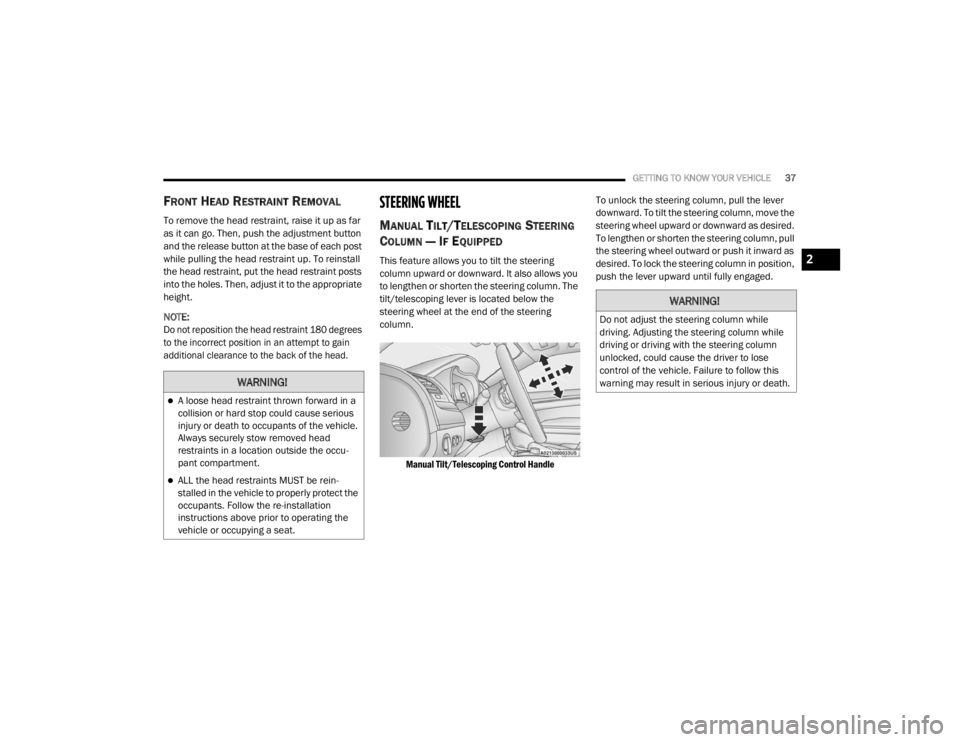
This feature allows you to tilt the steering
column upward or downward. It also allows you
to lengthen or shorten the steering column. The
tilt/telescoping lever is located below the
steering wheel at the end of the steering
column.
Manual Tilt/Telescoping Control Handle
To unlock the steering column, pull the lever
downward. To tilt the steering column, move the
steering wheel upward or downward as desired.
To lengthen or shorten the steering column, pull
the steering wheel outward or push it inward as
desired. To lock the steering column in position,
push the lever upward until fully engaged.
WARNING!
A loose head restraint thrown forward in a
collision or hard stop could cause serious
injury or death to occupants of the vehicle.
Always securely stow removed head
restraints in a location outside the occu
-
pant compartment.
ALL the head restraints MUST be rein -
stalled in the vehicle to properly protect the
occupants. Follow the re-installation
instructions above prior to operating the
vehicle or occupying a seat.
WARNING!
Do not adjust the steering column while
driving. Adjusting the steering column while
driving or driving with the steering column
unlocked, could cause the driver to lose
control of the vehicle. Failure to follow this
warning may result in serious injury or death.
2
20_LX_OM_EN_USC_t.book Page 37