2020 CHRYSLER 300 key fob
[x] Cancel search: key fobPage 29 of 328

GETTING TO KNOW YOUR VEHICLE27
NOTE:
After pushing the door handle button, you
must wait two seconds before you can lock or
unlock the doors, using either Passive Entry
door handle. This is done to allow you to
check if the vehicle is locked by pulling the
door handle, without the vehicle reacting and
unlocking.
The Passive Entry system will not operate if
the key fob battery is depleted.
The vehicle doors can also be locked by using
the key fob lock button or the lock button
located on the vehicle’s interior door panel.
General Information
The following regulatory statement applies to all
Radio Frequency (RF) devices equipped in this
vehicle:
This device complies with Part 15 of the FCC
Rules and with Innovation, Science and
Economic Development Canada license-exempt
RSS standard(s). Operation is subject to the
following two conditions:
1. This device may not cause harmful interference, and
2. This device must accept any interference
received, including interference that may
cause undesired operation.
Le présent appareil est conforme aux
CNR d`Innovation, Science and Economic
Development applicables aux appareils radio
exempts de licence. L'exploitation est autorisée
aux deux conditions suivantes:
1. l'appareil ne doit pas produire de brouillage, et
2. l'utilisateur de l'appareil doit accepter tout brouillage radioélectrique subi, même si le
brouillage est susceptible d'en compro -
mettre le fonctionnement.
La operación de este equipo está sujeta a las
siguientes dos condiciones:
1. es posible que este equipo o dispositivo no cause interferencia perjudicial y
2. este equipo o dispositivo debe aceptar cualquier interferencia, incluyendo la que
pueda causar su operación no deseada.
NOTE:
Changes or modifications not expressly
approved by the party responsible for compli -
ance could void the user’s authority to operate
the equipment.
AUTOMATIC UNLOCK DOORS ON EXIT
The doors will unlock automatically on vehicles
with power door locks if:
1. The Automatic Unlock Doors On Exit feature is enabled.
2. The vehicle was in motion, then speed returned to 0 mph (0 km/h) and the
transmission is placed in PARK.
3. The driver door is opened.
4. The doors were not previously unlocked.
Automatic Unlock Doors On Exit Programming
To change the current setting, refer to
“Uconnect Settings” in “Multimedia” for further
information.
NOTE:
Use the Automatic Unlock Doors On Exit feature
in accordance with local laws.
2
20_LX_OM_EN_USC_t.book Page 27
Page 30 of 328
28GETTING TO KNOW YOUR VEHICLE
AUTOMATIC DOOR LOCKS — IF
E
QUIPPED
The auto door lock feature default condition is
enabled. When enabled, the door locks will lock
automatically when the vehicle's speed exceeds
15 mph (24 km/h). The auto door lock feature
can be enabled or disabled by an authorized
dealer per written request of the customer.
Please see an authorized dealer for service.
CHILD-PROTECTION DOOR LOCK
S
YSTEM — REAR DOORS
To provide a safer environment for small
children riding in the rear seats, the rear doors
are equipped with Child-Protection Door Lock
system.
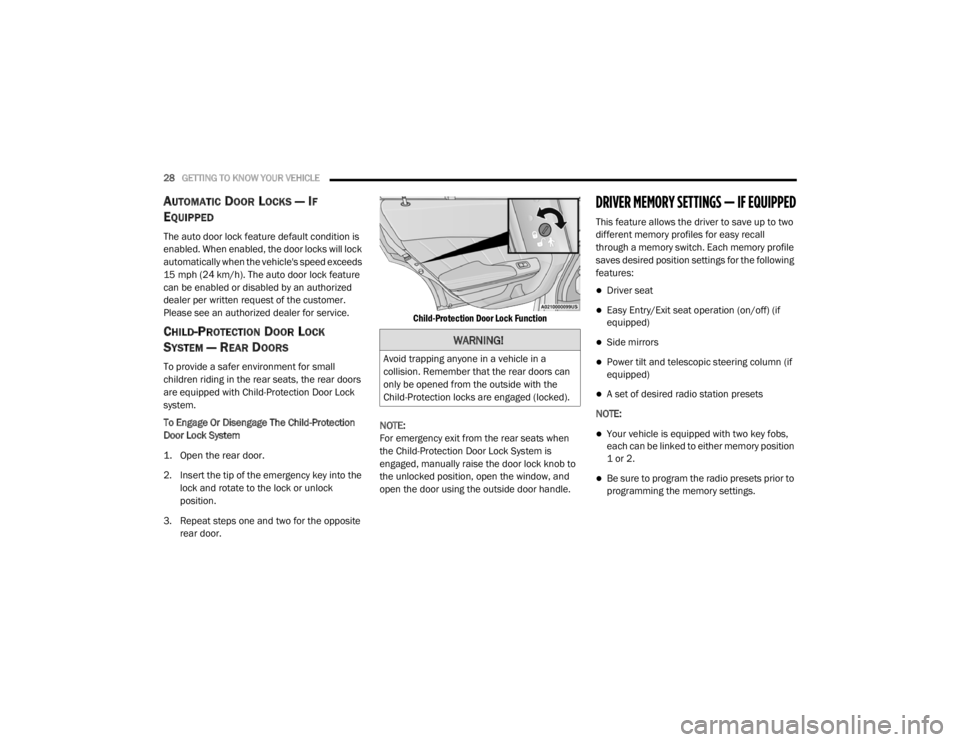
To Engage Or Disengage The Child-Protection
Door Lock System
1. Open the rear door.
2. Insert the tip of the emergency key into the
lock and rotate to the lock or unlock
position.
3. Repeat steps one and two for the opposite rear door.
Child-Protection Door Lock Function
NOTE:
For emergency exit from the rear seats when
the Child-Protection Door Lock System is
engaged, manually raise the door lock knob to
the unlocked position, open the window, and
open the door using the outside door handle.
DRIVER MEMORY SETTINGS — IF EQUIPPED
This feature allows the driver to save up to two
different memory profiles for easy recall
through a memory switch. Each memory profile
saves desired position settings for the following
features:
Driver seat
Easy Entry/Exit seat operation (on/off) (if
equipped)
Side mirrors
Power tilt and telescopic steering column (if
equipped)
A set of desired radio station presets
NOTE:
Your vehicle is equipped with two key fobs,
each can be linked to either memory position
1 or 2.
Be sure to program the radio presets prior to
programming the memory settings.
WARNING!
Avoid trapping anyone in a vehicle in a
collision. Remember that the rear doors can
only be opened from the outside with the
Child-Protection locks are engaged (locked).
20_LX_OM_EN_USC_t.book Page 28
Page 31 of 328

GETTING TO KNOW YOUR VEHICLE29
The memory settings switch is located on the
driver’s door trim panel. The switch consists of
three buttons:
The set (S) button, which is used to activate
the memory save function.
The (1) and (2) buttons which are used to
recall either of two pre-programmed memory
profiles.
Memory Settings Buttons
PROGRAMMING THE MEMORY FEATURE
To create a new memory profile, perform the
following:
NOTE:
Saving a new memory profile will erase the
selected profile from memory.
1. Place the vehicle’s ignition in the ON/RUN position (do not start the engine).
2. Adjust all memory profile settings to desired preferences (i.e., seat, side mirror, power tilt
and telescopic steering column [if
equipped], and radio station presets).
3. Push and release the set (S) button on the memory switch, and then push the desired
memory button (1 or 2) within five seconds.
The instrument cluster display will display
which memory position has been set.
NOTE:
Memory profiles can be set without the vehicle
in PARK, but the vehicle must be in PARK to
recall a memory profile.
LINKING AND UNLINKING THE REMOTE
K
EYLESS ENTRY KEY FOB TO MEMORY
Your key fobs can be programmed to recall one
of two saved memory profiles by pushing the
unlock button on the key fob.
NOTE:
Before programming your key fobs you must
select the “Personal Settings Linked To Key
Fob” feature through the Uconnect system
screen. Refer to “Uconnect Settings” in “Multi -
media” for further information.
To program your key fobs, perform the following:
1. Place the vehicle’s ignition in the OFF position.
2. Select a desired memory profile, 1 or 2.
3. Once the profile has been recalled, push and release the set (S) button on the
memory switch.
4. Within five seconds, push and release button (1) or (2) accordingly. “Memory
Profile Set” (1 or 2) will display in the
instrument cluster.
2
20_LX_OM_EN_USC_t.book Page 29
Page 32 of 328
30GETTING TO KNOW YOUR VEHICLE
5. Push and release the lock button on the key
fob within 10 seconds.
NOTE:
Your key fobs can be unlinked from your
memory settings by pushing the set (S) button,
and within 10 seconds, pushing the unlock
button on the key fob.
MEMORY POSITION RECALL
NOTE:
If a recall is attempted when the vehicle is not in
PARK, a message will be displayed in the instru -
ment cluster display.
To recall the memory settings for driver one or
two, push the desired memory button number
(1 or 2) or the unlock button on the key fob
linked to the desired memory position.
A recall can be canceled by pushing any of the
memory buttons during a recall (S, 1, or 2), or by
pushing any of the seat adjustment switches.
When a recall is canceled, the driver's seat and
power tilt and telescopic steering column (if
equipped) stop moving. A delay of one second
will occur before another recall can be selected.
SEATS
Seats are a part of the Occupant Restraint
System of the vehicle.
MANUAL ADJUSTMENT (REAR SEATS)
Folding Rear Seat
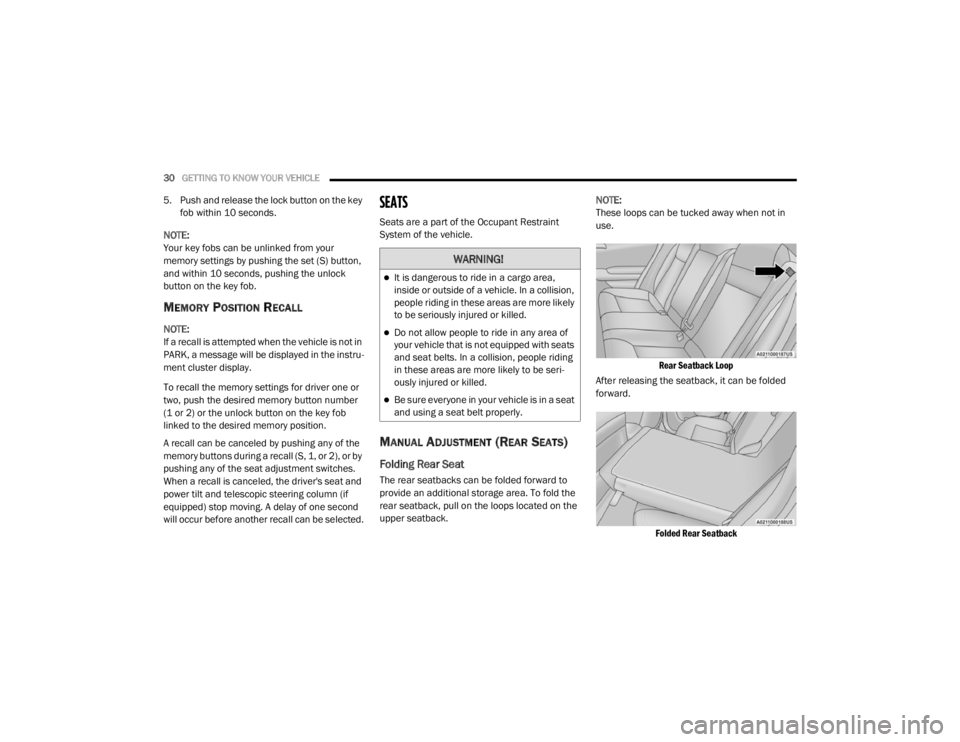
The rear seatbacks can be folded forward to
provide an additional storage area. To fold the
rear seatback, pull on the loops located on the
upper seatback. NOTE:
These loops can be tucked away when not in
use.
Rear Seatback Loop
After releasing the seatback, it can be folded
forward.
Folded Rear Seatback
WARNING!
It is dangerous to ride in a cargo area,
inside or outside of a vehicle. In a collision,
people riding in these areas are more likely
to be seriously injured or killed.
Do not allow people to ride in any area of
your vehicle that is not equipped with seats
and seat belts. In a collision, people riding
in these areas are more likely to be seri -
ously injured or killed.
Be sure everyone in your vehicle is in a seat
and using a seat belt properly.
20_LX_OM_EN_USC_t.book Page 30
Page 40 of 328
38GETTING TO KNOW YOUR VEHICLE
(Continued)
POWER TILT/TELESCOPING STEERING
C
OLUMN — IF EQUIPPED
This feature allows you to tilt the steering
column upward or downward. It also allows you
to lengthen or shorten the steering column. The
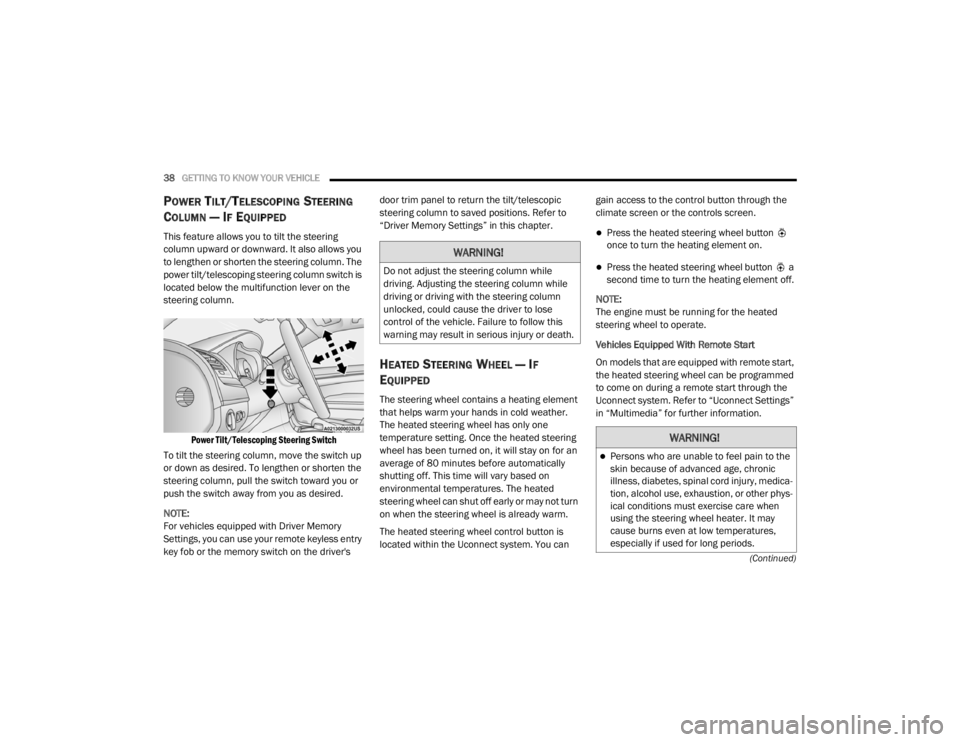
power tilt/telescoping steering column switch is
located below the multifunction lever on the
steering column.
Power Tilt/Telescoping Steering Switch
To tilt the steering column, move the switch up
or down as desired. To lengthen or shorten the
steering column, pull the switch toward you or
push the switch away from you as desired.
NOTE:
For vehicles equipped with Driver Memory
Settings, you can use your remote keyless entry
key fob or the memory switch on the driver's door trim panel to return the tilt/telescopic
steering column to saved positions. Refer to
“Driver Memory Settings” in this chapter.
HEATED STEERING WHEEL — IF
E
QUIPPED
The steering wheel contains a heating element
that helps warm your hands in cold weather.
The heated steering wheel has only one
temperature setting. Once the heated steering
wheel has been turned on, it will stay on for an
average of 80 minutes before automatically
shutting off. This time will vary based on
environmental temperatures. The heated
steering wheel can shut off early or may not turn
on when the steering wheel is already warm.
The heated steering wheel control button is
located within the Uconnect system. You can gain access to the control button through the
climate screen or the controls screen.
Press the heated steering wheel button
once to turn the heating element on.
Press the heated steering wheel button a
second time to turn the heating element off.
NOTE:
The engine must be running for the heated
steering wheel to operate.
Vehicles Equipped With Remote Start
On models that are equipped with remote start,
the heated steering wheel can be programmed
to come on during a remote start through the
Uconnect system. Refer to “Uconnect Settings”
in “Multimedia” for further information.
WARNING!
Do not adjust the steering column while
driving. Adjusting the steering column while
driving or driving with the steering column
unlocked, could cause the driver to lose
control of the vehicle. Failure to follow this
warning may result in serious injury or death.
WARNING!
Persons who are unable to feel pain to the
skin because of advanced age, chronic
illness, diabetes, spinal cord injury, medica -
tion, alcohol use, exhaustion, or other phys -
ical conditions must exercise care when
using the steering wheel heater. It may
cause burns even at low temperatures,
especially if used for long periods.
20_LX_OM_EN_USC_t.book Page 38
Page 42 of 328

40GETTING TO KNOW YOUR VEHICLE
OUTSIDE MIRRORS WITH TURN SIGNAL
A
ND APPROACH LIGHTING — IF
E
QUIPPED
Driver and passenger outside mirrors with turn
signal and approach lighting contain four LEDs,
which are located in the upper outer corner of
each mirror.
Three of the LEDs are turn signal indicators,
which flash with the corresponding turn signal
lights in the front and rear of the vehicle.
Turning on the Hazard Warning flashers will also
activate these LEDs.
The fourth LED supplies illuminated entry
lighting, which turns on in both mirrors when
you use the remote keyless entry key fob or
open any door. This LED shines outward to
illuminate the front and rear door handles. It
also shines downward to illuminate the area in
front of the doors.
The illuminated entry lighting fades to off after
about 30 seconds or it will fade to off
immediately once the ignition is placed into the
ON/RUN position. NOTE:
The approach lighting will not function when the
gear selector is moved out of the PARK position.POWER MIRRORS
The power mirror controls are located on the
driver's door trim panel.
Power Mirror Control
The power mirror controls consist of mirror
select buttons and a four-way mirror control
switch. To adjust a mirror, push either the L
(left) or R (right) button to select the mirror that
you want to adjust. NOTE:
A light in the select button will illuminate indi
-
cating the mirror is activated and can be
adjusted.
Using the mirror control switch, push on any of
the four arrows for the direction that you want
the mirror to move.
Power mirror preselected positions can be
controlled by the optional Memory Settings
Feature. Refer to “Driver Memory Settings” in
this chapter for further information.
POWER FOLDING OUTSIDE MIRRORS —
I
F EQUIPPED
If equipped with power folding mirrors, they can
be electrically folded rearward and unfolded
into the drive position.
The switch for the power folding mirrors is
located between the power mirror switches
L (left) and R (right). Push the switch once and
the mirrors will fold in, pushing the switch a
second time will return the mirrors to the
normal driving position.
If the mirror is manually folded after electrically
cycled, a potential extra button push is required
to get the mirrors back to the drive position.
1 — Mirror Direction Control
2 — Right Mirror Selection
3 — Left Mirror Selection
20_LX_OM_EN_USC_t.book Page 40
Page 49 of 328
GETTING TO KNOW YOUR VEHICLE47
Front Map/Reading Lights — If Equipped
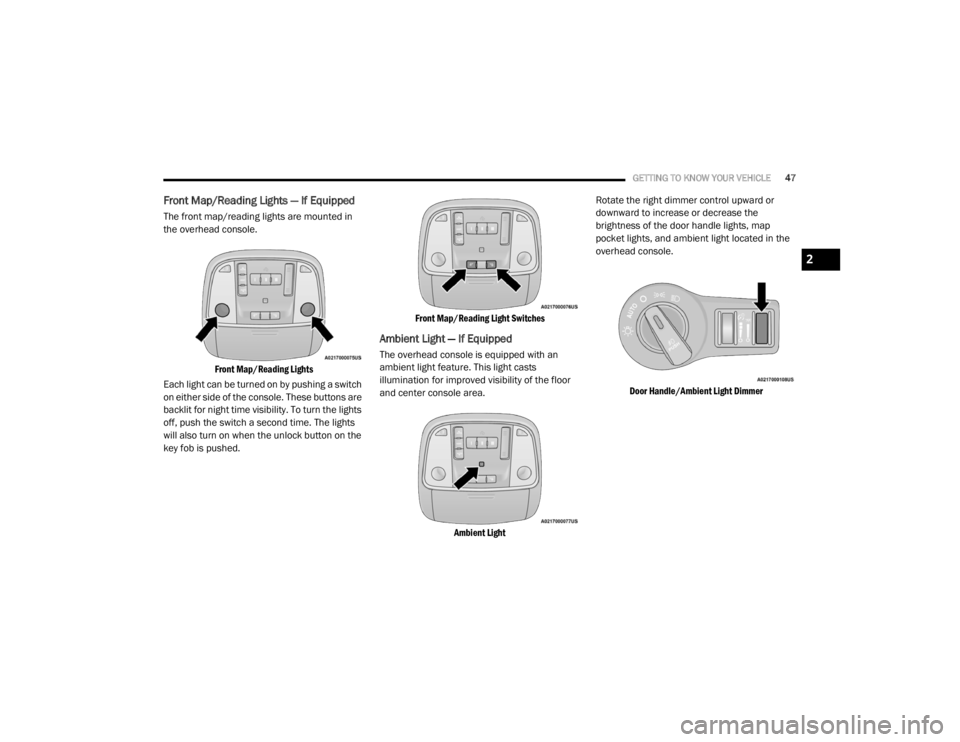
The front map/reading lights are mounted in
the overhead console.
Front Map/Reading Lights
Each light can be turned on by pushing a switch
on either side of the console. These buttons are
backlit for night time visibility. To turn the lights
off, push the switch a second time. The lights
will also turn on when the unlock button on the
key fob is pushed.
Front Map/Reading Light Switches
Ambient Light — If Equipped
The overhead console is equipped with an
ambient light feature. This light casts
illumination for improved visibility of the floor
and center console area.
Ambient Light
Rotate the right dimmer control upward or
downward to increase or decrease the
brightness of the door handle lights, map
pocket lights, and ambient light located in the
overhead console.
Door Handle/Ambient Light Dimmer
2
20_LX_OM_EN_USC_t.book Page 47
Page 59 of 328
GETTING TO KNOW YOUR VEHICLE57
Cabin Air Filter
The climate control system filters out dust and
pollen from the air. Contact an authorized
dealer to service your cabin air filter, and to
have it replaced when needed.
Operating Tips Chart
WINDOWS
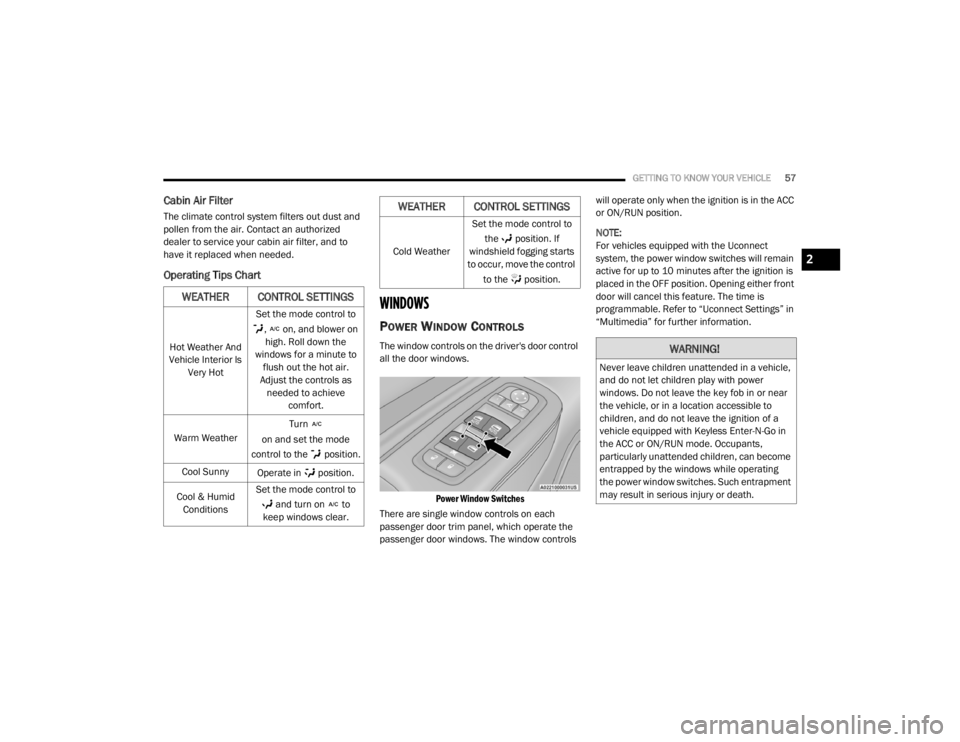
POWER WINDOW CONTROLS
The window controls on the driver's door control
all the door windows.
Power Window Switches
There are single window controls on each
passenger door trim panel, which operate the
passenger door windows. The window controls will operate only when the ignition is in the ACC
or ON/RUN position.
NOTE:
For vehicles equipped with the Uconnect
system, the power window switches will remain
active for up to 10 minutes after the ignition is
placed in the OFF position. Opening either front
door will cancel this feature. The time is
programmable. Refer to “Uconnect Settings” in
“Multimedia” for further information.
WEATHER CONTROL SETTINGS
Hot Weather And
Vehicle Interior Is Very Hot Set the mode control to
, on, and blower on high. Roll down the
windows for a minute to flush out the hot air.
Adjust the controls as needed to achieve comfort.
Warm Weather Turn
on and set the mode
control to the position.
Cool Sunny Operate in position.
Cool & Humid Conditions Set the mode control to
and turn on to
keep windows clear.
Cold Weather Set the mode control to
the position. If
windshield fogging starts
to occur, move the control
to the position.
WEATHER CONTROL SETTINGS
WARNING!
Never leave children unattended in a vehicle,
and do not let children play with power
windows. Do not leave the key fob in or near
the vehicle, or in a location accessible to
children, and do not leave the ignition of a
vehicle equipped with Keyless Enter-N-Go in
the ACC or ON/RUN mode. Occupants,
particularly unattended children, can become
entrapped by the windows while operating
the power window switches. Such entrapment
may result in serious injury or death.
2
20_LX_OM_EN_USC_t.book Page 57