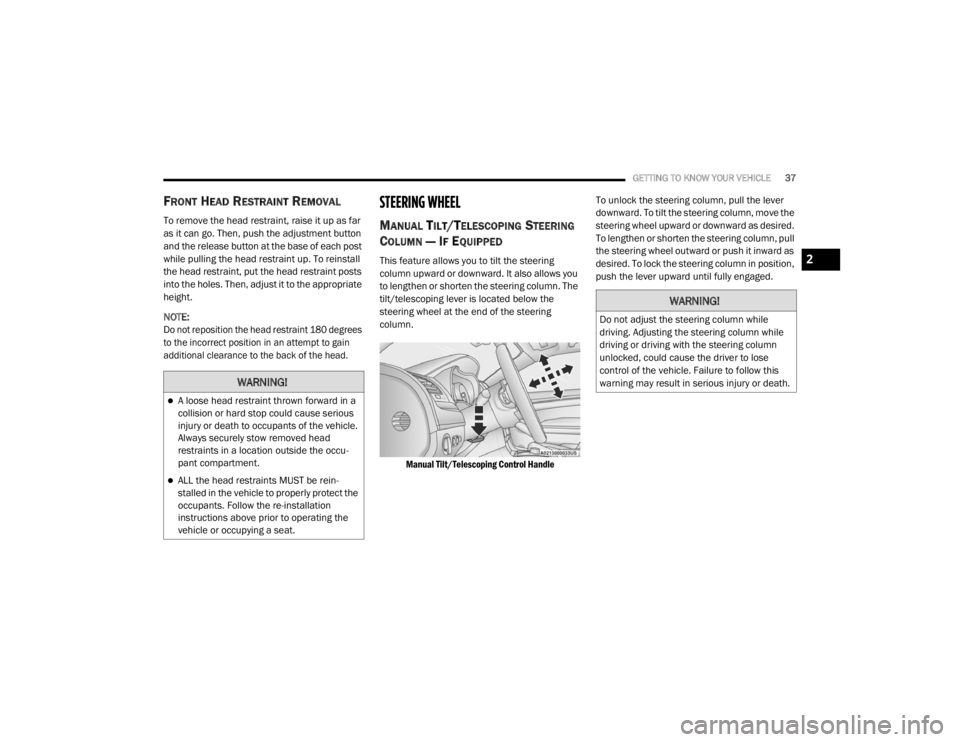
2020 CHRYSLER 300 steering wheel
[x] Cancel search: steering wheelPage 4 of 328

2
INTRODUCTION
HOW TO USE THIS MANUAL .................................. 9
Essential Information .................................... 9
Symbols .......................................................... 9
WARNINGS AND CAUTIONS ................................. 9
VEHICLE MODIFICATIONS/ALTERATIONS ........... 9
GETTING TO KNOW YOUR VEHICLE
VEHICLE USER GUIDE — IF EQUIPPED ...............10
KEYS ......................................................................11
Key Fob......................................................... 11
IGNITION SWITCH .................................................16
Keyless Push Button Ignition ...................... 16
Vehicle On Message ................................... 17
REMOTE START — IF EQUIPPED .........................18
How To Use Remote Start — If Equipped ... 18
Remote Start Abort Message On The
Instrument Cluster Display — If Equipped .. 19 To Enter Remote Start Mode ...................... 19
To Exit Remote Start Mode Without
Driving The Vehicle ..................................... 19 To Exit Remote Start Mode And Drive
The Vehicle ................................................... 19 Remote Start Comfort Systems —
If Equipped ................................................... 20 General Information .................................... 20 SENTRY KEY.......................................................... 21
Key Programming ....................................... 21
Replacement Keys....................................... 21
General Information .................................... 22
VEHICLE SECURITY ALARM — IF EQUIPPED .... 22
To Arm The System ...................................... 22
To Disarm The System ................................ 23
Rearming Of The System............................. 23
Tamper Alert................................................. 23
DOORS .................................................................. 23
Manual Door Locks...................................... 23
Power Door Locks ....................................... 24
Keyless Enter-N-Go — Passive Entry .......... 24
Automatic Unlock Doors On Exit ................. 27
Automatic Door Locks — If Equipped ......... 28
Child-Protection Door Lock System —
Rear Doors .................................................. 28
DRIVER MEMORY SETTINGS — IF EQUIPPED ... 28
Programming The Memory Feature............ 29
Linking And Unlinking The Remote Keyless
Entry Key Fob To Memory ........................... 29 Memory Position Recall............................... 30
SEATS ................................................................... 30
Manual Adjustment (Rear Seats) ............... 30
Power Seats ................................................ 31
Heated Seats — If Equipped ....................... 33
Front Ventilated Seats — If Equipped ........ 35 HEAD RESTRAINTS ..............................................35
Reactive Head Restraints — Front Seats .. 35
Rear Head Restraints ................................. 36
Front Head Restraint Removal ................... 37
STEERING WHEEL.................................................37
Manual Tilt/Telescoping Steering Column —
If Equipped .................................................. 37 Power Tilt/Telescoping Steering Column —
If Equipped .................................................. 38 Heated Steering Wheel — If Equipped ...... 38
MIRRORS ..............................................................39
Automatic Dimming Mirror — If Equipped . 39
Outside Mirrors ............................................ 39
Driver's Outside Automatic Dimming Mirror —
If Equipped ................................................... 39 Outside Mirrors With Turn Signal And
Approach Lighting — If Equipped ................ 40 Power Mirrors............................................... 40
Power Folding Outside Mirrors —
If Equipped ................................................... 40 Heated Mirrors — If Equipped ..................... 41
Tilt Side Mirrors In Reverse —
If Equipped ................................................... 41 Illuminated Vanity Mirrors —
If Equipped .................................................. 42
20_LX_OM_EN_USC_t.book Page 2
Page 9 of 328

7
STEERING WHEEL AUDIO CONTROLS ............ 302 Radio Operation .........................................302
Media Mode ...............................................302
AUX/USB CONTROL........................................... 302
RADIO OPERATION AND MOBILE PHONES.... 303
Regulatory And Safety Information........... 303
UCONNECT VOICE RECOGNITION
QUICK TIPS ........................................................ 304
Introducing Uconnect ................................304Get Started .................................................304
Basic Voice Commands .............................305Radio ..........................................................305Media ..........................................................305Phone .........................................................306
Voice Text Reply .........................................306
Climate .......................................................307Navigation (4C NAV) ..................................307Siri® Eyes Free — If Equipped ..................307
Do Not Disturb ..........................................308Android Auto™ — If Equipped ...................308Apple CarPlay® — If Equipped ................. 309
General Information ..................................309Additional Information ...............................310
CUSTOMER ASSISTANCE
SUGGESTIONS FOR OBTAINING SERVICE
FOR YOUR VEHICLE .......................................... 311
Prepare For The Appointment................... 311
Prepare A List............................................. 311
Be Reasonable With Requests ................. 311
IF YOU NEED ASSISTANCE ...............................311
FCA US LLC Customer Center ................... 312
FCA Canada Inc. Customer Center ........... 312
In Mexico Contact ...................................... 312
Puerto Rico And US Virgin Islands ............ 312
Customer Assistance For The Hearing Or
Speech Impaired (TDD/TTY) ..................... 312 Service Contract ....................................... 312 WARRANTY INFORMATION .............................. 313
MOPAR PARTS................................................... 313
REPORTING SAFETY DEFECTS ........................ 313
In The 50 United States And
Washington, D.C. ....................................... 313 In Canada ................................................... 313
PUBLICATION ORDER FORMS ........................ 314
20_LX_OM_EN_USC_t.book Page 7
Page 22 of 328

20GETTING TO KNOW YOUR VEHICLE
For vehicles not equipped with the Keyless
Enter-N-Go — Passive Entry feature, the
message “Remote Start Active — Insert Key
and Turn To Run” will show in the instrument
cluster display until you insert the key.
For vehicles equipped with the Keyless
Enter-N-Go — Passive Entry feature, the
message “Remote Start Active — Push Start
Button” will show in the instrument cluster
display until you push the START/STOP igni -
tion button.
To Cancel Remote Start
Remote Starting will also cancel if any of the
following occur:
The engine stalls or engine speed exceeds
2500 RPM.
Any engine warning lights come on.
Low Fuel Light turns on.
The hood is opened.
The hazard switch is pushed.
The gear selector is moved out of PARK.
The brake pedal is pushed.
REMOTE START COMFORT SYSTEMS —
I
F EQUIPPED
When remote start is activated, the heated
steering wheel and driver heated seat features
will automatically turn on in cold weather. In
warm weather, the driver vented seat feature
will automatically turn on when the remote start
is activated. These features will stay on through
the duration of remote start or until the ignition
switch is placed in the ON/RUN position.
GENERAL INFORMATION
The following regulatory statement applies to all
Radio Frequency (RF) devices equipped in this
vehicle:
This device complies with Part 15 of the FCC
Rules and with Innovation, Science and
Economic Development Canada license-exempt
RSS standard(s). Operation is subject to the
following two conditions:
1. This device may not cause harmful
interference, and
2. This device must accept any interference received, including interference that may
cause undesired operation. Le présent appareil est conforme aux CNR
d`Innovation, Science and Economic
Development applicables aux appareils radio
exempts de licence. L'exploitation est autorisée
aux deux conditions suivantes:
1. l'appareil ne doit pas produire de
brouillage, et
2. l'utilisateur de l'appareil doit accepter tout brouillage radioélectrique subi, même si le
brouillage est susceptible d'en compro -
mettre le fonctionnement.
La operación de este equipo está sujeta a las
siguientes dos condiciones:
1. es posible que este equipo o dispositivo no cause interferencia perjudicial y
2. este equipo o dispositivo debe aceptar cualquier interferencia, incluyendo la que
pueda causar su operación no deseada.
NOTE:
Changes or modifications not expressly
approved by the party responsible for compli -
ance could void the user’s authority to operate
the equipment.
20_LX_OM_EN_USC_t.book Page 20
Page 39 of 328

GETTING TO KNOW YOUR VEHICLE37
FRONT HEAD RESTRAINT REMOVAL
To remove the head restraint, raise it up as far
as it can go. Then, push the adjustment button
and the release button at the base of each post
while pulling the head restraint up. To reinstall
the head restraint, put the head restraint posts
into the holes. Then, adjust it to the appropriate
height.
NOTE:
Do not reposition the head restraint 180 degrees
to the incorrect position in an attempt to gain
additional clearance to the back of the head.
STEERING WHEEL
MANUAL TILT/TELESCOPING STEERING
C
OLUMN — IF EQUIPPED
This feature allows you to tilt the steering
column upward or downward. It also allows you
to lengthen or shorten the steering column. The
tilt/telescoping lever is located below the
steering wheel at the end of the steering
column.
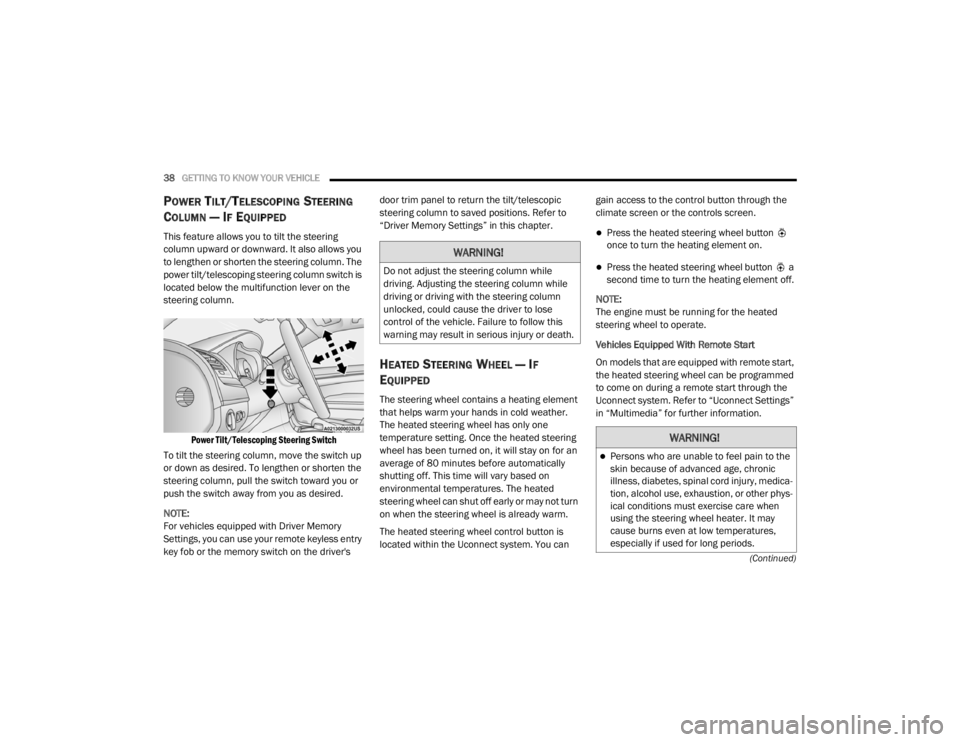
Manual Tilt/Telescoping Control Handle
To unlock the steering column, pull the lever
downward. To tilt the steering column, move the
steering wheel upward or downward as desired.
To lengthen or shorten the steering column, pull
the steering wheel outward or push it inward as
desired. To lock the steering column in position,
push the lever upward until fully engaged.
WARNING!
A loose head restraint thrown forward in a
collision or hard stop could cause serious
injury or death to occupants of the vehicle.
Always securely stow removed head
restraints in a location outside the occu
-
pant compartment.
ALL the head restraints MUST be rein -
stalled in the vehicle to properly protect the
occupants. Follow the re-installation
instructions above prior to operating the
vehicle or occupying a seat.
WARNING!
Do not adjust the steering column while
driving. Adjusting the steering column while
driving or driving with the steering column
unlocked, could cause the driver to lose
control of the vehicle. Failure to follow this
warning may result in serious injury or death.
2
20_LX_OM_EN_USC_t.book Page 37
Page 40 of 328

38GETTING TO KNOW YOUR VEHICLE
(Continued)
POWER TILT/TELESCOPING STEERING
C
OLUMN — IF EQUIPPED
This feature allows you to tilt the steering
column upward or downward. It also allows you
to lengthen or shorten the steering column. The
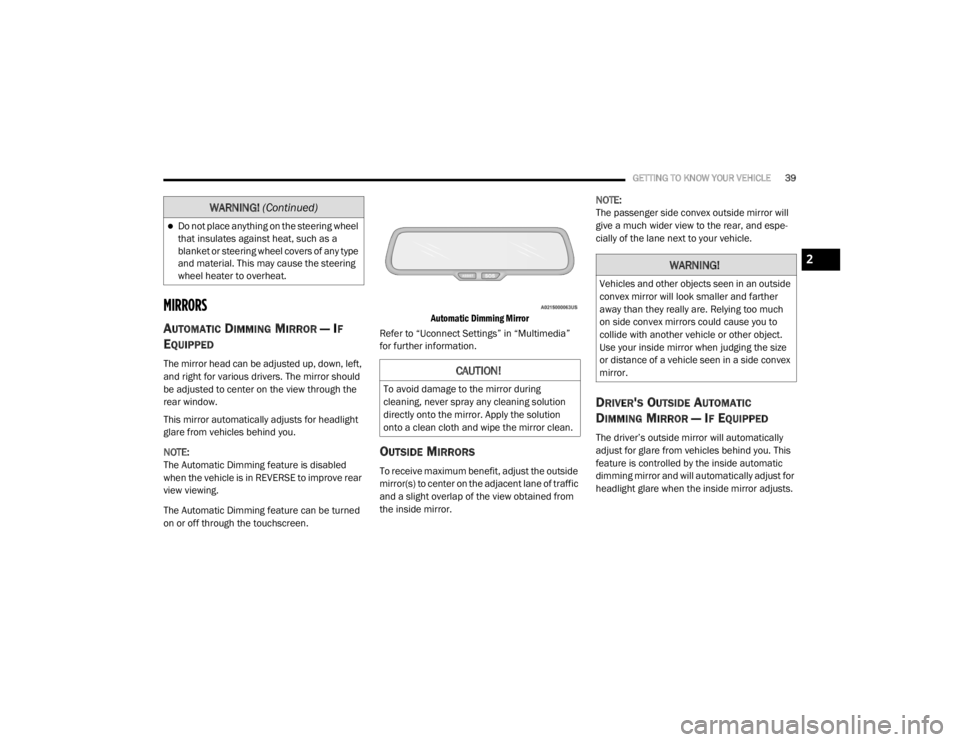
power tilt/telescoping steering column switch is
located below the multifunction lever on the
steering column.
Power Tilt/Telescoping Steering Switch
To tilt the steering column, move the switch up
or down as desired. To lengthen or shorten the
steering column, pull the switch toward you or
push the switch away from you as desired.
NOTE:
For vehicles equipped with Driver Memory
Settings, you can use your remote keyless entry
key fob or the memory switch on the driver's door trim panel to return the tilt/telescopic
steering column to saved positions. Refer to
“Driver Memory Settings” in this chapter.
HEATED STEERING WHEEL — IF
E
QUIPPED
The steering wheel contains a heating element
that helps warm your hands in cold weather.
The heated steering wheel has only one
temperature setting. Once the heated steering
wheel has been turned on, it will stay on for an
average of 80 minutes before automatically
shutting off. This time will vary based on
environmental temperatures. The heated
steering wheel can shut off early or may not turn
on when the steering wheel is already warm.
The heated steering wheel control button is
located within the Uconnect system. You can gain access to the control button through the
climate screen or the controls screen.
Press the heated steering wheel button
once to turn the heating element on.
Press the heated steering wheel button a
second time to turn the heating element off.
NOTE:
The engine must be running for the heated
steering wheel to operate.
Vehicles Equipped With Remote Start
On models that are equipped with remote start,
the heated steering wheel can be programmed
to come on during a remote start through the
Uconnect system. Refer to “Uconnect Settings”
in “Multimedia” for further information.
WARNING!
Do not adjust the steering column while
driving. Adjusting the steering column while
driving or driving with the steering column
unlocked, could cause the driver to lose
control of the vehicle. Failure to follow this
warning may result in serious injury or death.
WARNING!
Persons who are unable to feel pain to the
skin because of advanced age, chronic
illness, diabetes, spinal cord injury, medica -
tion, alcohol use, exhaustion, or other phys -
ical conditions must exercise care when
using the steering wheel heater. It may
cause burns even at low temperatures,
especially if used for long periods.
20_LX_OM_EN_USC_t.book Page 38
Page 41 of 328

GETTING TO KNOW YOUR VEHICLE39
MIRRORS
AUTOMATIC DIMMING MIRROR — IF
E
QUIPPED
The mirror head can be adjusted up, down, left,
and right for various drivers. The mirror should
be adjusted to center on the view through the
rear window.
This mirror automatically adjusts for headlight
glare from vehicles behind you.
NOTE:
The Automatic Dimming feature is disabled
when the vehicle is in REVERSE to improve rear
view viewing.
The Automatic Dimming feature can be turned
on or off through the touchscreen.
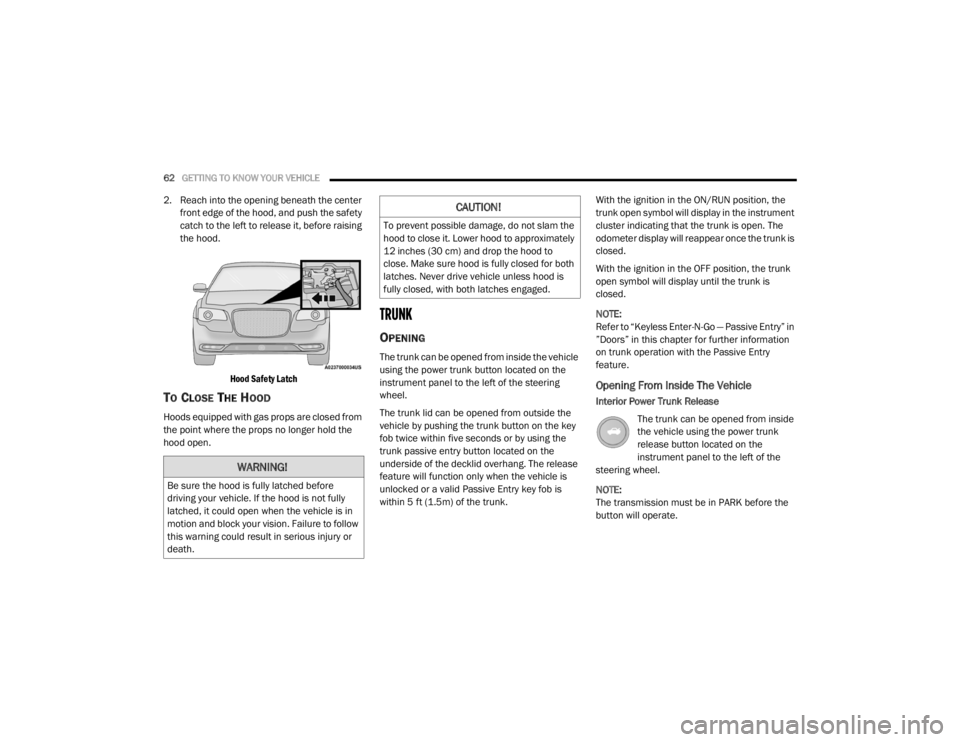
Automatic Dimming Mirror
Refer to “Uconnect Settings” in “Multimedia”
for further information.
OUTSIDE MIRRORS
To receive maximum benefit, adjust the outside
mirror(s) to center on the adjacent lane of traffic
and a slight overlap of the view obtained from
the inside mirror. NOTE:
The passenger side convex outside mirror will
give a much wider view to the rear, and espe
-
cially of the lane next to your vehicle.
DRIVER'S OUTSIDE AUTOMATIC
D
IMMING MIRROR — IF EQUIPPED
The driver’s outside mirror will automatically
adjust for glare from vehicles behind you. This
feature is controlled by the inside automatic
dimming mirror and will automatically adjust for
headlight glare when the inside mirror adjusts.
Do not place anything on the steering wheel
that insulates against heat, such as a
blanket or steering wheel covers of any type
and material. This may cause the steering
wheel heater to overheat.
WARNING! (Continued)
CAUTION!
To avoid damage to the mirror during
cleaning, never spray any cleaning solution
directly onto the mirror. Apply the solution
onto a clean cloth and wipe the mirror clean.
WARNING!
Vehicles and other objects seen in an outside
convex mirror will look smaller and farther
away than they really are. Relying too much
on side convex mirrors could cause you to
collide with another vehicle or other object.
Use your inside mirror when judging the size
or distance of a vehicle seen in a side convex
mirror.
2
20_LX_OM_EN_USC_t.book Page 39
Page 64 of 328

62GETTING TO KNOW YOUR VEHICLE
2. Reach into the opening beneath the center
front edge of the hood, and push the safety
catch to the left to release it, before raising
the hood.
Hood Safety Latch
TO CLOSE THE HOOD
Hoods equipped with gas props are closed from
the point where the props no longer hold the
hood open.
TRUNK
OPENING
The trunk can be opened from inside the vehicle
using the power trunk button located on the
instrument panel to the left of the steering
wheel.
The trunk lid can be opened from outside the
vehicle by pushing the trunk button on the key
fob twice within five seconds or by using the
trunk passive entry button located on the
underside of the decklid overhang. The release
feature will function only when the vehicle is
unlocked or a valid Passive Entry key fob is
within 5 ft (1.5m) of the trunk. With the ignition in the ON/RUN position, the
trunk open symbol will display in the instrument
cluster indicating that the trunk is open. The
odometer display will reappear once the trunk is
closed.
With the ignition in the OFF position, the trunk
open symbol will display until the trunk is
closed.
NOTE:
Refer to “Keyless Enter-N-Go — Passive Entry” in
”Doors” in this chapter for further information
on trunk operation with the Passive Entry
feature.
Opening From Inside The Vehicle
Interior Power Trunk Release
The trunk can be opened from inside
the vehicle using the power trunk
release button located on the
instrument panel to the left of the
steering wheel.
NOTE:
The transmission must be in PARK before the
button will operate.
WARNING!
Be sure the hood is fully latched before
driving your vehicle. If the hood is not fully
latched, it could open when the vehicle is in
motion and block your vision. Failure to follow
this warning could result in serious injury or
death.
CAUTION!
To prevent possible damage, do not slam the
hood to close it. Lower hood to approximately
12 inches (30 cm) and drop the hood to
close. Make sure hood is fully closed for both
latches. Never drive vehicle unless hood is
fully closed, with both latches engaged.
20_LX_OM_EN_USC_t.book Page 62
Page 80 of 328

78GETTING TO KNOW YOUR INSTRUMENT PANEL
engine cooling system is operating satis-
factorily.
The gauge pointer will likely indicate a
higher temperature when driving in hot
weather, up mountain grades, or when
towing a trailer. It should not be allowed
to exceed the upper limits of the normal
operating range. 5. Fuel Gauge
The pointer shows the level of fuel in the
fuel tank when the Keyless Push Button
Ignition is in the ON/RUN position.
The fuel pump symbol points
to the side of the vehicle where
the fuel door is located.
For further information refer to “Refueling
The Vehicle” in “Starting And Operating.”
NOTE:
The warning / indicator Lights will briefly illumi -
nate for a bulb check when the ignition is first
cycled.
INSTRUMENT CLUSTER DISPLAY
Your vehicle is equipped with an instrument
cluster display, which offers useful information
to the driver. With the ignition in the OFF mode,
opening/closing of a door will activate the
display for viewing, and display the total miles,
or kilometers, in the odometer. Your instrument
cluster display is designed to display important
information about your vehicle’s systems and
features. Using a driver interactive display
located on the instrument panel, your
instrument cluster display can show you how systems are working and give you warnings
when they are not. The steering wheel mounted
controls allow you to scroll through the main
menus and submenus. You can access the
specific information you want and make
selections and adjustments.
LOCATION AND CONTROLS
The instrument cluster display features an
interactive display which is located in the
instrument cluster.
This system conveniently allows the driver to
select a variety of useful information by pushing
the arrow buttons located on the left side of the
steering wheel. The instrument cluster display
menu items consist of the following:
Speedometer
Vehicle Info
Driver Assist — If Equipped
Fuel Economy
Trip
Audio
Messages
Screen Setup
WARNING!
A hot engine cooling system is dangerous.
You or others could be badly burned by steam
or boiling coolant. You may want to call an
authorized dealer for service if your vehicle
overheats.
CAUTION!
Driving with a hot engine cooling system
could damage your vehicle. If the
temperature gauge reads “H,” pull over and
stop the vehicle. Idle the vehicle with the air
conditioner turned off until the pointer drops
back into the normal range. If the pointer
remains on the “H,” turn the engine off
immediately and call an authorized dealer for
service.
20_LX_OM_EN_USC_t.book Page 78