2020 CHEVROLET SILVERADO 2500 change wheel
[x] Cancel search: change wheelPage 279 of 500
Chevrolet Silverado Owner Manual (GMNA-Localizing-U.S./Canada/Mexico-
13337620) - 2020 - CRC - 4/11/19
278 Driving and Operating
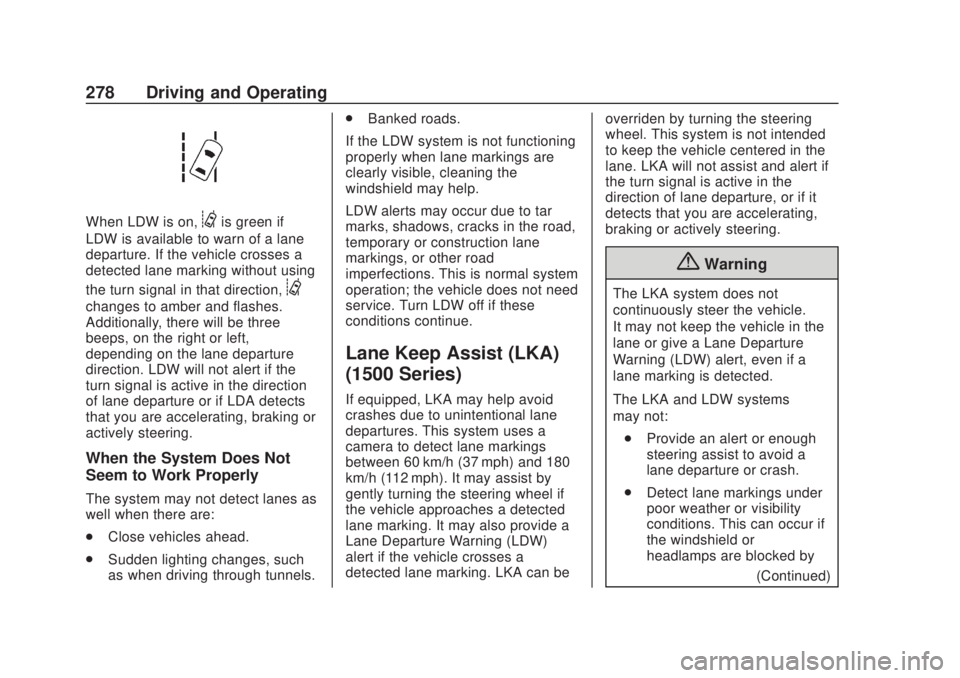
When LDW is on,@is green if
LDW is available to warn of a lane
departure. If the vehicle crosses a
detected lane marking without using
the turn signal in that direction,
@
changes to amber and flashes.
Additionally, there will be three
beeps, on the right or left,
depending on the lane departure
direction. LDW will not alert if the
turn signal is active in the direction
of lane departure or if LDA detects
that you are accelerating, braking or
actively steering.
When the System Does Not
Seem to Work Properly
The system may not detect lanes as
well when there are:
. Close vehicles ahead.
. Sudden lighting changes, such
as when driving through tunnels. .
Banked roads.
If the LDW system is not functioning
properly when lane markings are
clearly visible, cleaning the
windshield may help.
LDW alerts may occur due to tar
marks, shadows, cracks in the road,
temporary or construction lane
markings, or other road
imperfections. This is normal system
operation; the vehicle does not need
service. Turn LDW off if these
conditions continue.
Lane Keep Assist (LKA)
(1500 Series)
If equipped, LKA may help avoid
crashes due to unintentional lane
departures. This system uses a
camera to detect lane markings
between 60 km/h (37 mph) and 180
km/h (112 mph). It may assist by
gently turning the steering wheel if
the vehicle approaches a detected
lane marking. It may also provide a
Lane Departure Warning (LDW)
alert if the vehicle crosses a
detected lane marking. LKA can be overriden by turning the steering
wheel. This system is not intended
to keep the vehicle centered in the
lane. LKA will not assist and alert if
the turn signal is active in the
direction of lane departure, or if it
detects that you are accelerating,
braking or actively steering.
{Warning
The LKA system does not
continuously steer the vehicle.
It may not keep the vehicle in the
lane or give a Lane Departure
Warning (LDW) alert, even if a
lane marking is detected.
The LKA and LDW systems
may not:
. Provide an alert or enough
steering assist to avoid a
lane departure or crash.
. Detect lane markings under
poor weather or visibility
conditions. This can occur if
the windshield or
headlamps are blocked by
(Continued)
Page 293 of 500
Chevrolet Silverado Owner Manual (GMNA-Localizing-U.S./Canada/Mexico-
13337620) - 2020 - CRC - 4/11/19
292 Driving and Operating
6. Reapply the brake pedal. Thenapply the parking brake and
shift into P (Park).
7. Release the brake pedal.
Pulling the Trailer from the Water
To pull the trailer out of the water: 1. Press and hold the brake pedal.
2. Start the engine and shift into gear.
3. Release the parking brake.
4. Let up on the brake pedal.
5. Drive slowly until the tires are clear of the chocks.
6. Stop and have someone pick up and store the chocks.
7. Slowly pull the trailer from the water.
8. Once the vehicle and trailer have been driven from the
sloped part of the boat ramp,
the vehicle can be shifted from
four-wheel-drive high. Shift into the drive mode that is
appropriate for the road
conditions.
Caution
If the vehicle tires begin to spin
and the vehicle begins to slide
toward the water, remove your
foot from the accelerator pedal
and apply the brake pedal. Seek
help to have the vehicle towed up
the ramp.
Maintenance when Trailer
Towing
The vehicle needs service more
often when used to tow trailers. See
Maintenance Schedule
0441. It is
especially important to check the
engine oil, axle lubricant, belts,
cooling system, and brake system
before and during each trip.
Check periodically to see that all
nuts and bolts on the trailer hitch
are tight.
Engine Cooling When Trailer
Towing
The cooling system may temporarily
overheat during severe operating
conditions. See Engine Overheating
0 351.
Trailer Towing
If equipped with a diesel engine,
see the Duramax diesel
supplement.
Caution
Towing a trailer improperly can
damage the vehicle and result in
costly repairs not covered by the
vehicle warranty. To tow a trailer
correctly, follow the directions in
this section and see your dealer
for important information about
towing a trailer with the vehicle.
Trailering is different than just
driving the vehicle by itself.
Trailering means changes in
handling, acceleration, braking,
durability, and fuel economy.
Page 308 of 500
Chevrolet Silverado Owner Manual (GMNA-Localizing-U.S./Canada/Mexico-
13337620) - 2020 - CRC - 4/11/19
Driving and Operating 307
towing condition and free of
traffic at about 32–40 km/h
(20–25 mph) and fully apply
the Manual Trailer Brake Apply
Lever.
Adjusting Trailer Gain at
speeds lower than 32–40 km/h
(20–25 mph) may result in an
incorrect gain setting.
2. Adjust the Trailer Gain, using the Trailer Gain (+) or (−)
adjustment buttons, to just
below the point of trailer wheel
lock-up, indicated by trailer
wheel squeal or tire smoke
when a trailer wheel locks.
Trailer wheel lock-up may not
occur if towing a heavily loaded
trailer. Adjust the Trailer Gain
to the highest allowable setting
for the towing condition.
3. Readjust Trailer Gain anytime vehicle loading, trailer loading,
or road surface conditions
change or if trailer wheel
lock-up is noticed at any time
while towing.Other ITBC-Related DIC
Messages
TRAILER CONNECTED: This
message will briefly display when a
trailer with electric brakes is first
connected to the vehicle. This
message will automatically turn off
in about 10 seconds. This message
can be acknowledged before it
automatically turns off.
CHECK TRAILER WIRING: This
message will display if:
.The ITBC system first
determines connection to a
trailer with electric brakes and
then the trailer harness becomes
disconnected from the vehicle.
If the disconnect occurs while
the vehicle is stationary, this
message will automatically turn
off in about 30 seconds. This
message will also turn off if it is
acknowledged or if the trailer
harness is reconnected.
If the disconnect occurs while
the vehicle is moving, this
message will continue until the
ignition is turned off. This message will also turn off if it is
acknowledged or if the trailer
harness is reconnected.
. There is an electrical fault in the
wiring to the trailer brakes. This
message will continue as long
as there is an electrical fault in
the trailer wiring. This message
will also turn off if it is
acknowledged.
To determine whether the electrical
fault is on the vehicle side or trailer
side of the trailer wiring harness
connection: 1. Disconnect the trailer wiring harness from the vehicle.
2. Turn the ignition off.
3. Wait 10 seconds, then turn the ignition back to RUN.
4. If the CHECK TRAILER WIRING message reappears,
the electrical fault is on the
vehicle side.
Page 343 of 500
Chevrolet Silverado Owner Manual (GMNA-Localizing-U.S./Canada/Mexico-
13337620) - 2020 - CRC - 4/10/19
342 Vehicle Care
include engine revolutions, engine
temperature, and miles driven.
Based on driving conditions, the
mileage at which an oil change is
indicated can vary considerably. For
the oil life system to work properly,
the system must be reset every time
the oil is changed.
On some vehicles, when the system
has calculated that oil life has been
diminished, a CHANGE ENGINE
OIL SOON message comes on to
indicate that an oil change is
necessary. Change the oil as soon
as possible within the next 1 000 km
(600 mi). It is possible that, if driving
under the best conditions, the oil life
system might indicate that an oil
change is not necessary for up to a
year. The engine oil and filter must
be changed at least once a year
and, at this time, the system must
be reset. For vehicles without the
CHANGE ENGINE OIL SOON
message, an oil change is needed
when the REMAINING OIL LIFE
percentage is near 0%. Your dealer
has trained service people who will
perform this work and reset the
system. It is also important to checkthe oil regularly over the course of
an oil drain interval and keep it at
the proper level.
If the system is ever reset
accidentally, the oil must be
changed at 5 000 km (3,000 mi)
since the last oil change.
Remember to reset the oil life
system whenever the oil is changed.
How to Reset the Engine Oil
Life System
Reset the system whenever the
engine oil is changed so that the
system can calculate the next
engine oil change. Always reset the
engine oil life to 100% after every oil
change. It will not reset itself. To
reset the engine oil life system:
1. Display the oil life percentage on the DIC. See Driver
Information Center (DIC) (Base
Level) 0148 or
Driver Information Center (DIC)
(Midlevel and Uplevel) 0149.
2. Press the thumbwheel on the steering wheel, or the trip
odometer reset stem if the
vehicle does not have DIC controls, for several seconds.
When the confirmation
message displays, select YES.
The oil life will change
to 100%.
The oil life system can also be reset
as follows:
1. Display the oil life percentage on the DIC. See Driver
Information Center (DIC) (Base
Level) 0148 or
Driver Information Center (DIC)
(Midlevel and Uplevel) 0149.
2. Fully press the accelerator pedal slowly three times within
five seconds.
3. If the display changes to 100%, the system is reset.
If the vehicle has a CHANGE
ENGINE OIL SOON message and it
comes back on when the vehicle is
started and/or the oil life percentage
is near 0%, the engine oil life
system has not been reset. Repeat
the procedure.
Page 357 of 500
Chevrolet Silverado Owner Manual (GMNA-Localizing-U.S./Canada/Mexico-
13337620) - 2020 - CRC - 4/10/19
356 Vehicle Care
proper sequence to torque
specifications inCapacities and
Specifications 0457.
Brake linings should always be
replaced as complete axle sets.
Brake Pedal Travel
See your dealer if the brake pedal
does not return to normal height,
or if there is a rapid increase in
pedal travel. This could be a sign
that brake service may be required.
Replacing Brake System Parts
Always replace brake system parts
with new, approved replacement
parts. If this is not done, the brakes
may not work properly. The braking
performance expected can change
in many other ways if the wrong
replacement brake parts are
installed or parts are improperly
installed.
Brake Pad Life System
When to Change Brake Pads
This vehicle has a system that
estimates the remaining life of the
front and rear brake pads. Brake
pad life is displayed in the Driver
Information Center (DIC), along with
a percentage for each axle. The
system must be reset every time the
brake pads are changed.
When the system has determined
that the brake pads need to be
replaced, a message will display,
which may include mileage
remaining.
Brake pads should always be
replaced as complete axle sets.
How to Reset the Brake Pad
Life System
The system will automatically detect
when significantly worn brake pads
are replaced. When the ignition is
turned on after new pads and wear
sensors are installed, a message
will display. Follow the prompts to
reset the system. The brake pad life system can also
be manually reset:
1. Display Brake Pad Life on the DIC. See Driver Information
Center (DIC) (Base Level)
0 148 or
Driver Information Center (DIC)
(Midlevel and Uplevel) 0149.
2. Press the thumbwheel or the trip odometer reset stem if the
vehicle does not have DIC
buttons. Select front or rear
pads as appropriate.
3. Select YES on the confirmation message, or press the trip
odometer reset stem on a base
level DIC. Repeat for pads on
the other axle if they were also
replaced.
How to Disable the Brake Pad
Life System
The brake pad life system can be
turned off. This may be necessary if
aftermarket brake pads without wear
sensors are installed. When the
system is turned off, the front and
rear brake pad life percentages will
not display. However, the built-in
Page 381 of 500
Chevrolet Silverado Owner Manual (GMNA-Localizing-U.S./Canada/Mexico-
13337620) - 2020 - CRC - 4/10/19
380 Vehicle Care
performance on most road surfaces
and weather conditions. Original
equipment tires designed to GM's
specific tire performance criteria
have a TPC specification code
molded onto the sidewall. Original
equipment all-season tires can be
identified by the last two characters
of this TPC code, which will
be“MS.”
Consider installing winter tires on
the vehicle if frequent driving on
snow or ice-covered roads is
expected. All-season tires provide
adequate performance for most
winter driving conditions, but they
may not offer the same level of
traction or performance as winter
tires on snow or ice-covered roads.
See Winter Tires 0380.
Winter Tires
This vehicle was not originally
equipped with winter tires. Winter
tires are designed for increased
traction on snow and ice-covered
roads. Consider installing winter
tires on the vehicle if frequent
driving on ice or snow covered roads is expected. See your dealer
for details regarding winter tire
availability and proper tire selection.
Also, see
Buying New Tires 0399.
With winter tires, there may be
decreased dry road traction,
increased road noise, and shorter
tread life. After changing to winter
tires, be alert for changes in vehicle
handling and braking.
If using winter tires:
. Use tires of the same brand and
tread type on all four wheel
positions.
. Use only radial ply tires of the
same size, load range, and
speed rating as the original
equipment tires.
Winter tires with the same speed
rating as the original equipment tires
may not be available for H, V, W, Y,
and ZR speed rated tires. If winter
tires with a lower speed rating are
chosen, never exceed the tire's
maximum speed capability.
Low-Profile Tires
If the vehicle has 275/60R20 or
275/50R22 size tires, they are
classified as low-profile tires.
Caution
Low-profile tires are more
susceptible to damage from road
hazards or curb impact than
standard profile tires. Tire and/or
wheel assembly damage can
occur when coming into contact
with road hazards like potholes,
or sharp edged objects, or when
sliding into a curb. The warranty
does not cover this type of
damage. Keep tires set to the
correct inflation pressure and
when possible, avoid contact with
curbs, potholes, and other road
hazards.
Page 399 of 500

Chevrolet Silverado Owner Manual (GMNA-Localizing-U.S./Canada/Mexico-
13337620) - 2020 - CRC - 4/10/19
398 Vehicle Care
Use this rotation pattern when
rotating the tires if the vehicle
has polished forged aluminum
dual rear wheels. The spare
wheel can be used in any
position in the event of a flat tire,
and can be rotated with the rear
inner wheels. After the flat tire is
repaired, if the spare is not on
one of the inner rear positions, it
must be replaced by the correct
wheel in the front or rear outer
positions.
When installing dual wheels,
check that the vent holes in the
inner and outer wheels on each
side are lined up.
Adjust the front and rear tires to
the recommended inflation
pressure on the Tire and
Loading Information label after
the tires have been rotated. See
Tire Pressure0387 and
Vehicle Load Limits 0200. Check that all wheel nuts are
properly tightened. See
“Wheel
Nut Torque” underCapacities
and Specifications 0457, and
“Removing the Flat Tire and
Installing the Spare Tire” under
Tire Changing 0407.
{Warning
Rust or dirt on a wheel, or on the
parts to which it is fastened, can
make wheel nuts become loose
after time. The wheel could come
off and cause a crash. When
changing a wheel, remove any
rust or dirt from places where the
wheel attaches to the vehicle. In
an emergency, a cloth or a paper
towel can be used; however, use
a scraper or wire brush later to
remove all rust or dirt.
Lightly coat the inner diameter of
the wheel hub opening with
wheel bearing grease after a
wheel change or tire rotation to
prevent corrosion or rust build-up. Do not get grease on
the flat wheel mounting surface
or on the wheel nuts or bolts.
Reset the Tire Pressure Monitor
System (TPMS), if the vehicle
has one. See
Tire Pressure
Monitor Operation 0390.
If the full-size tire is part of the
tire rotation, make sure the tire
rotated into the spare position is
stored securely. Push, pull, and
then try to rotate or turn the tire.
If it moves, use the wheel
wrench/hoist shaft to tighten the
cable. See Tire Changing 0407.
When It Is Time for New
Tires
Factors, such as maintenance,
temperatures, driving speeds,
vehicle loading, and road conditions
affect the wear rate of the tires.
Page 407 of 500
Chevrolet Silverado Owner Manual (GMNA-Localizing-U.S./Canada/Mexico-
13337620) - 2020 - CRC - 4/10/19
406 Vehicle Care
{Warning
Lifting a vehicle and getting under
it to do maintenance or repairs is
dangerous without the
appropriate safety equipment and
training. If a jack is provided with
the vehicle, it is designed only for
changing a flat tire. If it is used for
anything else, you or others could
be badly injured or killed if the
vehicle slips off the jack. If a jack
is provided with the vehicle, only
use it for changing a flat tire.
If a tire goes flat, avoid further tire
and wheel damage by driving slowly
to a level place, well off the road,
if possible. Turn on the hazard
warning flashers. See Hazard
Warning Flashers 0169.
{Warning
Changing a tire can be
dangerous. The vehicle can slip
off the jack and roll over or fall
causing injury or death. Find a
level place to change the tire. To
help prevent the vehicle from
moving:
1. Set the parking brake firmly.
2. Put the shift lever inP (Park).
3. For vehicles with four-wheel drive with an N (Neutral)
transfer case position, be
sure the transfer case is in a
drive gear —not in
N (Neutral).
4. Turn off the engine and do not restart while the vehicle
is raised.
5. Do not allow passengers to remain in the vehicle.
(Continued)
Warning (Continued)
6. Place wheel blocks,if equipped, on both sides of
the tire at the opposite
corner of the tire being
changed.
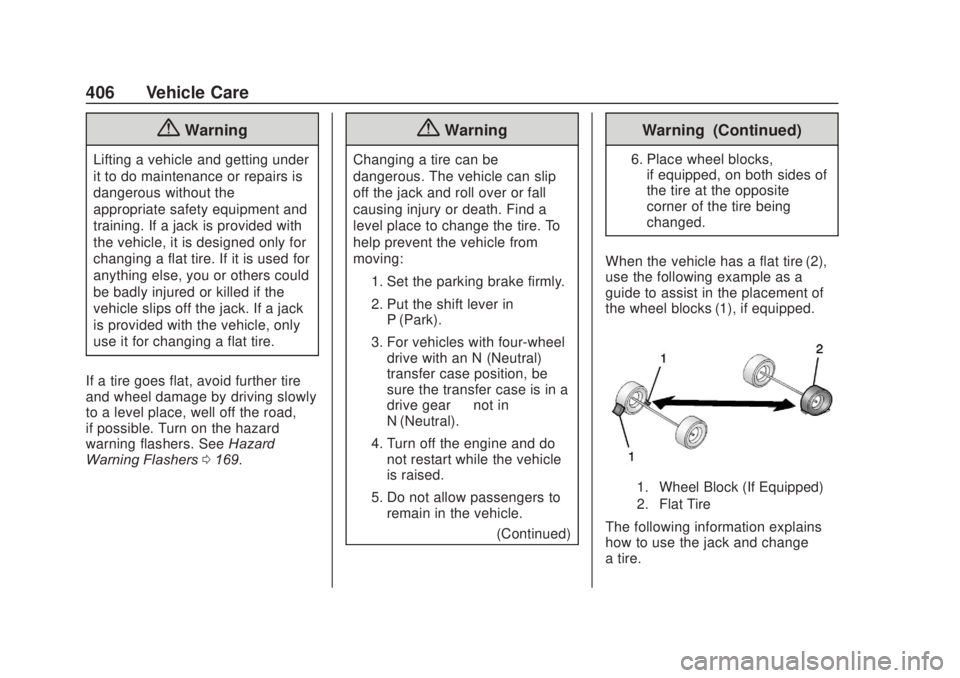
When the vehicle has a flat tire (2),
use the following example as a
guide to assist in the placement of
the wheel blocks (1), if equipped.
1. Wheel Block (If Equipped)
2. Flat Tire
The following information explains
how to use the jack and change
a tire.