2020 CHEVROLET SILVERADO 2500 lock
[x] Cancel search: lockPage 425 of 500
Chevrolet Silverado Owner Manual (GMNA-Localizing-U.S./Canada/Mexico-
13337620) - 2020 - CRC - 4/10/19
424 Vehicle Care
Towing the Vehicle
Caution
Incorrectly towing a disabled
vehicle may cause damage. The
damage would not be covered by
the vehicle warranty. Do not lash
or hook to suspension
components. Use the proper
straps around the tires to secure
the vehicle. Do not drag a locked
wheel/tire. Use tire skates or
dollies under any locked wheel/
tire while loading the vehicle. Do
not use a sling type lift to tow the
vehicle. This could damage the
vehicle.
Caution
If the vehicle cannot be shifted
into Neutral (N), do not use the
tow eye to tow the vehicle.
Vehicle damage may occur.GM recommends a flatbed tow truck
to transport a disabled vehicle. Use
ramps to help reduce approach
angles, if necessary. A towed
vehicle should have its drive wheels
off the ground. Contact Roadside
Assistance or a professional towing
service if the disabled vehicle must
be towed.
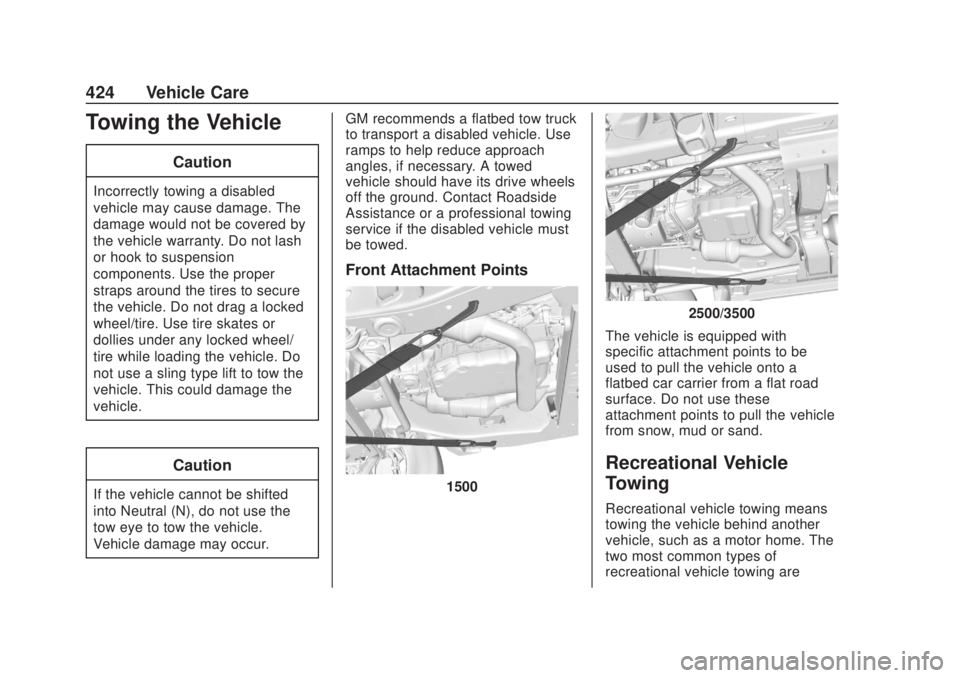
Front Attachment Points
1500
2500/3500
The vehicle is equipped with
specific attachment points to be
used to pull the vehicle onto a
flatbed car carrier from a flat road
surface. Do not use these
attachment points to pull the vehicle
from snow, mud or sand.
Recreational Vehicle
Towing
Recreational vehicle towing means
towing the vehicle behind another
vehicle, such as a motor home. The
two most common types of
recreational vehicle towing are
Page 427 of 500
Chevrolet Silverado Owner Manual (GMNA-Localizing-U.S./Canada/Mexico-
13337620) - 2020 - CRC - 4/10/19
426 Vehicle Care
Two-wheel-drive vehicles and
vehicles with a single-speed transfer
case should not be towed with all
four wheels on the ground.
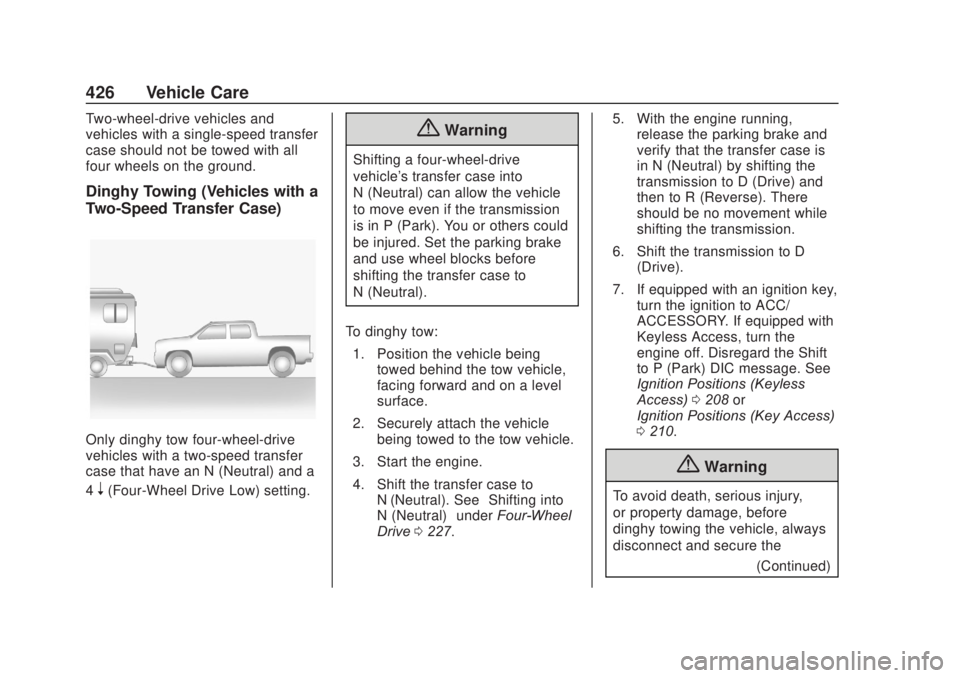
Dinghy Towing (Vehicles with a
Two-Speed Transfer Case)
Only dinghy tow four-wheel-drive
vehicles with a two-speed transfer
case that have an N (Neutral) and a
4
n(Four-Wheel Drive Low) setting.
{Warning
Shifting a four-wheel-drive
vehicle's transfer case into
N (Neutral) can allow the vehicle
to move even if the transmission
is in P (Park). You or others could
be injured. Set the parking brake
and use wheel blocks before
shifting the transfer case to
N (Neutral).
To dinghy tow: 1. Position the vehicle being towed behind the tow vehicle,
facing forward and on a level
surface.
2. Securely attach the vehicle being towed to the tow vehicle.
3. Start the engine.
4. Shift the transfer case to N (Neutral). See “Shifting into
N (Neutral)” underFour-Wheel
Drive 0227. 5. With the engine running,
release the parking brake and
verify that the transfer case is
in N (Neutral) by shifting the
transmission to D (Drive) and
then to R (Reverse). There
should be no movement while
shifting the transmission.
6. Shift the transmission to D (Drive).
7. If equipped with an ignition key, turn the ignition to ACC/
ACCESSORY. If equipped with
Keyless Access, turn the
engine off. Disregard the Shift
to P (Park) DIC message. See
Ignition Positions (Keyless
Access) 0208 or
Ignition Positions (Key Access)
0 210.
{Warning
To avoid death, serious injury,
or property damage, before
dinghy towing the vehicle, always
disconnect and secure the
(Continued)
Page 428 of 500
Chevrolet Silverado Owner Manual (GMNA-Localizing-U.S./Canada/Mexico-
13337620) - 2020 - CRC - 4/10/19
Vehicle Care 427
Warning (Continued)
negative battery cable and cover
the negative battery post and
cable with a non-conductive
material. If the battery is left
connected or the battery cable
contacts the post, the Electric
Parking Brake may activate
during towing, which could cause
a crash.
8. Disconnect the negative (–) battery cable. See “Negative
Battery Cable Disconnection”
in Battery - North America
0 358.
9. Shift the transmission to P (Park).
Caution
If the steering column is locked,
vehicle damage may occur. 10. Move the steering wheel to
make sure the steering column
is unlocked.
11. If the vehicle has an ignition key, keep it in the towed
vehicle in ACC/ACCESSORY
to prevent the steering column
from locking. If the vehicle is
equipped with Keyless Access,
keep the RKE transmitter
outside of the vehicle and
manually lock the doors.
Access the vehicle by using
the key in the door lock. See
Door Locks 025.
Disconnecting the Towed Vehicle
Before disconnecting from the tow
vehicle: 1. Park on a level surface. Secure the vehicle with wheel blocks.
2. Re-connect the negative (–) battery. See Battery - North
America 0358.
3. Turn on the ignition with the engine off. For vehicles with a
key, turn the ignition to ON/
RUN with the engine off. If the vehicle is equipped with
Keyless Access, with your foot
off the brake pedal, press and
hold ENGINE START/STOP for
five seconds until the green
light comes on in the button.
See
Ignition Positions (Keyless
Access) 0208 or
Ignition Positions (Key Access)
0 210.
4. Set the parking brake. See Electric Parking Brake 0233.
5. Disconnect from the tow vehicle.
6. Shift the transmission to N (Neutral).
7. Shift the transfer case to 2
m
(Two-Wheel Drive High). When
the shift to 2
m(Two-Wheel
Drive High) is complete, the
light in the instrument cluster
will stop flashing and stay lit.
See Four-Wheel-Drive Light
0 141.
8. Start the engine. Check that the vehicle is in 2
m
(Two-Wheel Drive High) by
Page 429 of 500
Chevrolet Silverado Owner Manual (GMNA-Localizing-U.S./Canada/Mexico-
13337620) - 2020 - CRC - 4/10/19
428 Vehicle Care
starting the engine and shifting
the transmission to D (Drive)
and then to R (Reverse). There
should be movement of the
vehicle while shifting.
9. Shift the transmission to P (Park) and turn off the
ignition.
10. Release the parking brake and remove the wheel blocks.
11. Reset any lost presets. The outside temperature
display will default to 0 °C (32 °
F) but will reset with normal
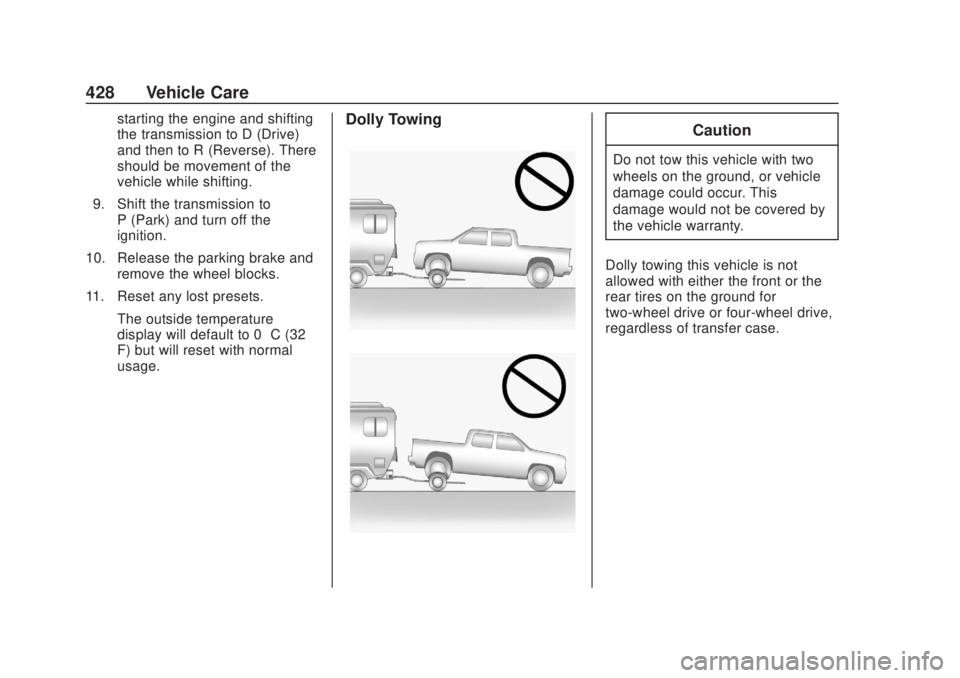
usage.Dolly TowingCaution
Do not tow this vehicle with two
wheels on the ground, or vehicle
damage could occur. This
damage would not be covered by
the vehicle warranty.
Dolly towing this vehicle is not
allowed with either the front or the
rear tires on the ground for
two-wheel drive or four-wheel drive,
regardless of transfer case.
Page 430 of 500
Chevrolet Silverado Owner Manual (GMNA-Localizing-U.S./Canada/Mexico-
13337620) - 2020 - CRC - 4/10/19
Vehicle Care 429
Appearance Care
Exterior Care
Locks
Locks are lubricated at the factory.
Use a de-icing agent only when
absolutely necessary, and have the
locks greased after using. See
Recommended Fluids and
Lubricants0451.
Washing the Vehicle
To preserve the vehicle's finish,
wash it often and out of direct
sunlight.
{Warning
Do not power wash any part of
the vehicle’s interior, including the
vinyl floor covering. This could
damage safety and other systems
in the vehicle, which would not be
covered by the vehicle warranty.
Caution
Do not use petroleum-based,
acidic, or abrasive cleaning
agents as they can damage the
vehicle's paint, metal, or plastic
parts. If damage occurs, it would
not be covered by the vehicle
warranty. Approved cleaning
products can be obtained from
your dealer. Follow all
manufacturer directions regarding
correct product usage, necessary
safety precautions, and
appropriate disposal of any
vehicle care product.
Caution
Avoid using high-pressure
washes closer than 30 cm (12 in)
to the surface of the vehicle. Use
of power washers exceeding
8,274 kPa (1,200 psi) can result
in damage or removal of paint
and decals.
Caution
Do not power wash any
component under the hood that
has this
esymbol.
This could cause damage that
would not be covered by the
vehicle warranty.
Underhood Component
Power Wash
If power washing underhood
components, do not exceed these
limits:
. Fluid pressures of 110 bar
(1600 psi)
. Fluid temperatures of 25°C
(77° F)
. Nozzle must remain 30 cm
(12 in) or farther from
components
Page 435 of 500
Chevrolet Silverado Owner Manual (GMNA-Localizing-U.S./Canada/Mexico-
13337620) - 2020 - CRC - 4/10/19
434 Vehicle Care
2500/3500 Series vehicles, at least
every engine oil change lubricate
the upper and lower control arm ball
joints. Control arm ball joints on
1500 series vehicles are
maintenance-free.
2500/3500 Series vehicles equipped
with steering linkage, at least every
engine oil change lubricate the tie
rod ball joints, idler arm pivot shaft
bearings, idler arm socket, and
pitman arm socket.
Caution
Lubrication of applicable
suspension points should not be
done unless the temperature is
−12 °C (10 °F) or higher,
or damage could result.
Body Component Lubrication
Lubricate all key lock cylinders,
hood hinges, liftgate hinges, and the
steel fuel door hinge unless the
components are plastic. Applying
silicone grease on weatherstripswith a clean cloth will make them
last longer, seal better, and not stick
or squeak.
Underbody Maintenance
At least twice a year, spring and fall,
use plain water to flush any
corrosive materials from the
underbody. Take care to thoroughly
clean any areas where mud and
other debris can collect. If equipped
with power assist steps, extend
them and then use a high pressure
wash to clean all joints and gaps.
Do not directly power wash the
transfer case and/or front/rear axle
output seals. High pressure water
can overcome the seals and
contaminate the fluid. Contaminated
fluid will decrease the life of the
transfer case and/or axles and
should be replaced.
Sheet Metal Damage
If the vehicle is damaged and
requires sheet metal repair or
replacement, make sure the body
repair shop applies anti-corrosion
material to parts repaired or
replaced to restore corrosion
protection.
Original manufacturer replacement
parts will provide the corrosion
protection while maintaining the
vehicle warranty.
Finish Damage
Quickly repair minor chips and
scratches with touch-up materials
available from your dealer to avoid
corrosion. Larger areas of finish
damage can be corrected in your
dealer's body and paint shop.
Chemical Paint Spotting
Airborne pollutants can fall upon
and attack painted vehicle surfaces
causing blotchy, ring-shaped
discolorations, and small, irregular
dark spots etched into the paint
surface. Refer to
“Finish Care”
previously in this section.
Interior Care
To prevent dirt particle abrasions,
regularly clean the vehicle's interior.
Immediately remove any soils.
Page 439 of 500
Chevrolet Silverado Owner Manual (GMNA-Localizing-U.S./Canada/Mexico-
13337620) - 2020 - CRC - 4/10/19
438 Vehicle Care
Warning (Continued)
and injury. Make sure the floor
mat does not interfere with the
pedals.
Use the following guidelines for
proper floor mat usage:
. The original equipment floor
mats were designed for your
vehicle. If the floor mats need
replacing, it is recommended
that GM certified floor mats be
purchased. Non-GM floor mats
may not fit properly and may
interfere with the pedals. Always
check that the floor mats do not
interfere with the pedals.
. Do not use a floor mat if the
vehicle is not equipped with a
floor mat retainer on the driver
side floor.
. Use the floor mat with the
correct side up. Do not turn
it over.
. Do not place anything on top of
the driver side floor mat. .
Use only a single floor mat on
the driver side.
. Do not place one floor mat on
top of another.
Removing and Replacing the
Floor Mats
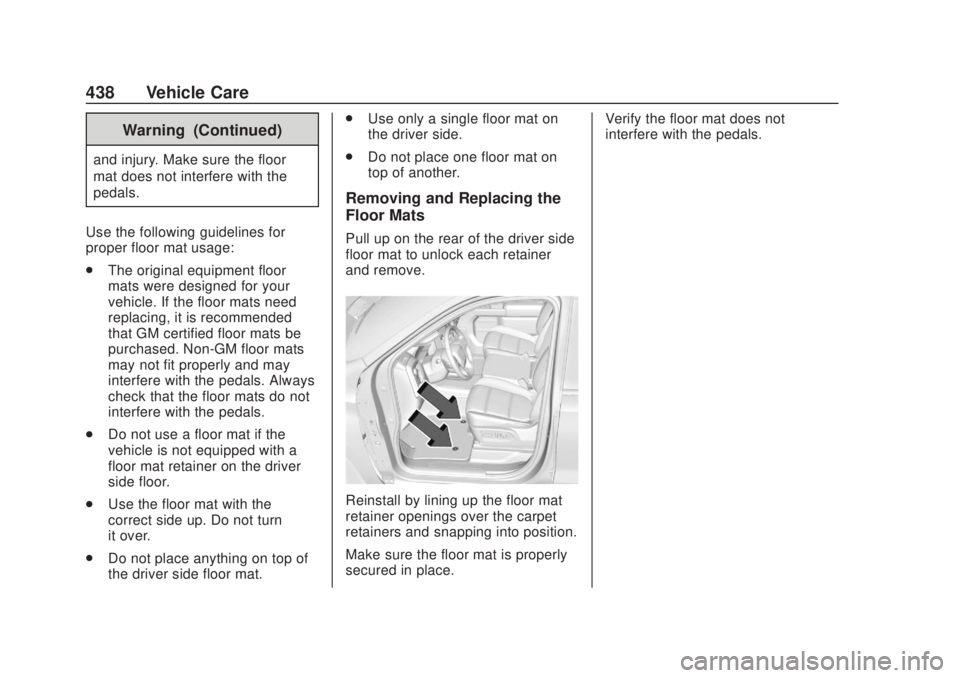
Pull up on the rear of the driver side
floor mat to unlock each retainer
and remove.
Reinstall by lining up the floor mat
retainer openings over the carpet
retainers and snapping into position.
Make sure the floor mat is properly
secured in place. Verify the floor mat does not
interfere with the pedals.
Page 444 of 500

Chevrolet Silverado Owner Manual (GMNA-Localizing-U.S./Canada/Mexico-
13337620) - 2020 - CRC - 4/2/19
Service and Maintenance 443
.Lubricate body components. See
Exterior Care 0429.
. Check starter switch. See Starter
Switch Check 0362.
. Check automatic transmission
shift lock control function. See
Automatic Transmission Shift
Lock Control Function Check
0363.
. Check ignition transmission lock.
See Ignition Transmission Lock
Check 0363.
. Check parking brake and
automatic transmission park
mechanism. See Park Brake and
P (Park) Mechanism Check
0 363.
. Check accelerator pedal for
damage, high effort, or binding.
Replace if needed.
. Visually inspect gas strut for
signs of wear, cracks, or other
damage. Check the hold open
ability of the strut. If the hold
open is low, service the gas
strut. See Gas Strut(s) 0365. .
Inspect sunroof track and seal,
if equipped. See Sunroof051.
. Verify spare tire key lock
operation and lubricate as
needed. See Tire Changing
0 407.
. Visually inspect the spare tire to
ensure that it is tightly stowed
under the vehicle. Push, pull,
and try to turn the tire. If the
spare tire moves, tighten as
necessary. See Tire Changing
0 407.