Page 334 of 500
Chevrolet Silverado Owner Manual (GMNA-Localizing-U.S./Canada/Mexico-
13337620) - 2020 - CRC - 4/10/19
Vehicle Care 333
1. Remote Negative (–) Location.See Jump Starting - North
America 0419.
2. Positive (+) Terminal (Under Cover). See Jump Starting -
North America 0419.
3. Battery - North America 0358.
4. Engine Compartment Fuse
Block 0371.
5. Engine Cooling Fans (Out of View). See Cooling System
0 346.
6. Engine Oil Fill Cap. See “When
to Add Engine Oil” under
Engine Oil 0339.
7. Engine Oil Dipstick. See “Checking Engine Oil” under
Engine Oil 0339.
8. Coolant Surge Tank and Pressure Cap. See Cooling
System 0346.
9. Engine Air Cleaner/Filter 0344.
10. Brake Fluid Reservoir. See Brake Fluid 0357. 11. Windshield Washer Fluid
Reservoir. See “Adding Washer
Fluid” under Washer Fluid
0 354.
Page 336 of 500
Chevrolet Silverado Owner Manual (GMNA-Localizing-U.S./Canada/Mexico-
13337620) - 2020 - CRC - 4/10/19
Vehicle Care 335
1. Remote Negative (–) Location.See Jump Starting - North
America 0419.
2. Positive (+) Terminal (Under Cover). See Jump Starting -
North America 0419.
3. Battery - North America 0358.
4. Engine Compartment Fuse
Block 0371.
5. Engine Cooling Fans (Out of View). See Cooling System
0 346.
6. Engine Oil Dipstick. See “Checking Engine Oil” under
Engine Oil 0339.
7. Engine Oil Fill Cap. See “When
to Add Engine Oil” under
Engine Oil 0339.
8. Coolant Surge Tank and Pressure Cap. See Cooling
System 0346.
9. Engine Air Cleaner/Filter 0344.
10. Brake Fluid Reservoir. See Brake Fluid 0357. 11. Windshield Washer Fluid
Reservoir. See “Adding Washer
Fluid” under Washer Fluid
0 354.
Page 338 of 500
Chevrolet Silverado Owner Manual (GMNA-Localizing-U.S./Canada/Mexico-
13337620) - 2020 - CRC - 4/10/19
Vehicle Care 337
1. Remote Negative (–) Location.See Jump Starting - North
America 0419.
2. Positive (+) Terminal (Under Cover). See Jump Starting -
North America 0419.
3. Battery - North America 0358.
4. Engine Compartment Fuse
Block 0371.
5. Engine Oil Dipstick. See “Checking Engine Oil” under
Engine Oil 0339.
6. Engine Cooling Fans (Out of View). See Cooling System
0 346.
7. Engine Oil Fill Cap. See “When
to Add Engine Oil” under
Engine Oil 0339.
8. Coolant Surge Tank and Pressure Cap. See Cooling
System 0346.
9. Engine Air Cleaner/Filter 0344.
10. Brake Fluid Reservoir. See Brake Fluid 0357. 11. Windshield Washer Fluid
Reservoir. See “Adding Washer
Fluid” under Washer Fluid
0 354.
Page 340 of 500

Chevrolet Silverado Owner Manual (GMNA-Localizing-U.S./Canada/Mexico-
13337620) - 2020 - CRC - 4/10/19
Vehicle Care 339
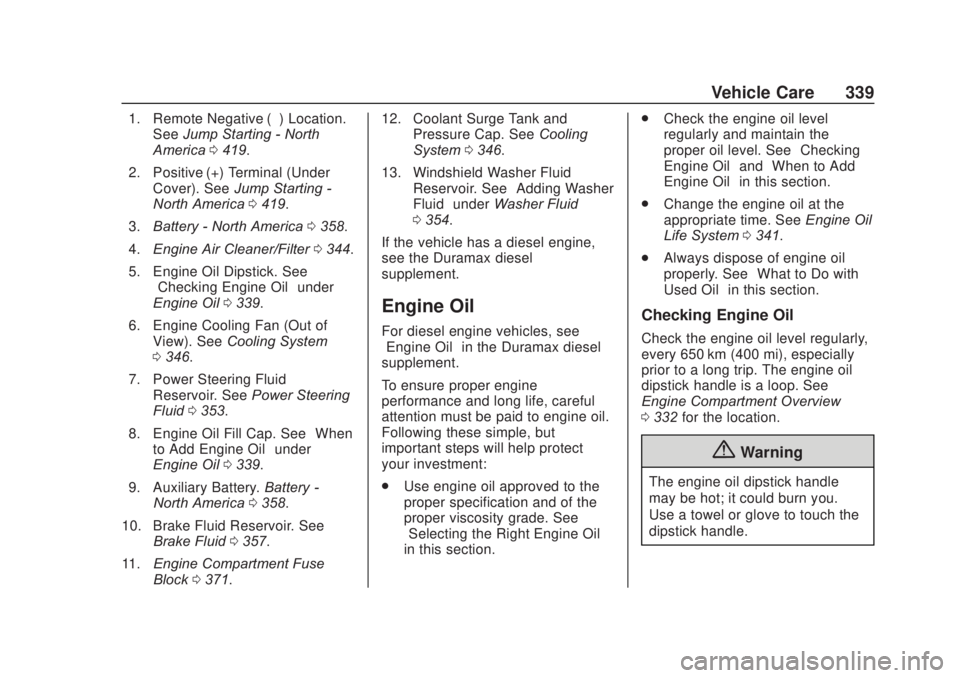
1. Remote Negative (–) Location.See Jump Starting - North
America 0419.
2. Positive (+) Terminal (Under Cover). See Jump Starting -
North America 0419.
3. Battery - North America 0358.
4. Engine Air Cleaner/Filter 0344.
5. Engine Oil Dipstick. See “Checking Engine Oil” under
Engine Oil 0339.
6. Engine Cooling Fan (Out of View). See Cooling System
0 346.
7. Power Steering Fluid Reservoir. See Power Steering
Fluid 0353.
8. Engine Oil Fill Cap. See “When
to Add Engine Oil” under
Engine Oil 0339.
9. Auxiliary Battery. Battery -
North America 0358.
10. Brake Fluid Reservoir. See Brake Fluid 0357.
11. Engine Compartment Fuse
Block 0371. 12. Coolant Surge Tank and
Pressure Cap. See Cooling
System 0346.
13. Windshield Washer Fluid Reservoir. See “Adding Washer
Fluid” under Washer Fluid
0 354.
If the vehicle has a diesel engine,
see the Duramax diesel
supplement.
Engine Oil
For diesel engine vehicles, see
“Engine Oil” in the Duramax diesel
supplement.
To ensure proper engine
performance and long life, careful
attention must be paid to engine oil.
Following these simple, but
important steps will help protect
your investment:
. Use engine oil approved to the
proper specification and of the
proper viscosity grade. See
“Selecting the Right Engine Oil”
in this section. .
Check the engine oil level
regularly and maintain the
proper oil level. See “Checking
Engine Oil” and“When to Add
Engine Oil” in this section.
. Change the engine oil at the
appropriate time. See Engine Oil
Life System 0341.
. Always dispose of engine oil
properly. See “What to Do with
Used Oil” in this section.Checking Engine Oil
Check the engine oil level regularly,
every 650 km (400 mi), especially
prior to a long trip. The engine oil
dipstick handle is a loop. See
Engine Compartment Overview
0332 for the location.
{Warning
The engine oil dipstick handle
may be hot; it could burn you.
Use a towel or glove to touch the
dipstick handle.
Page 351 of 500

Chevrolet Silverado Owner Manual (GMNA-Localizing-U.S./Canada/Mexico-
13337620) - 2020 - CRC - 4/10/19
350 Vehicle Care
Warning (Continued)
warning. The engine could catch
fire and you or others could be
burned.
{Warning
Steam and scalding liquids from a
hot cooling system are under
pressure. Turning the pressure
cap, even a little, can cause them
to come out at high speed and
you could be burned. Never turn
the cap when the cooling system,
including the pressure cap, is hot.
Wait for the cooling system and
pressure cap to cool.
Caution
Failure to follow the specific
coolant fill procedure could cause
the engine to overheat and could(Continued)
Caution (Continued)
cause system damage. If coolant
is not visible in the surge tank,
contact your dealer.
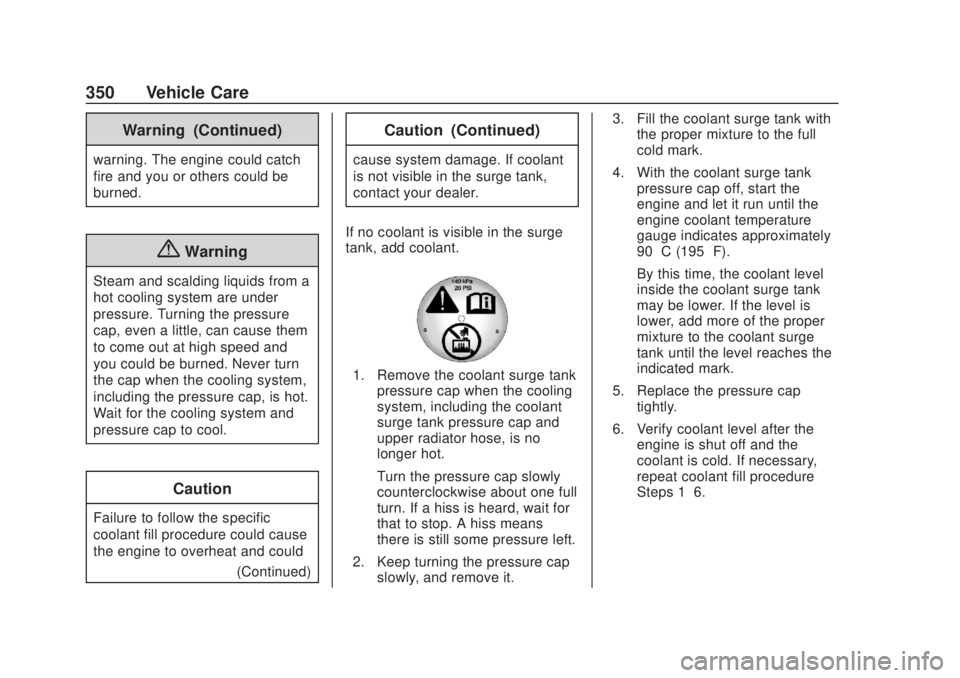
If no coolant is visible in the surge
tank, add coolant.
1. Remove the coolant surge tank pressure cap when the cooling
system, including the coolant
surge tank pressure cap and
upper radiator hose, is no
longer hot.
Turn the pressure cap slowly
counterclockwise about one full
turn. If a hiss is heard, wait for
that to stop. A hiss means
there is still some pressure left.
2. Keep turning the pressure cap slowly, and remove it. 3. Fill the coolant surge tank with
the proper mixture to the full
cold mark.
4. With the coolant surge tank pressure cap off, start the
engine and let it run until the
engine coolant temperature
gauge indicates approximately
90 °C (195 °F).
By this time, the coolant level
inside the coolant surge tank
may be lower. If the level is
lower, add more of the proper
mixture to the coolant surge
tank until the level reaches the
indicated mark.
5. Replace the pressure cap tightly.
6. Verify coolant level after the engine is shut off and the
coolant is cold. If necessary,
repeat coolant fill procedure
Steps 1–6.
Page 364 of 500

Chevrolet Silverado Owner Manual (GMNA-Localizing-U.S./Canada/Mexico-
13337620) - 2020 - CRC - 4/10/19
Vehicle Care 363
1. Before starting this check, besure there is enough room
around the vehicle.
2. Apply both the parking brake and the regular brake.
Do not use the accelerator
pedal, and be ready to turn off
the engine immediately if it
starts.
3. Try to start the engine in each gear. The vehicle should start
only in P (Park) or N (Neutral).
If the vehicle starts in any other
position, contact your dealer for
service.
Automatic Transmission
Shift Lock Control
Function Check
{Warning
When you are doing this
inspection, the vehicle could
move suddenly. If the vehicle
moves, you or others could be
injured. 1. Before starting this check, be
sure there is enough room
around the vehicle. It should be
parked on a level surface.
2. Apply the parking brake. Be ready to apply the regular
brake immediately if the vehicle
begins to move.
3. With the engine off, turn the ignition on, but do not start the
engine. Without applying the
regular brake, try to move the
shift lever out of P (Park) with
normal effort. If the shift lever
moves out of P (Park), contact
your dealer for service.
Ignition Transmission
Lock Check
If equipped with Key Access
ignition, while parked, and with the
parking brake set, try to turn the
ignition off in each shift lever
position. The ignition should turn to
off only when the shift lever is in
P (Park). The ignition key should come out
only when the ignition is off. Contact
your dealer if service is required.
Park Brake and P (Park)
Mechanism Check
{Warning
When you are doing this check,
the vehicle could begin to move.
You or others could be injured
and property could be damaged.
Make sure there is room in front
of the vehicle in case it begins to
roll. Be ready to apply the regular
brake at once should the vehicle
begin to move.
Park on a fairly steep hill, with the
vehicle facing downhill. Keeping
your foot on the regular brake, set
the parking brake.
. To check the parking brake's
holding ability: With the engine
running and the transmission in
N (Neutral), slowly remove foot
Page 368 of 500

Chevrolet Silverado Owner Manual (GMNA-Localizing-U.S./Canada/Mexico-
13337620) - 2020 - CRC - 4/10/19
Vehicle Care 367
LED Lighting
This vehicle has several LED lamps.
For replacement of any LED lighting
assembly, contact your dealer.
Headlamps, Front Turn
Signal, Sidemarker, and
Parking Lamps
Base Level Headlamp
Assembly
1. Sidemarker lamp
2. Low-Beam Headlamp
3. High-Beam Headlamp
4. Turn Signal/Park Lamps
Midlevel Headlamp Assembly
1. Turn Signal Lamps
Headlamp Replacement
Base Level1. Open the hood.
2. Remove the headlamp bulb cover.
3. Turn the bulb socket counterclockwise to remove it
from the headlamp assembly.
4. Unplug the electrical connector from the bulb by releasing the
clip on the connector. 5. Replace the bulb and reverse
Steps 1–4 to reinstall.
Midlevel and Uplevel
See your dealer for headlamp
replacement.
Uplevel
See your dealer for turn signal
replacement.
Turn Signal Lamp
Replacement
1. Open the hood.
2. Turn the bulb socket counterclockwise to remove it
from the headlamp assembly
and pull it straight out.
3. Remove the bulb by pulling it straight out of the bulb socket.
4. Replace the bulb and reverse Steps 1–3 to reinstall.
Page 370 of 500
Chevrolet Silverado Owner Manual (GMNA-Localizing-U.S./Canada/Mexico-
13337620) - 2020 - CRC - 4/10/19
Vehicle Care 369
4. Turn the bulb socketcounterclockwise.
5. Pull the bulb straight out from the socket.
6. Replace the bulb and reverse Steps 1–5 to reinstall.
Center High-Mounted
Stoplamp (CHMSL) and
Cargo Lamp
This procedure is for the regular cab
only. For crew cab and double cab
see your dealer.
1. Cargo Lamp Bulbs
2. Center High-Mounted
Stoplamp (CHMSL) Bulb
To replace one of these bulbs:
1. Remove the two screws and lift off the lamp assembly.
2. Turn the bulb socket counterclockwise and pull it
straight out.
3. Pull the bulb straight out from the socket.
License Plate Lamp
To replace the bulb:
1. Reach behind the rear bumper and locate the bulb.
2. Turn the bulb socket counterclockwise and pull the
bulb straight out of the socket.