2020 CHEVROLET SILVERADO 2500 center console
[x] Cancel search: center consolePage 40 of 500
Chevrolet Silverado Owner Manual (GMNA-Localizing-U.S./Canada/Mexico-
13337620) - 2020 - CRC - 4/2/19
Keys, Doors, and Windows 39
open the driver door to reset the
system. Then turn the vehicle on
and immediately turn the
steering wheel side to side for
about 15 seconds. In some
cases, it may take significant
force to unbind the column.
To keep the steering column from
binding, straighten the front wheels
before turning off the vehicle.
Immobilizer
See Radio Frequency Statement
0 471.
Immobilizer Operation
This vehicle has a passive
theft-deterrent system.
The system does not have to be
manually armed or disarmed. The vehicle is automatically
immobilized when the vehicle is
turned off.
The system is automatically
disarmed when the ignition is turned
from off to on.
The security light, in the instrument
cluster, comes on if there is a
problem with arming or disarming
the theft-deterrent system.
The system has one or more RKE
transmitters matched to an
immobilizer control unit in your
vehicle. Only a correctly matched
RKE transmitter will start the
vehicle. If the transmitter is ever
damaged, you may not be able to
start your vehicle.
When trying to start the vehicle, the
security light may come on briefly
when the ignition is turned on. If the
engine does not start and the
security light stays on, there is a
problem with the system. Turn the
ignition off and try again.
If the vehicle will not change ignition
modes (ACC/ACCESSORY, on, off),
and the RKE transmitter appears tobe undamaged, try another
transmitter. Or, you may try placing
the transmitter in the transmitter
pocket located in the center
console. See
Remote Keyless Entry
(RKE) System Operation (Key
Access) 013 or
Remote Keyless Entry (RKE)
System Operation (Keyless Access)
0 15.
If the ignition mode will not change
with the other transmitter or with the
transmitter in the transmitter pocket,
your vehicle needs service. If the
ignition does change modes, the
first transmitter may be faulty. See
your dealer who can service the
theft-deterrent system and have a
new RKE transmitter programmed to
the vehicle.
It is possible for the immobilizer
system to learn new or replacement
RKE transmitters. Up to eight
transmitters can be programmed for
the vehicle. To program additional
transmitters, see "Programming
Page 65 of 500

Chevrolet Silverado Owner Manual (GMNA-Localizing-U.S./Canada/Mexico-
13337620) - 2020 - CRC - 4/2/19
64 Seats and Restraints
To fold the seat, slowly pull the seat
cushion up.
To return the seat to the normal
seating position, slowly pull the seat
cushion down.
{Warning
A seat belt that is improperly
routed, not properly attached,
or twisted will not provide the
protection needed in a crash. The
person wearing the belt could be
seriously injured. After raising the
rear seatback, always check to be(Continued)
Warning (Continued)
sure that the seat belts are
properly routed and attached, and
are not twisted.
Heated Rear Seats
{Warning
If you cannot feel temperature
change or pain to the skin, the
seat heater may cause burns.
See the Warning under Heated
and Ventilated Front Seats 061.If available, the buttons are on the
rear of the center console. To
operate, the engine must be
running.
Press
MorLto heat the left or
right outboard seat cushion. An
indicator on the climate control
display appears when this feature
is on.
This feature turns on at the highest
setting. With each press of the
button, the heated seat changes to
the next lower setting, and then the
off setting. Three lights indicate the
highest setting, and one light
indicates the lowest. If the heated
Page 114 of 500
Chevrolet Silverado Owner Manual (GMNA-Localizing-U.S./Canada/Mexico-
13337620) - 2020 - CRC - 4/2/19
Storage 113
Storage
Storage Compartments
Storage Compartments . . . . . . . 113
Glove Box . . . . . . . . . . . . . . . . . . . . 113
Cupholders . . . . . . . . . . . . . . . . . . . 113
Underseat Storage . . . . . . . . . . . 114
Rear Storage . . . . . . . . . . . . . . . . . 114
Center Console Storage . . . . . . 114
Floor Console Storage . . . . . . . . 115
Additional Storage Features
Cargo Tie-Downs . . . . . . . . . . . . . 116
Storage
Compartments
{Warning
Do not store heavy or sharp
objects in storage compartments.
In a crash, these objects may
cause the cover to open and
could result in injury.
Glove Box
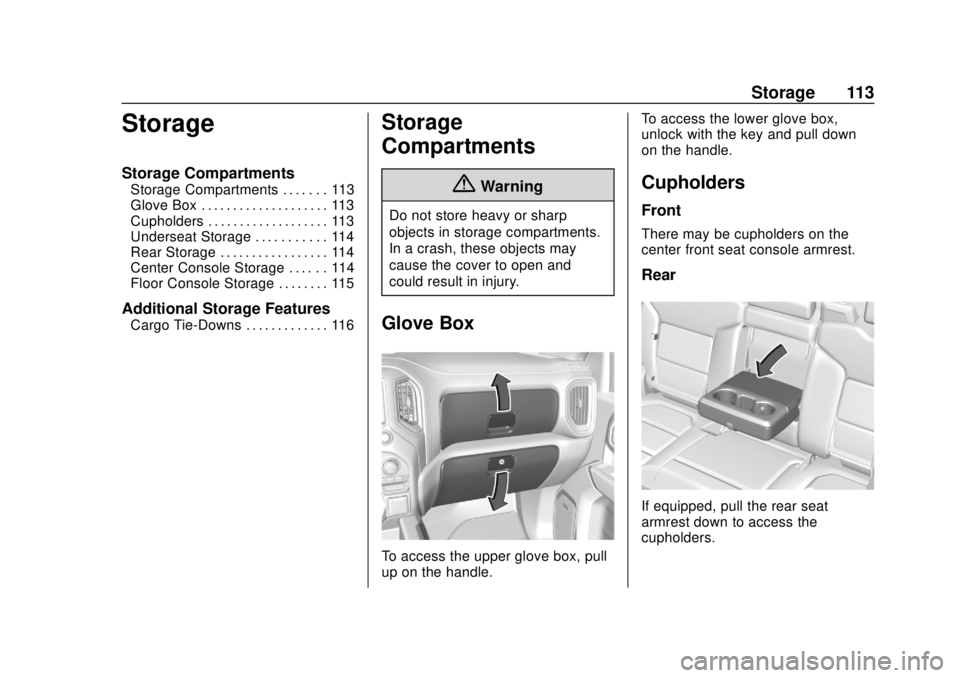
To access the upper glove box, pull
up on the handle.To access the lower glove box,
unlock with the key and pull down
on the handle.
Cupholders
Front
There may be cupholders on the
center front seat console armrest.
Rear
If equipped, pull the rear seat
armrest down to access the
cupholders.
Page 115 of 500
Chevrolet Silverado Owner Manual (GMNA-Localizing-U.S./Canada/Mexico-
13337620) - 2020 - CRC - 4/2/19
114 Storage
Underseat Storage
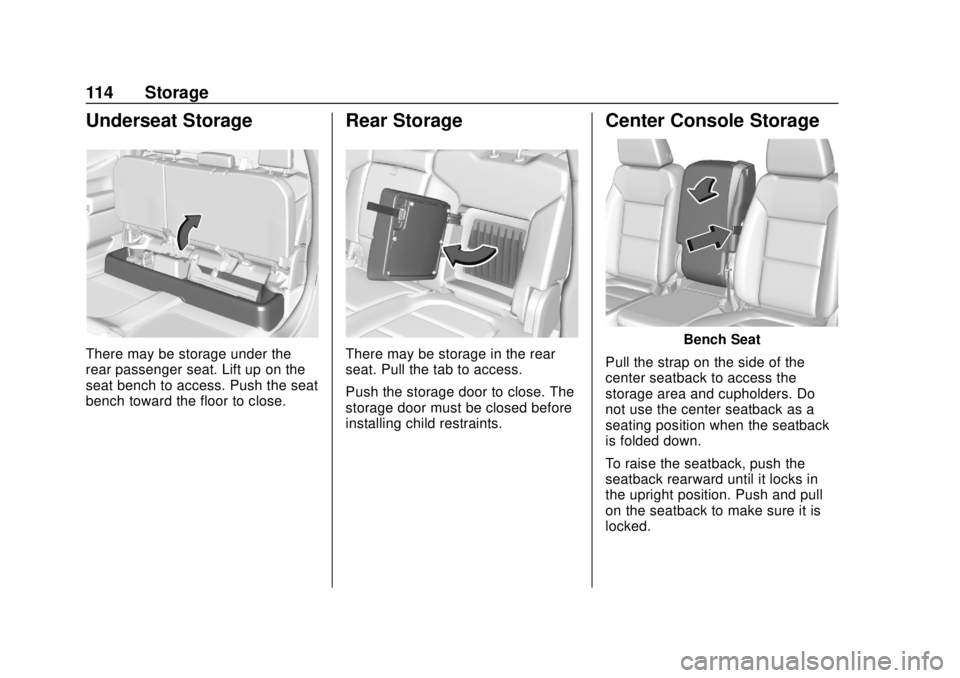
There may be storage under the
rear passenger seat. Lift up on the
seat bench to access. Push the seat
bench toward the floor to close.
Rear Storage
There may be storage in the rear
seat. Pull the tab to access.
Push the storage door to close. The
storage door must be closed before
installing child restraints.
Center Console Storage
Bench Seat
Pull the strap on the side of the
center seatback to access the
storage area and cupholders. Do
not use the center seatback as a
seating position when the seatback
is folded down.
To raise the seatback, push the
seatback rearward until it locks in
the upright position. Push and pull
on the seatback to make sure it is
locked.
Page 116 of 500
Chevrolet Silverado Owner Manual (GMNA-Localizing-U.S./Canada/Mexico-
13337620) - 2020 - CRC - 4/2/19
Storage 115
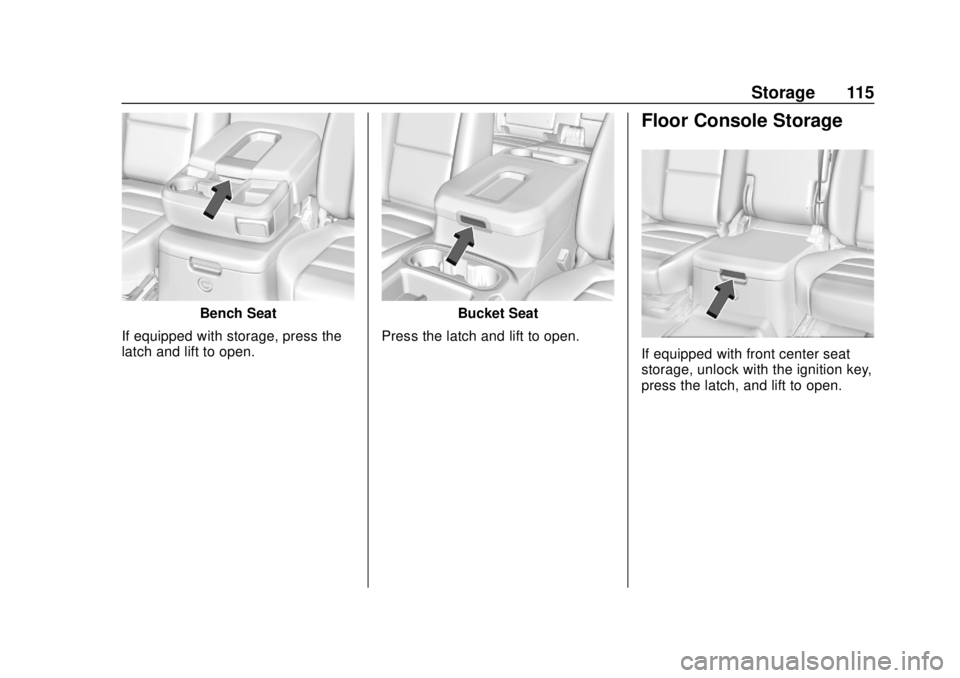
Bench Seat
If equipped with storage, press the
latch and lift to open.Bucket Seat
Press the latch and lift to open.
Floor Console Storage
If equipped with front center seat
storage, unlock with the ignition key,
press the latch, and lift to open.
Page 123 of 500
Chevrolet Silverado Owner Manual (GMNA-Localizing-U.S./Canada/Mexico-
13337620) - 2020 - CRC - 4/2/19
122 Instruments and Controls
Power Outlets
Accessory power outlets can be
used to plug in electrical equipment,
such as a cell phone or MP3 player.
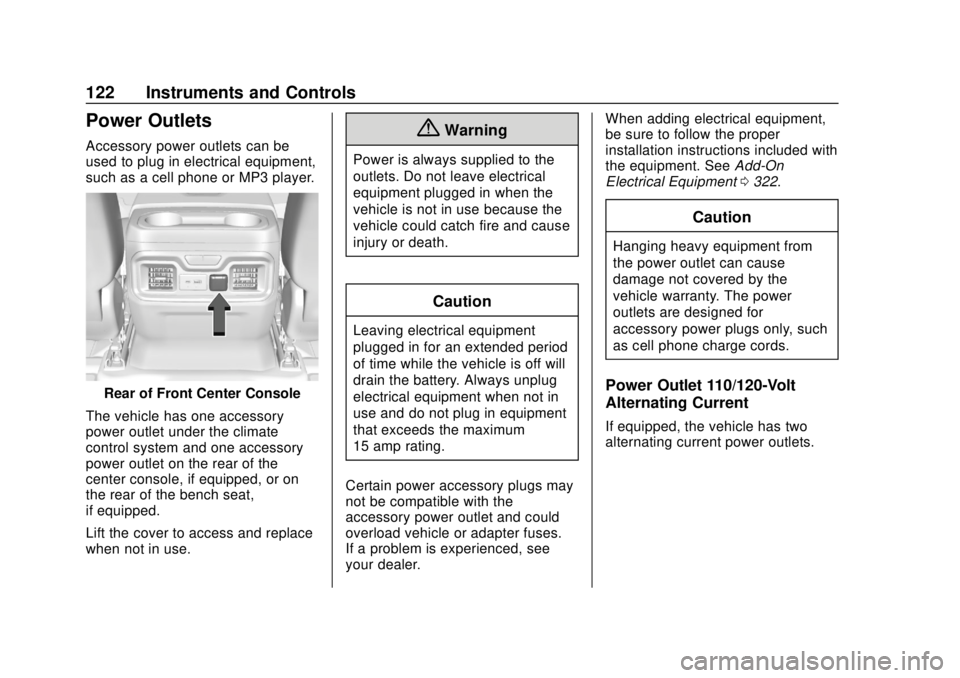
Rear of Front Center Console
The vehicle has one accessory
power outlet under the climate
control system and one accessory
power outlet on the rear of the
center console, if equipped, or on
the rear of the bench seat,
if equipped.
Lift the cover to access and replace
when not in use.
{Warning
Power is always supplied to the
outlets. Do not leave electrical
equipment plugged in when the
vehicle is not in use because the
vehicle could catch fire and cause
injury or death.
Caution
Leaving electrical equipment
plugged in for an extended period
of time while the vehicle is off will
drain the battery. Always unplug
electrical equipment when not in
use and do not plug in equipment
that exceeds the maximum
15 amp rating.
Certain power accessory plugs may
not be compatible with the
accessory power outlet and could
overload vehicle or adapter fuses.
If a problem is experienced, see
your dealer. When adding electrical equipment,
be sure to follow the proper
installation instructions included with
the equipment. See
Add-On
Electrical Equipment 0322.
Caution
Hanging heavy equipment from
the power outlet can cause
damage not covered by the
vehicle warranty. The power
outlets are designed for
accessory power plugs only, such
as cell phone charge cords.
Power Outlet 110/120-Volt
Alternating Current
If equipped, the vehicle has two
alternating current power outlets.
Page 125 of 500
Chevrolet Silverado Owner Manual (GMNA-Localizing-U.S./Canada/Mexico-
13337620) - 2020 - CRC - 4/2/19
124 Instruments and Controls
.Other equipment requiring an
extremely stable power supply,
such as
microcomputer-controlled
electric blankets and touch
sensor lamps
. Medical equipment
Wireless Charging
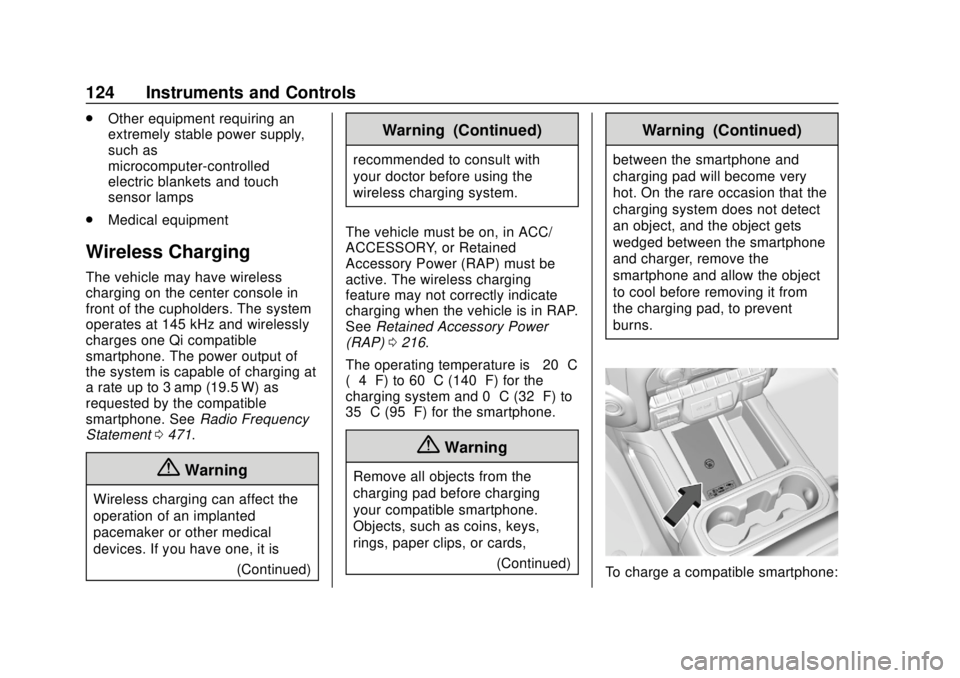
The vehicle may have wireless
charging on the center console in
front of the cupholders. The system
operates at 145 kHz and wirelessly
charges one Qi compatible
smartphone. The power output of
the system is capable of charging at
a rate up to 3 amp (19.5 W) as
requested by the compatible
smartphone. See Radio Frequency
Statement 0471.
{Warning
Wireless charging can affect the
operation of an implanted
pacemaker or other medical
devices. If you have one, it is
(Continued)
Warning (Continued)
recommended to consult with
your doctor before using the
wireless charging system.
The vehicle must be on, in ACC/
ACCESSORY, or Retained
Accessory Power (RAP) must be
active. The wireless charging
feature may not correctly indicate
charging when the vehicle is in RAP.
See Retained Accessory Power
(RAP) 0216.
The operating temperature is −20 °C
(−4 °F) to 60 °C (140 °F) for the
charging system and 0 °C (32 °F) to
35 °C (95 °F) for the smartphone.
{Warning
Remove all objects from the
charging pad before charging
your compatible smartphone.
Objects, such as coins, keys,
rings, paper clips, or cards,
(Continued)
Warning (Continued)
between the smartphone and
charging pad will become very
hot. On the rare occasion that the
charging system does not detect
an object, and the object gets
wedged between the smartphone
and charger, remove the
smartphone and allow the object
to cool before removing it from
the charging pad, to prevent
burns.
To charge a compatible smartphone:
Page 172 of 500
Chevrolet Silverado Owner Manual (GMNA-Localizing-U.S./Canada/Mexico-
13337620) - 2020 - CRC - 4/2/19
Lighting 171
When the headlamps are changed
to high beam, the fog lamps also go
off. When the high-beam headlamps
are turned off, the fog lamps will
come on again.
Some localities have laws that
require the headlamps to be on with
the fog lamps.
Task Lighting
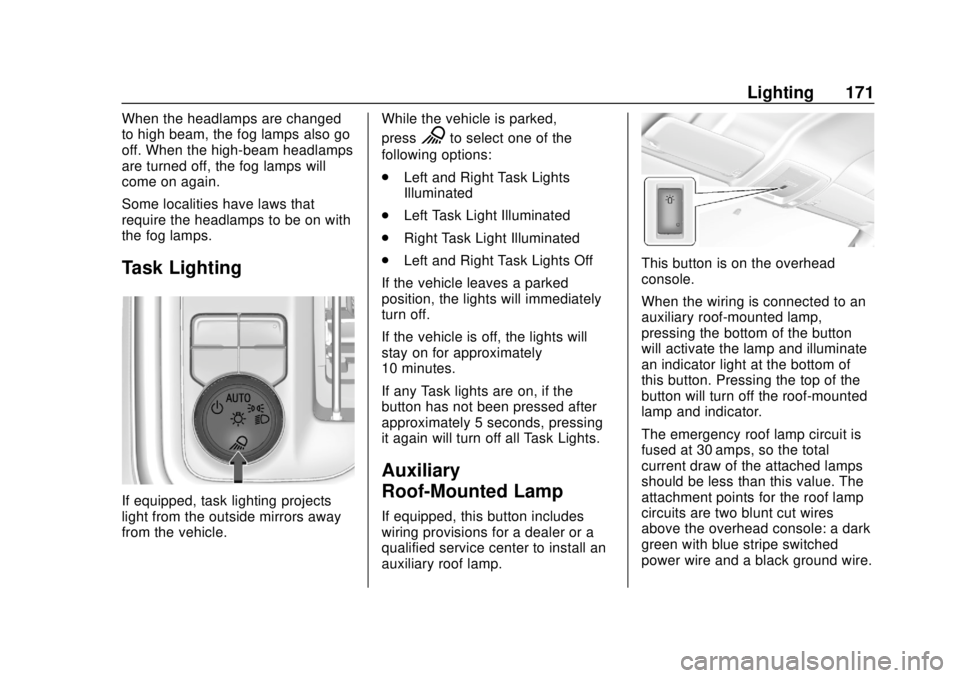
If equipped, task lighting projects
light from the outside mirrors away
from the vehicle.While the vehicle is parked,
press
Kto select one of the
following options:
. Left and Right Task Lights
Illuminated
. Left Task Light Illuminated
. Right Task Light Illuminated
. Left and Right Task Lights Off
If the vehicle leaves a parked
position, the lights will immediately
turn off.
If the vehicle is off, the lights will
stay on for approximately
10 minutes.
If any Task lights are on, if the
button has not been pressed after
approximately 5 seconds, pressing
it again will turn off all Task Lights.
Auxiliary
Roof-Mounted Lamp
If equipped, this button includes
wiring provisions for a dealer or a
qualified service center to install an
auxiliary roof lamp.
This button is on the overhead
console.
When the wiring is connected to an
auxiliary roof-mounted lamp,
pressing the bottom of the button
will activate the lamp and illuminate
an indicator light at the bottom of
this button. Pressing the top of the
button will turn off the roof-mounted
lamp and indicator.
The emergency roof lamp circuit is
fused at 30 amps, so the total
current draw of the attached lamps
should be less than this value. The
attachment points for the roof lamp
circuits are two blunt cut wires
above the overhead console: a dark
green with blue stripe switched
power wire and a black ground wire.