2020 CHEVROLET MALIBU battery
[x] Cancel search: batteryPage 235 of 358
Chevrolet Malibu Owner Manual (GMNA-Localizing-U.S./Canada/Mexico-
13555849) - 2020 - CRC - 8/21/19
234 Vehicle Care
Negative Battery Cable
ReconnectionCaution
When reconnecting the battery:. Use the original nut from the
vehicle to secure the
negative battery cable. Do
not use a different nut.
If you need a replacement
nut, see your dealer.
. Tighten the nut with a hand
tool. Do not use an impact
wrench or power tools to
tighten the nut.
The vehicle could be damaged if
these guidelines are not followed.
Caution
Do not use paints, lubricants,
or corrosion inhibitors on the nut
that secures the negative battery
cable to the vehicle. This could
damage the vehicle. For vehicles equipped with the 2.0L
engine:
1. Install the negative battery cable clamp to the negative
battery post.
2. Tighten the negative battery cable nut.
3. Turn the ignition on.
Starter Switch Check
{Warning
When you are doing this
inspection, the vehicle could
move suddenly. If the vehicle
moves, you or others could be
injured.
1. Before starting this check, be sure there is enough room
around the vehicle.
2. Apply both the parking brake and the regular brake. Do not use the accelerator
pedal, and be ready to turn off
the engine immediately if it
starts.
3. Try to start the engine in each gear. The vehicle should start
only in P (Park) or N (Neutral).
If the vehicle starts in any other
position, contact your dealer for
service.
Automatic Transmission
Shift Lock Control
Function Check
{Warning
When you are doing this
inspection, the vehicle could
move suddenly. If the vehicle
moves, you or others could be
injured.
1. Before starting this check, be sure there is enough room
around the vehicle. It should be
parked on a level surface.
Page 246 of 358

Chevrolet Malibu Owner Manual (GMNA-Localizing-U.S./Canada/Mexico-
13555849) - 2020 - CRC - 8/21/19
Vehicle Care 245
The vehicle may not be equipped
with all of the fuses, relays, and
features shown.Fuses Usage
1 –
2 –
3 Antilock brake system pump/Electric brake
boost
5 –
6 Rear closure
7 –
8 Memory seat module
9 Electric brake boost/ Pedestrian friendly
alert function –HEV
10 Automatic occupant sensing/Airbag –HEV
11 DC DC converter 1
12 Rear window defogger
13 Heated mirrors
14 – Fuses Usage
15 Passive entry/Passive start
16 Front wiper
17 Passenger power seat
18 Antilock brake system valve
19 Driver power seat
21 Sunroof
22 Parking lamp
23 Automatic headlamp leveling/Adaptive
forward lighting
24 –
26 Transmission control module/Ignition
27 Instrument panel/ Body/Ignition
28 –
29 Rear vision camera/ Ventilated seats
30 Malfunction indicator lamp/Ignition Fuses Usage
32 Canister vent solenoid/Evap leak
check module
33 Front heated seat
34 Battery system manager/Accessory
power module
fan–HEV
35 Body control module 6/Body control
module 7
36 Fuel module
38 –
39 –
40 Steering column lock
41 –
43 Heated steering wheel
44 Headlamp leveling
45 –
46 Engine control module/Ignition
47 –
Page 249 of 358

Chevrolet Malibu Owner Manual (GMNA-Localizing-U.S./Canada/Mexico-
13555849) - 2020 - CRC - 8/21/19
248 Vehicle Care
The vehicle may not be equipped
with all of the fuses, relays, and
features shown.Fuses Usage
F1 Left power windows
F2 Right power windows
F3 – Fuses Usage
F4 Heating, ventilation, and air conditioning
blower
F5 Body control module 2 (without Stop/Start
option)
F6 Left rear heated seat
F7 Right rear heated seat Fuses Usage
F8 Body control module 3
F9 Engine control module/Rear
battery-HEV
F10 Body control module 2 (with Stop/Start
option)
F11 –
F12 –
F13 –
F14 –
F15 Transmission control module (with Stop/
Start option)
F16 Amplifier
F17 Seat power lumbar
F18 –
F19 –
F20 Body control module 1 (without Stop/Start
option)
F21 Body control module 4
Page 264 of 358
Chevrolet Malibu Owner Manual (GMNA-Localizing-U.S./Canada/Mexico-
13555849) - 2020 - CRC - 8/21/19
Vehicle Care 263
To release and correct the pressure,
while the turn signal lamp is still
flashing, briefly press the center of
the valve stem. When the
recommended pressure is reached,
the horn sounds once.
If the turn signal lamp does not flash
within 15 seconds after starting to
inflate the tire, the tire fill alert has
not been activated or is not working.
If the hazard warning flashers are
on, the tire fill alert visual feedback
will not work properly.
The TPMS will not activate the tire
fill alert properly under the following
conditions:
.There is interference from an
external device or transmitter.
. The air pressure from the
inflation device is not sufficient
to inflate the tire.
. There is a malfunction in
the TPMS.
. There is a malfunction in the
horn or turn signal lamps. .
The identification code of the
TPMS sensor is not registered to
the system.
. The battery of the TPMS sensor
is low.
If the tire fill alert does not operate
due to TPMS interference, move the
vehicle about 1 m (3 ft) back or
forward and try again. If the tire fill
alert feature is not working, use a
tire pressure gauge.
TPMS Sensor Matching
Process
Each TPMS sensor has a unique
identification code. The identification
code needs to be matched to a new
tire/wheel position after rotating the
vehicle’s tires or replacing one or
more of the TPMS sensors. The
TPMS sensor matching process
should also be performed after
replacing a spare tire with a road
tire containing the TPMS sensor.
The malfunction light and the DIC
message should go off at the next
ignition cycle. The sensors are
matched to the tire/wheel positions,
using a TPMS relearn tool, in the following order: driver side front tire,
passenger side front tire, passenger
side rear tire, and driver side rear
tire. See your dealer for service or
to purchase a relearn tool. A TPMS
relearn tool can also be purchased.
See Tire Pressure Monitor Sensor
Activation Tool at
www.gmtoolsandequipment.com or
call 1-800-GM TOOLS
(1-800-468-6657).
There are two minutes to match the
first tire/wheel position, and
five minutes overall to match all four
tire/wheel positions. If it takes
longer, the matching process stops
and must be restarted.
The TPMS sensor matching
process is:
1. Set the parking brake.
2. Place the vehicle in Service Mode. See Ignition Positions
0 155.
3. If equipped, make sure the Tire Pressure info page option is
turned on. The info pages on
the DIC can be turned on and
off through the Options menu.
Page 287 of 358
Chevrolet Malibu Owner Manual (GMNA-Localizing-U.S./Canada/Mexico-
13555849) - 2020 - CRC - 8/21/19
286 Vehicle Care
Jump Starting
Jump Starting - North
America
For more information about the
vehicle 12-volt battery, seeBattery -
North America 0232.
If the battery has run down, you
may want to use another vehicle
and some jumper cables to start
your vehicle. Be sure to use the
following steps to do it safely.
{Warning
WARNING: Battery posts,
terminals, and related
accessories contain lead and lead
compounds, chemicals known to
the State of California to cause
cancer and birth defects or other
reproductive harm. Batteries also
contain other chemicals known to
the State of California to cause
cancer. WASH HANDS AFTER
(Continued)
Warning (Continued)
HANDLING.For more information
go to www.P65Warnings.ca.gov/
passenger-vehicle.
See California Proposition
65 Warning 0213 and the back
cover.
{Warning
Batteries can hurt you. They can
be dangerous because:
. They contain acid that can
burn you.
. They contain gas that can
explode or ignite.
. They contain enough
electricity to burn you.
If you do not follow these steps
exactly, some or all of these
things can hurt you.
Caution
Ignoring these steps could result
in costly damage to the vehicle
that would not be covered by the
vehicle warranty. Trying to start
the vehicle by pushing or pulling it
will not work, and it could damage
the vehicle.
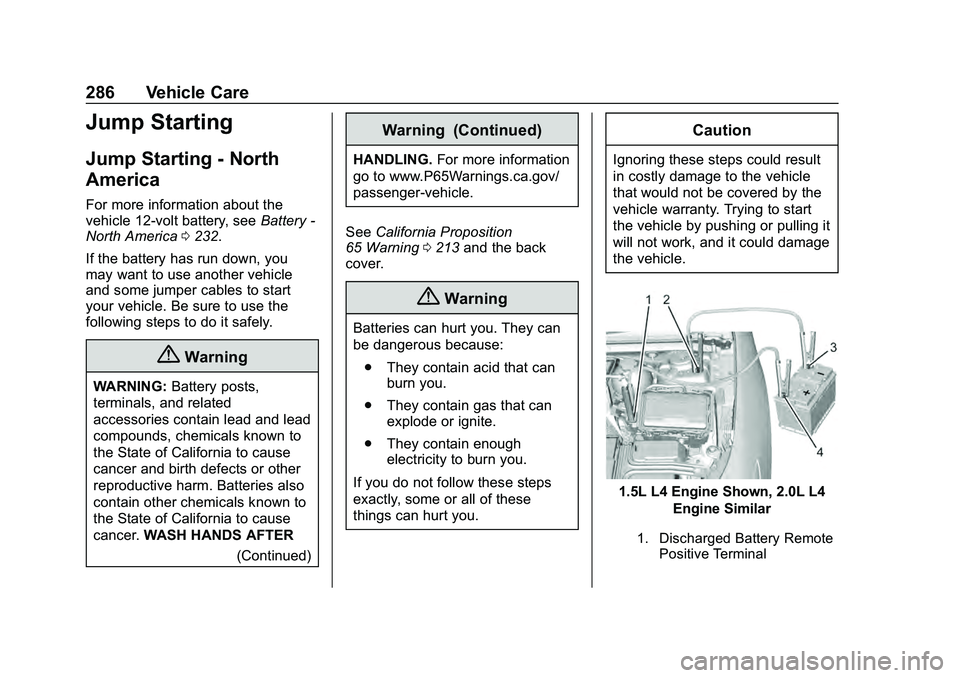
1.5L L4 Engine Shown, 2.0L L4 Engine Similar
1. Discharged Battery RemotePositive Terminal
Page 288 of 358
Chevrolet Malibu Owner Manual (GMNA-Localizing-U.S./Canada/Mexico-
13555849) - 2020 - CRC - 8/21/19
Vehicle Care 287
2. Discharged Battery RemoteNegative Terminal
3. Good Battery Remote Negative Terminal
4. Good Battery Remote Positive Terminal
The vehicle has a remote
positive (+) terminal under a trim
cover. It is under the cover of the
engine compartment fuse block on
the driver side of the engine
compartment. See Engine
Compartment Overview 0216. You
should always use this remote
positive (+) terminal.
The jump start negative ground
terminal for the discharged battery
is on the shock tower on the driver
side of the engine compartment.
1. Check the other vehicle. It must have a 12-volt battery
with a negative ground system.
Caution
If the other vehicle does not have
a 12-volt system with a negative
ground, both vehicles can be
damaged. Only use a vehicle that
has a 12-volt system with a
negative ground for jump starting.
2. Position the two vehicles so that they are not touching.
3. Set the parking brake firmly on both vehicles. Put an automatic
transmission in P (Park) or a
manual transmission in Neutral
before setting the parking
brake.
Caution
If any accessories are left on or
plugged in during the jump
starting procedure, they could be
damaged. The repairs would not
be covered by the vehicle
(Continued)
Caution (Continued)
warranty. Whenever possible, turn
off or unplug all accessories on
either vehicle when jump starting.
4. Turn the ignition off and switch off all lights and accessories in
both vehicles, except the
hazard warning flashers if
needed.
{Warning
An electric fan can start up even
when the engine is not running
and can injure you. Keep hands,
clothing, and tools away from any
underhood electric fan.
{Warning
Using a match near a battery can
cause battery gas to explode.
People have been hurt doing this,
(Continued)
Page 289 of 358
Chevrolet Malibu Owner Manual (GMNA-Localizing-U.S./Canada/Mexico-
13555849) - 2020 - CRC - 8/21/19
288 Vehicle Care
Warning (Continued)
and some have been blinded.
Use a flashlight if you need more
light.
Battery fluid contains acid that
can burn you. Do not get it on
you. If you accidentally get it in
your eyes or on your skin, flush
the place with water and get
medical help immediately.
{Warning
Fans or other moving engine
parts can injure you badly. Keep
your hands away from moving
parts once the engine is running.
5. Connect the red positive (+) cable to the positive (+) or
remote positive (+) terminal of
the discharged battery.
6. Connect the other end of the positive (+) cable to the
positive (+) terminal of the good battery. Use a remote
positive (+) terminal if the
vehicle has one.
7. Connect one end of the black negative (−) cable to the
negative (−) terminal of the
good battery.
8. Connect the other end of the negative (−) cable to the
negative (–) ground terminal for
the discharged battery.
9. Start the vehicle with the good battery and run the engine at
idle speed for at least
four minutes.
10. Try to start the vehicle that had the dead battery. If it will not
start after a few tries, it
probably needs service.
Caution
If the jumper cables are
connected or removed in the
wrong order, electrical shorting
may occur and damage the
(Continued)
Caution (Continued)
vehicle. The repairs would not be
covered by the vehicle warranty.
Always connect and remove the
jumper cables in the correct order,
making sure that the cables do
not touch each other or other
metal.
Jumper Cable Removal
Reverse the sequence exactly when
removing the jumper cables.
After starting the disabled vehicle
and removing the jumper cables,
allow it to idle for several minutes.
Page 291 of 358
Chevrolet Malibu Owner Manual (GMNA-Localizing-U.S./Canada/Mexico-
13555849) - 2020 - CRC - 8/21/19
290 Vehicle Care
.How far will the vehicle be
towed? Some vehicles have
restrictions on how far and how
long they can tow.
. Does the vehicle have the
proper towing equipment? See
your dealer or trailering
professional for additional advice
and equipment
recommendations.
. Is the vehicle ready to be
towed? Just as preparing the
vehicle for a long trip, make sure
the vehicle is prepared to be
towed.Dinghy Towing (2.0L
Engine Only)
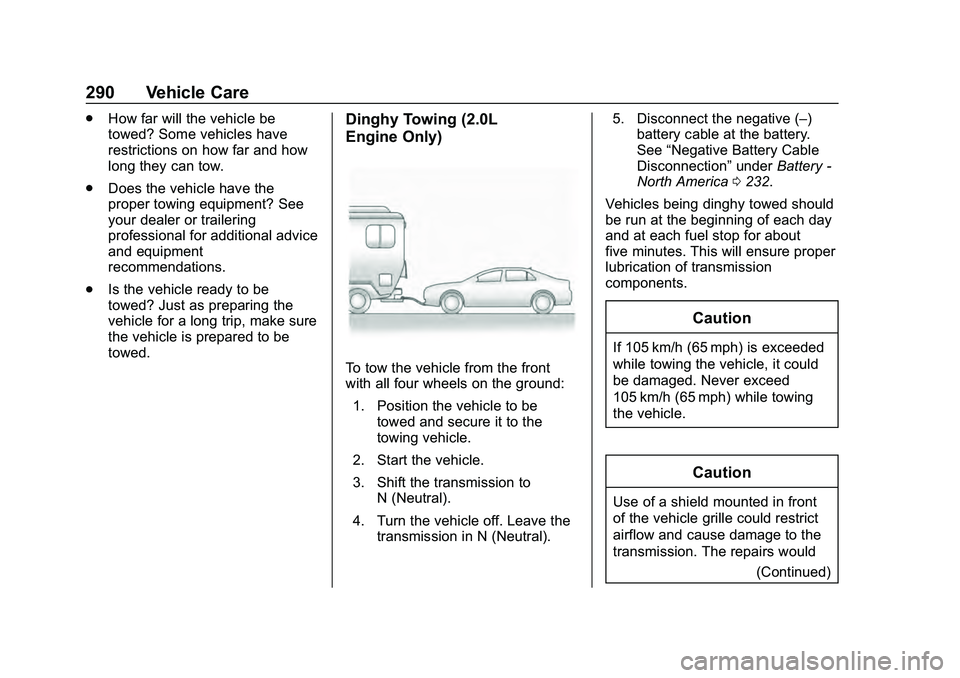
To tow the vehicle from the front
with all four wheels on the ground:
1. Position the vehicle to be towed and secure it to the
towing vehicle.
2. Start the vehicle.
3. Shift the transmission to N (Neutral).
4. Turn the vehicle off. Leave the transmission in N (Neutral). 5. Disconnect the negative (–)
battery cable at the battery.
See “Negative Battery Cable
Disconnection” underBattery -
North America 0232.
Vehicles being dinghy towed should
be run at the beginning of each day
and at each fuel stop for about
five minutes. This will ensure proper
lubrication of transmission
components.
Caution
If 105 km/h (65 mph) is exceeded
while towing the vehicle, it could
be damaged. Never exceed
105 km/h (65 mph) while towing
the vehicle.
Caution
Use of a shield mounted in front
of the vehicle grille could restrict
airflow and cause damage to the
transmission. The repairs would (Continued)