2019 VOLVO S60 TWIN ENGINE turn signal
[x] Cancel search: turn signalPage 6 of 645

4
Resetting user data when the vehiclechanges owners132
Resetting center display settings132
Table of settings in the center display133
Driver profiles134
Selecting a driver profile135
Changing a driver profile's name135
Protecting a driver profile136
Linking a remote key to a driver profile136
Resetting driver profile settings137
Messages in the center display138
Handling messages in the center display138
Handling messages saved from thecenter display139
Head-up display*140
Activating and deactivating the head-up display*141
Head-up display settings*142
Voice control143
Using voice commands144
Voice control for cellular phones145
Voice control for radio and media146
Voice control settings147
LIGHTING
Lighting control and panel150
Adjusting light functions via the cen-ter display151
Adjusting the headlight pattern152
Parking lights152
Daytime running lights153
Low beams154
Using high beam154
Active high beam155
Using turn signals156
Active Bending Lights*157
Front fog lights/cornering illumination*157
Rear fog light158
Brake lights159
Emergency brake lights159
Hazard warning flashers159
Using home safe lighting160
Welcome Light160
Interior Lighting160
Adjusting interior lighting162
WINDOWS, GLASS AND MIRRORS
Windows, glass and mirrors164
Pinch protection for windows andsun curtains164
Reset procedure for pinch protection165
Power windows165
Operating the power windows166
Using sun curtains*167
Rearview/door mirrors168
Adjusting the rearview mirror dim-ming function168
Adjusting the door mirrors169
Panoramic roof*170
Operating the panoramic roof*171
Auto closing the panoramic roof* suncurtain174
Wiper blades and washer fluid174
Using the windshield wipers175
Using the rain sensor175
Using the rain sensor's memory function176
Using the windshield and headlightwashers177
Page 82 of 645

DISPLAYS AND VOICE CONTROL
* Option/accessory.80
Instruments and controls in left-hand drive vehicles
The overviews show the location of the vehicle'sdisplays and controls.
Steering wheel and dashboard
Parking lights, daytime running lights, lowbeams, high beams, turn signals, rear foglight, trip computer reset
Steering wheel paddles for manual shifting*
Head-up display*
Instrument panel
Wipers and washers, rain sensor*
Right-side steering wheel keypad
Steering wheel adjustment
Horn
Left-side steering wheel keypad
Hood open
Display lighting, trunk lid unlock/open, halo-gen headlight height adjustment
Ceiling console
Front reading lights and courtesy lighting
Panoramic roof*
Ceiling console display ON CALL button
HomeLink®*
Center and tunnel console
Center display
Hazard warning flashers, defrosting, media
Gear selector
Start knob
Drive modes
Parking brake
Auto-hold brakes
Driver's door
Page 95 of 645

DISPLAYS AND VOICE CONTROL
}}
93
SymbolMeaning
A
B
Fault in ABS system
If this symbol is illuminated, theABS system is malfunctioning. Thevehicle's regular brakes will stillwork, but without the ABS function.
A
B
Auto-brake on
This symbol illuminates when thefunction is activated and the brakesor parking brakes are being used.The brakes hold the vehicle at astandstill after it has stopped.
SymbolMeaning
Tire pressure system
This symbol illuminates to indicatelow tire pressure. If there is a faultin the tire pressure system, thesymbol will first flash for approxi-mately 1 minute and then glowsteadily. This may occur if the sys-tem cannot detect or alert thedriver of low tire pressure asintended.
Emission control system
If this symbol illuminates after star-ting the engine, it could indicate afault in the vehicle's emission con-trol system. Have the vehiclechecked by a workshop. Volvo rec-ommends contacting an authorizedVolvo workshop.
Left/right turn signals
These symbols flash when the turnsignals are used.
SymbolMeaning
Parking lights
This symbol illuminates when theparking lights are on.
Fault in headlight system
This symbol illuminates if a faulthas been detected in the ABL(Active Bending Lights) function oranother fault in the headlight sys-tem.
Active high beams on
This symbol lights up in blue whenthe active high beams are on.
Active high beams off
This symbol lights up in white whenthe active high beams are off.
High beams on
This symbol illuminates when thehigh beams are on or flashed.
Active high beams on
This symbol lights up in blue whenthe active high beams are on. Park-ing lights are on.
Page 143 of 645

DISPLAYS AND VOICE CONTROL
* Option/accessory.141
The snowflake symbol will illuminate ifthere is a risk of slippery conditions.
NOTE
People with certain types of vision problemsmay experience headaches or eye strainwhen using the head-up display.
City Safety in head-up-display
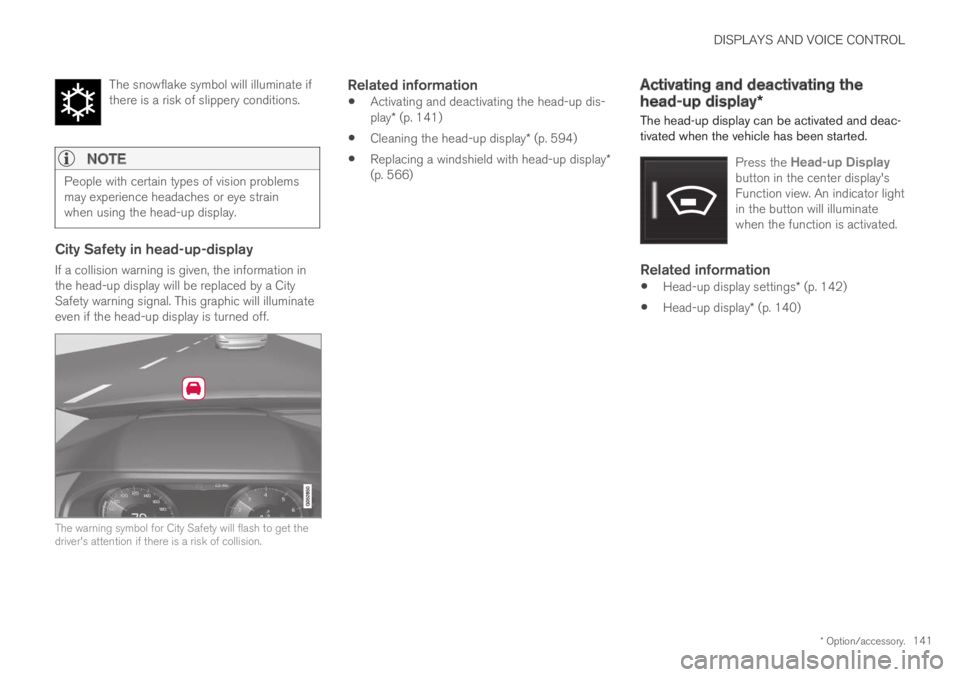
If a collision warning is given, the information inthe head-up display will be replaced by a CitySafety warning signal. This graphic will illuminateeven if the head-up display is turned off.
The warning symbol for City Safety will flash to get thedriver's attention if there is a risk of collision.
Related information
Activating and deactivating the head-up dis-play* (p. 141)
Cleaning the head-up display* (p. 594)
Replacing a windshield with head-up display*(p. 566)
Activating and deactivating the
head-up display*
The head-up display can be activated and deac-tivated when the vehicle has been started.
Press the Head-up Displaybutton in the center display'sFunction view. An indicator lightin the button will illuminatewhen the function is activated.
Related information
Head-up display settings* (p. 142)
Head-up display* (p. 140)
Page 146 of 645

||
DISPLAYS AND VOICE CONTROL
* Option/accessory.144
ses from the system. The voice control systemuses the same microphone as devices connectedwith Bluetooth, and the voice control systemresponds through the vehicle's loudspeakers. Incertain cases, text messages will also be dis-played in the instrument panel. The functions arecontrolled using the right-side steering wheelkeypad and settings are made in the center dis-play.
System updates
The voice control system is continuouslyimproved. For optimal functionality, always down-load the latest update at support.volvocars.com.
Related information
Using voice commands (p. 144)
Voice control for cellular phones (p. 145)
Voice control for radio and media (p. 146)
Climate control system voice commands(p. 197)
Voice control settings (p. 147)
Using voice commands16
Press the button for voice con-
trol on the right-sidesteering wheel keypad to acti-vate the system and initiate avoice command dialog.
These may include:
Wait until after the tone, and then speak inyour normal voice at a normal speed.
Do not speak while the system is responding(the system is unable to process commandsduring this time).
Avoid background noises in the passengercompartment by keeping doors, windows andthe panoramic roof* closed.
Voice control can be canceled by:
pressing briefly and saying "Cancel".
pressing and holding the steering wheel key-
pad's voice command button until twoaudible signals are given.
To speed up the voice command dialog and skipsystem responses, press the voice command but-
ton while the system is responding and giveyour next command.
To change the audio volume of the system, turnthe volume knob while the voice is speaking. It ispossible to use other buttons while voice com-mands are being given. However, because otheraudio is silenced during dialog with the system, itis not possible to perform any functions con-nected to audio using the buttons.
Voice command examples
Press , say "Call [First name] [Last name][number category]" - calls the selected contactfrom the phone book. If the contact has severalphone numbers (e.g. home, cell, work), the rightcategory must also be given.
Press and say "Call Robyn Smithcellular".
Commands/phrases
The following commands can usually be used inany situation:
"Repeat" - repeats the most recent voicecommand in the current dialog.
"Cancel" - cancels the dialog.
"Help" - initiates a help dialog. The systemresponds with commands that can be usedin the current situation, an instruction or anexample.
15Certain markets only.16Certain markets only.
Page 153 of 645

LIGHTING
* Option/accessory.151
WARNING
The vehicle lighting system cannot in all situa-tions determine when the daylight is too weakor not strong enough, e.g. when there is fogor rain.
The driver is always responsible for driving thevehicle with lighting that is safe for the trafficconditions and as specified by applicable traf-fic regulations.
Thumbwheel in instrument panel
Thumb wheel (to the left) for adjusting interior bright-ness.
Related information
Adjusting light functions via the center dis-play (p. 151)
Interior Lighting (p. 160)
Parking lights (p. 152)
Using turn signals (p. 156)
Using high beam (p. 154)
Low beams (p. 154)
Front fog lights/cornering illumination*(p. 157)
Rear fog light (p. 158)
Active Bending Lights* (p. 157)
Brake lights (p. 159)
Emergency brake lights (p. 159)
Hazard warning flashers (p. 159)
Adjusting light functions via thecenter display
A number of light functions can be adjusted andactivated via the center display. These includeactive high beams, home safe lighting andapproach lighting.
1.Tap Settings in the center display's Topview.
2.Tap My CarLights and Lighting.
3.Select Exterior Lights or Interior Lightingand then select the function that you wouldlike to adjust.
Related information
Lighting control and panel (p. 150)
Active high beam (p. 155)
Using home safe lighting (p. 160)
Welcome Light (p. 160)
Using turn signals (p. 156)
Changing settings in the center display's Topview (p. 130)
Function view in the center display (p. 120)
Page 158 of 645

||
LIGHTING
156
active high beams become available again, or thewindshield sensors are no longer blocked, the
message will disappear and the symbol willbe displayed.
WARNING
Automatic high beam is an aid in using thebest possible light based on prevailing condi-tions.
The driver is always responsible for manuallyswitching between high and low beam whentraffic situations or weather conditions requirethis.
Related information
Lighting control and panel (p. 150)
Using high beam (p. 154)
Camera/radar sensor limitations (p. 300)
Using turn signals
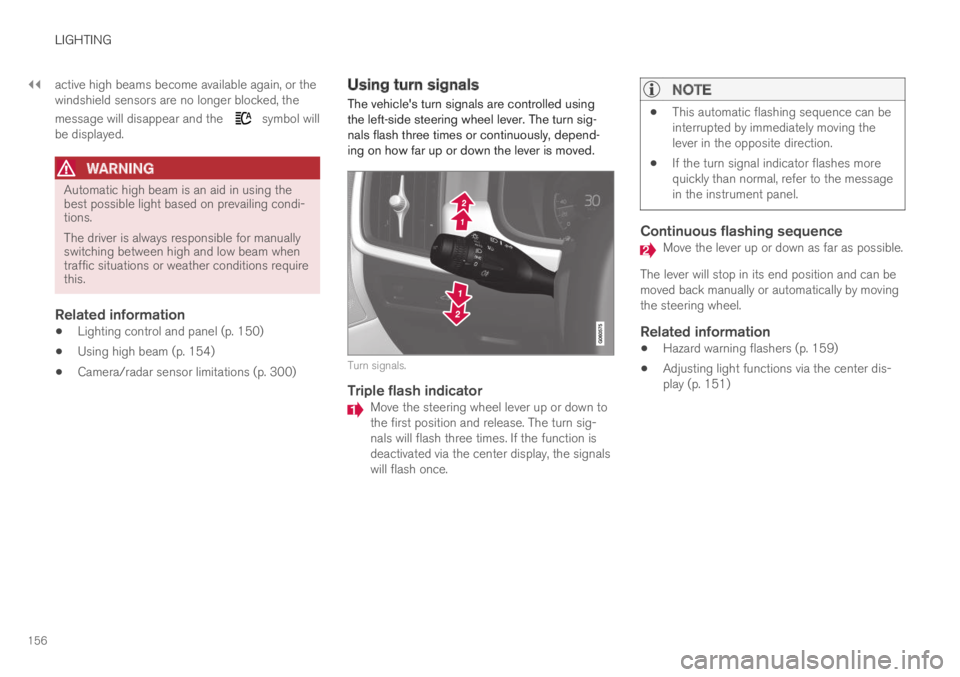
The vehicle's turn signals are controlled usingthe left-side steering wheel lever. The turn sig-nals flash three times or continuously, depend-ing on how far up or down the lever is moved.
Turn signals.
Triple flash indicator
Move the steering wheel lever up or down tothe first position and release. The turn sig-nals will flash three times. If the function isdeactivated via the center display, the signalswill flash once.
NOTE
This automatic flashing sequence can beinterrupted by immediately moving thelever in the opposite direction.
If the turn signal indicator flashes morequickly than normal, refer to the messagein the instrument panel.
Continuous flashing sequence
Move the lever up or down as far as possible.
The lever will stop in its end position and can bemoved back manually or automatically by movingthe steering wheel.
Related information
Hazard warning flashers (p. 159)
Adjusting light functions via the center dis-play (p. 151)
Page 161 of 645

LIGHTING
159
Brake lights
The brake lights are automatically illuminatedwhen braking.
The brake lights are illuminated when the brakepedal is depressed and when the brakes areautomatically applied by a driver support system.
Related information
Emergency brake lights (p. 159)
Brake functions (p. 396)
Driver support systems (p. 260)
Emergency brake lights
The emergency brake lights are activated towarn following vehicles of hard braking.
This function causes an additional taillight oneach side of the vehicle to illuminate.
The emergency brake lights are activated in theevent of hard braking or if the ABS system isactivated and the vehicle is traveling at a highspeed.
After the driver decelerates to a low speed andthen releases the brake, the brake lights resumetheir normal brightness.
Related information
Brake lights (p. 159)
Brakes (p. 397)
Hazard warning flashers (p. 159)
Hazard warning flashers
Hazard warning flashers warn other road usersby all of the vehicle's turn signals being activatedat the same time. The function can be used towarn about a traffic hazard.
Hazard warning flashers button.
Press the button to activate the hazard warningflashers.
NOTE
Regulations concerning the use of hazardwarning flashers may vary from country tocountry.
Related information
Emergency brake lights (p. 159)
Using turn signals (p. 156)