2019 TOYOTA PROACE VERSO power
[x] Cancel search: powerPage 147 of 505
146
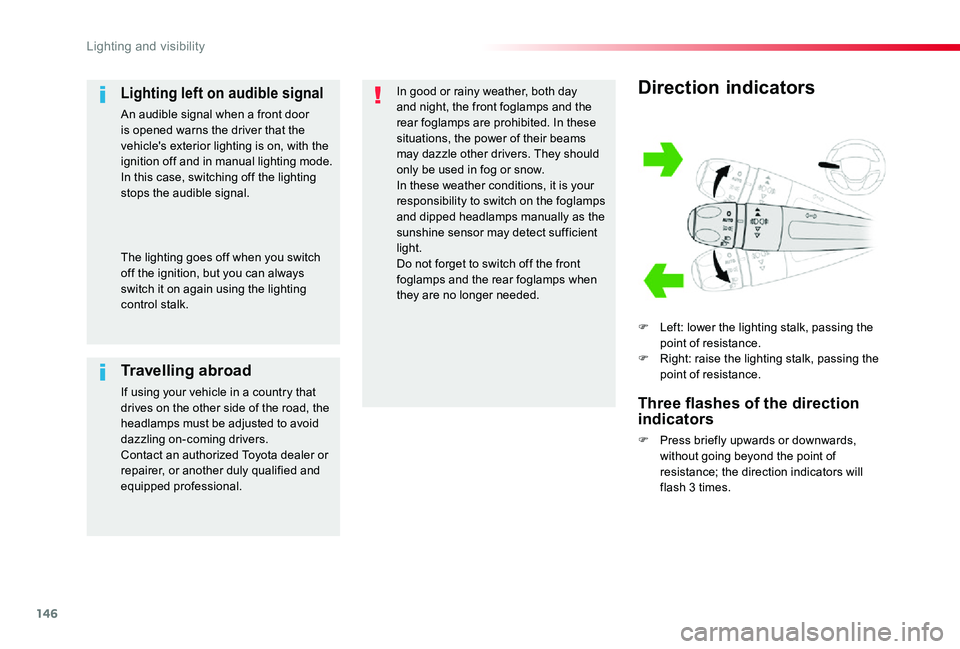
Direction indicators
F Left: lower the lighting stalk, passing the point of resistance.F Right: raise the lighting stalk, passing the point of resistance.
Three flashes of the direction indicators
F Press briefly upwards or downwards,
without going beyond the point of resistance; the direction indicators will flash 3 times.
In good or rainy weather, both day and night, the front foglamps and the rear foglamps are prohibited. In these situations, the power of their beams may dazzle other drivers. They should only be used in fog or snow.In these weather conditions, it is your responsibility to switch on the foglamps and dipped headlamps manually as the sunshine sensor may detect sufficient light.Do not forget to switch off the front foglamps and the rear foglamps when they are no longer needed.
Lighting left on audible signal
An audible signal when a front door is opened warns the driver that the vehicle's exterior lighting is on, with the ignition off and in manual lighting mode.In this case, switching off the lighting stops the audible signal.
Travelling abroad
If using your vehicle in a country that drives on the other side of the road, the headlamps must be adjusted to avoid dazzling on-coming drivers.
Contact an authorized Toyota dealer or repairer, or another duly qualified and equipped professional.
The lighting goes off when you switch off the ignition, but you can always switch it on again using the lighting control stalk.
Lighting and visibility
Page 163 of 505
162
To y o t a Tr a c t i o n
Select
Special patented traction control system which improves traction on snow, mud and sand.This system, the operation of which has been optimised for each situation, allows you to manoeuvre in most conditions of poor grip (encountered during touring use).
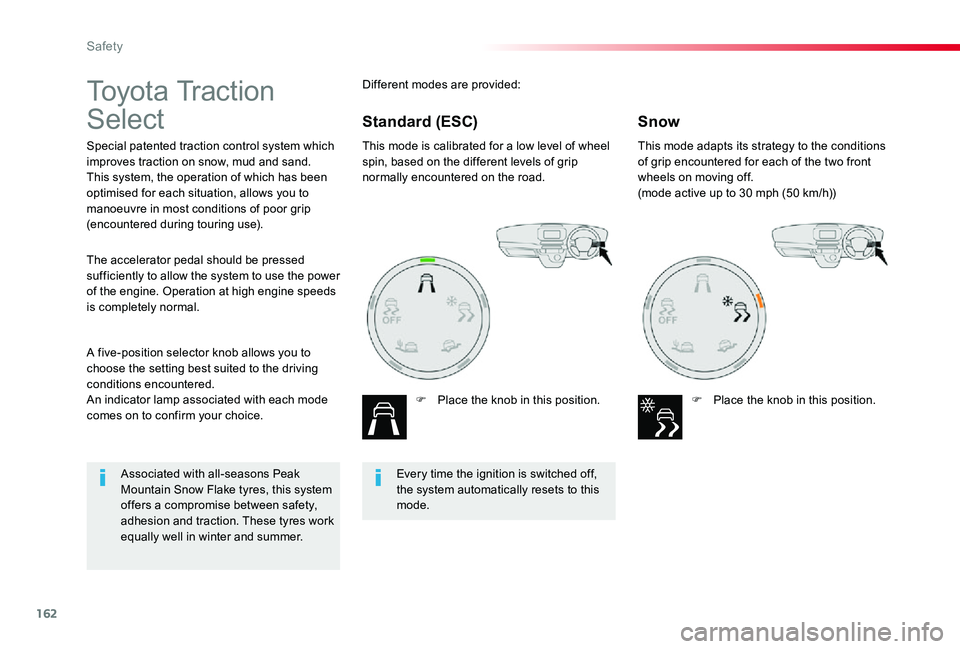
This mode is calibrated for a low level of wheel spin, based on the different levels of grip normally encountered on the road.
F Place the knob in this position.
This mode adapts its strategy to the conditions of grip encountered for each of the two front wheels on moving off.(mode active up to 30 mph (50 km/h))
F Place the knob in this position.
A five-position selector knob allows you to choose the setting best suited to the driving conditions encountered.An indicator lamp associated with each mode comes on to confirm your choice.
The accelerator pedal should be pressed sufficiently to allow the system to use the power of the engine. Operation at high engine speeds is completely normal.
Different modes are provided:
SnowStandard (ESC)
Every time the ignition is switched off, the system automatically resets to this mode.
Associated with all-seasons Peak Mountain Snow Flake tyres, this system offers a compromise between safety, adhesion and traction. These tyres work equally well in winter and summer.
Safety
Page 205 of 505
204
Gear shift indicator
Depending on the driving situation and your vehicle's equipment, the system may advise you to skip one or more gears.You can follow this instruction without going through the intermediate gears.
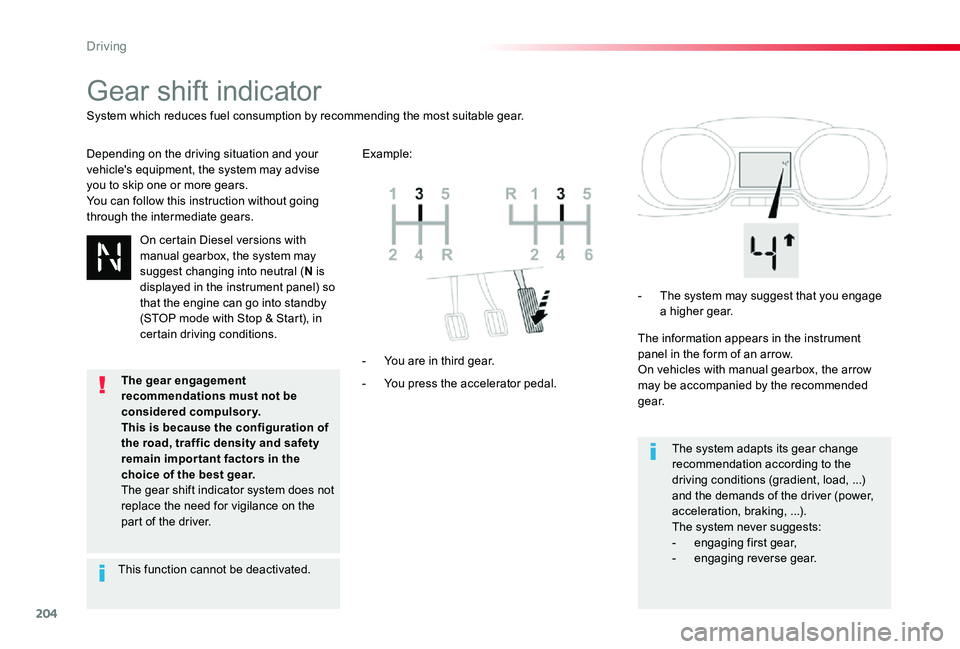
- You press the accelerator pedal.
- You are in third gear.
- The system may suggest that you engage a higher gear.
The information appears in the instrument panel in the form of an arrow.On vehicles with manual gearbox, the arrow may be accompanied by the recommended g e a r.
The system adapts its gear change recommendation according to the driving conditions (gradient, load, ...) and the demands of the driver (power, acceleration, braking, ...).The system never suggests:- engaging first gear,- engaging reverse gear.
System which reduces fuel consumption by recommending the most suitable gear.
Example:
On certain Diesel versions with
manual gearbox, the system may suggest changing into neutral (N is displayed in the instrument panel) so that the engine can go into standby (STOP mode with Stop & Start), in certain driving conditions.
This function cannot be deactivated.
The gear engagement recommendations must not be considered compulsory.This is because the configuration of the road, traffic density and safety remain impor tant factors in the choice of the best gear.The gear shift indicator system does not replace the need for vigilance on the part of the driver.
Driving
Page 215 of 505
214
Stop & StartGoing into engine
STOP mode
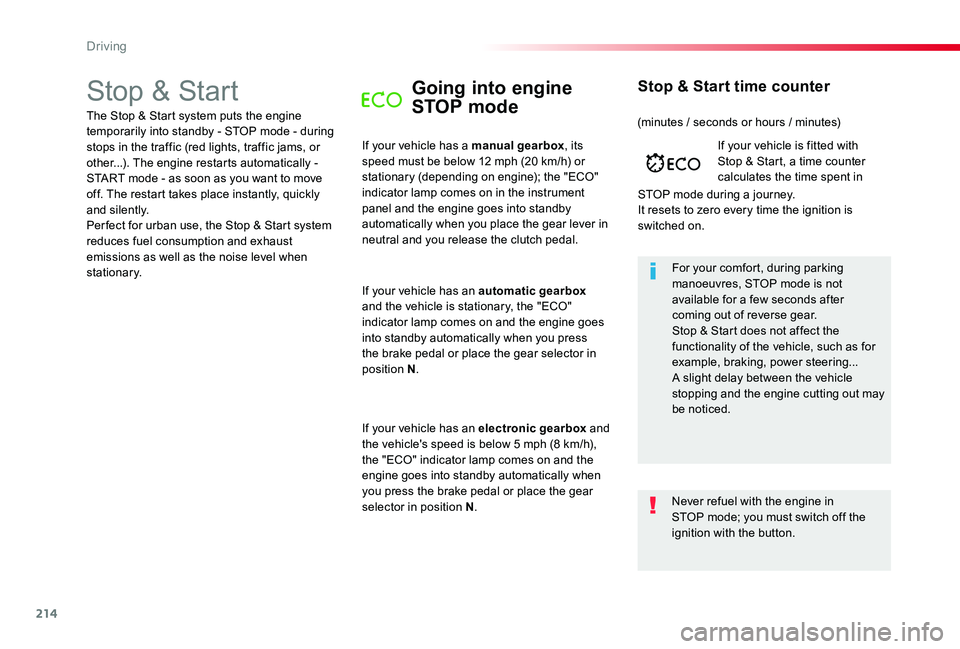
If your vehicle has a manual gearbox, its speed must be below 12 mph (20 km/h) or stationary (depending on engine); the "ECO" indicator lamp comes on in the instrument panel and the engine goes into standby automatically when you place the gear lever in neutral and you release the clutch pedal.
For your comfort, during parking manoeuvres, STOP mode is not available for a few seconds after coming out of reverse gear.Stop & Start does not affect the functionality of the vehicle, such as for example, braking, power steering...A slight delay between the vehicle stopping and the engine cutting out may be noticed.
If your vehicle is fitted with Stop & Start, a time counter calculates the time spent in
STOP mode during a journey.It resets to zero every time the ignition is switched on.
Stop & Start time counter
The Stop & Start system puts the engine temporarily into standby - STOP mode - during stops in the traffic (red lights, traffic jams, or other...). The engine restarts automatically - START mode - as soon as you want to move off. The restart takes place instantly, quickly and silently.Per fect for urban use, the Stop & Start system reduces fuel consumption and exhaust emissions as well as the noise level when stationary.
If your vehicle has an automatic gearbox and the vehicle is stationary, the "ECO" indicator lamp comes on and the engine goes into standby automatically when you press the brake pedal or place the gear selector in position N.
If your vehicle has an electronic gearbox and the vehicle's speed is below 5 mph (8 km/h), the "ECO" indicator lamp comes on and the engine goes into standby automatically when you press the brake pedal or place the gear selector in position N.
(minutes / seconds or hours / minutes)
Never refuel with the engine in STOP mode; you must switch off the ignition with the button.
Driving
Page 268 of 505
267
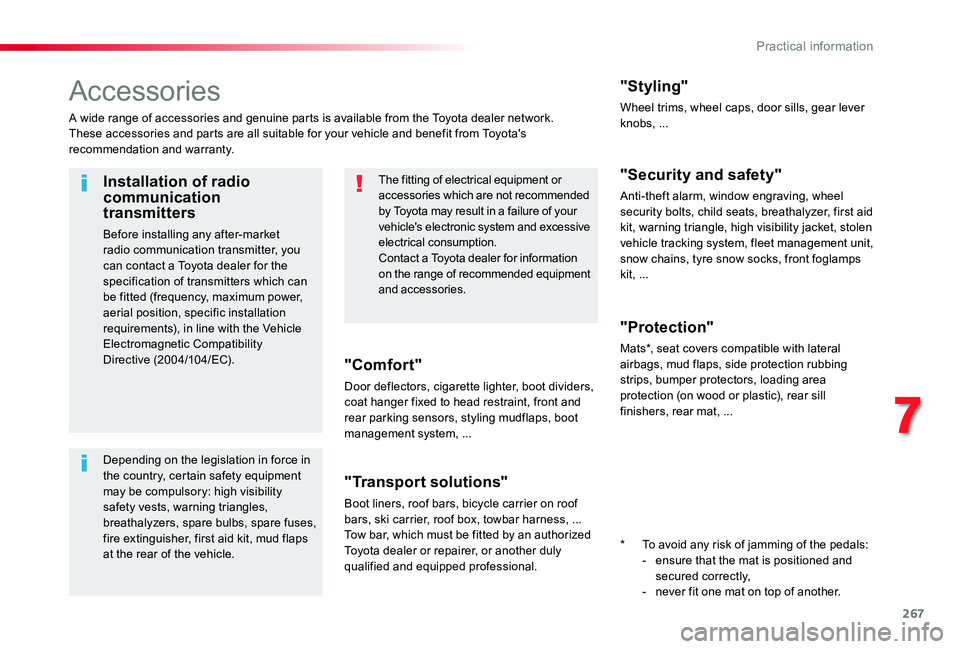
Accessories
A wide range of accessories and genuine parts is available from the Toyota dealer network.These accessories and parts are all suitable for your vehicle and benefit from Toyota's recommendation and warranty.
"Comfort"
Door deflectors, cigarette lighter, boot dividers, coat hanger fixed to head restraint, front and rear parking sensors, styling mudflaps, boot management system, ...
"Transport solutions"
Boot liners, roof bars, bicycle carrier on roof bars, ski carrier, roof box, towbar harness, ...Tow bar, which must be fitted by an authorized Toyota dealer or repairer, or another duly qualified and equipped professional.
"Styling"
Wheel trims, wheel caps, door sills, gear lever knobs, ...
"Security and safety"
Anti-theft alarm, window engraving, wheel security bolts, child seats, breathalyzer, first aid kit, warning triangle, high visibility jacket, stolen vehicle tracking system, fleet management unit,
snow chains, tyre snow socks, front foglamps kit, ...
"Protection"
Mats*, seat covers compatible with lateral airbags, mud flaps, side protection rubbing strips, bumper protectors, loading area protection (on wood or plastic), rear sill finishers, rear mat, ...
The fitting of electrical equipment or accessories which are not recommended by Toyota may result in a failure of your vehicle's electronic system and excessive electrical consumption.
Contact a Toyota dealer for information on the range of recommended equipment and accessories.
Installation of radio communication transmitters
Before installing any after-market
radio communication transmitter, you can contact a Toyota dealer for the specification of transmitters which can be fitted (frequency, maximum power, aerial position, specific installation requirements), in line with the Vehicle Electromagnetic Compatibility Directive (2004/104/EC).
Depending on the legislation in force in the country, certain safety equipment may be compulsory: high visibility safety vests, warning triangles, breathalyzers, spare bulbs, spare fuses, fire extinguisher, first aid kit, mud flaps
at the rear of the vehicle.* To avoid any risk of jamming of the pedals:- ensure that the mat is positioned and secured correctly,- never fit one mat on top of another.
7
Practical information
Page 273 of 505
272
* According to engine.
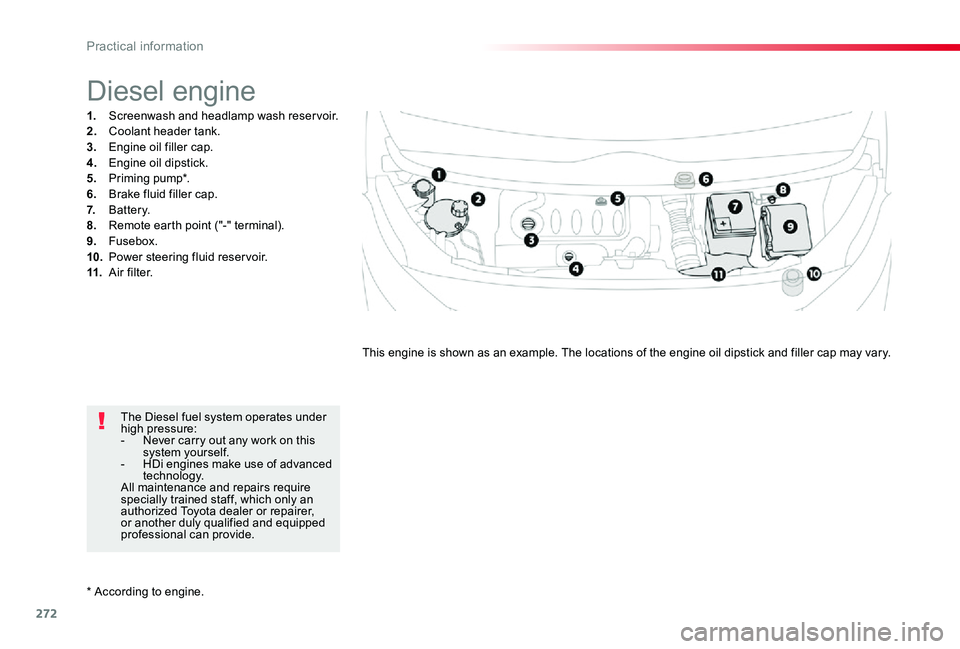
Diesel engine
1. Screenwash and headlamp wash reser voir.2. Coolant header tank.3. Engine oil filler cap.4. Engine oil dipstick.5. Priming pump*.6. Brake fluid filler cap.7. Battery.8. Remote earth point ("-" terminal).9. Fusebox.10. Power steering fluid reservoir.11. A i r f i l t e r.
This engine is shown as an example. The locations of the engine oil dipstick and filler cap may vary.
The Diesel fuel system operates under high pressure:- Never carry out any work on this system yourself.- HDi engines make use of advanced technology.All maintenance and repairs require specially trained staff, which only an authorized Toyota dealer or repairer, or another duly qualified and equipped professional can provide.
Practical information
Page 275 of 505

274
Oil grade
Before topping-up the oil or changing the oil, check that the oil is the correct grade for your engine and conforms to the manufacturer's recommendations.
Topping-up the engine oil level
The location of the oil filler cap is shown in the
corresponding underbonnet layout view.F Unscrew the oil filler cap to reveal the filler aperture.F Add oil in small quantities, avoiding any spills on engine components (risk of fire).F Wait a few minutes before checking the level again using the dipstick.F Add more oil if necessary.F After checking the level, carefully refit the oil filler cap and the dipstick in its tube.
After topping-up the oil, the check when switching on the ignition with the oil level indicator in the instrument panel
is not valid during the 30 minutes after topping up.
Engine oil change
Refer to the manufacturer's service schedule for details of the inter val for this operation.In order to maintain the reliability of the engine and emission control system, never use additives in the engine oil.
The brake fluid level should be close to the "MA X" mark. If it is not, check the brake pad wear.
Brake fluid level
Changing the fluid
Refer to the manufacturer's service schedule for details of the inter val for this operation.
Fluid specification
The brake fluid must conform to the manufacturer's recommendations.
Coolant level
The coolant level should be close to the "MA X" mark but should never exceed it.
In addition, as the cooling system is pressurised, wait at least one hour after switching off the engine before carrying out any work.To avoid any risk of scalding, unscrew the cap by two turns to allow the pressure to drop. When the pressure has dropped, remove the cap and top up the level.
The cooling fan may star t after switching off the engine: take care with ar ticles and clothing that might be caught by the fan blades.
When the engine is warm, the temperature of the coolant is regulated by the fan.
Check the coolant level regularly, according to the use made of your vehicle (every 3 000 miles or 5 000 kms / 3 months); if necessary, top-up using coolant recommended by the manufacturer.Topping-up the coolant between ser vices is normal.
Power steering fluid level
The power steering fluid level should be close to the "MA X" mark. With the engine cold, unscrew the cap to check the level.
Practical information
Page 314 of 505
313
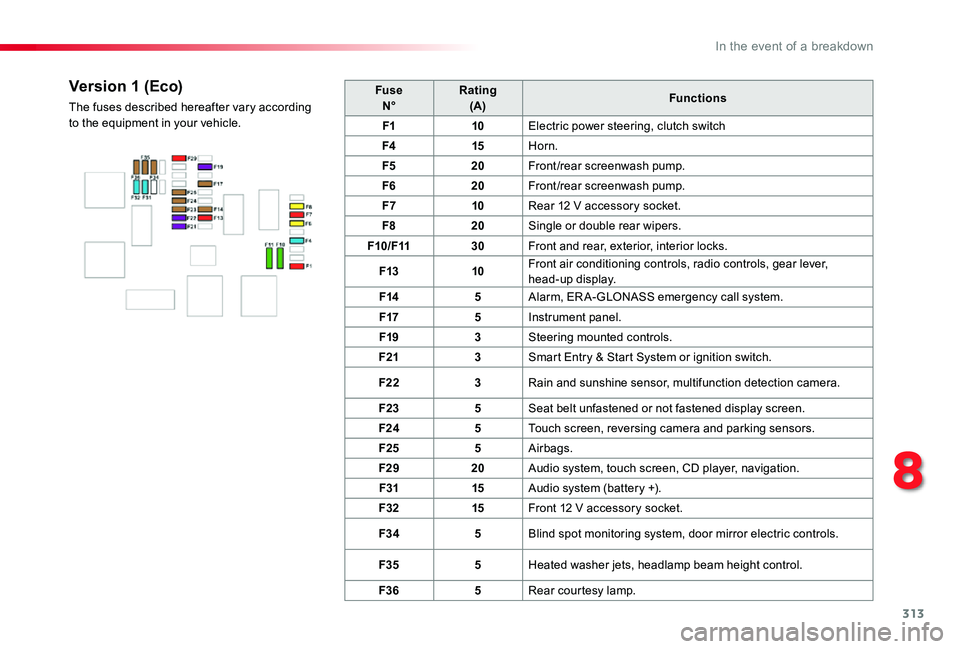
FuseN°Rating(A)Functions
F110Electric power steering, clutch switch
F415Horn.
F520Front/rear screenwash pump.
F620Front/rear screenwash pump.
F710Rear 12 V accessory socket.
F820Single or double rear wipers.
F10/F1130Front and rear, exterior, interior locks.
F1310Front air conditioning controls, radio controls, gear lever, head-up display.
F145Alarm, ER A-GLONASS emergency call system.
F175Instrument panel.
F193Steering mounted controls.
F213Smart Entry & Start System or ignition switch.
F223Rain and sunshine sensor, multifunction detection camera.
F235Seat belt unfastened or not fastened display screen.
F245Touch screen, reversing camera and parking sensors.
F255Airbags.
F2920Audio system, touch screen, CD player, navigation.
F3115Audio system (battery +).
F3215Front 12 V accessory socket.
F345Blind spot monitoring system, door mirror electric controls.
F355Heated washer jets, headlamp beam height control.
F365Rear courtesy lamp.
Version 1 (Eco)
The fuses described hereafter vary according to the equipment in your vehicle.
8
In the event of a breakdown