2019 TOYOTA PROACE CITY VERSO battery
[x] Cancel search: batteryPage 101 of 272
101
Driving
6
WARNI NG
With a manual gearbox, engage a gear and then switch off the ignition.
WARNI NG
With an automatic gearbox, place the gear selector in position P, then switch off the ignition.
Electric parking brake
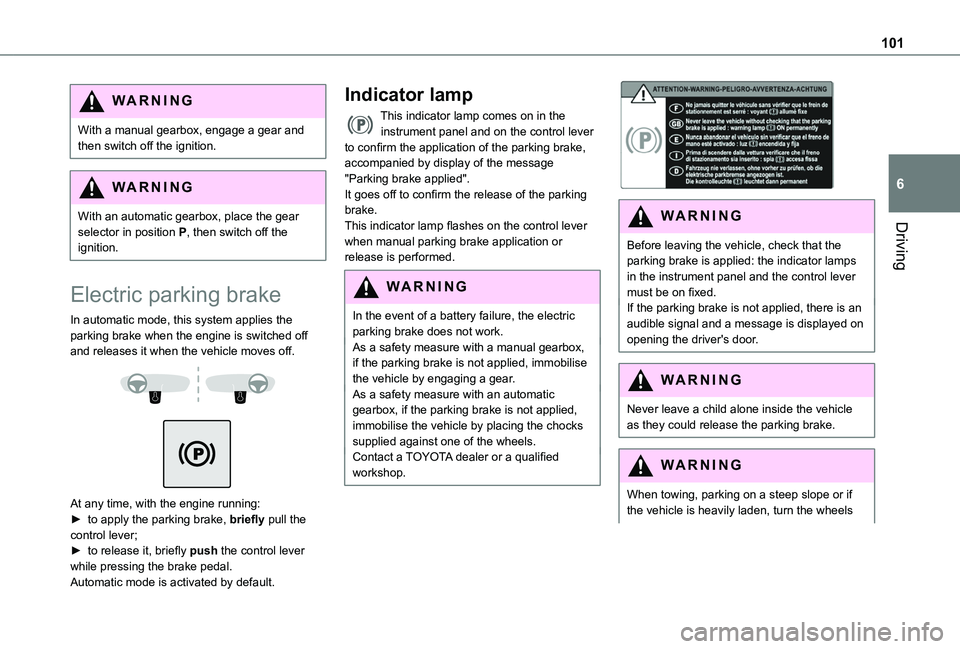
In automatic mode, this system applies the parking brake when the engine is switched off and releases it when the vehicle moves off.
At any time, with the engine running:► to apply the parking brake, briefly pull the control lever;► to release it, briefly push the control lever while pressing the brake pedal.Automatic mode is activated by default.
Indicator lamp
This indicator lamp comes on in the instrument panel and on the control lever to confirm the application of the parking brake, accompanied by display of the message "Parking brake applied".It goes off to confirm the release of the parking brake.This indicator lamp flashes on the control lever when manual parking brake application or release is performed.
WARNI NG
In the event of a battery failure, the electric parking brake does not work.As a safety measure with a manual gearbox, if the parking brake is not applied, immobilise the vehicle by engaging a gear.As a safety measure with an automatic gearbox, if the parking brake is not applied, immobilise the vehicle by placing the chocks supplied against one of the wheels.Contact a TOYOTA dealer or a qualified workshop.
WARNI NG
Before leaving the vehicle, check that the parking brake is applied: the indicator lamps in the instrument panel and the control lever must be on fixed.If the parking brake is not applied, there is an audible signal and a message is displayed on opening the driver's door.
WARNI NG
Never leave a child alone inside the vehicle as they could release the parking brake.
WARNI NG
When towing, parking on a steep slope or if the vehicle is heavily laden, turn the wheels
Page 109 of 272
109
Driving
6
and from N to R. This will not cause any damage to the gearbox.Do not exceed 100 km/h (60 mph), local speed restrictions permitting.Have it checked by a TOYOTA dealer or a qualified workshop.
WARNI NG
There is a risk of damage to the gearbox:
– if you press the accelerator and brake pedals at the same time (braking or acceleration must be done only with the right foot),– if you force the selector from position P to another position when the battery is flat.
EC O
To reduce fuel consumption when stationary for long periods with the engine running (traffic jam, etc.), position the selector on N and apply the parking brake.
WARNI NG
If your vehicle has an automatic gearbox, do not try to start the engine by pushing the vehicle.
Gear efficiency indicator
(Depending on engine.)This system helps reduce fuel consumption by recommending the most appropriate gear.
Operation
Depending on the driving situation and the vehicle's equipment, the system may advise to skip one or more gears.Gear shift recommendations should not be considered compulsory. In fact, the road layout, the traffic density and safety remain the deciding factors when choosing the best gear. The driver therefore remains responsible for deciding whether or not to follow the indications issued by the system.This function cannot be deactivated.
NOTIC E
With an automatic gearbox, the system is only active in manual operation.
The information appears in the instrument panel, in the form of an ascending or descending arrow and the recommended gear.
NOTIC E
The system adapts its gear shift recommendation according to the driving conditions (slope, load, etc.) and the driver’s
requirements (power, acceleration, braking, etc.).The system never suggests:– engaging first gear;– engaging reverse.
Stop & Start
The Stop & Start function puts the engine temporarily into standby - STOP mode - during phases when the vehicle is stopped (red lights, queues, etc.). The engine restarts automatically - START mode - as soon as the driver wishes to move off again.Primarily designed for urban use, the function is intended to reduce fuel consumption and exhaust emissions as well as the noise level when stationary.The function does not affect the functionalities of the vehicle, in particular the braking.
WARNI NG
Opening the bonnetBefore doing anything under the bonnet, deactivate the Stop & Start system to avoid any risk of injury caused by the engine restarting automatically.
Page 110 of 272
11 0
WARNI NG
Driving on flooded roadsBefore entering into a flooded area, it is strongly recommended that you deactivate the Stop & Start system.For more information on Driving recommendations, particularly on flooded roads, refer to the corresponding section.
Deactivation/Activation
With button
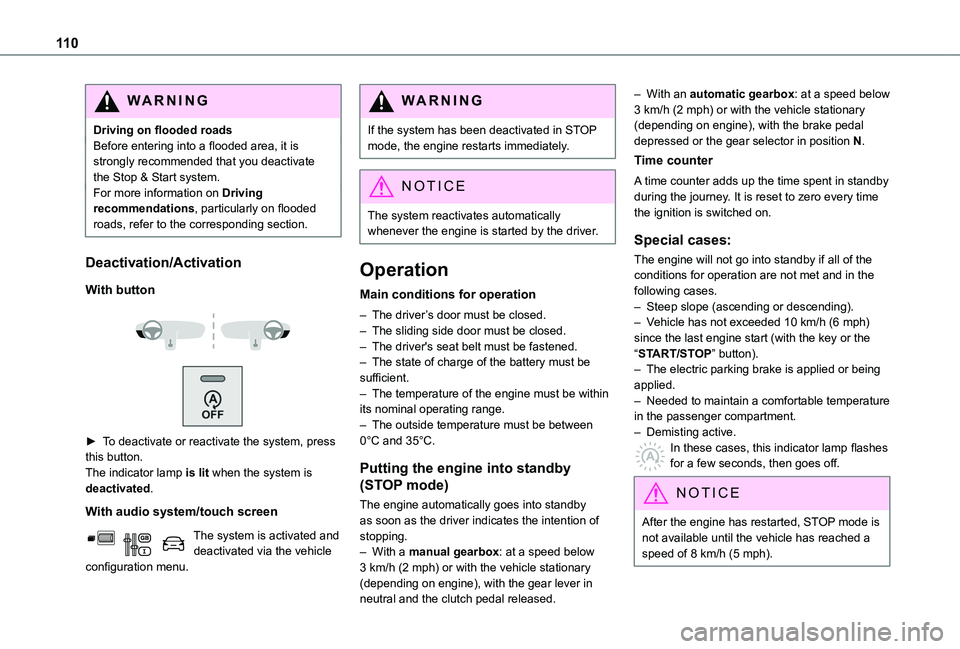
► To deactivate or reactivate the system, press this button.The indicator lamp is lit when the system is deactivated.
With audio system/touch screen
The system is activated and deactivated via the vehicle configuration menu.
WARNI NG
If the system has been deactivated in STOP mode, the engine restarts immediately.
NOTIC E
The system reactivates automatically whenever the engine is started by the driver.
Operation
Main conditions for operation
– The driver’s door must be closed.– The sliding side door must be closed.– The driver's seat belt must be fastened.– The state of charge of the battery must be sufficient.– The temperature of the engine must be within its nominal operating range.– The outside temperature must be between 0°C and 35°C.
Putting the engine into standby
(STOP mode)
The engine automatically goes into standby as soon as the driver indicates the intention of stopping.– With a manual gearbox: at a speed below 3 km/h (2 mph) or with the vehicle stationary (depending on engine), with the gear lever in neutral and the clutch pedal released.
– With an automatic gearbox: at a speed below 3 km/h (2 mph) or with the vehicle stationary (depending on engine), with the brake pedal depressed or the gear selector in position N.
Time counter
A time counter adds up the time spent in standby during the journey. It is reset to zero every time the ignition is switched on.
Special cases:
The engine will not go into standby if all of the conditions for operation are not met and in the following cases.– Steep slope (ascending or descending).– Vehicle has not exceeded 10 km/h (6 mph) since the last engine start (with the key or the “START/STOP” button).– The electric parking brake is applied or being applied.– Needed to maintain a comfortable temperature in the passenger compartment.– Demisting active.
In these cases, this indicator lamp flashes for a few seconds, then goes off.
NOTIC E
After the engine has restarted, STOP mode is not available until the vehicle has reached a speed of 8 km/h (5 mph).
Page 111 of 272
111
Driving
6
NOTIC E
During parking manoeuvres, STOP mode is not available for a few seconds after coming out of reverse gear or turning the steering wheel.
Restarting the engine (START mode)
The engine automatically restarts as soon as the driver indicates the intention of moving off again.– With a manual gearbox: with the clutch pedal fully depressed.– With an automatic gearbox:• With the selector in position D or M: with the brake pedal released.• With the selector in position N and the brake pedal released: with the selector at D or M.• With the selector in position P and the brake pedal depressed: with the selector at R, N, D or M.
Special cases
The engine will restart automatically if all conditions for operation are met again and in the following case.– Speed of the vehicle exceeds 3 km/h (2 mph) (depending on the engine).In this case, this indicator lamp flashes for a few seconds, then goes off.
Malfunctions
Depending on the vehicle’s equipment:In the event of a system malfunction, this warning lamp flashes on the instrument panel.The warning lamp in this button flashes and a message appears, accompanied by an audible signal.Have the vehicle checked by a TOYOTA dealer or a qualified workshop.
The vehicle stalls in STOP mode
All of the instrument panel warning lamps come on if there is a fault.Depending on version, a warning message may also be displayed, prompting you to place the gear selector in position N and depress the brake pedal.► Switch off the ignition then start the engine again with the key or the "START/STOP" button.
WARNI NG
The Stop & Start system requires a 12 V battery of specific technology and specification.All work concerning the battery must be carried out only by a TOYOTA dealer or a qualified workshop.
Under-inflation detection
This system automatically checks the pressures of the tyres while driving.It compares the information given by the wheel speed sensors with reference values, which must be reinitialised every time the tyre pressures are adjusted or a wheel changed.The system triggers an alert as soon as it detects a drop in the inflation pressure of one or more tyres.
WARNI NG
Under-inflation detection does not replace the need for vigilance on the part of the driver.This system does not avoid the need to regularly check the tyre pressures (including the spare wheel) as well as before a long journey.Driving with under-inflated tyres, particularly in adverse conditions (heavy load, high speed, long journey):– worsens road-holding.– lengthens braking distances.– causes premature wear of the tyres.– increases fuel consumption.
Page 152 of 272
152
Energy economy mode
System which manages the duration of use of certain functions to conserve a sufficient level of charge in the battery.After switching off the engine and for a maximum cumulative period of around 40 minutes, you can continue to use functions such as the audio and telematics system, the wipers, the dipped beam headlamps, the courtesy lamps, etc.
Switching to the mode
A message indicating that the vehicle has switched to economy mode is displayed on the instrument panel screen and the active functions are put on standby.
NOTIC E
If a telephone call is in progress at the time, it will be maintained for around 10 minutes using your audio system’s hands-free system.
Exiting the mode
These functions will be automatically reactivated the next time the vehicle is used.In order to restore the use of these functions immediately, start the engine and let it run:– for less than 10 minutes, to use the equipment for approximately 5 minutes,– for more than 10 minutes, to use the equipment for approximately 30 minutes.
Let the engine run for the duration specified to ensure that the battery charge is sufficient.Do not repeatedly and continuously restart the engine in order to charge the battery.
WARNI NG
A flat battery prevents the engine from starting.For more information on the 12 V battery,
refer to the corresponding section.
Load reduction mode
System that manages the use of certain functions according to the level of charge remaining in the battery.When the vehicle is being driven, the load reduction function temporarily deactivates certain functions, such as the air conditioning and the heated rear screen.The deactivated functions are reactivated automatically as soon as conditions permit.
Roof bars / Roof rack
WARNI NG
RecommendationsDistribute the load uniformly, taking care to avoid overloading one of the sides.
Arrange the heaviest part of the load as close as possible to the roof.Secure the load firmly.Drive gently: the vehicle will be more susceptible to the effects of side winds and its stability may be affected.Regularly check the security and tight fastening of the roof bars and racks, at least before each trip.Remove the roof bars once they are no longer needed.
WARNI NG
In the event of loading (not exceeding 40 cm (1 ft 3") in height) on the roof, do not exceed the following loads:– Transverse bars on longitudinal bars: 80 kg (176 lb).– Two transverse bars bolted to the roof: 100 kg (220 lb).– Three transverse bars bolted to the roof:
150 kg (330 lb).– An aluminium rack: 120 kg (264 lb).– A steel rack: 115 kg (253 lb).If the height exceeds 40 cm (1 ft 3"), adapt the speed of the vehicle to the profile of the road to avoid damaging the roof bars or the roof rack and the fixings on the vehicle.Refer to national legislation in order to comply with the regulations for transporting objects that are longer than the vehicle.
Page 154 of 272
154
► Pull the release lever, located at the bottom of the door frame, towards you.► Lift the safety catch and raise the bonnet.
► Unclip the stay from its housing and place it in the support slot to hold the bonnet open.
Closing
► Take the stay out of the support slot.► Clip the stay in its housing.► Lower the bonnet and release it near the end of its travel.► Pull on the bonnet to check that it is locked correctly.
WARNI NG
Because of the presence of electrical
equipment under the bonnet, it is recommended that exposure to water (rain, washing, etc.) be limited.
Engine compartment
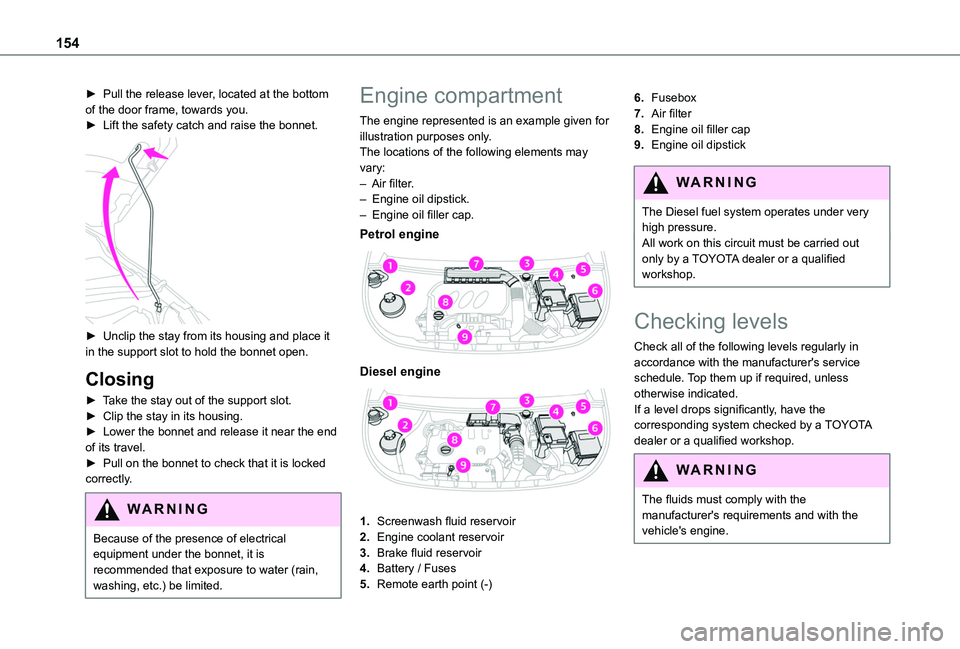
The engine represented is an example given for illustration purposes only.The locations of the following elements may vary:– Air filter.– Engine oil dipstick.– Engine oil filler cap.
Petrol engine
Diesel engine
1.Screenwash fluid reservoir
2.Engine coolant reservoir
3.Brake fluid reservoir
4.Battery / Fuses
5.Remote earth point (-)
6.Fusebox
7.Air filter
8.Engine oil filler cap
9.Engine oil dipstick
WARNI NG
The Diesel fuel system operates under very high pressure.All work on this circuit must be carried out only by a TOYOTA dealer or a qualified workshop.
Checking levels
Check all of the following levels regularly in accordance with the manufacturer's service schedule. Top them up if required, unless otherwise indicated.If a level drops significantly, have the corresponding system checked by a TOYOTA dealer or a qualified workshop.
WARNI NG
The fluids must comply with the manufacturer's requirements and with the vehicle's engine.
Page 157 of 272
157
Practical information
7
WARNI NG
Only use products recommended by TOYOTA or products of equivalent quality and specification.In order to optimise the operation of components as important as those in the braking system, TOYOTA selects and offers very specific products.
12 V battery
The battery does not require any maintenance.However, check regularly that the terminals are correctly tightened (versions without quick release terminals) and that the connections are clean.
NOTIC E
For more information on the precautions to take before any work on the 12 V battery, refer to the corresponding section.
WARNI NG
Versions equipped with Stop & Start are fitted with a 12 V lead-acid battery of specific technology and specification.Its replacement should be carried out only by a TOYOTA dealer or a qualified workshop.
Passenger compartment
filter
Depending on the environment and the use of the vehicle (e.g. dusty atmosphere, city driving), change it twice as often, if necessary.
NOTIC E
A clogged passenger compartment filter can adversely affect air conditioning system performance and generate undesirable odours.
Air filter
Depending on the environment and the use of the vehicle (e.g. dusty atmosphere, city driving), change it twice as often, if necessary.
Oil filter
Change the oil filter each time the engine oil is changed.
Particle filter (Diesel)
When the particle filter is approaching saturation, this warning lamp comes on temporarily, accompanied by a message warning of the risk of filter clogging.
As soon as the traffic conditions permit, regenerate the filter by driving at a speed of at least 60 km/h (37 mph) until the warning lamp goes off.
NOTIC E
If the warning lamp stays on, this indicates a low Diesel additive level.For more information on Checking levels,
refer to the corresponding section.
NOTIC E
Following prolonged operation of the vehicle at very low speed or at idle, you may, in exceptional circumstances, notice the emission of water vapour at the exhaust while accelerating. This has no impact on the vehicle’s behaviour or the environment.
NOTIC E
New vehicleDuring the first few particle filter regeneration operations, you may notice a "burning" smell. This is perfectly normal.
Manual gearbox
The gearbox does not require any maintenance (no oil change).
Page 177 of 272
177
In the event of a breakdown
8
Fuse No.Rating (A)Functions
F110Wireless smartphone charger, interior electrochrome rear view mirror.
F415Horn.
F620Screenwash pump.
F71012 V socket (rear).
F1030Electric locks module.
F1310Telematics and radio controls.
F145Alarm, advanced telematic unit.
F193Trailer interface unit.
F235Generic trailer interface unit.
F275Additional heating.
F2920Audio system, touch screen.
Fuse No.Rating (A)Functions
F3115Audio system (as an accessory).
F321512 V socket (front).
F345Mirror control.
F365USB port.
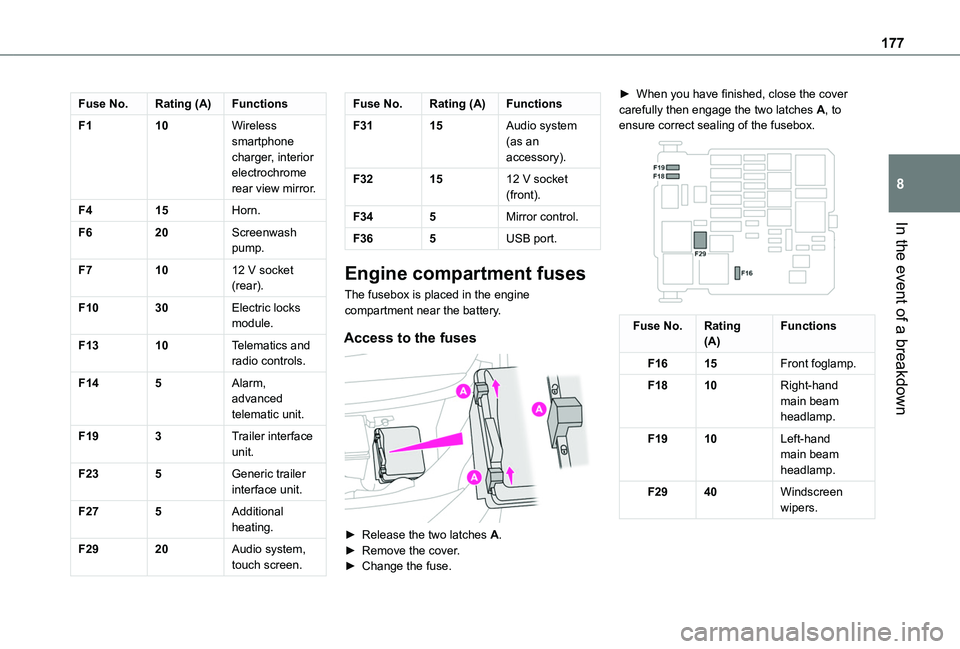
Engine compartment fuses
The fusebox is placed in the engine compartment near the battery.
Access to the fuses
► Release the two latches A.► Remove the cover.► Change the fuse.
► When you have finished, close the cover carefully then engage the two latches A, to ensure correct sealing of the fusebox.
Fuse No.Rating(A)Functions
F1615Front foglamp.
F1810Right-hand main beam headlamp.
F1910Left-hand main beam headlamp.
F2940Windscreen wipers.