2019 TOYOTA PROACE CITY VERSO battery
[x] Cancel search: batteryPage 30 of 272
30
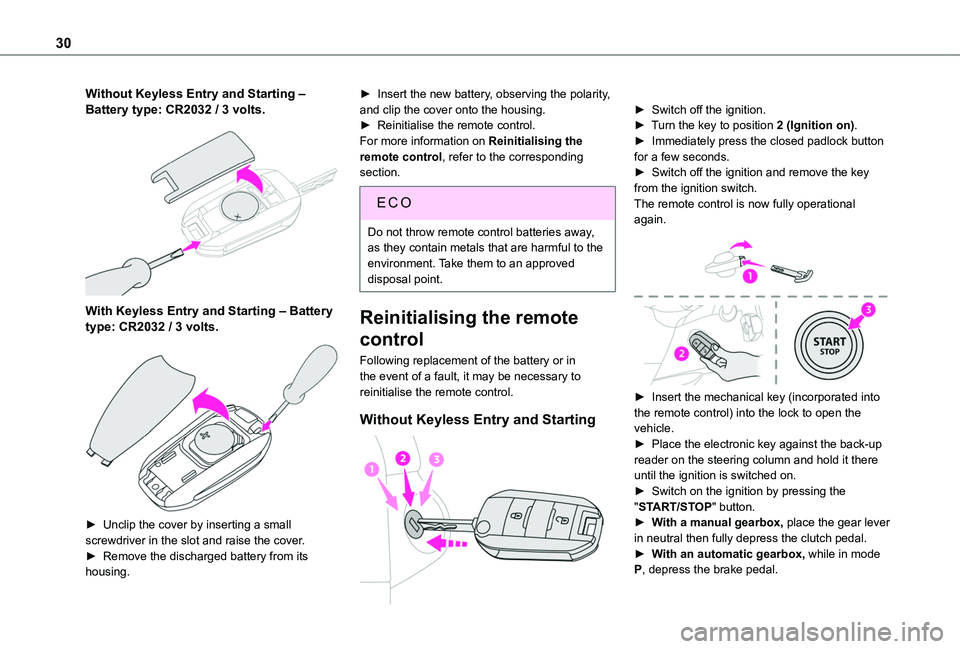
Without Keyless Entry and Starting ‒ Battery type: CR2032 / 3 volts.
With Keyless Entry and Starting ‒ Battery type: CR2032 / 3 volts.
► Unclip the cover by inserting a small screwdriver in the slot and raise the cover.
► Remove the discharged battery from its housing.
► Insert the new battery, observing the polarity, and clip the cover onto the housing.► Reinitialise the remote control.For more information on Reinitialising the remote control, refer to the corresponding section.
EC O
Do not throw remote control batteries away, as they contain metals that are harmful to the environment. Take them to an approved disposal point.
Reinitialising the remote
control
Following replacement of the battery or in the event of a fault, it may be necessary to reinitialise the remote control.
Without Keyless Entry and Starting
► Switch off the ignition.► Turn the key to position 2 (Ignition on).► Immediately press the closed padlock button for a few seconds.► Switch off the ignition and remove the key from the ignition switch.The remote control is now fully operational again.
► Insert the mechanical key (incorporated into the remote control) into the lock to open the vehicle.► Place the electronic key against the back-up
reader on the steering column and hold it there until the ignition is switched on.► Switch on the ignition by pressing the "START/STOP" button.► With a manual gearbox, place the gear lever in neutral then fully depress the clutch pedal.► With an automatic gearbox, while in mode P, depress the brake pedal.
Page 34 of 272
34
may occur if a person or an object is trapped or caught.
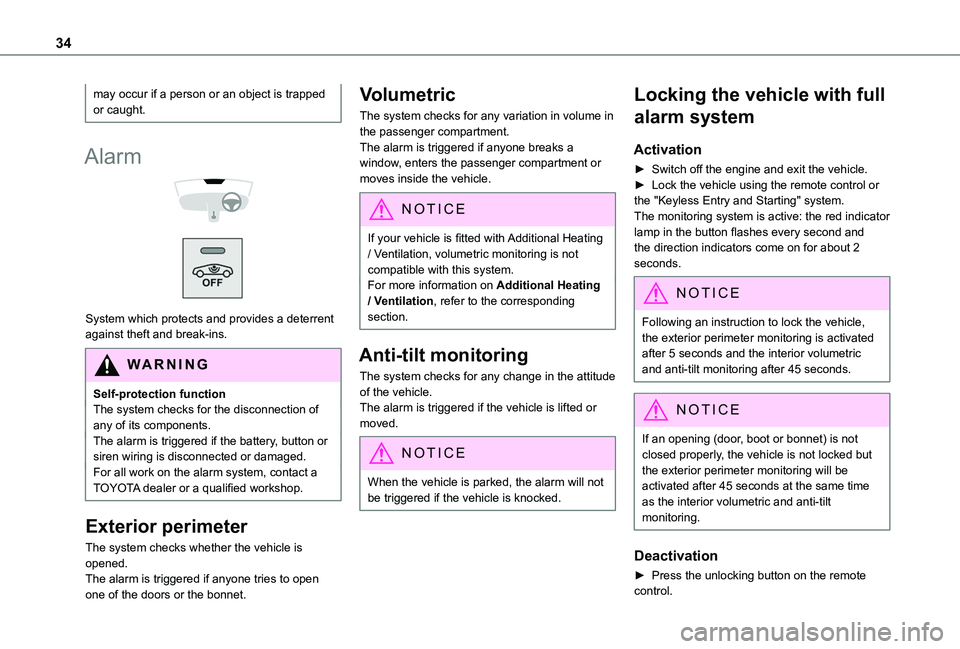
Alarm
System which protects and provides a deterrent against theft and break-ins.
WARNI NG
Self-protection functionThe system checks for the disconnection of any of its components.The alarm is triggered if the battery, button or siren wiring is disconnected or damaged.For all work on the alarm system, contact a TOYOTA dealer or a qualified workshop.
Exterior perimeter
The system checks whether the vehicle is opened.The alarm is triggered if anyone tries to open one of the doors or the bonnet.
Volumetric
The system checks for any variation in volume in the passenger compartment.The alarm is triggered if anyone breaks a window, enters the passenger compartment or moves inside the vehicle.
NOTIC E
If your vehicle is fitted with Additional Heating / Ventilation, volumetric monitoring is not compatible with this system.For more information on Additional Heating / Ventilation, refer to the corresponding section.
Anti-tilt monitoring
The system checks for any change in the attitude of the vehicle.The alarm is triggered if the vehicle is lifted or moved.
NOTIC E
When the vehicle is parked, the alarm will not be triggered if the vehicle is knocked.
Locking the vehicle with full
alarm system
Activation
► Switch off the engine and exit the vehicle.► Lock the vehicle using the remote control or the "Keyless Entry and Starting" system.The monitoring system is active: the red indicator lamp in the button flashes every second and the direction indicators come on for about 2 seconds.
NOTIC E
Following an instruction to lock the vehicle, the exterior perimeter monitoring is activated after 5 seconds and the interior volumetric and anti-tilt monitoring after 45 seconds.
NOTIC E
If an opening (door, boot or bonnet) is not closed properly, the vehicle is not locked but the exterior perimeter monitoring will be activated after 45 seconds at the same time as the interior volumetric and anti-tilt monitoring.
Deactivation
► Press the unlocking button on the remote control.
Page 36 of 272
36
Have it checked by a TOYOTA dealer or a qualified workshop.
Automatic activation
(Depending on the country of sale)The system is activated automatically 2 minutes after the last door or the boot is closed.► To avoid triggering the alarm on entering the vehicle, first press the unlocking button on the remote control or unlock the vehicle using the “Keyless Entry and Starting” system.
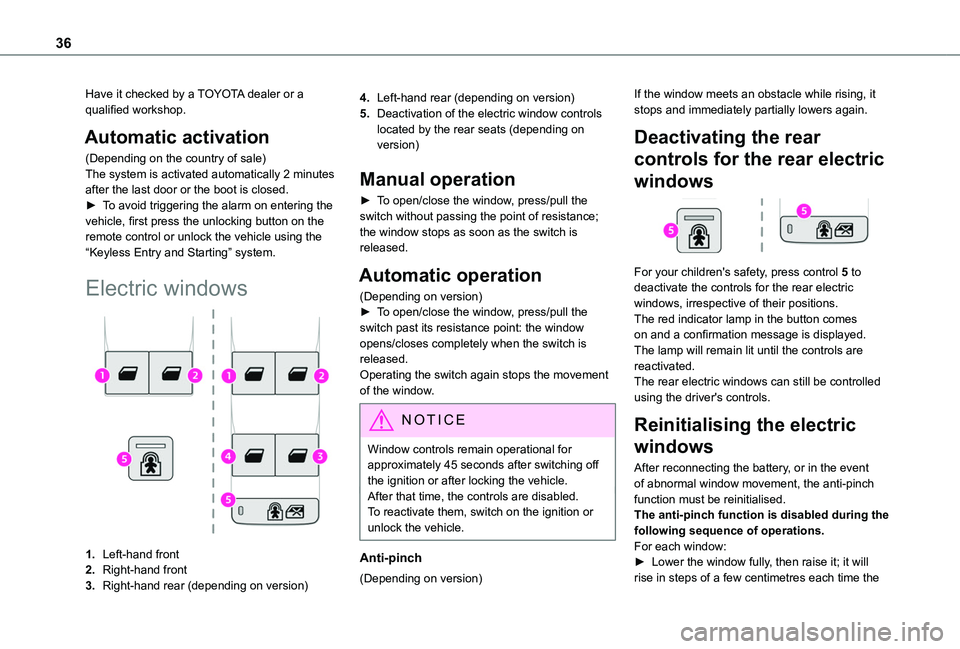
Electric windows
1.Left-hand front
2.Right-hand front
3.Right-hand rear (depending on version)
4.Left-hand rear (depending on version)
5.Deactivation of the electric window controls located by the rear seats (depending on version)
Manual operation
► To open/close the window, press/pull the switch without passing the point of resistance; the window stops as soon as the switch is released.
Automatic operation
(Depending on version)► To open/close the window, press/pull the switch past its resistance point: the window opens/closes completely when the switch is released.Operating the switch again stops the movement of the window.
NOTIC E
Window controls remain operational for approximately 45 seconds after switching off the ignition or after locking the vehicle.After that time, the controls are disabled. To reactivate them, switch on the ignition or unlock the vehicle.
Anti-pinch
(Depending on version)
If the window meets an obstacle while rising, it stops and immediately partially lowers again.
Deactivating the rear
controls for the rear electric
windows
For your children's safety, press control 5 to deactivate the controls for the rear electric windows, irrespective of their positions.The red indicator lamp in the button comes on and a confirmation message is displayed. The lamp will remain lit until the controls are reactivated.The rear electric windows can still be controlled using the driver's controls.
Reinitialising the electric
windows
After reconnecting the battery, or in the event of abnormal window movement, the anti-pinch function must be reinitialised.The anti-pinch function is disabled during the following sequence of operations.For each window:► Lower the window fully, then raise it; it will rise in steps of a few centimetres each time the
Page 50 of 272
50
remains lit for the whole time that the battery is being charged.
WARNI NG
The system is not designed to charge multiple devices simultaneously.
WARNI NG
Do not leave any metal objects (coins, keys, vehicle remote control, etc.) in the charging area while a device is being charged, due to the risk of overheating or interrupting the charging process.
Operating check
The state of the indicator lamp allows the operation of the charger to be monitored.
State of the indicator lampMeaning
OffEngine switched off.No compatible devices detected.
Charging finished.
State of the indicator lampMeaning
Fixed greenCompatible device detected.Charging.
Flashing orangeForeign object detected in the charging zone.Device not well centred in the charging zone.
Fixed orangeFault with the device's battery meter.Device battery temperature too high.Charger malfunction.
If the indicator lamp is lit orange:– remove the device, then place it back in the centre of the charging zone.or– remove the device and try again in a quarter of an hour.If the problem persists, have the system checked by a TOYOTA dealer or a qualified workshop.
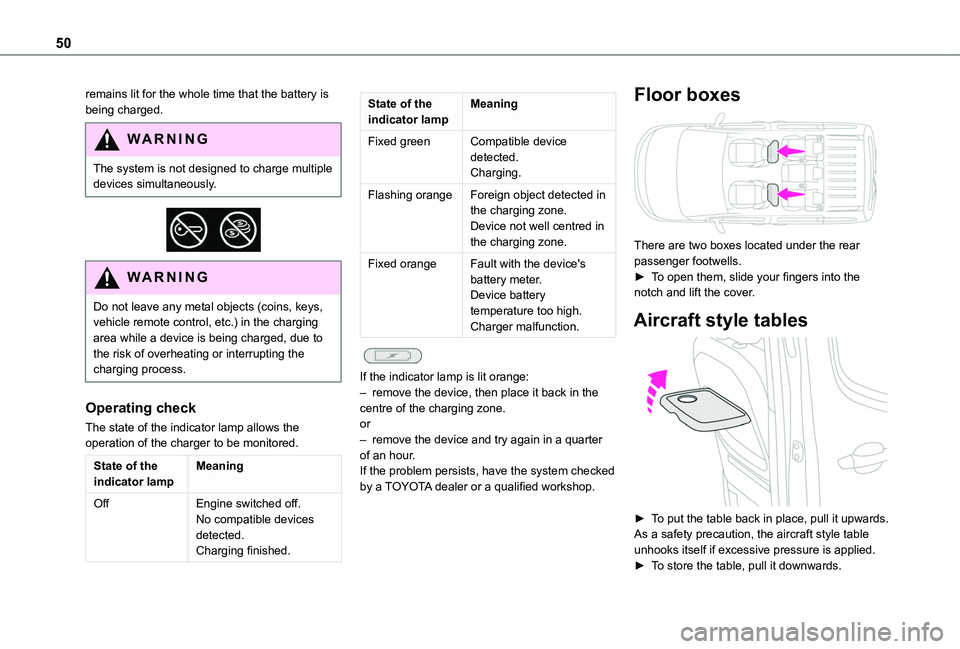
Floor boxes
There are two boxes located under the rear passenger footwells.► To open them, slide your fingers into the notch and lift the cover.
Aircraft style tables
► To put the table back in place, pull it upwards.As a safety precaution, the aircraft style table unhooks itself if excessive pressure is applied.► To store the table, pull it downwards.
Page 61 of 272
61
Ease of use and comfort
3
Off
► Pressing and holding this button stops the heating immediately (confirmed by the red indicator lamp coming on briefly).
NOTIC E
The indicator lamp in the remote control flashes for about 2 seconds if the vehicle has not received the signal, in which case
you should move to a different location and repeat the command.
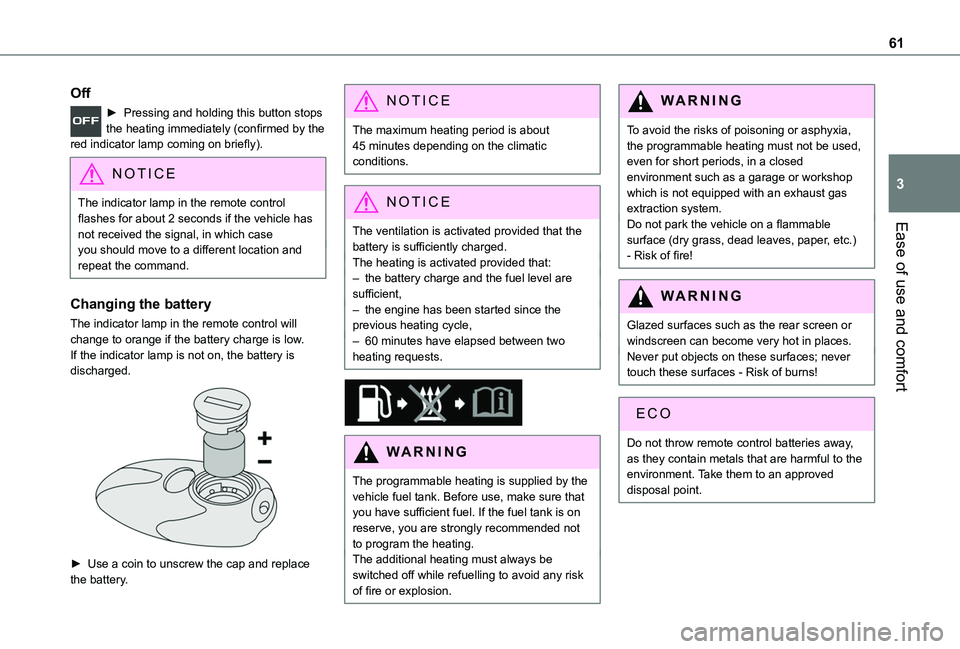
Changing the battery
The indicator lamp in the remote control will change to orange if the battery charge is low.If the indicator lamp is not on, the battery is discharged.
► Use a coin to unscrew the cap and replace the battery.
NOTIC E
The maximum heating period is about 45 minutes depending on the climatic conditions.
NOTIC E
The ventilation is activated provided that the
battery is sufficiently charged. The heating is activated provided that: – the battery charge and the fuel level are sufficient,– the engine has been started since the previous heating cycle,– 60 minutes have elapsed between two heating requests.
WARNI NG
The programmable heating is supplied by the vehicle fuel tank. Before use, make sure that you have sufficient fuel. If the fuel tank is on reserve, you are strongly recommended not to program the heating.The additional heating must always be switched off while refuelling to avoid any risk of fire or explosion.
WARNI NG
To avoid the risks of poisoning or asphyxia, the programmable heating must not be used, even for short periods, in a closed environment such as a garage or workshop which is not equipped with an exhaust gas extraction system.Do not park the vehicle on a flammable surface (dry grass, dead leaves, paper, etc.) - Risk of fire!
WARNI NG
Glazed surfaces such as the rear screen or windscreen can become very hot in places.Never put objects on these surfaces; never touch these surfaces - Risk of burns!
Do not throw remote control batteries away, as they contain metals that are harmful to the environment. Take them to an approved disposal point.
Page 72 of 272
72
The lighting of the indicator lamp and a voice message confirm that the call has been made to the “Localised Emergency Call” call centre.*.► Pressing again immediately cancels the request.The lamp remains lit until the call is ended."Localised Emergency Call" immediately geolocates your vehicle and contacts you in your language**, and - if necessary - requests that relevant emergency services be dispatched**. In countries where the service is not available, or when the geolocation service has been expressly declined, the call is routed directly to the emergency services (112) without the vehicle location information.
WARNI NG
If an impact is detected by the airbag control unit, an emergency call is made automatically, independently of the deployment of any airbags.
* In accordance with the general conditions of use of the service, available from dealers an\
d subject to technological and technical limitations.
** According to the geographic coverage of ‘Localised Emergency Call and the official national language chosen by the owner of the vehicle.
The list of countries covered and telematic services provided is availab\
le from dealers or on the website for your country.
*** In accordance with the general conditions of use of the service, available from dealers\
and subject to technological and technical limitations.
**** In areas covered by ‘Localised Emergency Call’. The list of countries covered and telematic services provided is availab\
le from dealers or on the website for your country.
Operation of the system
– Indicator lamp on (for 3 seconds) upon switching on the ignition: the system is operating correctly.– Fixed red indicator lamp: system malfunction.– Flashing red indicator lamp: replace the back-up battery.In the last 2 cases, the emergency and assistance call services may not work.Contact a qualified repairer as soon as possible.
NOTIC E
The system fault does not prevent the vehicle from being driven.
Emergency or assistance
call (type 2)
Localised Emergency Call
(PE112)
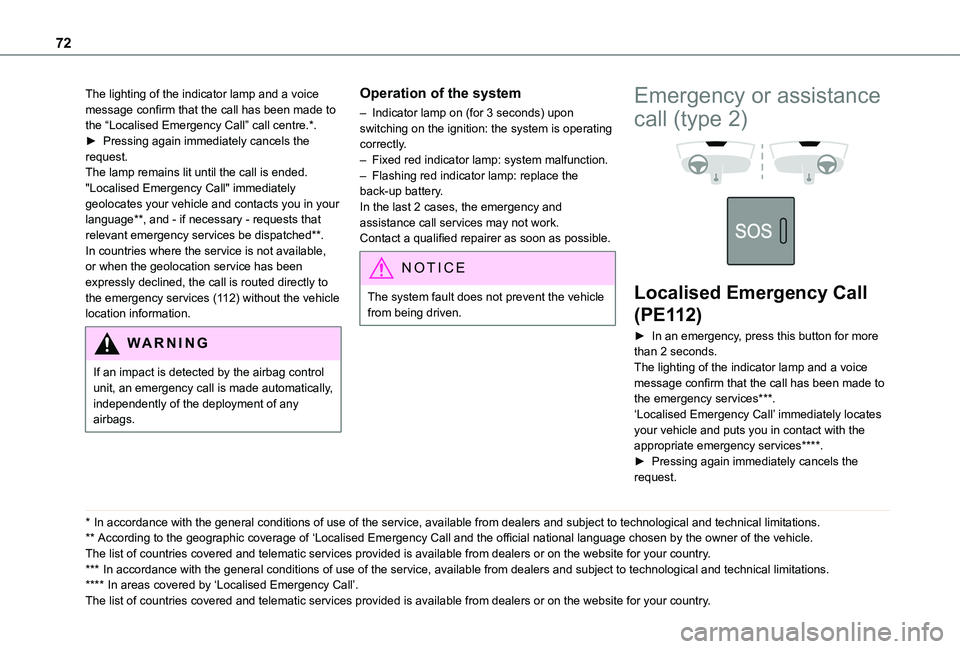
► In an emergency, press this button for more than 2 seconds.The lighting of the indicator lamp and a voice message confirm that the call has been made to the emergency services***.‘Localised Emergency Call’ immediately locates your vehicle and puts you in contact with the appropriate emergency services****.► Pressing again immediately cancels the request.
Page 73 of 272
73
Safety
5
The indicator lamp flashes when the vehicle data is sent, and then remains lit when communication is established.
WARNI NG
If an impact is detected by the airbag control unit, an emergency call is made automatically, independently of the deployment of any airbags.
NOTIC E
‘Localised Emergency Call’ is a service that can be accessed free of charge.
System operation
– Upon switching on the ignition, if the indicator lamp lights up red, then green, and then goes out: the system is operating correctly.– If the indicator lamp is fixed red: system malfunction– If the indicator lamp flashes red: replace the emergency battery. In the latter two cases, emergency and assistance call services may not work.Contact a dealer or a qualified repairer as soon as possible.
NOTIC E
The system fault does not prevent the vehicle from being driven.
NOTIC E
Data processingAll processing of personal information by the "Localised Emergency Call" system (PE112) complies with the framework for protection of personal information established by Regulation 2016/679 (GDPR) and Directive 2002/58/EC of the European Parliament and the Council, and in particular, seeks to protect the vital interests of the data subject, in accordance with Article 6.1, paragraph d) of Regulation 2016/679.Personal information processing is strictly limited to the management of the "Localised Emergency Call" system used with the “112” European single emergency call number.
The "Localised Emergency Call" system is able to collect and process only the following data relating to the vehicle: chassis number, type (passenger vehicle or light commercial vehicle), fuel type or power source, most recent three locations and direction of travel,
and a timestamped log file recording the automatic activation of the system.The recipients of the processed data are the emergency call handling centres designated by the relevant national authorities in the territory in which they are located, enabling priority reception and handling of calls to the “112” emergency number.
NOTIC E
Data storageData contained in the system’s memory is not accessible from outside the system until a call is made. The system is not traceable and is not continuously monitored in its normal operating mode. The data in the system's internal memory is automatically and continuously erased. Only the vehicle’s three most recent locations are stored.When an emergency call is triggered, the data log is stored for no more than 13 hours.
NOTIC E
Access to dataYou have the right to access the data and, if
necessary, submit a request to rectify, erase or restrict the processing of any personal information not processed in accordance with the provisions of Regulation 2016/679
Page 100 of 272
100
Switching on the ignition
with Keyless Entry and
Starting
With the Keyless Entry and Starting system’s electronic key inside the vehicle, pressing the "START/STOP" button, with no action on the pedals, allows the ignition to be switched on.► Pressing this button again switches off the ignition and allows the vehicle to be locked.
Back-up starting with
Keyless Entry and Starting
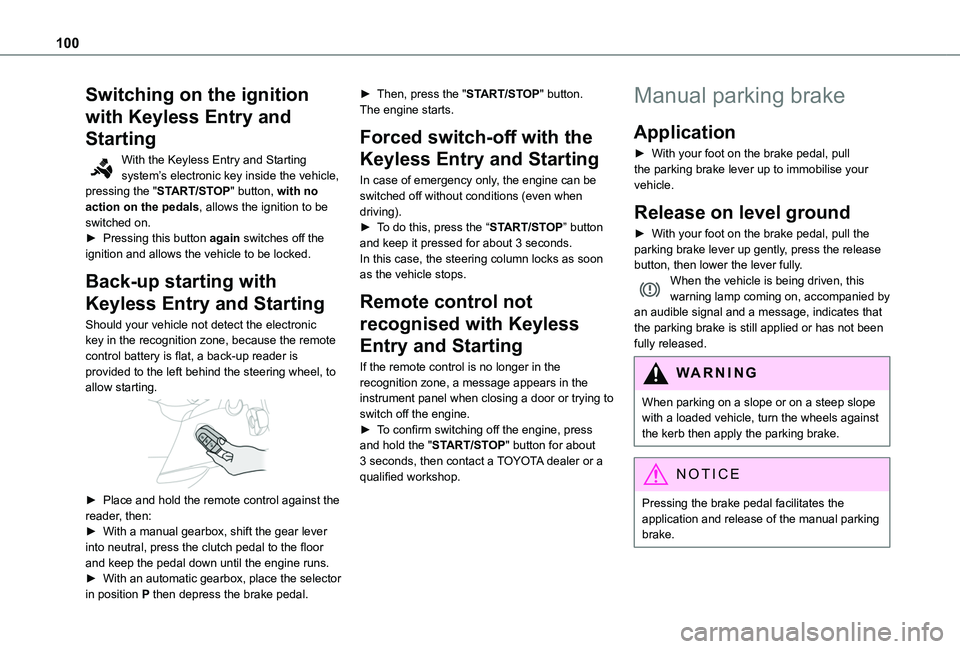
Should your vehicle not detect the electronic key in the recognition zone, because the remote control battery is flat, a back-up reader is provided to the left behind the steering wheel, to allow starting.
► Place and hold the remote control against the reader, then:► With a manual gearbox, shift the gear lever into neutral, press the clutch pedal to the floor and keep the pedal down until the engine runs.► With an automatic gearbox, place the selector in position P then depress the brake pedal.
► Then, press the "START/STOP" button.The engine starts.
Forced switch-off with the
Keyless Entry and Starting
In case of emergency only, the engine can be switched off without conditions (even when driving).► To do this, press the “START/STOP” button and keep it pressed for about 3 seconds.In this case, the steering column locks as soon as the vehicle stops.
Remote control not
recognised with Keyless
Entry and Starting
If the remote control is no longer in the recognition zone, a message appears in the instrument panel when closing a door or trying to switch off the engine.► To confirm switching off the engine, press
and hold the "START/STOP" button for about 3 seconds, then contact a TOYOTA dealer or a qualified workshop.
Manual parking brake
Application
► With your foot on the brake pedal, pull the parking brake lever up to immobilise your vehicle.
Release on level ground
► With your foot on the brake pedal, pull the parking brake lever up gently, press the release button, then lower the lever fully.When the vehicle is being driven, this warning lamp coming on, accompanied by an audible signal and a message, indicates that the parking brake is still applied or has not been fully released.
WARNI NG
When parking on a slope or on a steep slope with a loaded vehicle, turn the wheels against the kerb then apply the parking brake.
NOTIC E
Pressing the brake pedal facilitates the application and release of the manual parking brake.