2019 TOYOTA CAMRY HYBRID change time
[x] Cancel search: change timePage 298 of 592

2984-5. Using the driving support systems
Audio system screen (RCTA function only)
If a vehicle approaching from the right or left at the rear of the vehicle is
detected, the RCTA icon ( P. 303, 307) for the detected side will be dis-
played.
RCTA
buzzer (RCTA function only)
When a vehicle approaching from the right or left rear of the v ehicle is
detected, a buzzer sounds from behind the rear seat.
Vehicles with 4.2-inch m ulti-information display
Press
/ of the meter control switches, select .
Press
/ of the meter control sw itches, select or .
Press of the meter control switch.
Each time is pressed, t he function changes on/off.
Vehicles with 7-inch multi-information display
Press
/ of the meter control switches, select .
Press
/ of the meter control sw itches, select or .
Press of the meter control switch.
Each time is pressed, t he function changes on/off.
■The outside rear view mirror indicators visibility
When under strong sunlight, the outside rear view mirror indica tor may be dif-
ficult to see.
■ RCTA buzzer hearing
RCTA function may be difficult to hear over loud noises such as high audio
volume.
■ When “Blind Spot Monitor Unavaila ble” and “Rear Cross Traffic Alert
Unavailable” are shown on the multi-information display
Ice, snow, mud, etc., may be attached to the rear bumper around the sensors.
( P. 300)
The system should return to normal operation after removing the ice, snow,
mud, etc. from the rear bumper.
Additionally, the sensors may not operate normally when driving in extremely
hot or cold environments.
Turning the BSM function/RCTA function on/off
4
5
1
2
3
1
2
3
Page 311 of 592

3114-5. Using the driving support systems
4
Driving
Front corner sensors
Front center sensors
Rear corner sensors
Rear center sensors
Press
/ of the meter con-
trol switches, select .
Press
/ of the meter con-
trol switches, select .
Press of the meter con-
trol switch.
Each time is pressed, t he function changes on/off.
When on, the indicator light comes on to inform the driver that the sys-
tem is operational.
Intuitive parking assist
: If equipped
The distance from your vehicle to nearby obstacles when paral-
lel parking or maneuvering into a garage is measured by the
sensors and communicated via the displays and a buzzer.
Always check the surrounding ar ea when using this system.
Types of sensors
1
2
3
4
Turning the intuitive parking assist on/off
1
2
3
Page 352 of 592

3525-1. Using the air conditioning system and defogger
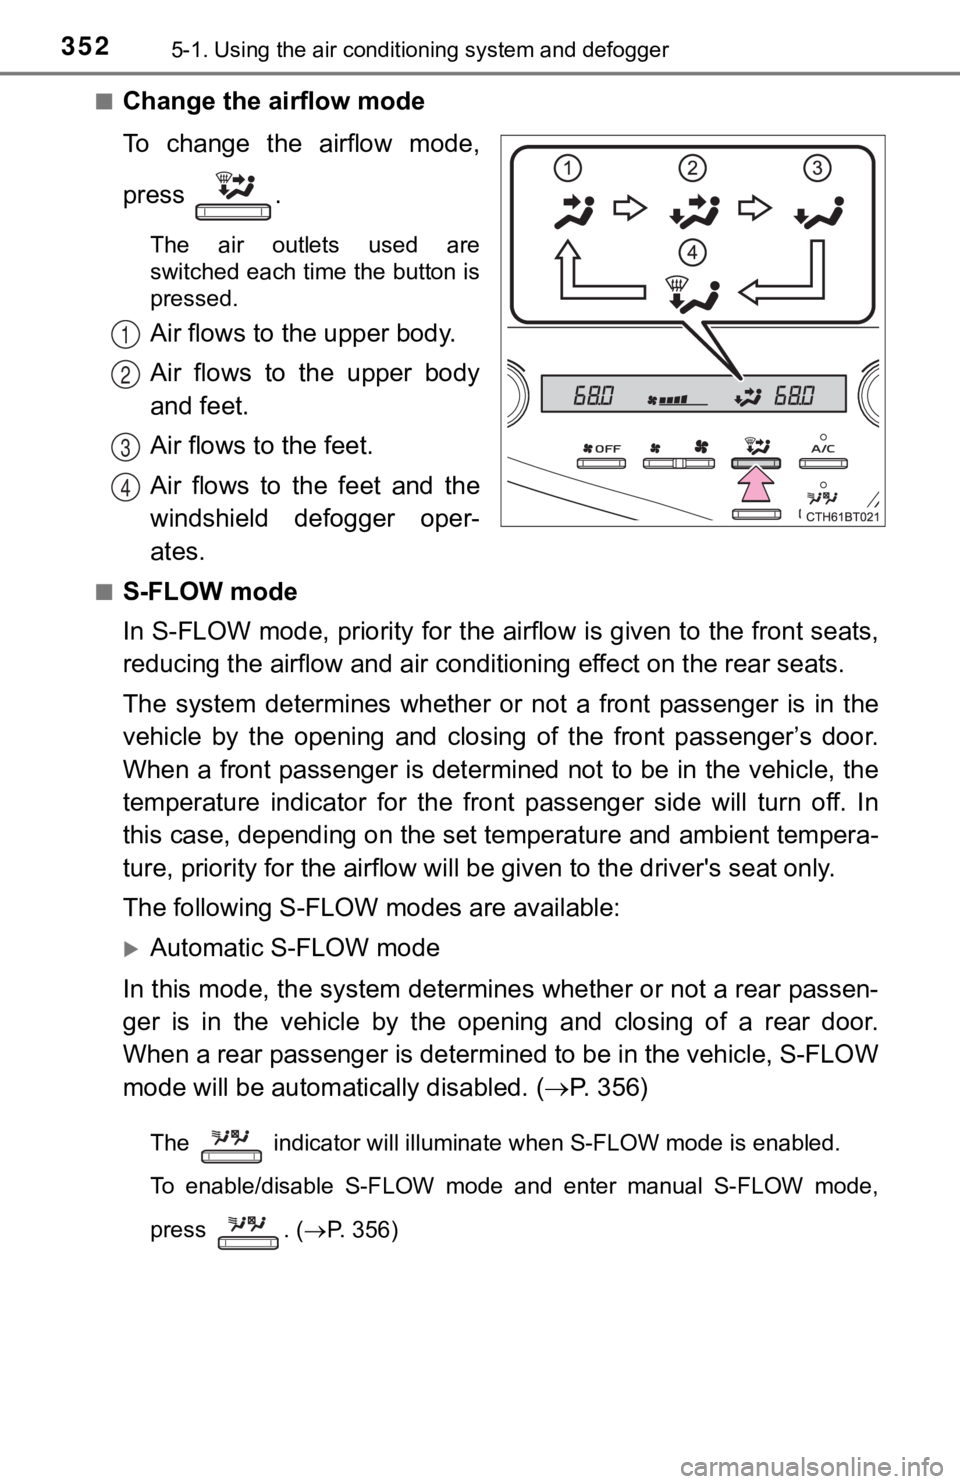
■Change the airflow mode
To change the airflow mode,
press .
The air outlets used are
switched each time the button is
pressed.
Air flows to the upper body.
Air flows to the upper body
and feet.
Air flows to the feet.
Air flows to the feet and the
windshield defogger oper-
ates.
■S-FLOW mode
In S-FLOW mode, priority for the airflow is given to the front seats,
reducing the airflow and air conditioning effect on the rear se ats.
The system determines whether or not a front passenger is in the
vehicle by the opening and closing of the front passenger’s door.
When a front passenger is determined not to be in the vehicle, the
temperature indicator for the fr ont passenger side will turn off. In
this case, depending on the set temperature and ambient tempera -
ture, priority for the airflow w ill be given to the driver's seat only.
The following S-FLOW modes are available:
Automatic S-FLOW mode
In this mode, the system determi nes whether or not a rear passen-
ger is in the vehicle by the opening and closing of a rear door .
When a rear passenger is determ ined to be in the vehicle, S-FLOW
mode will be automat ically disabled. (P. 3 5 6 )
The indicator will illuminate when S-FLOW mode is enabled.
To enable/disable S-FLOW mode and enter manual S-FLOW mode,
press . ( P. 356)
1
2
3
4
Page 356 of 592

3565-1. Using the air conditioning system and defogger
■Using automatic mode
Fan speed is adjusted automatically according to the temperatur e setting and
the ambient conditions.
Therefore, the fan may stop for a while until warm or cool air is ready to flow
immediately after is pressed.
■ Operation of the air condit ioning system in S-FLOW mode
If the front passenger’s door or a rear door is opened then clo sed, the air con-
ditioning system determines that a passenger is in the vehicle. In this case,
priority for the airflow will be changed from the driver’s seat only to the front
seats only or all seats, respectively. (Depending on the set temperature or
ambient temperature, priority for the airflow may not be given to the driver’s
seat only.)
If a passenger is judged to be in the vehicle, the system will retain the judge-
ment for a certain amount of time after the power switch is tur ned off.
■ Operation of automatic S-FLOW mode
When the system is operating in automatic S-FLOW mode, if a rea r door is
opened and then closed, S-FLOW mode will be disabled. To enable S-FLOW
mode, press
.
■ Changing from manual S-FLOW mode to automatic S-FLOW mode
Press
to disable S-FLOW mode.
Turn the power switch off.
After 60 minutes have elapsed, change the power switch to ON mo de.
■ Fogging up of the windows
●The windows will easily fog up when the humidity in the vehicle is high.
Turning on will dehumidify the air from the outlets and defog the
windshield effectively.
● If you turn off, the windows may fog up more easily.
● The windows may fog up if the recirculated air mode is used.
■ Windshield fog detection function
When automatic mode is set, the humidity sensor ( P. 358) detects fog on
the windshield and controls the air conditioning system to prev ent fog.1
2
3
Page 359 of 592

3595-1. Using the air conditioning system and defogger
5
Interior features
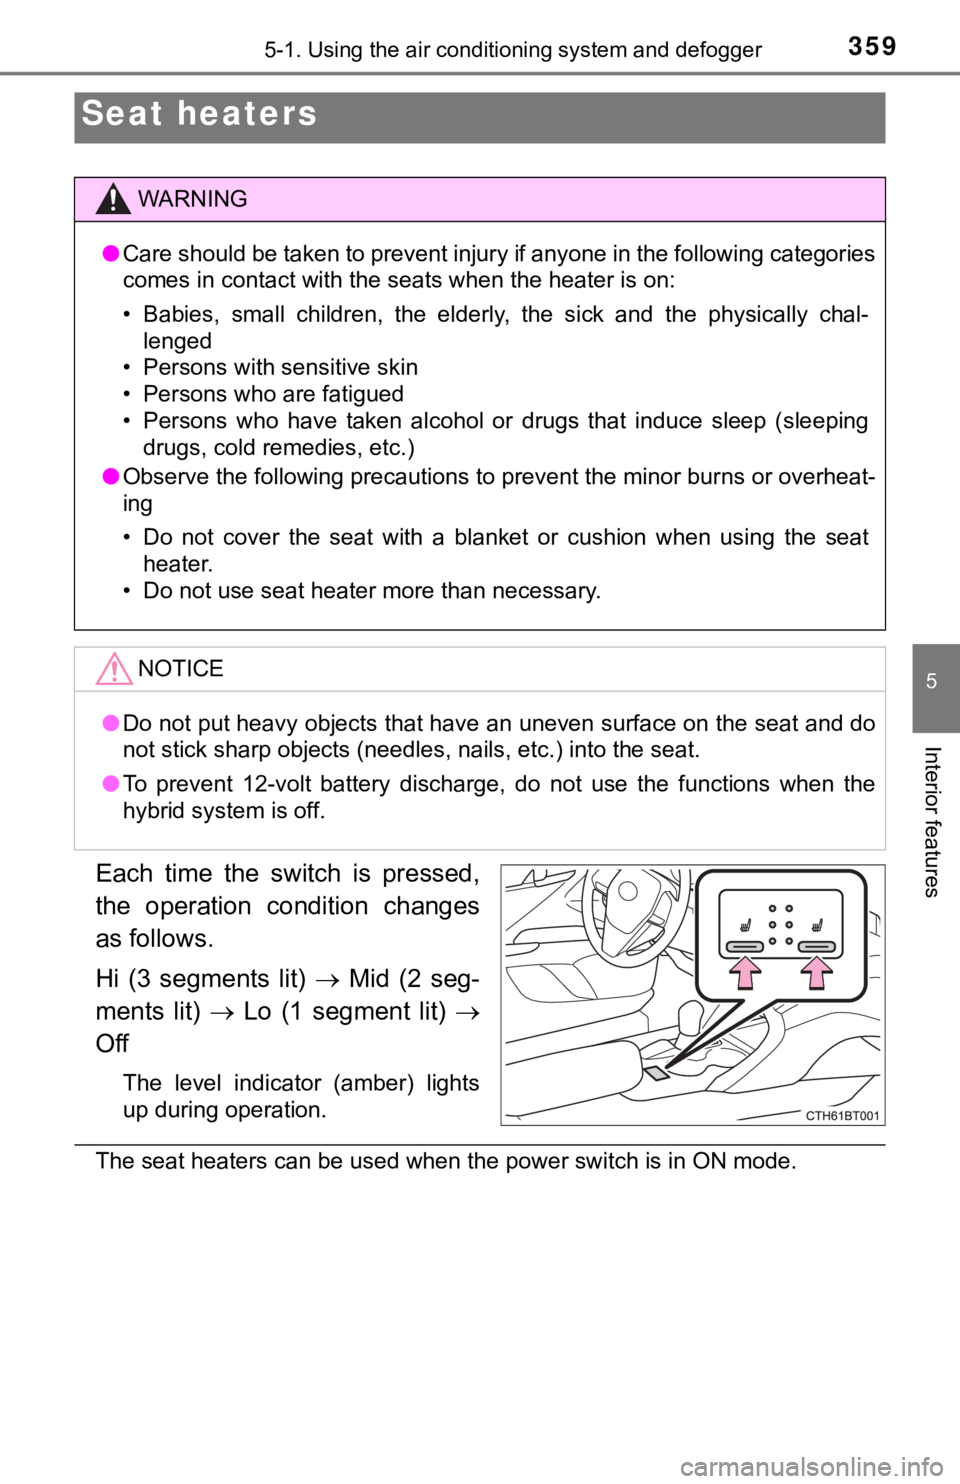
Each time the switch is pressed,
the operation condition changes
as follows.
Hi (3 segments lit) Mid (2 seg-
ments lit) Lo (1 segment lit)
Off
The level indicator (amber) lights
up during operation.
The seat heaters can be used when the power switch is in ON mod e.
Seat heaters
WARNING
●Care should be taken to prevent injury if anyone in the followi ng categories
comes in contact with the seats when the heater is on:
• Babies, small children, the elderly, the sick and the physical ly chal-
lenged
• Persons with sensitive skin
• Persons who are fatigued
• Persons who have taken alcohol or drugs that induce sleep (sle eping
drugs, cold remedies, etc.)
● Observe the following precautions to prevent the minor burns or overheat-
ing
• Do not cover the seat with a blanket or cushion when using the seat
heater.
• Do not use seat heater more than necessary.
NOTICE
● Do not put heavy objects that have an uneven surface on the sea t and do
not stick sharp objects (needles, nails, etc.) into the seat.
● To prevent 12-volt battery discharge, do not use the functions when the
hybrid system is off.
Page 377 of 592

3775-4. Other interior features
5
Interior features
■The wireless charger can be operated when
The power switch is in ACCESSORY or ON mode.
■ Portable devices that can be charged
●Portable devices compatible with the Qi wireless charging stand ard can be
charged by the wireless charger. However, compatibility with all devices
which meet the Qi wireless charging standard is not guaranteed.
● The wireless charger is designed to supply low power electricit y (5 W or
less) to a cellular phone, smartphone, or other portable device .
■ If a cover or accessory is attach ed to the portable device
Do not charge a portable device if a cover or accessory which i s not Qi com-
patible is attached. Depending on the type of cover and/or acce ssory
attached, it may not be possible to charge the portable device. If the portable
device is placed on the charging area and does not charge, remo ve the cover
and/or accessories.
■ If interference is heard in AM ra dio broadcasts while charging
Turn off the wireless charger and check if the noise is reduced. If noise is
reduced, press and hold the power supply switch of the wireless charger for 2
seconds. The frequency of the wireless charger is changed and n oise may be
reduced. When the frequency is changed, the operation indicator light will
blink (orange) 2 times.
■ Charging precautions
●If the electronic key cannot be detected in the cabin, charging cannot be
performed. When a door is opened and closed, charging may be te mporarily
suspended.
● While charging, the wireless charger and the portable device wi ll become
warm. This is not a malfunction.
If a portable device becomes warm while charging and charging s tops due
to the protection function of the portable device, wait until t he portable
device cools down and charge it again.
■ Sound generated during operation
When the power supply switch is turned on or while a portable d evice is being
identified, operation sounds may be heard. This is not a malfunction.
■ Cleaning the wireless charger
P. 398
Page 428 of 592

4286-3. Do-it-yourself maintenance
◆Registering ID codes
Vehicles without a tire inflation pressure display function
Every tire pressure warning valve and transmitter has a unique ID
code. In addition to the set of tire pressure warning system se nsor
ID codes initially registered to the vehicle, a second set of ID codes
can be registered.
A second set of tire pressure warning system sensor ID codes ca n
be registered at your Toyota dealer. When 2 sets of ID codes ha ve
been registered, either ID code set can be selected.
Vehicles with a tire inflation pressure display function
Every tire pressure warning valve and transmitter has a unique ID
code. When replacing a tire pressure warning valve and transmit ter,
it is necessary to reg ister the ID codes.
The ID codes can be registered on (4.2-inch display) or (7-
inch display) of the multi-information display.
■Changing the available set of ID codes (vehicles without a tire
inflation pressure display function)
When 2 sets of ID codes are reg istered, the corresponding ID code
set for the installed wheels can be selected on (4.2-inch disp lay)
or (7-inch display) of the multi-information display. It is no t nec-
essary to reregister the ID codes each time the wheels are
changed.
For information regarding changing the registered ID codes for an
ID code set, contact your Toyota dealer.
■How to register the ID codes (vehicles with a tire inflation pr es-
sure display function)
Park the vehicle in a safe place, wait for approximately 20 min -
utes, and then start t he hybrid system. (P. 210)
Select (4.2-inch display) or (7-inch display) on the multi-
information display using the meter control switches on the ste er-
ing wheel. ( P. 111, 125)
4.2-inch display: Select “Vehi cle Settings” and then press .
7-inch display: Select and then press and hold .
Select “TPWS” and then press .
1
2
3
4
Page 429 of 592

4296-3. Do-it-yourself maintenance
6
Maintenance and care
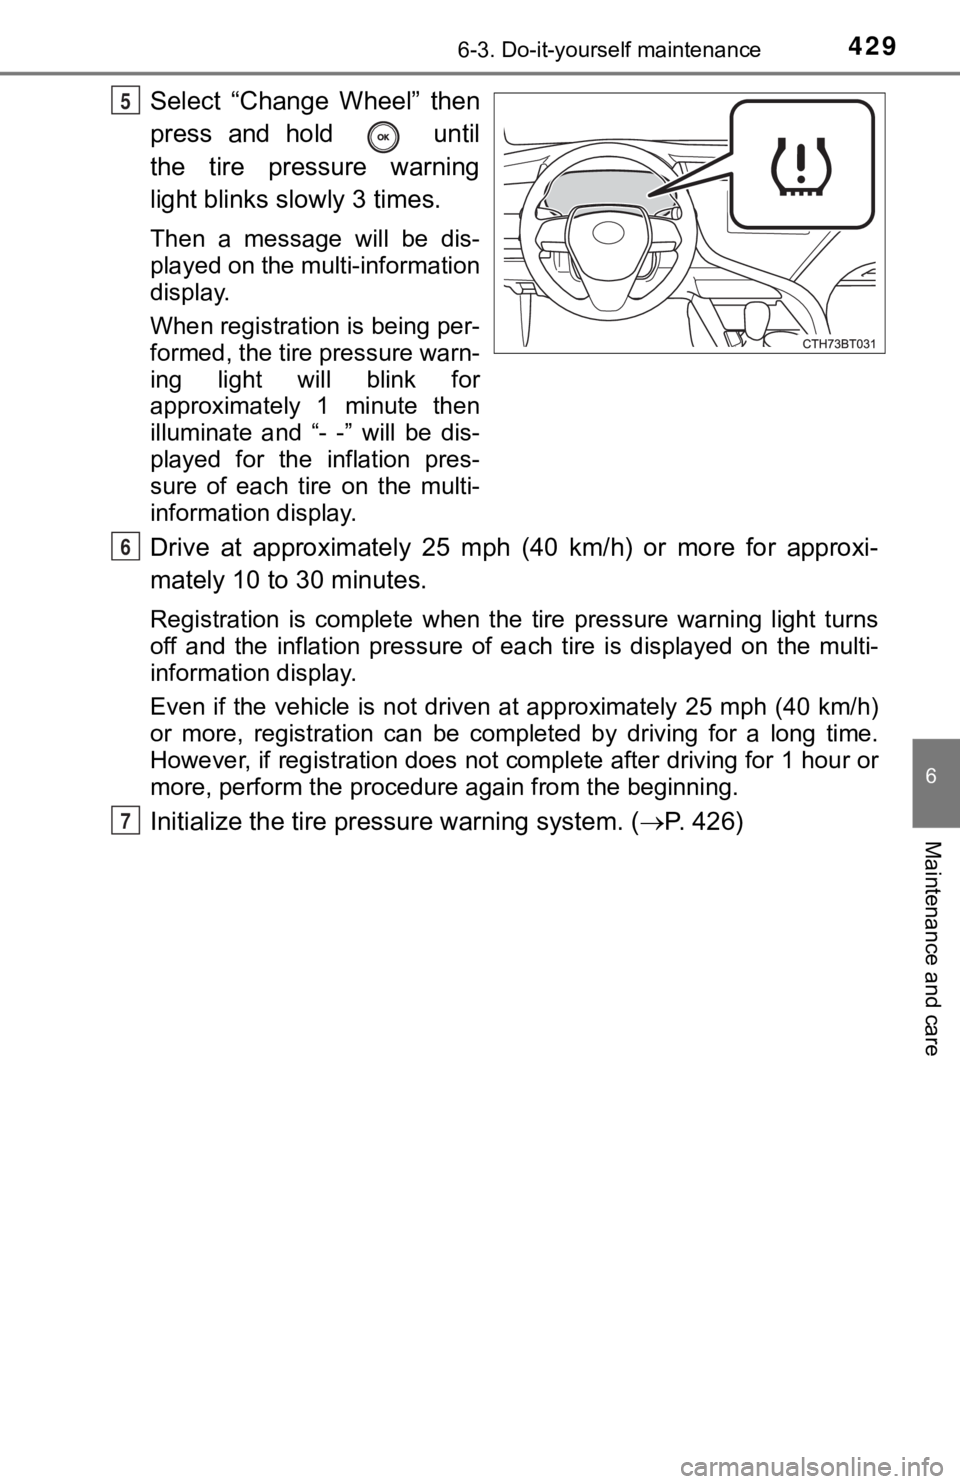
Select “Change Wheel” then
press and hold until
the tire pressure warning
light blinks slowly 3 times.
Then a message will be dis-
played on the multi-information
display.
When registration is being per-
formed, the tire pressure warn-
ing light will blink for
approximately 1 minute then
illuminate and “- -” will be dis-
played for the inflation pres-
sure of each tire on the multi-
information display.
Drive at approximately 25 mph (40 km/h) or more for approxi-
mately 10 to 30 minutes.
Registration is complete when the tire pressure warning light turns
off and the inflation pressure of each tire is displayed on the multi-
information display.
Even if the vehicle is not driven at approximately 25 mph (40 k m/h)
or more, registration can be completed by driving for a long ti me.
However, if registration does not complete after driving for 1 hour or
more, perform t he procedure again from the beginning.
Initialize the tire pressure warning system. ( P. 426)
5
6
7