Page 59 of 224

Starting and Powering
Off
Starting When you open a door, Model X powers on
the instrument panel and touchscreen and you
can operate all controls.
To drive Model X:
1. PRESS THE BRAKE PEDAL - Model X
powers on and is ready to drive.
2. SELECT A GEAR - Move the gear lever all
the way down for Drive and all the way up
for Reverse. See Shifting Gears on page
60.
Note: If the PIN to Drive feature is enabled
(see PIN to Drive on page 153), you must also
enter a valid PIN on the touchscreen before
you can drive Model X.
Note: If Passive Entry is off and you do not
press the brake pedal to start Model X within
approximately five minutes, a message
displays on the instrument panel and you must
use the key to lock then unlock Model X again
before starting the vehicle.
Everything you need to know when driving
Model X displays on the instrument panel.
Key Not Inside
If Model X does not detect a key when you
press the brake, the instrument panel displays
a message telling you that a key is not inside.
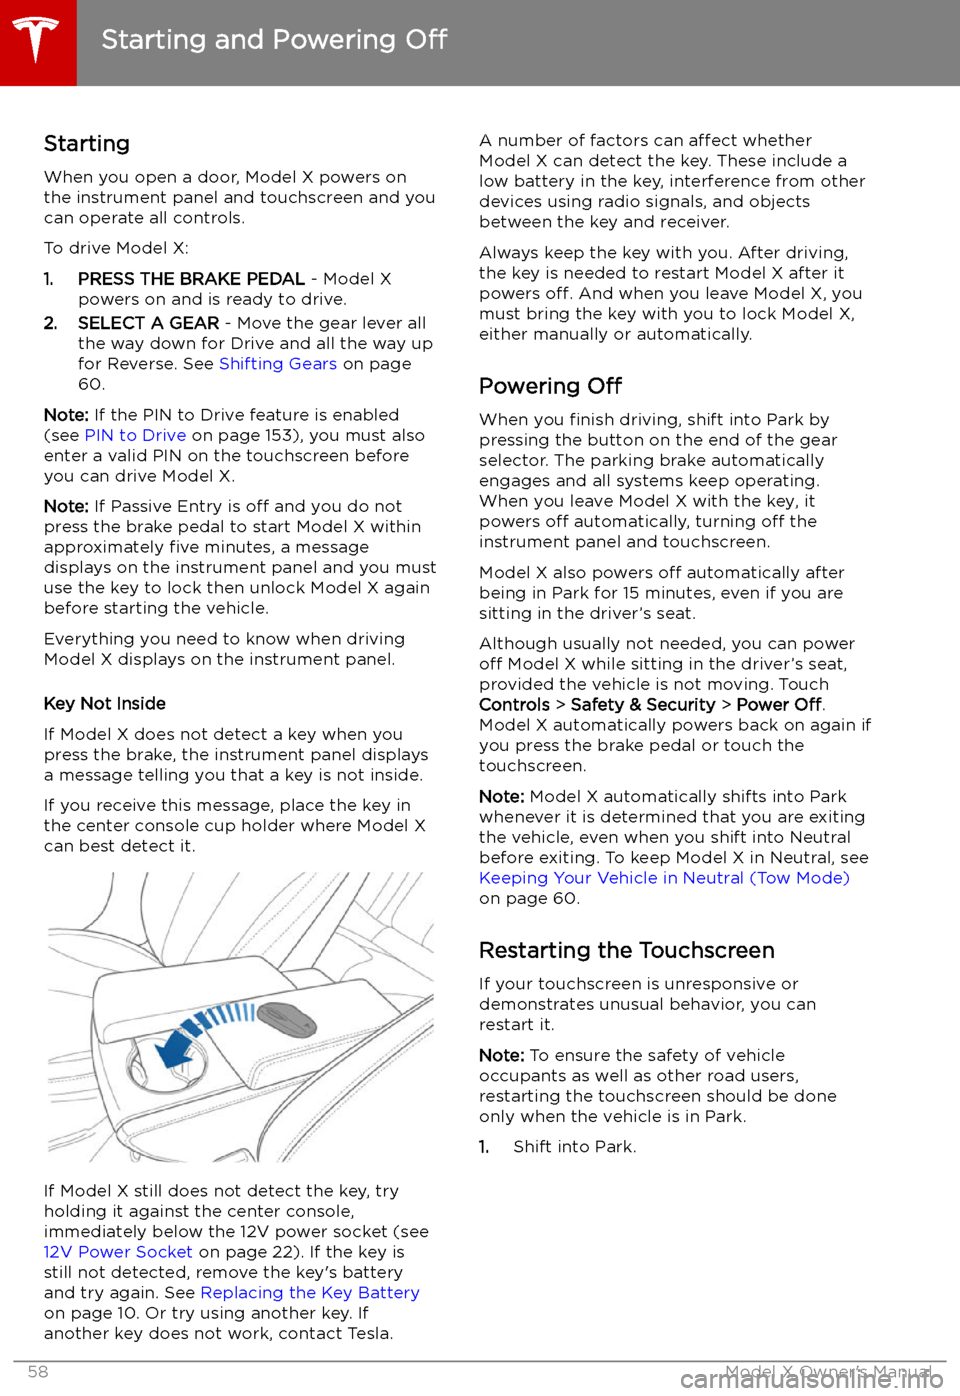
If you receive this message, place the key in
the center console cup holder where Model X
can best detect it.
If Model X still does not detect the key, try
holding it against the center console,
immediately below the 12V power socket (see
12V Power Socket on page 22). If the key is
still not detected, remove the key
Page 96 of 224

8.Remove the key and store it in a safe
place (preferably inside the vehicle).
Note: The key can be removed only if the
hitch is locked. This indicates a proper
connection. Do not use the hitch if the key
is not removed.
Note: Tesla recommends making a note of
the key code. You need this code if you lose the keys and need to order areplacement.
9. Close the dust cover to prevent dirt and
debris from entering the lock. For newer
version with push clips, reattach the dust
cover, snap it in place and open the push
clips before pushing them in.
Note: To maintain the hitch, regularly grease
its surfaces with non-resinous grease.
Disconnecting the Tow Hitch After towing, remove the hitch:
1. Insert the key and turn to align the top of
the key with the “unlocked” position.
2. While firmly holding the bottom of the
hitch (to prevent it from dropping to the
ground), pull the locking cylinder out
approximately 0.5 cm, and turn it
clockwise until the red marking on the
locking cylinder aligns with the white dot.
At this point, the locking cylinder is locked
in the "open" and the hitch drops out of
the housing.
Warning: Be careful when turning the
locking cylinder. If it does not lock
into the “Open Position”, it
automatically retracts into its original
“closed" position and can pinch your fingers.
3. Reinstall the dust cover on the hitch
housing to prevent dirt from accumulating
inside the housing.
4. Close the dust cover on the hitch
Page 154 of 224
Security Settings
About the Security System
If Model X does not detect a key nearby and a
locked door or trunk is opened, an alarm sounds and the headlights and turn signals
Page 165 of 224
Charging Instructions
Opening the Charge Port The charge port is located on the left side of
Model X, behind a door that is part of the rear
tail light assembly. Before charging, park
Model X to ensure that the charge cable easily reaches the charge port.
With Model X unlocked (or a recognized key is
within range) and in Park, press and release
the button on the Tesla charge cable to open the charge port door.
You can also open the charge port door using
any of these methods:
Page 166 of 224

If the charge port light turns red while
charging, a fault is detected. Check the instrument panel or touchscreen for a
message describing the fault. A fault can
occur due to something as common as a power outage. If a power outage occurs,
charging resumes automatically when power
is restored.
Note: When charging, particularly at high
currents, the refrigerant compressor and fan
operate as needed to keep the Battery cool.
Therefore, it is normal to hear sounds during charging.
Note: Air conditioning performance is
generally not affected by charging. However,
under certain circumstances (for example, you
are charging at high currents during a
particularly warm day), the air coming from
the vents may not be as cool as expected and
a message displays on the instrument panel.
This is normal behavior and ensures that the Battery stays within an optimum temperature
range while charging to support longevity and
optimum performance.Warning: Never spray liquid at a high
velocity (for example, if using a pressure
washer) towards the charge port while
charging. Failure to follow these
instructions can result in serious injury or
damage to the vehicle, charging
equipment, or property.
Stopping Charging
Stop charging at any time by disconnecting
the charge cable or touching Stop Charging
on the touchscreen.
Note: To prevent unauthorized unplugging of
the charge cable, the charge cable latch remains locked and Model X must be unlockedor able to recognize your key before you can
disconnect the charge cable.
To disconnect the charge cable:
1. Press and hold the button on the
connector handle to release the latch.
Alternatively, unlock the vehicle by
opening a door, using a key fob, or
touching Stop Charging on the
touchscreen. These methods unlock the
charge port as well.
2. Pull the connector from the charge port.
3. Push the charge port door closed.
Note: If Model X is equipped with a motorized
charge port door, it automatically closes shortly after you remove the charge cable.
Caution: Tesla strongly recommends
leaving Model X plugged in when not in use. This maintains the Battery at the
optimum level of charge.
Manually Releasing Charge Cable
If the usual methods for releasing a charge
cable from the charge port (using the charge
handle release button, touchscreen, or mobile
app) do not work, carefully follow these steps:
1. Ensure that Model X is not actively
charging by displaying the charging
screen on the touchscreen. If necessary,
touch Stop Charging .
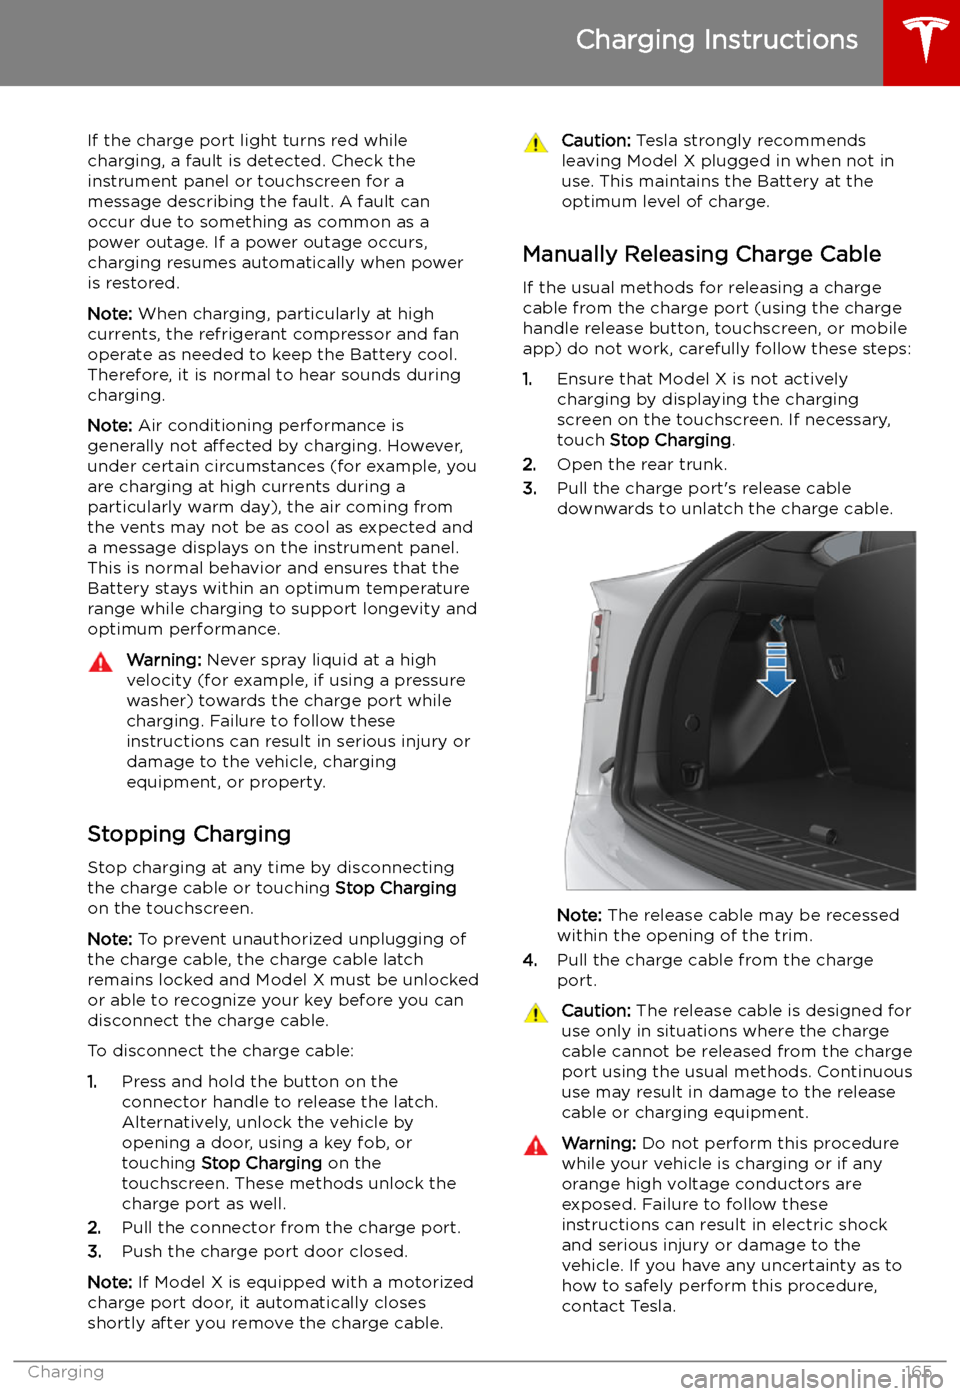
2. Open the rear trunk.
3. Pull the charge port
Page 213 of 224
Declarations of Conformity
Key and Passive Unlocking System
FCC Certification
Model NumberMfrGHzTested ForKey fob 1048598Tesla2.4USA
Canada
Per FCC ID 2AEIM-1048598, the device(s) listed above complies with Part 15 of the FCC rules.
Operation is subject to the following two conditions:
1. This device may not cause harmful interference, and
2. This device must accept any interference received, including interference that may cause
undesired operation.
Changes or modifications not expressly approved by Tesla could void your authority to operate
the equipment.
Compliance Label - Singapore
Model A-0749G11:
Model A-0749G01:
Declarations of Conformity
212Model X Owner
Page 216 of 224
Key and Passive Entry System
This device has been evaluated against the essential requirements of the 2014/53/EU Directive.Bulgarian�K �g�Z�k�l�h�y�s�_�l�h Tesla Inc. �^�_�d�e�Z�j�b�j�Z, �q�_ KEY FOB and PASSIVE ENTRTY SYSTEM
�h�l�]�h�\�Z�j�y �g�Z �k�t�s�_�k�l�\�_�g�b�l�_ �b�a�b�k�d�\�Z�g�b�y �b �^�j�m�]�b�l�_ �i�j�b�e�h�`�b�f�b �b�a�b�k�d�\�Z�g�b�y �g�Z �>�b�j�_�d�l�b�\�Z
2014/53/EC.CroatianOvime Tesla Inc. ”, izjavljuje da je ovaj KEY FOB and PASSIVE ENTRY SYSTEM je
u skladu s osnovnim zahtjevima i drugim relevantnim odredbama Direktive
2014/53/EU.CzechTesla Inc. t
Page 218 of 224

Index
A ABS (Anti-lock Braking System) 72
absolute speed limit 122
Acceleration settings 79
access panel, removing 183
accessoriesplugging into power socket 22
accessory carrier 87
adaptive headlights 63
Adaptive Suspension Damping 150
air circulation 136
air conditioning 134
air distribution 136
air filter 139
air suspension 150
air vents 139
airbag, front passenger, disabling 47
airbags 45
alarm 153
all-season tires 177
always connected, setting 82
Always Show Estimated Round Trip Energy 143
anti-lock braking (ABS) 72
audioplaying files 145
steering wheel buttons 53
volume control 145
Auto High Beam 63
Auto Lane Change 108
auto-raising suspension 150
automatic emergency braking 120
Autopark 113
autopilotblind spot warning 117
side collision warning 117
staying inside lane markings 117AutopilotAuto Lane Change 108
automatic emergency braking 119
Autopark 113
Autosteer 106
collision avoidance assist 119
forward collision warning 119
Navigate on Autopilot 109
overtake acceleration 100
overview 97
speed assist 122
speed limit warning 122
staying within speed limits 122
Summon 115
Traffic-Aware Cruise Control 100
Autopilot components 97
Autosteer 106
average range 82
B
backup camera 84battery (12V)complete discharge 162
specifications 196Battery (high voltage)care of 162
coolant 183
specifications 196
temperature limits 162
battery (key), replacing 10
bicycle carrier 87
blind spot warning 117
blind spot warning chime 117
Bluetoothdevices, playing audio files from 147
general information 148
phone, pairing and using 148
body repairs 186
body touch up 181
brakesautomatic in emergencies 120