Page 71 of 224
7.Pay attention to important alert messages that display here. If any alerts are in effect, you can
view information about them by touching the alert icon (exclamation mark) on the touchscreen
Page 74 of 224

Note: If regenerative braking is aggressively
slowing Model X (such as when your foot is
completely off the accelerator pedal at
highway speeds), the brake lights turn on to
alert others that you are slowing down.Warning: In snowy or icy conditions
Model X may experience traction loss
during regenerative braking, particularly
when in the Standard setting and/or not
using winter tires. Tesla recommends
using the Low setting (see To Set the
Regenerative Braking Level on page 73)
in snowy or icy conditions to help
maintain vehicle stability.
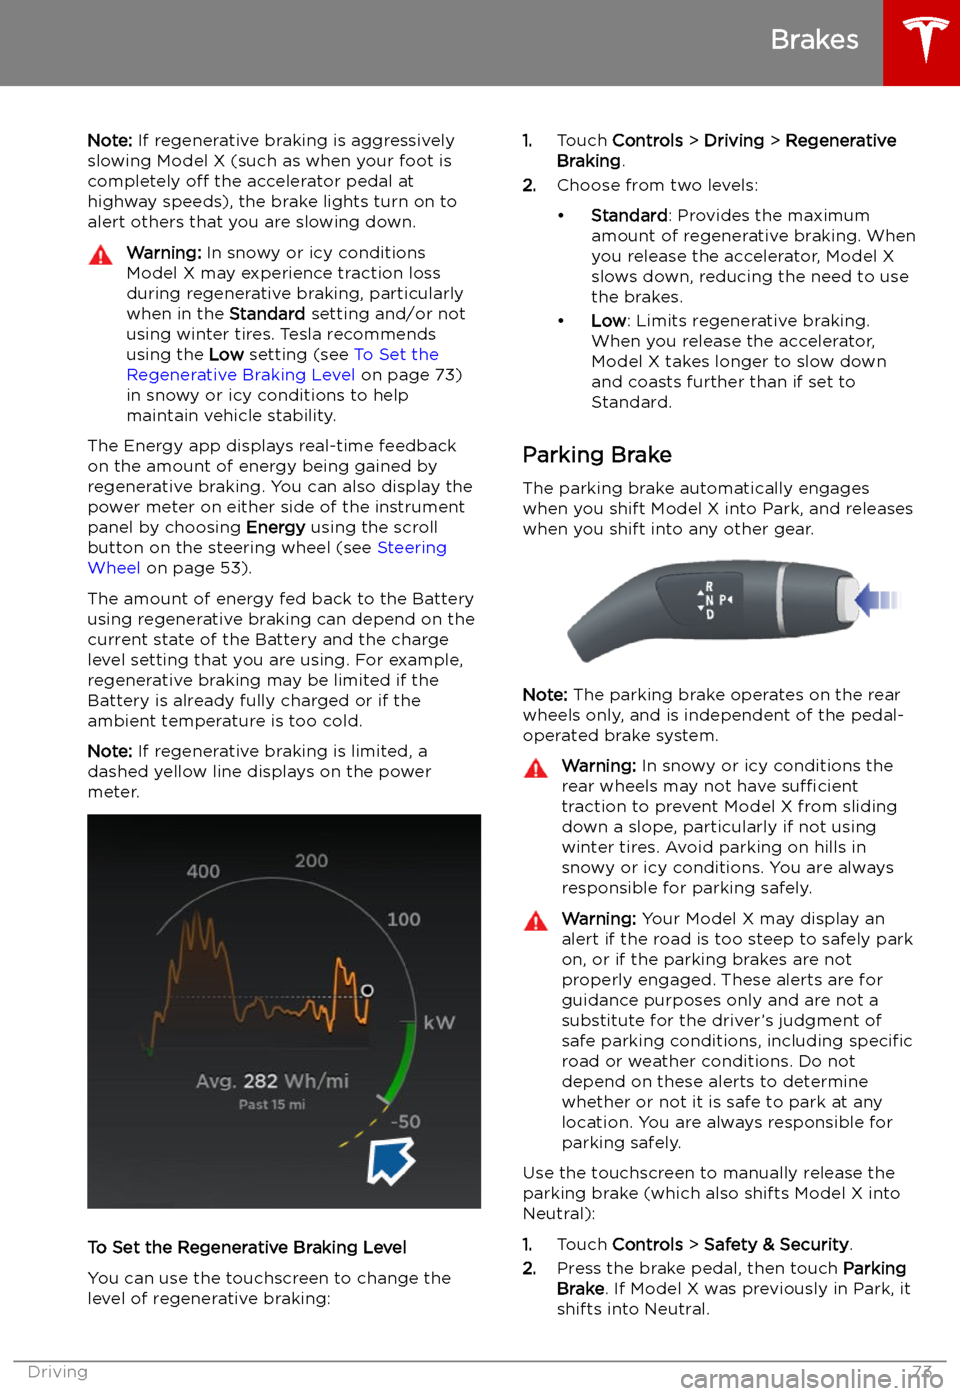
The Energy app displays real-time feedback
on the amount of energy being gained by
regenerative braking. You can also display the
power meter on either side of the instrument
panel by choosing Energy using the scroll
button on the steering wheel (see Steering
Wheel on page 53).
The amount of energy fed back to the Battery using regenerative braking can depend on thecurrent state of the Battery and the charge
level setting that you are using. For example,
regenerative braking may be limited if the Battery is already fully charged or if the
ambient temperature is too cold.
Note: If regenerative braking is limited, a
dashed yellow line displays on the power
meter.
To Set the Regenerative Braking Level
You can use the touchscreen to change the
level of regenerative braking:
1. Touch Controls > Driving > Regenerative
Braking .
2. Choose from two levels:
Page 75 of 224
When you use the touchscreen to
manually apply the parking brake,
the red parking brake indicator lights
up on the instrument panel .If the parking brake experiences an
electrical issue, the amber parking brake indicator lights up and a fault
message displays at the top of the
instrument panel.Caution: In the unlikely event that
Model X loses electrical power, you
cannot access the touchscreen and are
therefore unable to release the parking
brake. Contact Tesla.
Brakes
74Model X Owner
Page 77 of 224

Park Assist
How Park Assist Works
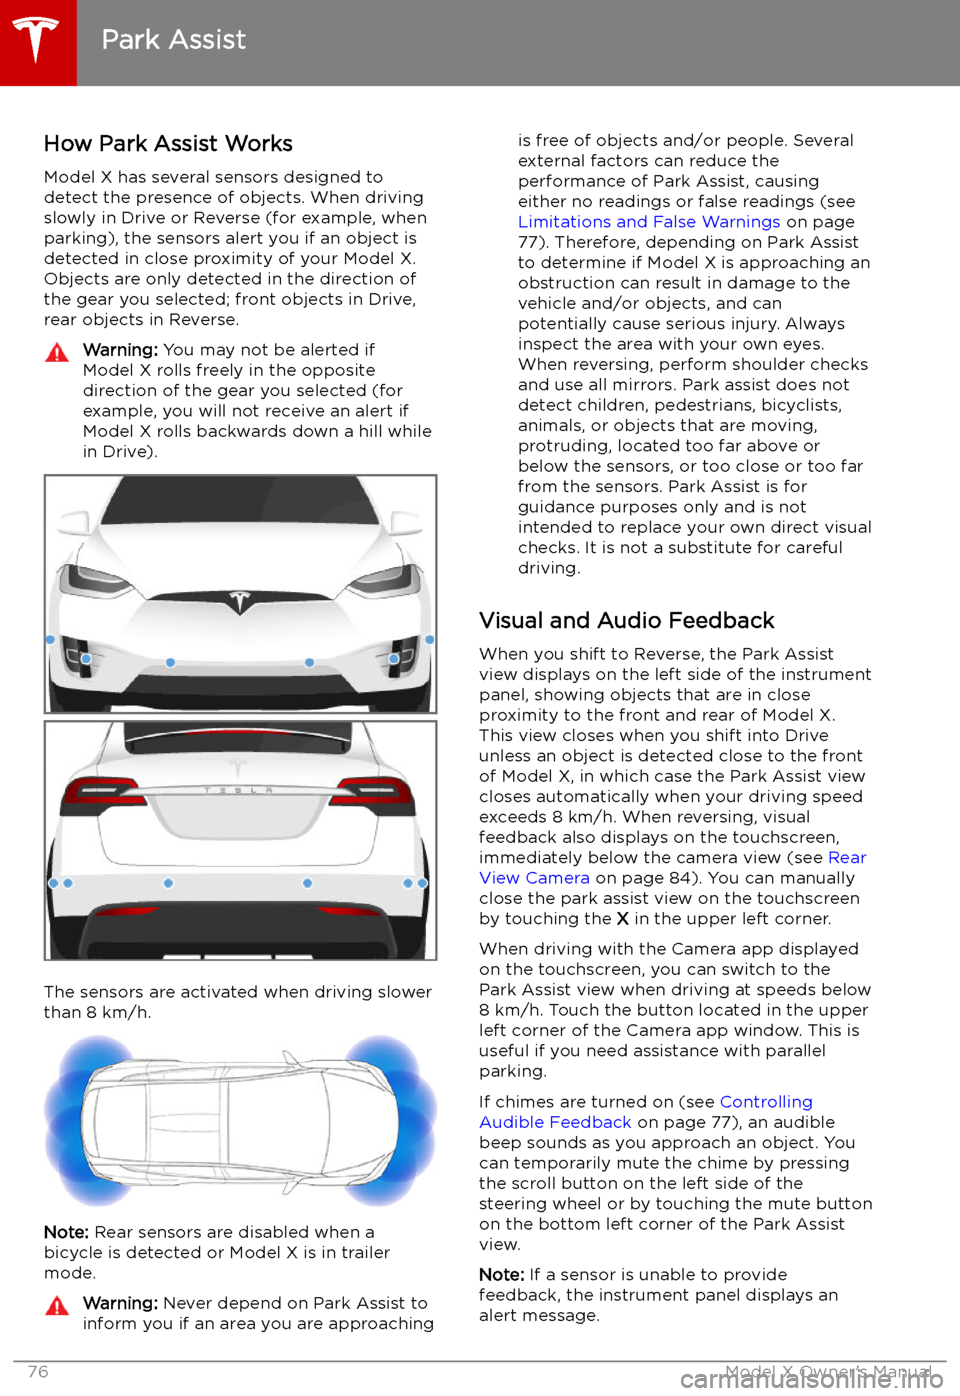
Model X has several sensors designed to
detect the presence of objects. When driving
slowly in Drive or Reverse (for example, when
parking), the sensors alert you if an object is
detected in close proximity of your Model X.
Objects are only detected in the direction of
the gear you selected; front objects in Drive,
rear objects in Reverse.
Warning: You may not be alerted if
Model X rolls freely in the opposite
direction of the gear you selected (for
example, you will not receive an alert if
Model X rolls backwards down a hill while
in Drive).
The sensors are activated when driving slower
than 8 km/h.
Note: Rear sensors are disabled when a
bicycle is detected or Model X is in trailer
mode.
Warning: Never depend on Park Assist to
inform you if an area you are approachingis free of objects and/or people. Several
external factors can reduce the
performance of Park Assist, causing
either no readings or false readings (see
Limitations and False Warnings on page
77). Therefore, depending on Park Assist
to determine if Model X is approaching an
obstruction can result in damage to the
vehicle and/or objects, and can
potentially cause serious injury. Always
inspect the area with your own eyes.
When reversing, perform shoulder checks and use all mirrors. Park assist does not
detect children, pedestrians, bicyclists,
animals, or objects that are moving, protruding, located too far above or
below the sensors, or too close or too far
from the sensors. Park Assist is for
guidance purposes only and is not intended to replace your own direct visual
checks. It is not a substitute for careful
driving.
Visual and Audio Feedback
When you shift to Reverse, the Park Assist
view displays on the left side of the instrument
panel, showing objects that are in close
proximity to the front and rear of Model X.
This view closes when you shift into Drive
unless an object is detected close to the front
of Model X, in which case the Park Assist view
closes automatically when your driving speed
exceeds 8 km/h. When reversing, visual
feedback also displays on the touchscreen, immediately below the camera view (see Rear
View Camera on page 84). You can manually
close the park assist view on the touchscreen by touching the X in the upper left corner.
When driving with the Camera app displayed on the touchscreen, you can switch to the
Park Assist view when driving at speeds below
8 km/h. Touch the button located in the upper
left corner of the Camera app window. This is
useful if you need assistance with parallel parking.
If chimes are turned on (see Controlling
Audible Feedback on page 77), an audible
beep sounds as you approach an object. You
can temporarily mute the chime by pressing
the scroll button on the left side of the
steering wheel or by touching the mute button on the bottom left corner of the Park Assist
view.
Note: If a sensor is unable to provide
feedback, the instrument panel displays an
alert message.
Park Assist
76Model X Owner
Page 82 of 224
Trip Information
Displaying Trip Information Trip information displays on the touchscreen
when you touch Controls > Trips . For the
current trip, you can display distance, duration
and average energy usage. You can also show
distance and total and average energy used since your last charge and for additional trips.
To name or rename a trip, touch the trip
Page 85 of 224

Rear View Camera
Camera Location
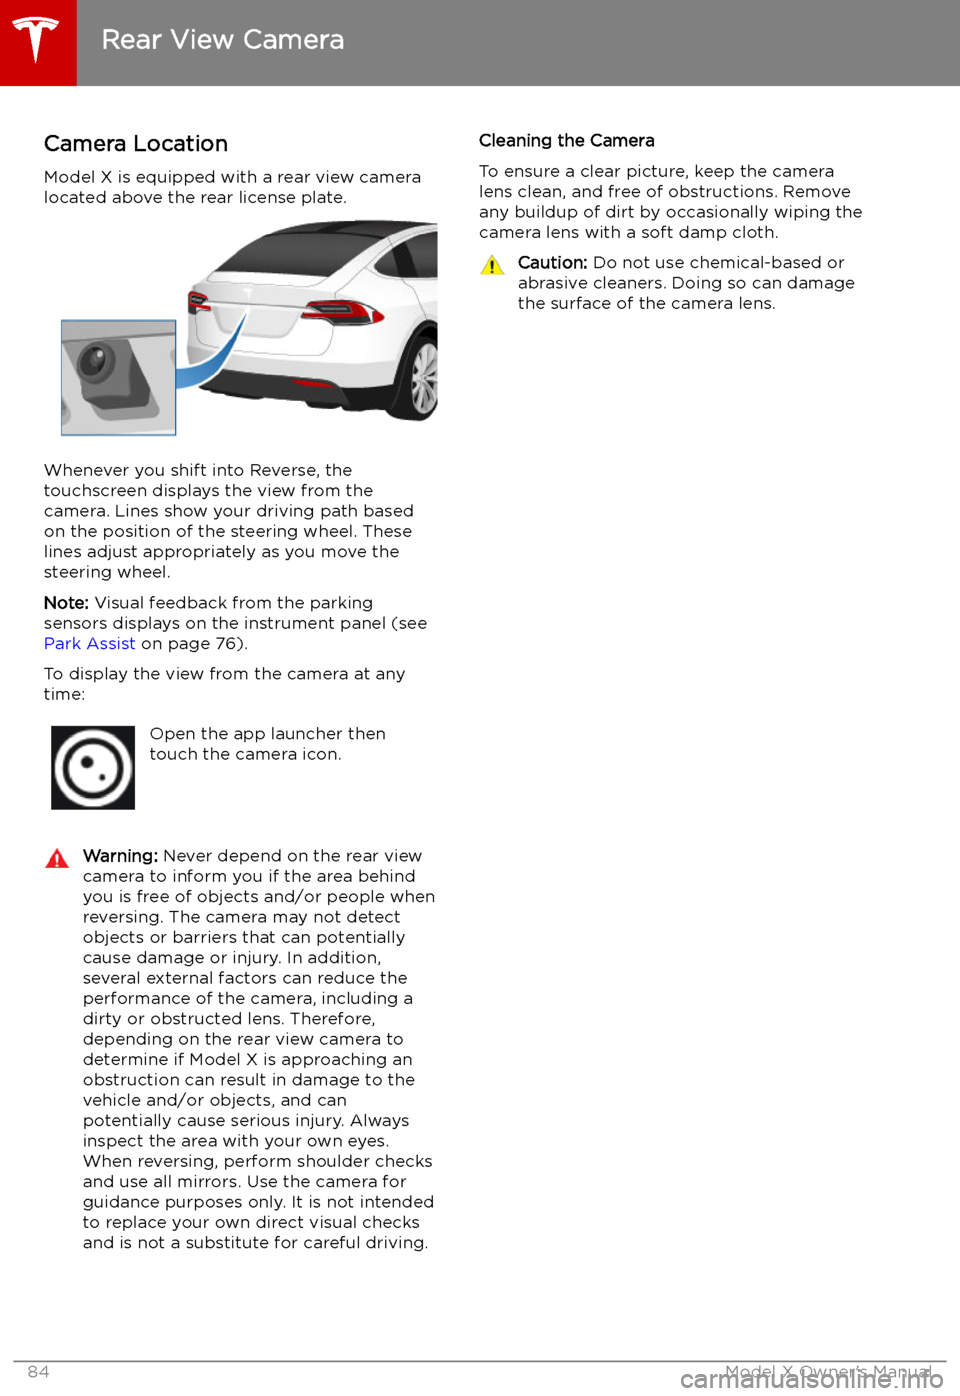
Model X is equipped with a rear view camera
located above the rear license plate.
Whenever you shift into Reverse, the
touchscreen displays the view from the
camera. Lines show your driving path based
on the position of the steering wheel. These
lines adjust appropriately as you move the
steering wheel.
Note: Visual feedback from the parking
sensors displays on the instrument panel (see
Park Assist on page 76).
To display the view from the camera at any
time:
Open the app launcher then
touch the camera icon.Warning: Never depend on the rear view
camera to inform you if the area behind
you is free of objects and/or people when
reversing. The camera may not detect
objects or barriers that can potentially
cause damage or injury. In addition, several external factors can reduce the
performance of the camera, including a
dirty or obstructed lens. Therefore,
depending on the rear view camera to
determine if Model X is approaching an
obstruction can result in damage to the vehicle and/or objects, and can
potentially cause serious injury. Always
inspect the area with your own eyes.
When reversing, perform shoulder checks and use all mirrors. Use the camera forguidance purposes only. It is not intendedto replace your own direct visual checks
and is not a substitute for careful driving.Cleaning the Camera
To ensure a clear picture, keep the camera
lens clean, and free of obstructions. Remove
any buildup of dirt by occasionally wiping the camera lens with a soft damp cloth.Caution: Do not use chemical-based or
abrasive cleaners. Doing so can damage
the surface of the camera lens.
Rear View Camera
84Model X Owner
Page 123 of 224

Speed Assist
How Speed Assist Works
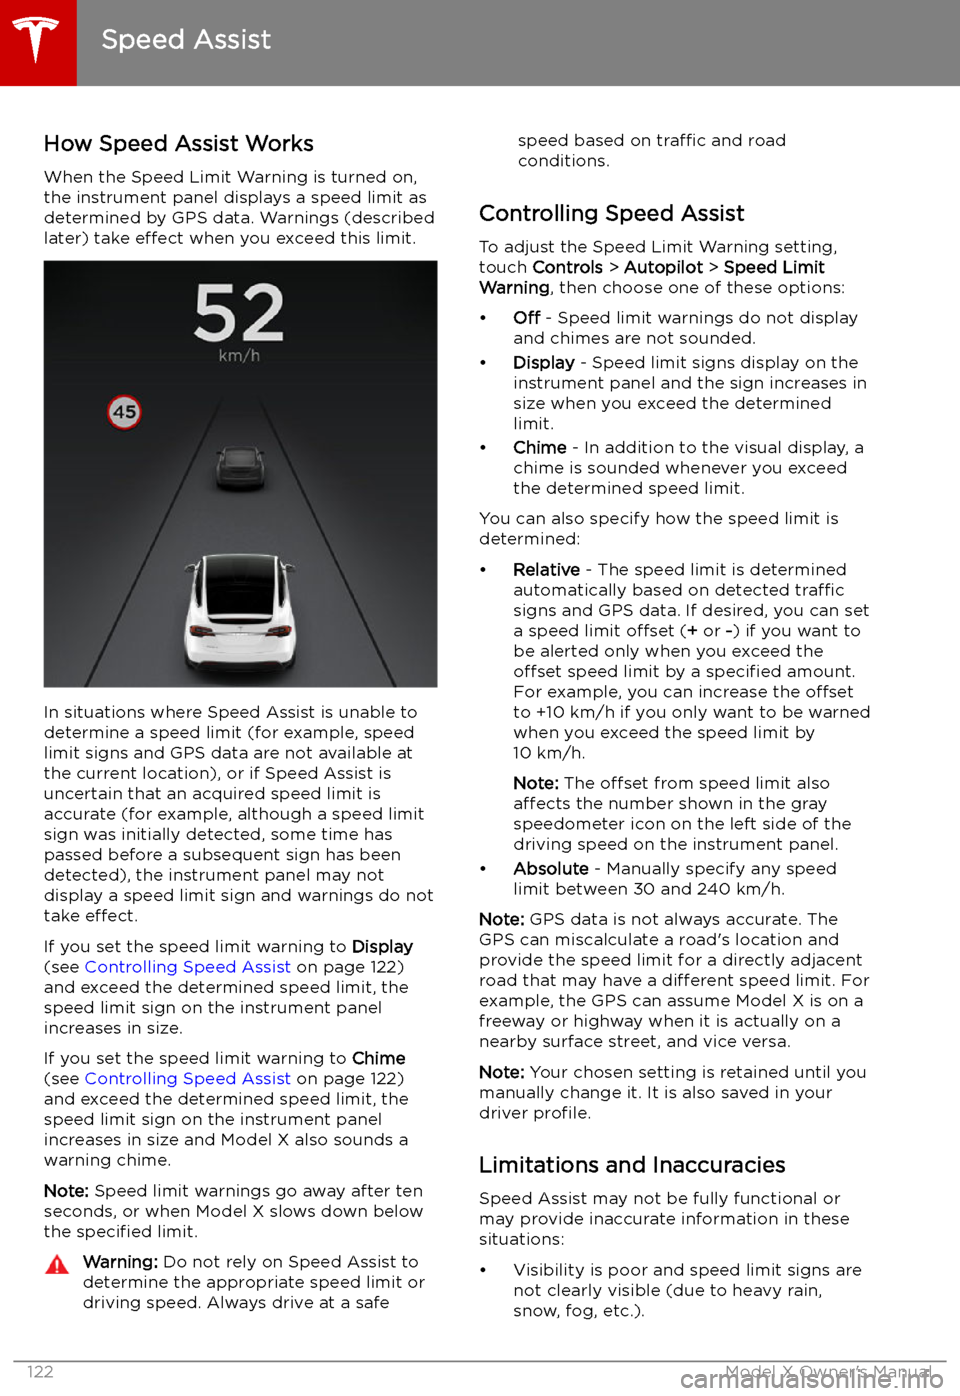
When the Speed Limit Warning is turned on,
the instrument panel displays a speed limit as
determined by GPS data. Warnings (described
later) take effect when you exceed this limit.
In situations where Speed Assist is unable to
determine a speed limit (for example, speed
limit signs and GPS data are not available at
the current location), or if Speed Assist is
uncertain that an acquired speed limit is
accurate (for example, although a speed limit sign was initially detected, some time has
passed before a subsequent sign has been
detected), the instrument panel may not
display a speed limit sign and warnings do not take effect.
If you set the speed limit warning to Display
(see Controlling Speed Assist on page 122)
and exceed the determined speed limit, the
speed limit sign on the instrument panel
increases in size.
If you set the speed limit warning to Chime
(see Controlling Speed Assist on page 122)
and exceed the determined speed limit, the speed limit sign on the instrument panelincreases in size and Model X also sounds a
warning chime.
Note: Speed limit warnings go away after ten
seconds, or when Model X slows down below
the specified limit.
Warning:
Do not rely on Speed Assist to
determine the appropriate speed limit or driving speed. Always drive at a safespeed based on traffic and road
conditions.
Controlling Speed Assist
To adjust the Speed Limit Warning setting,
touch Controls > Autopilot > Speed Limit
Warning , then choose one of these options:
Page 125 of 224
Using the Touchscreen
Controls
Overview
Touch Controls on the bottom corner of the touchscreen to control features and
customize Model X to suit your preferences. The Controls window appears over the map. Touch an option on the left side of the window to display the
associated controls and settings. By default, Quick Controls displays for quicker
access to commonly used settings.To close the Controls window, touch the X in the top left corner, touch Controls
again, or swipe down on the window.When an information icon displays beside a specific setting, touch it to display a
popup that provides helpful details about the associated setting.
Note: The following illustrations are for demonstration purposes only. Depending on vehicle
options, software version and market region, the options available may be different.
Controls
124Model X Owner