2019 TESLA MODEL X display
[x] Cancel search: displayPage 7 of 224
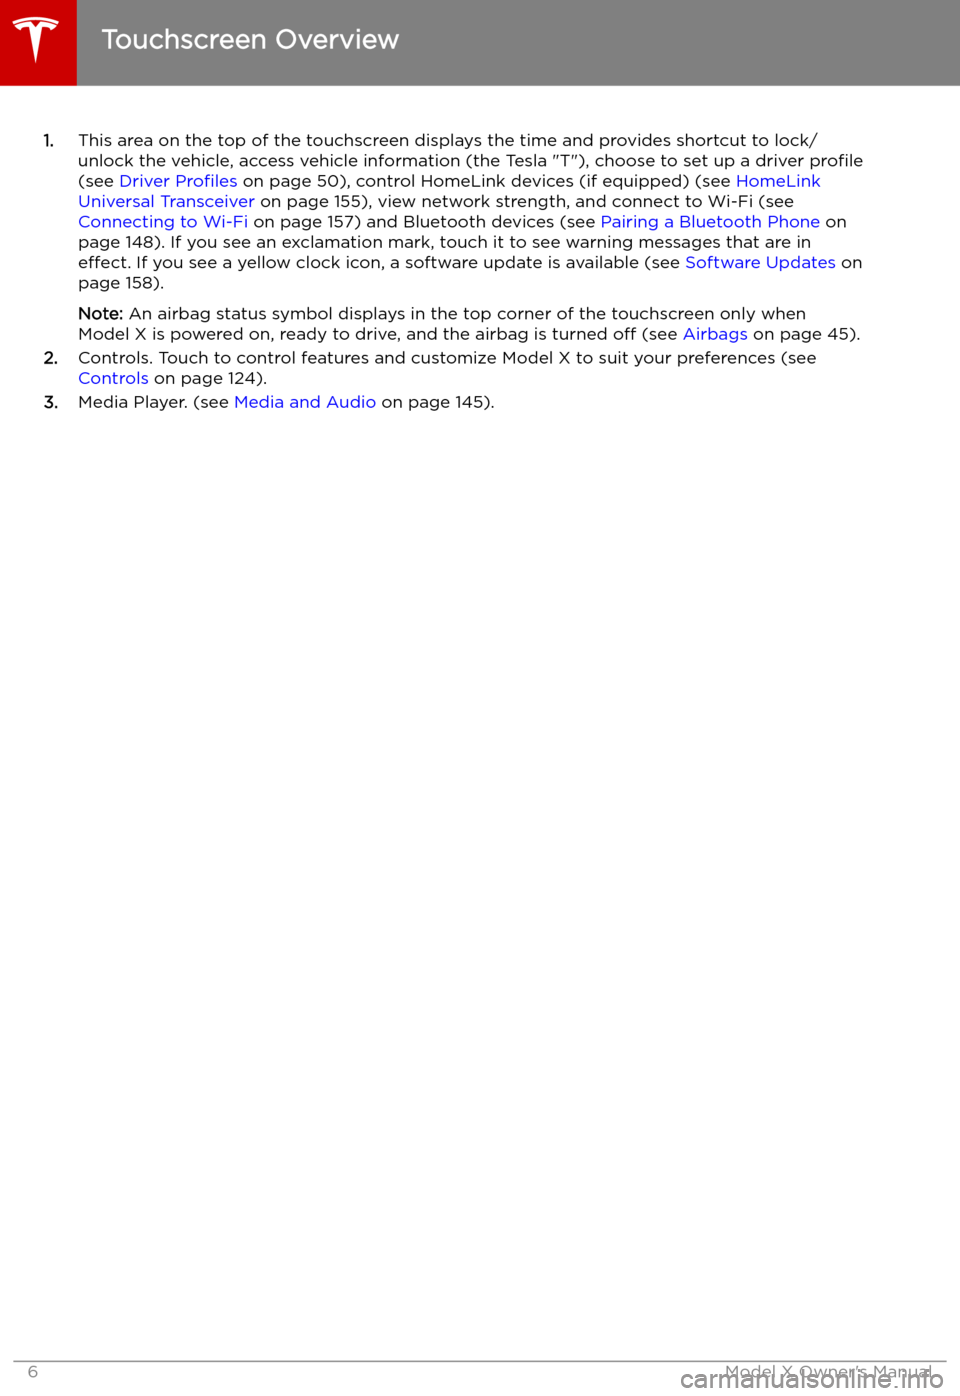
1.This area on the top of the touchscreen displays the time and provides shortcut to lock/
unlock the vehicle, access vehicle information (the Tesla "T"), choose to set up a driver profile
(see Driver Profiles on page 50), control HomeLink devices (if equipped) (see HomeLink
Universal Transceiver on page 155), view network strength, and connect to Wi-Fi (see
Connecting to Wi-Fi on page 157) and Bluetooth devices (see Pairing a Bluetooth Phone on
page 148). If you see an exclamation mark, touch it to see warning messages that are in effect. If you see a yellow clock icon, a software update is available (see Software Updates on
page 158).
Note: An airbag status symbol displays in the top corner of the touchscreen only when
Model X is powered on, ready to drive, and the airbag is turned off (see Airbags on page 45).
2. Controls. Touch to control features and customize Model X to suit your preferences (see
Controls on page 124).
3. Media Player. (see Media and Audio on page 145).
Touchscreen Overview
6Model X Owner
Page 8 of 224
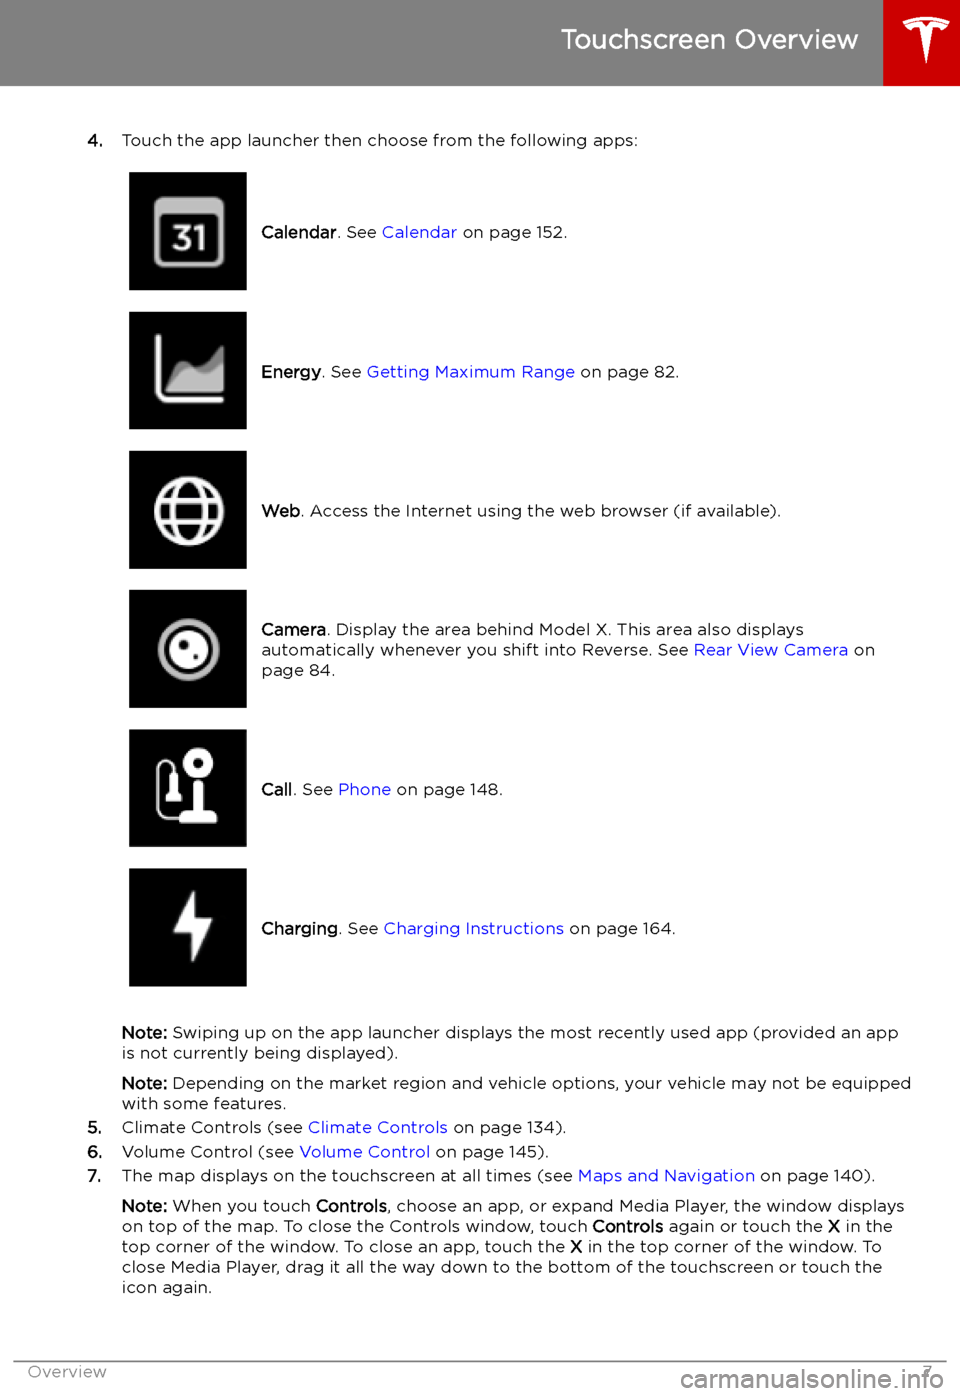
4.Touch the app launcher then choose from the following apps:
Calendar . See Calendar on page 152.Energy. See Getting Maximum Range on page 82.Web. Access the Internet using the web browser (if available).Camera . Display the area behind Model X. This area also displays
automatically whenever you shift into Reverse. See Rear View Camera on
page 84.Call . See Phone on page 148.Charging . See Charging Instructions on page 164.
Note: Swiping up on the app launcher displays the most recently used app (provided an app
is not currently being displayed).
Note: Depending on the market region and vehicle options, your vehicle may not be equipped
with some features.
5. Climate Controls (see Climate Controls on page 134).
6. Volume Control (see Volume Control on page 145).
7. The map displays on the touchscreen at all times (see Maps and Navigation on page 140).
Note: When you touch Controls, choose an app, or expand Media Player, the window displays
on top of the map. To close the Controls window, touch Controls again or touch the X in the
top corner of the window. To close an app, touch the X in the top corner of the window. To
close Media Player, drag it all the way down to the bottom of the touchscreen or touch the icon again.
Touchscreen Overview
Overview7
Page 9 of 224

The Tesla "T"
Touch the Tesla "T" at the top center of the touchscreen to display:
Page 15 of 224
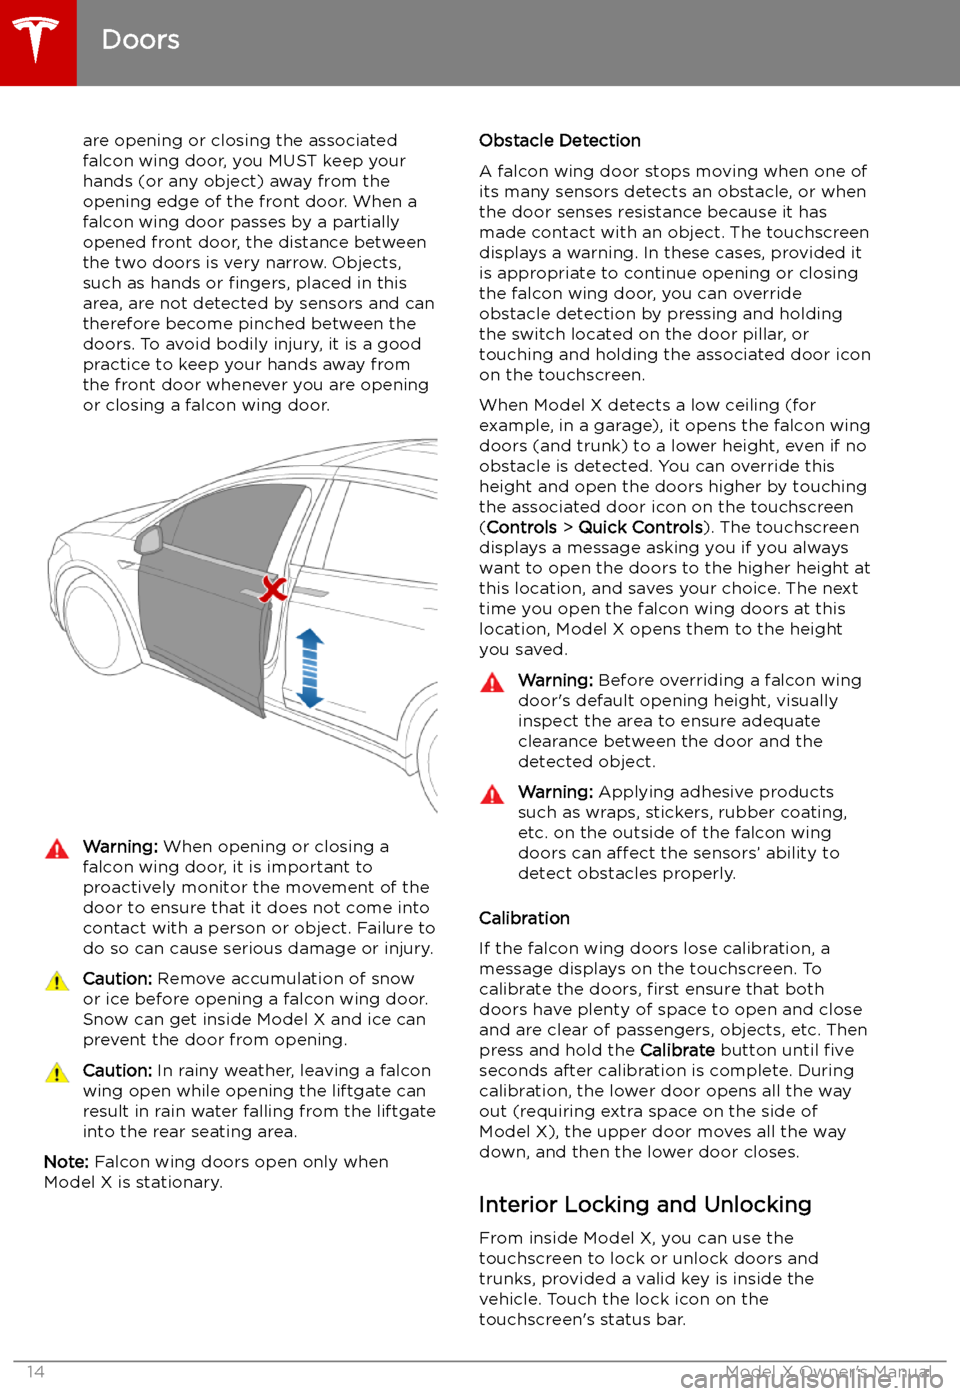
are opening or closing the associatedfalcon wing door, you MUST keep your
hands (or any object) away from the opening edge of the front door. When a falcon wing door passes by a partially
opened front door, the distance between
the two doors is very narrow. Objects,
such as hands or fingers, placed in this
area, are not detected by sensors and can
therefore become pinched between the
doors. To avoid bodily injury, it is a good practice to keep your hands away from
the front door whenever you are opening
or closing a falcon wing door.Warning: When opening or closing a
falcon wing door, it is important to
proactively monitor the movement of the door to ensure that it does not come into
contact with a person or object. Failure to
do so can cause serious damage or injury.Caution: Remove accumulation of snow
or ice before opening a falcon wing door.
Snow can get inside Model X and ice can
prevent the door from opening.Caution: In rainy weather, leaving a falcon
wing open while opening the liftgate can
result in rain water falling from the liftgate
into the rear seating area.
Note: Falcon wing doors open only when
Model X is stationary.
Obstacle Detection
A falcon wing door stops moving when one of
its many sensors detects an obstacle, or when
the door senses resistance because it has made contact with an object. The touchscreen
displays a warning. In these cases, provided it
is appropriate to continue opening or closing
the falcon wing door, you can override obstacle detection by pressing and holding
the switch located on the door pillar, or
touching and holding the associated door icon on the touchscreen.
When Model X detects a low ceiling (for
example, in a garage), it opens the falcon wing
doors (and trunk) to a lower height, even if no
obstacle is detected. You can override this height and open the doors higher by touching
the associated door icon on the touchscreen
( Controls > Quick Controls ). The touchscreen
displays a message asking you if you always
want to open the doors to the higher height at
this location, and saves your choice. The next
time you open the falcon wing doors at this
location, Model X opens them to the height you saved.Warning: Before overriding a falcon wing
door
Page 21 of 224
Front Trunk
Opening
To open the front trunk:
1. Ensure that the area around the hood is
free of obstacles.
2. Touch Controls > Quick Controls > FRONT
TRUNK on the touchscreen, touch the
front trunk button on the mobile app, or
double-click the front trunk button on the key.
3. Pull the hood up.
When a door or trunk/liftgate is
open, the instrument panel displays
the Door Open indicator light. The
image of your Model X on the
touchscreen also displays the open front trunk.Warning: Before opening or closing the
hood, it is important to check that the area around the hood is free of obstacles
(people and objects). Failure to do so
may result in damage or serious injury.
Note: The front trunk locks whenever closed
and you lock Model X using either the
touchscreen or externally using the key or
mobile app, you leave Model X carrying your key (if Walk-Away Locking on page 15 is
turned on), or when Valet mode is active (see Valet Mode on page 51).
Closing
The Model X hood is not heavy enough to
latch under its own weight and applying
pressure on the front edge or center of the
hood can cause damage.
To properly close the hood:
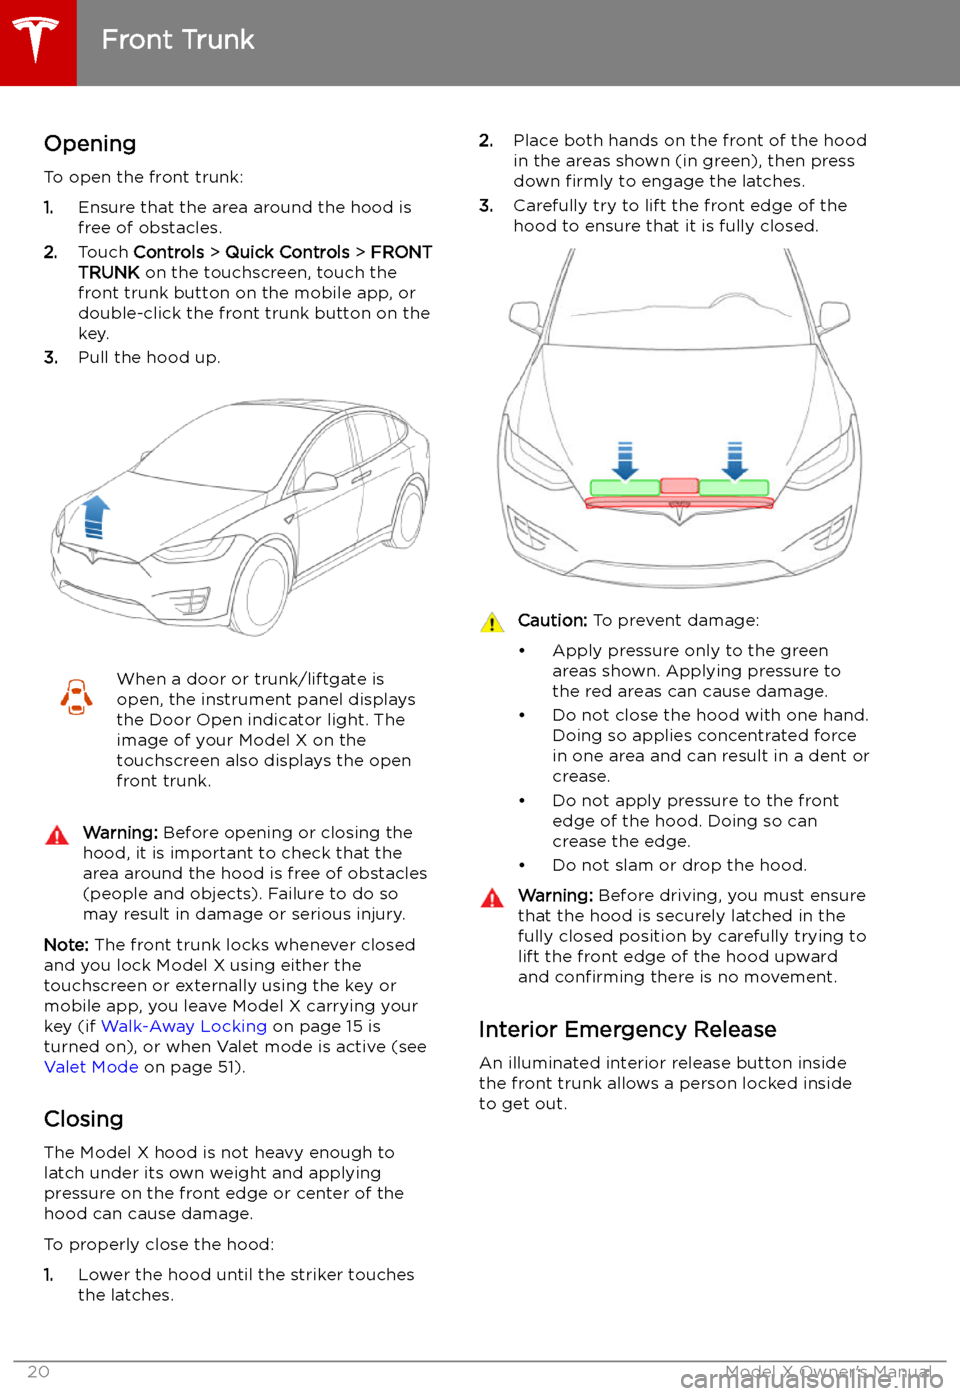
1. Lower the hood until the striker touches
the latches.
2. Place both hands on the front of the hood
in the areas shown (in green), then press
down firmly to engage the latches.
3. Carefully try to lift the front edge of the
hood to ensure that it is fully closed.Caution: To prevent damage:
Page 29 of 224

1.Move seat forward/backward (up/down
on the control) and adjust the backrest
(left/right on the control).
2. Move seat forward/backward.
3. Adjust backrest.
Note: The backrest locks into position when
you release the lever. If a backrest is not
locked into position when a driving gear is engaged, the instrument panel displays analert for the unlocked backrest. Adjust the
backrest again, ensuring it locks into position.Warning: Riding in a moving vehicle with
the seat back reclined can result in
serious injuries in a collision, as you could
slide under the lap belt or be propelled into the seat belt. Ensure the backs of
occupied seats are reclined no more than 30 degrees when the vehicle is moving.Adjusting Second Row Seat Backs
(Bench Seats)
If your Model X is equipped with two seating
rows, the second row bench seats can
accommodate up to three passengers. Use the
mechanical adjustment lever located at the side of each outboard seating position toadjust the seat backs. A bench seat is split
60/40 so the adjustment lever on the left side
moves the seat backs for both the left and
center seats, whereas the lever on the right
side moves the rightmost seat back only.
While pulling and holding the lever, move the
seat back to the desired position, and then
release the lever. When returning a seat back
to its upright position, try moving it forward or
back to ensure it is securely latched into
position.Warning: Riding in a moving vehicle with
the seat back reclined can result in
serious injuries in a collision, as you could
slide under the lap belt or be propelled into the seat belt. Ensure the backs of
occupied seats are reclined no more than 30 degrees when the vehicle is moving.
Front and Rear Seats
28Model X Owner
Page 59 of 224
Starting and Powering
Off
Starting When you open a door, Model X powers on
the instrument panel and touchscreen and you
can operate all controls.
To drive Model X:
1. PRESS THE BRAKE PEDAL - Model X
powers on and is ready to drive.
2. SELECT A GEAR - Move the gear lever all
the way down for Drive and all the way up
for Reverse. See Shifting Gears on page
60.
Note: If the PIN to Drive feature is enabled
(see PIN to Drive on page 153), you must also
enter a valid PIN on the touchscreen before
you can drive Model X.
Note: If Passive Entry is off and you do not
press the brake pedal to start Model X within
approximately five minutes, a message
displays on the instrument panel and you must
use the key to lock then unlock Model X again
before starting the vehicle.
Everything you need to know when driving
Model X displays on the instrument panel.
Key Not Inside
If Model X does not detect a key when you
press the brake, the instrument panel displays
a message telling you that a key is not inside.
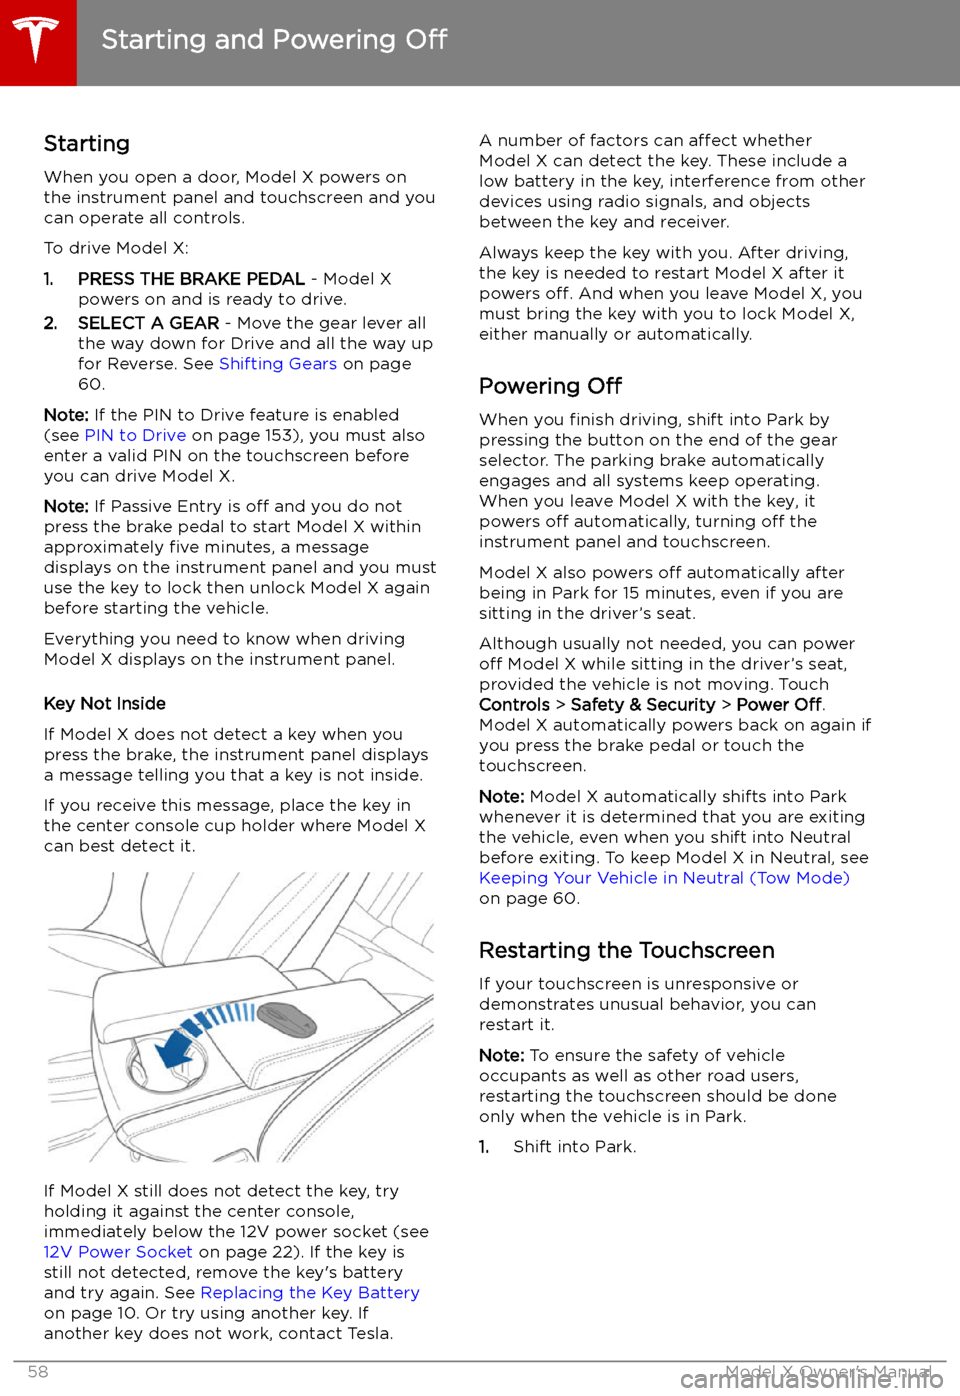
If you receive this message, place the key in
the center console cup holder where Model X
can best detect it.
If Model X still does not detect the key, try
holding it against the center console,
immediately below the 12V power socket (see
12V Power Socket on page 22). If the key is
still not detected, remove the key
Page 70 of 224
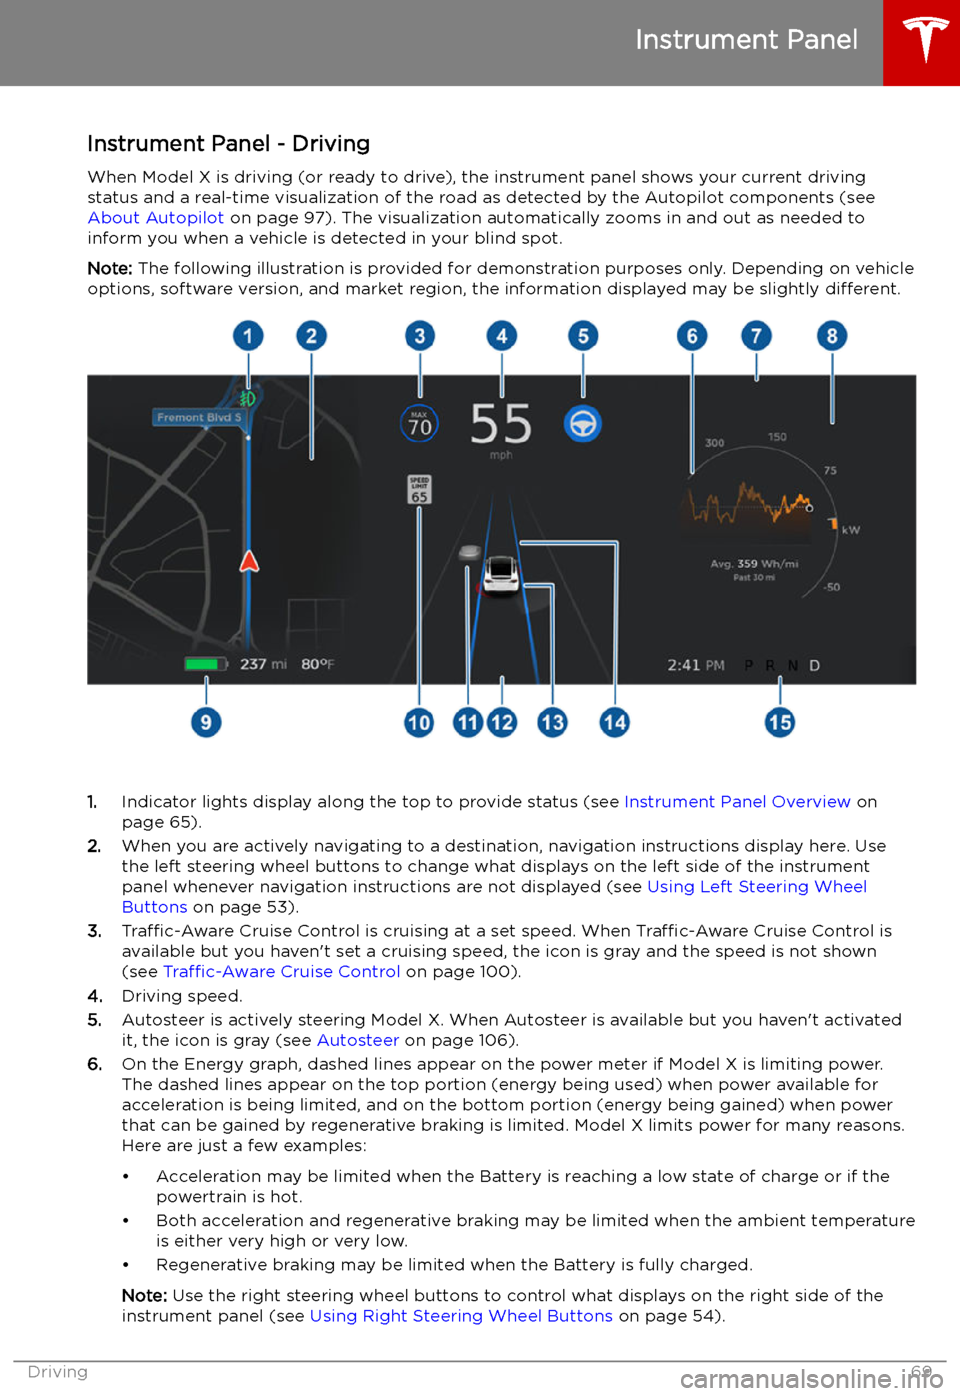
Instrument Panel - DrivingWhen Model X is driving (or ready to drive), the instrument panel shows your current driving
status and a real-time visualization of the road as detected by the Autopilot components (see
About Autopilot on page 97). The visualization automatically zooms in and out as needed to
inform you when a vehicle is detected in your blind spot.
Note: The following illustration is provided for demonstration purposes only. Depending on vehicle
options, software version, and market region, the information displayed may be slightly different.
1.Indicator lights display along the top to provide status (see Instrument Panel Overview on
page 65).
2. When you are actively navigating to a destination, navigation instructions display here. Use
the left steering wheel buttons to change what displays on the left side of the instrument
panel whenever navigation instructions are not displayed (see Using Left Steering Wheel
Buttons on page 53).
3. Traffic-Aware Cruise Control is cruising at a set speed. When Traffic-Aware Cruise Control is
available but you haven