Page 463 of 698
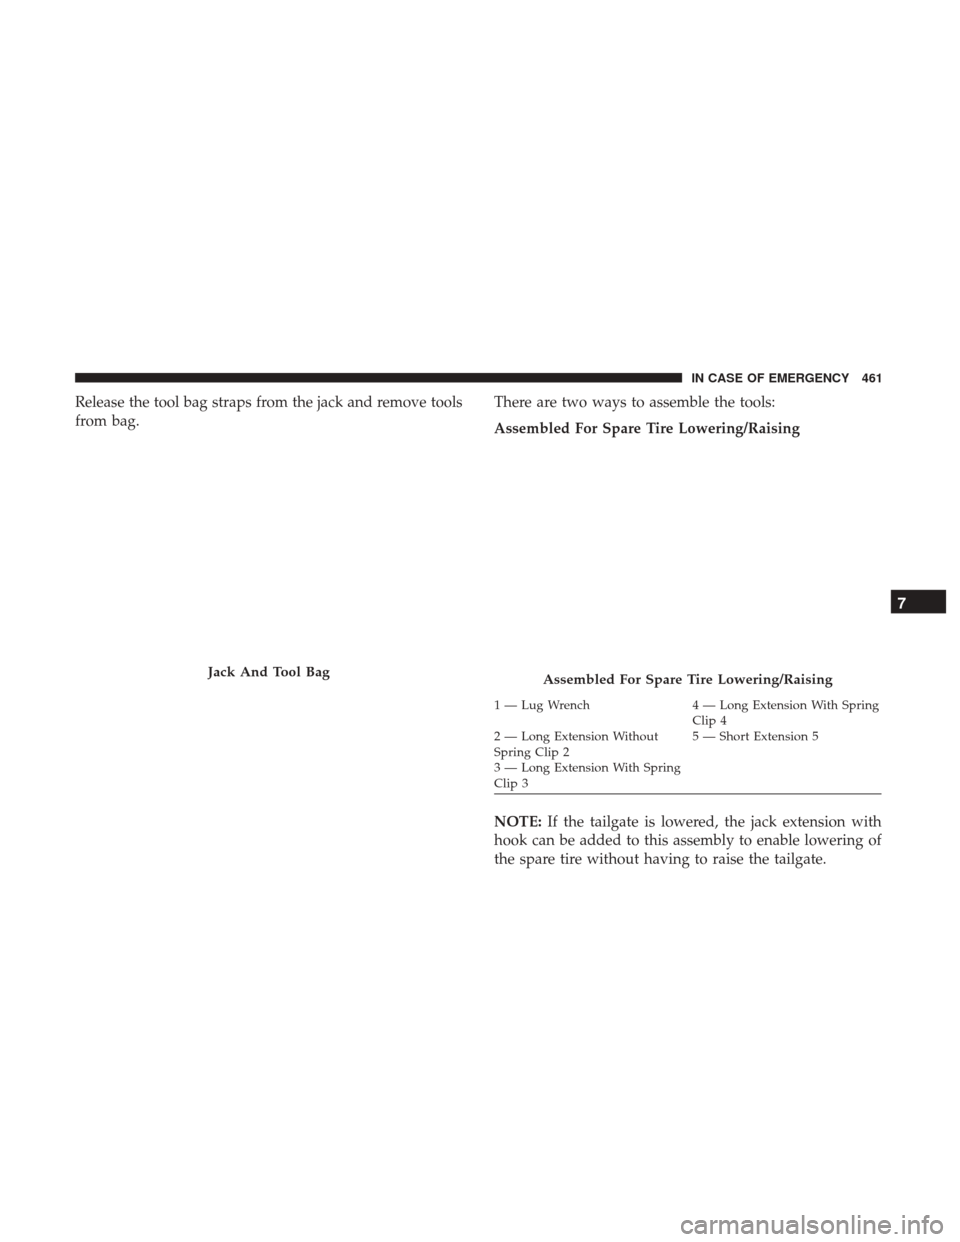
Release the tool bag straps from the jack and remove tools
from bag.There are two ways to assemble the tools:
Assembled For Spare Tire Lowering/Raising
NOTE:
If the tailgate is lowered, the jack extension with
hook can be added to this assembly to enable lowering of
the spare tire without having to raise the tailgate.
Jack And Tool BagAssembled For Spare Tire Lowering/Raising
1 — Lug Wrench 4 — Long Extension With Spring
Clip 4
2 — Long Extension Without
Spring Clip 2 5 — Short Extension 5
3 — Long Extension With Spring
Clip 3
7
IN CASE OF EMERGENCY 461
Page 465 of 698
WARNING!(Continued)
sharp turns. A loose jack, tools, bracket or other objects
in the vehicle may move around with force, resulting
in serious injury.
Removing The Spare Tire
1. Remove the spare tire before attempting to jack up the
truck. Attach the lug wrench to the extension tubes with
the curved angle facing away from the vehicle.
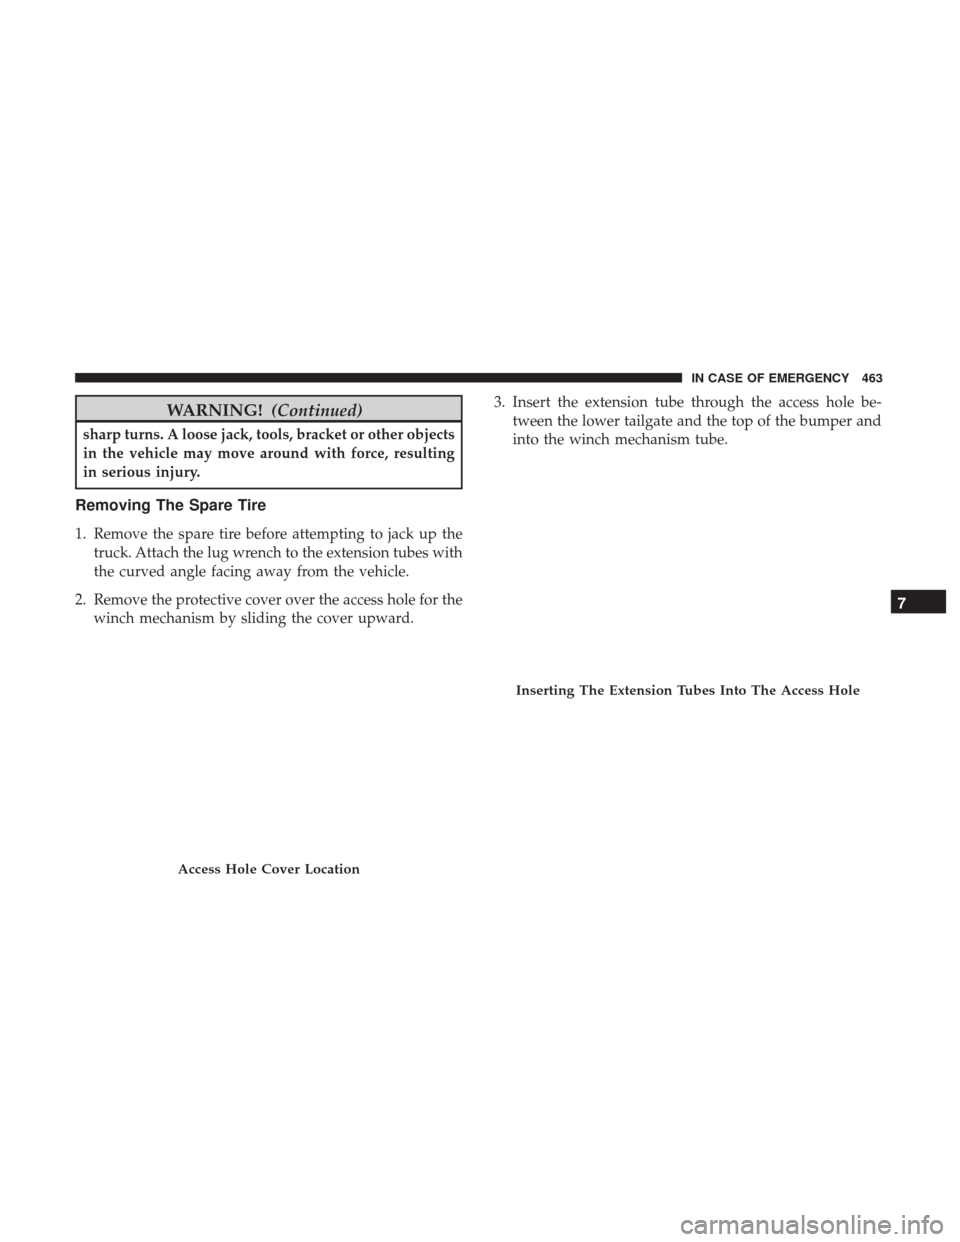
2. Remove the protective cover over the access hole for the winch mechanism by sliding the cover upward. 3. Insert the extension tube through the access hole be-
tween the lower tailgate and the top of the bumper and
into the winch mechanism tube.
Access Hole Cover Location
Inserting The Extension Tubes Into The Access Hole
7
IN CASE OF EMERGENCY 463
Page 466 of 698
4. Rotate the lug wrench handle counterclockwise until thespare tire is on the ground with enough cable slack to
allow you to pull it out from under the vehicle. 5. Pull the spare tire out from under the vehicle to gain
access to the spare tire retainer.
Rotating The Lug Wrench Handle
Pulling The Spare Tire Out
464 IN CASE OF EMERGENCY
Page 467 of 698
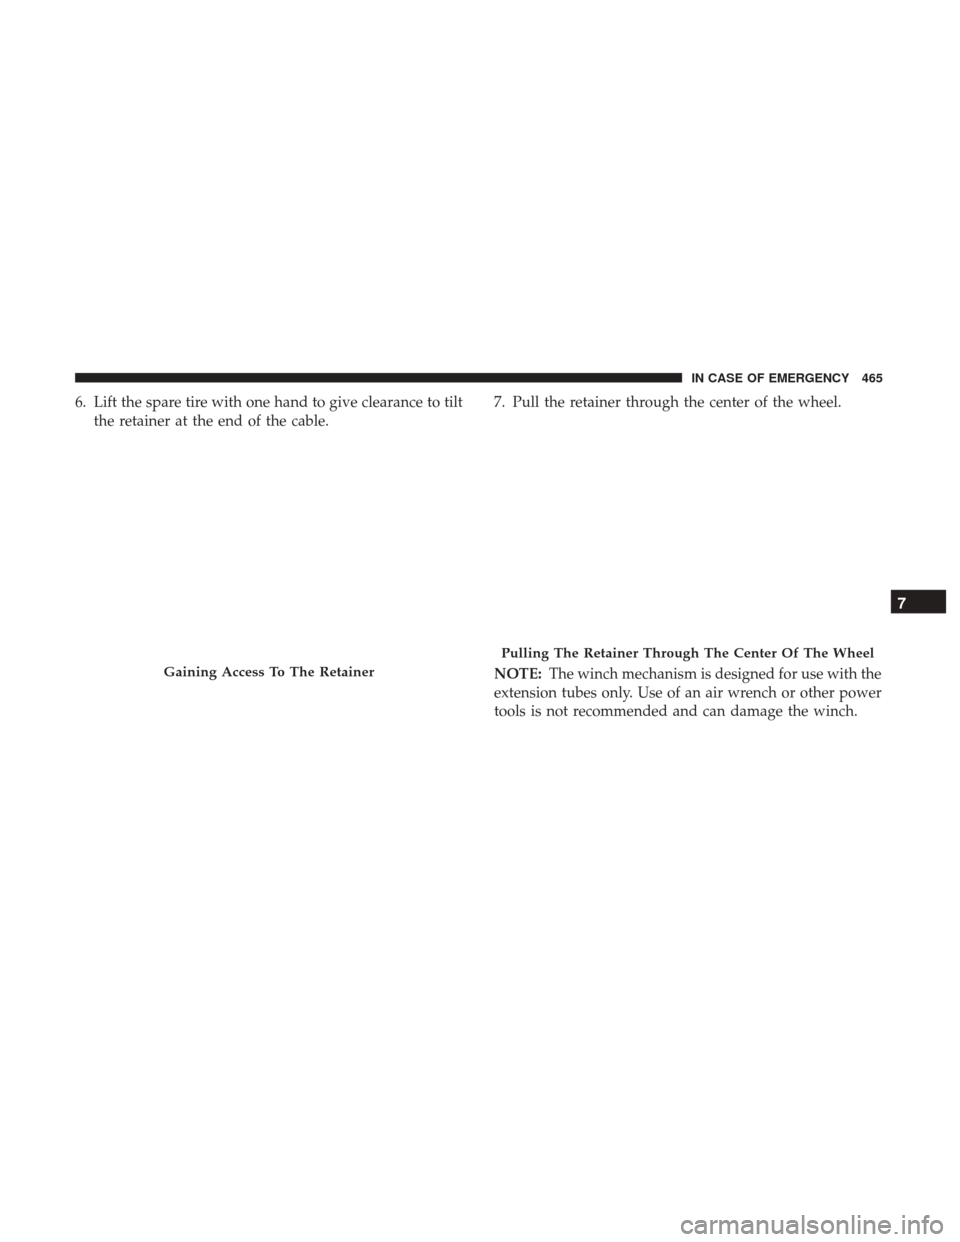
6. Lift the spare tire with one hand to give clearance to tiltthe retainer at the end of the cable. 7. Pull the retainer through the center of the wheel.
NOTE:
The winch mechanism is designed for use with the
extension tubes only. Use of an air wrench or other power
tools is not recommended and can damage the winch.
Gaining Access To The Retainer
Pulling The Retainer Through The Center Of The Wheel
7
IN CASE OF EMERGENCY 465
Page 469 of 698

WARNING!(Continued)
•Never start or run the engine with the vehicle on a
jack.
• Do not let anyone sit in the vehicle when it is on a
jack.
• Do not get under the vehicle when it is on a jack. If
you need to get under a raised vehicle, take it to a
service center where it can be raised on a lift.
• Only use the jack in the positions indicated and for
lifting this vehicle during a tire change.
• If working on or near a roadway, be extremely
careful of motor traffic.
• To assure that spare tires, flat or inflated, are securely
stowed, spares must be stowed with the valve stem
facing the ground.
CAUTION!
Do not attempt to raise the vehicle by jacking on
locations other than those indicated in the Jacking
Instructions for this vehicle.
1. Remove the spare wheel, jack, and tools from storage.
2. Using the lug wrench, loosen, but do not remove, the wheel nuts by turning them counterclockwise one turn
while the wheel is still on the ground.
Jack Warning Label
7
IN CASE OF EMERGENCY 467
Page 472 of 698

WARNING!
Raising the vehicle higher than necessary can make the
vehicle less stable. It could slip off the jack and hurt
someone near it. Raise the vehicle only enough to
remove the tire.
5. Remove the lug nuts and pull the wheel off. Install the spare wheel and lug nuts with the cone shaped end of
the lug nuts toward the wheel. Hand tighten the lug
nuts with vehicle lifted. To avoid the risk of forcing the
vehicle off the jack, do not fully tighten the lug nuts until
the vehicle has been lowered.
6. Lower vehicle to ground, finish tightening the lug nuts. Push down on the wrench while at the end of the handle
for increased leverage. Tighten the lug nuts in a star
pattern until each nut has been tightened twice.
NOTE: For the correct lug nut torque refer to “Torque
Specifications” in “Technical Specifications.”If in doubt
about the correct tightness, have them checked with a
torque wrench by an authorized dealer or service station.
WARNING!
A loose tire or jack thrown forward in a collision or
hard stop, could endanger the occupants of the vehicle.
Always stow the jack parts and the spare tire in the
places provided.
7. Install the wheel center cap and remove the wheel blocks. Do not install chrome or aluminum wheel center
caps on the spare wheel. This may result in cap damage.
8. Lower the jack to its fully closed position. Stow the replaced tire, jack, and tools as previously described.
9. Adjust the tire pressure when possible.
To Stow The Flat Or Spare
WARNING!
A loose tire or jack thrown forward in a collision or
hard stop could endanger the occupants of the vehicle.
Always stow the jack parts and the spare tire in the
places provided. Have the deflated (flat) tire repaired
or replaced immediately.
470 IN CASE OF EMERGENCY
Page 473 of 698
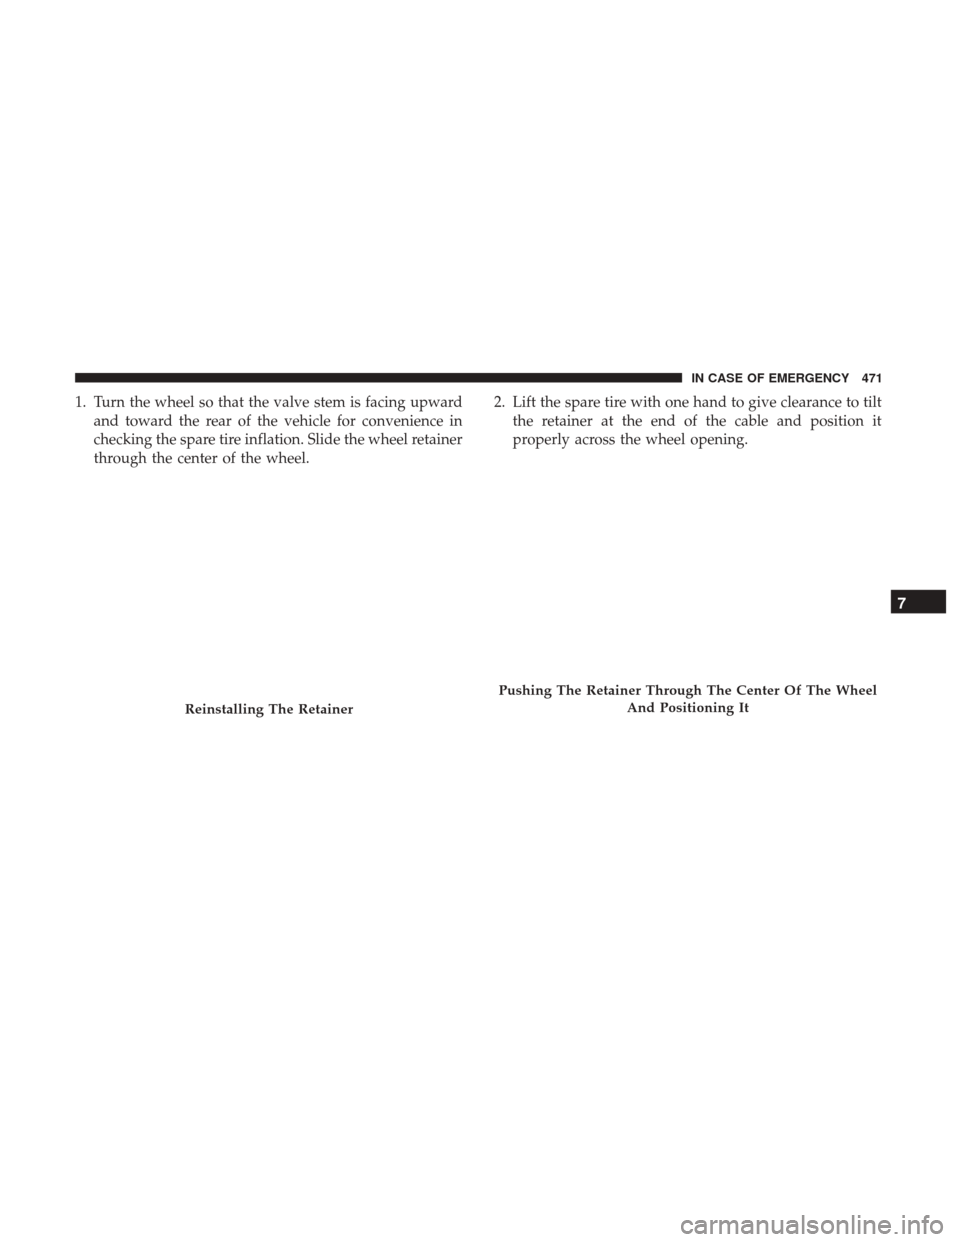
1. Turn the wheel so that the valve stem is facing upwardand toward the rear of the vehicle for convenience in
checking the spare tire inflation. Slide the wheel retainer
through the center of the wheel. 2. Lift the spare tire with one hand to give clearance to tilt
the retainer at the end of the cable and position it
properly across the wheel opening.
Reinstalling The Retainer
Pushing The Retainer Through The Center Of The Wheel
And Positioning It
7
IN CASE OF EMERGENCY 471
Page 490 of 698
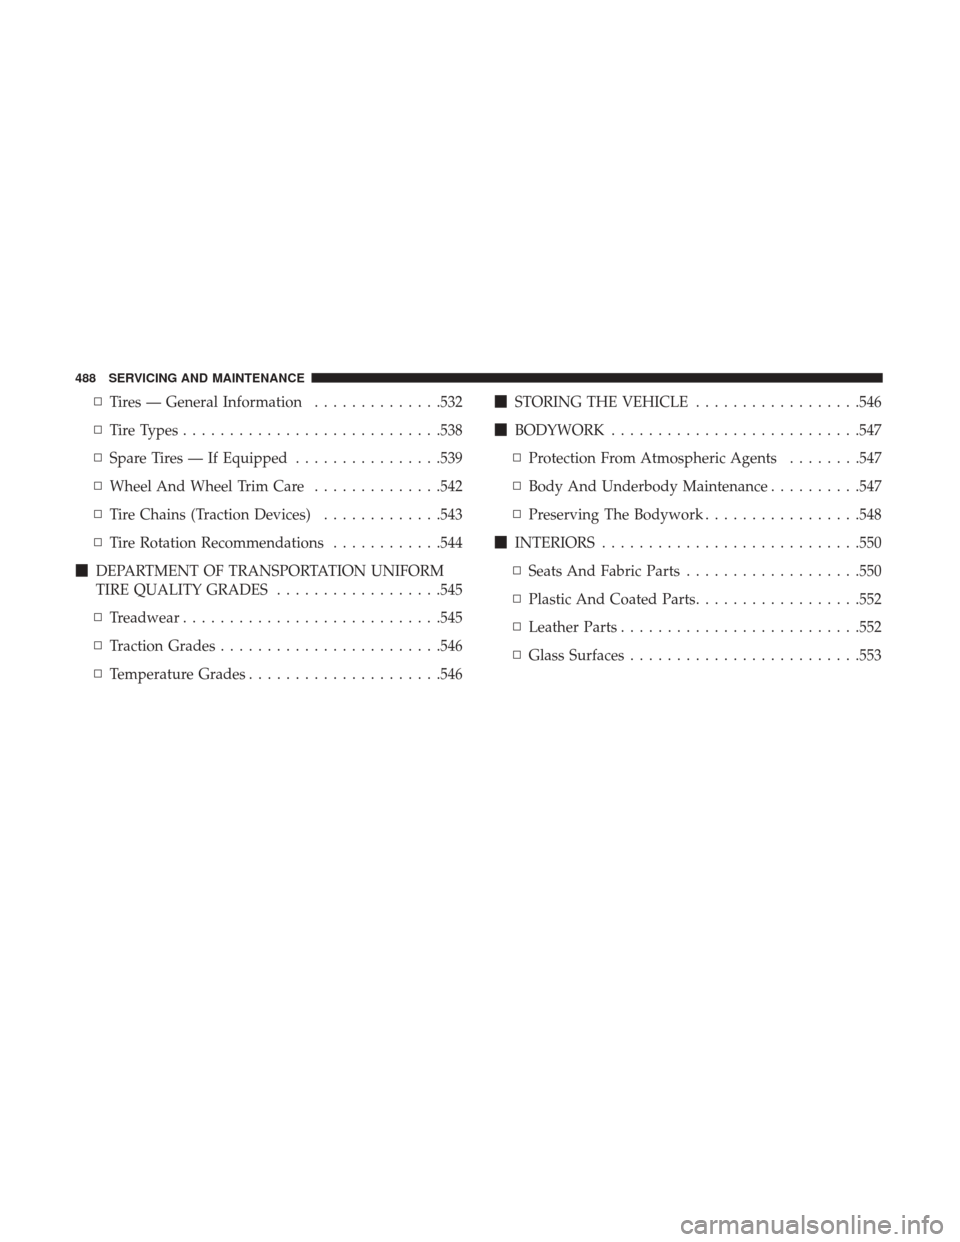
▫Tires — General Information ..............532
▫ Tire Types ........................... .538
▫ Spare Tires — If Equipped ................539
▫ Wheel And Wheel Trim Care ..............542
▫ Tire Chains (Traction Devices) .............543
▫ Tire Rotation Recommendations ............544
� DEPARTMENT OF TRANSPORTATION UNIFORM
TIRE QUALITY GRADES ..................545
▫ Treadwear ........................... .545
▫ Traction Grades ....................... .546
▫ Temperature Grades .....................546 �
STORING THE VEHICLE ..................546
� BODYWORK .......................... .547
▫ Protection From Atmospheric Agents ........547
▫ Body And Underbody Maintenance ..........547
▫ Preserving The Bodywork .................548
� INTERIORS ........................... .550
▫ Seats And Fabric Parts ...................550
▫ Plastic And Coated Parts ..................552
▫ Leather Parts ......................... .552
▫ Glass Surfaces ........................ .553
488 SERVICING AND MAINTENANCE