2019 Peugeot Partner Screen
[x] Cancel search: ScreenPage 165 of 312

163
Malfunction
If a fault occurs when shifting to
reverse, this warning lamp comes on
in the instrument panel, accompanied
by a message and an audible signal
(short beep).
Contact a PEUGEOT dealer or a qualified
workshop to have the system checked.
Reversing camera
With the ignition on, this system uses a camera
located near the third brake lamp to display a
view of the rear of your vehicle on the output
screen (if it is a panel van or has a solid
partition).
The reversing camera is activated automatically
when reverse gear is engaged. The image is
displayed on the output screen. The output
screen switches off when the gearbox is in
neutral or in a for ward gear. The blue lines 1 represent the general direction
of the vehicle (the gap corresponds to the width
of your vehicle with the mirrors).
The red line 2 represents a distance of about
30
cm beyond the edge of your vehicle's rear
b u m p e r.
The green lines 3 represent distances of
about 1 and 2
metres beyond the edge of your
vehicle's rear bumper.
The turquoise blue curves 4 represent the
maximum turning circle.
The reversing camera is a driving aid which
cannot, in any circumstances, replace the
need for vigilance on the part of the driver.
Some objects may not be seen by the
camera. Certain vehicles may be difficult to see
(dark colours, headlamps off) when the
brightness of the screen is reduced by the
vehicle’s lighting dimmer.
The image quality may be affected by the
environment, the exterior conditions (rain,
dirt, dust), the driving mode, the lighting
conditions (night, low sun).
In the presence of areas in shade, or in
conditions of bright sunlight or inadequate
lighting, the image may be darkened and
with lower contrast.
Obstacles may appear further away than
they actually are in reality.
During parking manoeuvres and lane
changes, it is important to check the sides
of the vehicle using the mirrors.
The rear parking sensors also provide
information on the vehicle's surroundings.
6
Driving
Page 166 of 312
164
Maintenance
recommendations
In bad or wintry weather, ensure that the
camera is not covered by mud, frost or snow.
Check the cleanliness of the camera lens
regularly.
If necessary, clean the camera with a soft, dry
cloth.
When washing the vehicle using a high-
pressure jet, keep the spray directed at least
30 cm away from the camera.
Surround Rear Vision
With the ignition on, in order to improve
visibility of the passenger side blind spot and
the rear of the vehicle, this system uses two
cameras to display the views of the vehicle’s
close surroundings on the output screen (if it is
a panel van or has a solid partition).
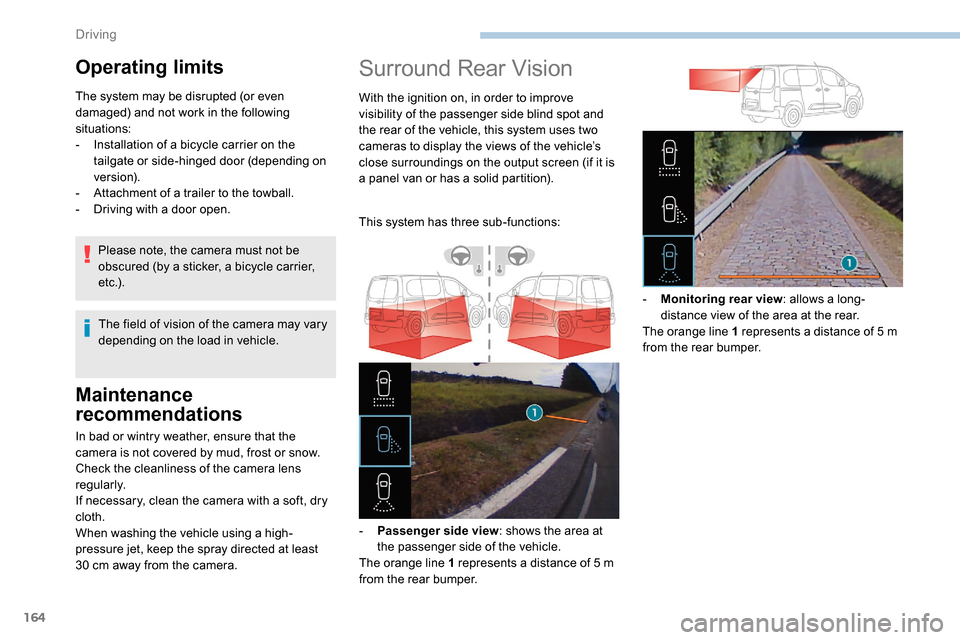
This system has three sub-functions:
-
P
assenger side view : shows the area at
the passenger side of the vehicle.
The orange line 1 represents a distance of 5
m
from the rear bumper. -
M
onitoring rear view: allows a long-
distance view of the area at the rear.
The orange line 1 represents a distance of 5
m
from the rear bumper.
Operating limits
The system may be disrupted (or even
damaged) and not work in the following
situations:
-
I
nstallation of a bicycle carrier on the
tailgate or side-hinged door (depending on
ve r s i o n).
-
A
ttachment of a trailer to the towball.
-
D
riving with a door open.
The field of vision of the camera may vary
depending on the load in vehicle.
Please note, the camera must not be
obscured (by a sticker, a bicycle carrier,
e t c .) .
Driving
Page 167 of 312

165
The blue dimension lines 1 represent the width
of your vehicle with the mirrors unfolded.
The red line 2 represents a distance of 30 cm
from the rear bumper; the two green lines 3 and
4 represent 1
m and 2 m, respectively.
The blue cur ves 5 appear successively; they
are based on the position of the steering wheel
and represent the turning circle radius of your
vehicle.
The orange dashes 6 represent the opening
radii of the rear doors. - The
visual reversing aid : allows a view of
the area close to the rear of the vehicle. Some items may not be seen by the rear
camera.
Certain vehicles may be difficult to see
(dark colours, headlamps off) when the
brightness of the screen is reduced by the
vehicle’s lighting dimmer.
The image quality may be affected by the
environment, the exterior conditions (rain,
dirt, dust), the driving mode, the lighting
conditions (night, low sun).
In the presence of areas in shade, or in
conditions of bright sunlight or inadequate
lighting, the image may be darkened and
with lower contrast.Obstacles may appear further away than
they actually are in reality.
During parking manoeuvres and lane
changes, it is important to check the sides
of the vehicle using the mirrors.
The rear parking sensors also provide
information on the vehicle's surroundings.
Activation/Deactivation
The system starts when the ignition is switched
on.
This system is a driving aid which cannot,
in any circumstances, replace the need for
vigilance on the part of the driver.
Please routinely check your exterior
mirrors while driving and during
manoeuvres.
F
W
ith the ignition on, press the
corresponding button below the screen to
switch the output screen on/off.
A message appears.
6
Driving
Page 168 of 312
166
Operating limits
The system may be disrupted (or even
damaged) and not work in the following
situations:
-
I
nstallation of a bicycle carrier on the
tailgate or side-hinged door (depending on
ve r s i o n).
-
A
ttachment of a trailer to the towball.
-
D
riving with a door open.
Please note, the cameras must not be
obscured (by a sticker, a bicycle carrier,
e t c .) .
The field of vision of the rear camera
( monitoring rear view and visual
reversing aid ) may vary depending on the
load in the vehicle.
If the side-hinged door is opened during
use of the monitoring rear view or the
visual reversing aid, in for ward gear or
reverse gear, the output screen becomes
grey.
If the front passenger door is opened
during use of the passenger side view ,
in for ward gear or reverse gear, the output
screen becomes grey.
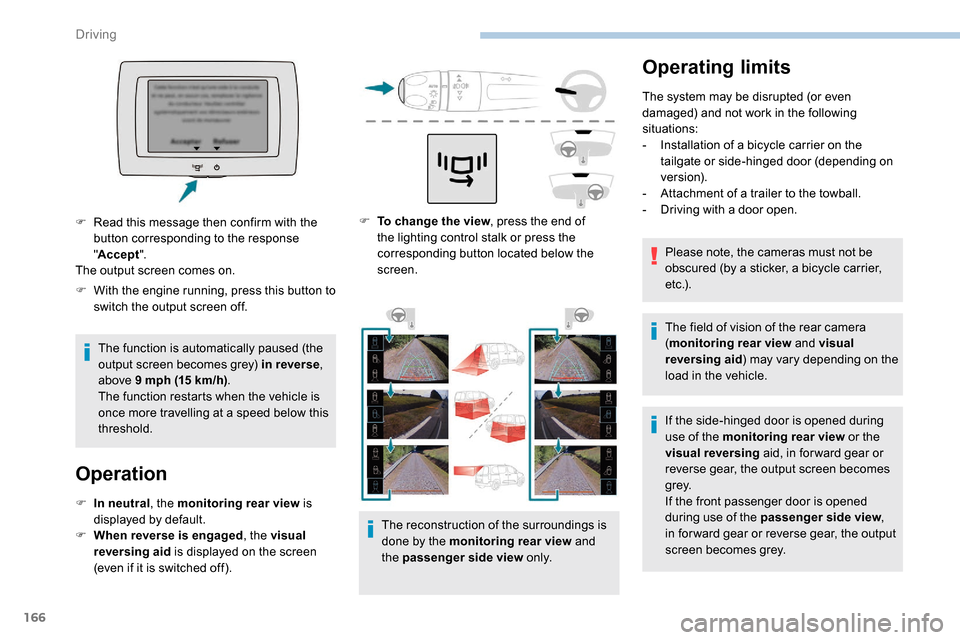
F
T
o change the view , press the end of
the lighting control stalk or press the
corresponding button located below the
screen.
The reconstruction of the surroundings is
done by the monitoring rear view and
the passenger side view o n l y.
F
W
ith the engine running, press this button to
switch the output screen off.
The function is automatically paused (the
output screen becomes grey) in reverse ,
above 9
mph (15
km/h) .
The function restarts when the vehicle is
once more travelling at a speed below this
threshold.
Operation
F In neutral , the monitoring rear view is
displayed by default.
F
W
hen reverse is engaged , the visual
reversing aid is displayed on the screen
(even if it is switched off).
F
R
ead this message then confirm with the
button corresponding to the response
" Accept ".
The output screen comes on.
Driving
Page 169 of 312

167
If a trailer is attached to the towball,
when reverse gear is engaged the visual
reversing aid will no longer work until the
trailer is disconnected. The monitoring
rear view becomes the default view.
If the system develops a malfunction, go
to a PEUGEOT dealer to avoid any safety
problems.
Maintenance
recommendations
In bad or wintry weather, ensure that the
sensors and cameras are not covered with
mud, ice or snow.
Check the cleanliness of the camera lenses
regularly.
If necessary, clean the cameras with a soft, dry
cloth.
When washing your vehicle at high-pressure,
direct the spray from at least 30
cm away from
the cameras and parking sensors.
Under-inflation detection
This system automatically monitors the tyre
pressure while driving.
The system monitors the pressure in all four
tyres, once the vehicle is moving.
It compares the information given by the
wheel speed sensors with reference values,
which must be reinitialised after ever y tyre
pressure adjustment or wheel change .
The system triggers an alert as soon as it
detects a drop in the pressure of one or more
tyres.
The tyre under-inflation detection system
does not replace the need for vigilance on
the part of the driver.
This system still requires you to check
the tyre inflation pressures (including
the spare wheel) every month as well as
before a long journey.
Driving with under-inflated tyres impairs
handling, extends braking distances and
causes early tyre wear, particularly in
adverse conditions (heavy loads, high
speeds, long journeys). Driving with under-inflated tyres
increases fuel consumption.
The tyre pressure specifications for your
vehicle can be found on the tyre pressure
label.
For more information on the
Identification markings , refer to the
corresponding section.
Tyre pressures should be checked when
the tyres are "cold" (vehicle stopped for
1
hour or after a journey of less than
6
miles (10 km) at moderate speeds).
Other wise (when hot), add 0.3
bar to the
pressures shown on the label.
Snow chains
The system does not have to be
reinitialised after fitting or removing snow
chains.
Under-inflation alert
This warning is indicated by fixed
illumination of the warning lamp, an
audible signal and, depending on
the equipment installed, a message
displayed on the screen.
6
Driving
Page 170 of 312
168
F Reduce speed immediately, avoid excessive steering movements and sudden braking.
F
S
top the vehicle as soon as it is safe to do
so.
The loss of pressure detected does not
always cause visible bulging of the tyre.
Do not satisfy yourself with just a visual
check.
F
I
n the event of a puncture, use the
temporary puncture repair kit or the spare
wheel (depending on equipment),
or
F
i
f you have a compressor, such as the one
in the temporary puncture repair kit, check
the pressures of the four tyres when cold,
or
F
i
f it is not possible to carry out this check
immediately, drive carefully at reduced
speed.
The alert is kept active until the system is
reinitialised.
Reinitialisation
The system must be reinitialised after any
adjustment to the pressure of one or more
tyres, and after changing one or more wheels. Before reinitialising the system, ensure
that the pressures of the four tyres
are correct for the conditions of use
of the vehicle and conform to the
recommendations on the tyre pressure
label.
The under-inflation alert can only be relied
on if the reinitialisation of the system has
been done with the pressures in the four
tyres correctly adjusted.
The under-inflation detection system
does not give a warning if a pressure is
incorrect at the time of reinitialisation.
The system is initialised with the ignition on and
the vehicle stationary. The new pressure parameters saved
are considered reference values by the
system.
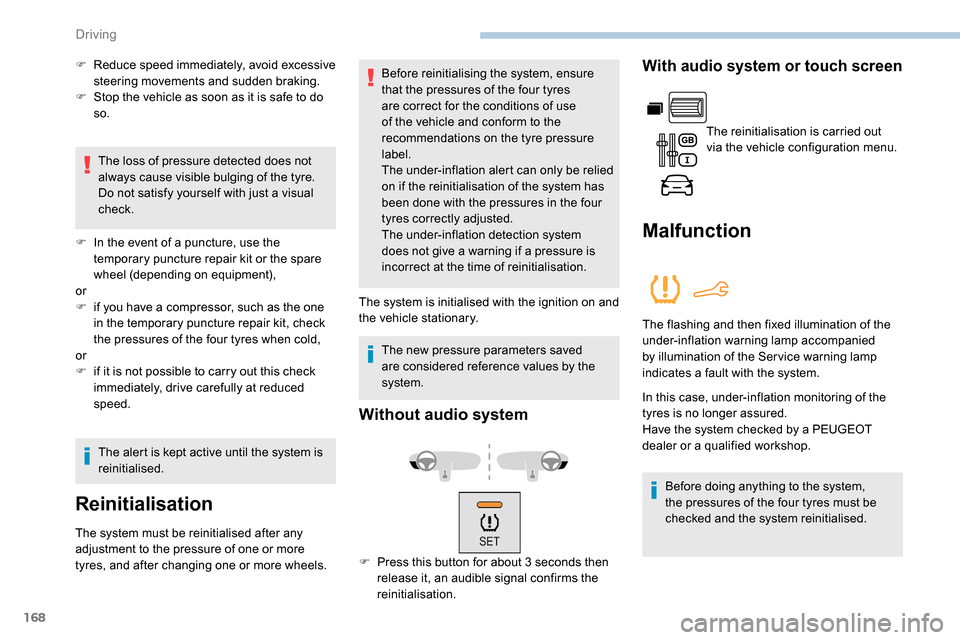
Without audio system
F Press this button for about 3 seconds then
release it, an audible signal confirms the
reinitialisation.
With audio system or touch screen
The reinitialisation is carried out
via the vehicle configuration menu.
Malfunction
The flashing and then fixed illumination of the
under-inflation warning lamp accompanied
by illumination of the Ser vice warning lamp
indicates a fault with the system.
In this case, under-inflation monitoring of the
tyres is no longer assured.
Have the system checked by a PEUGEOT
dealer or a qualified workshop.
Before doing anything to the system,
the pressures of the four tyres must be
checked and the system reinitialised.
Driving
Page 178 of 312
176
ON
Measurement display on the
instrument panel.
If the weight of the vehicle's load
exceeds the maximum authorized
weight, this warning lamp comes
on.
Malfunction
Display of the malfunction in the
loading area
Contact a PEUGEOT dealer or a qualified
workshop.
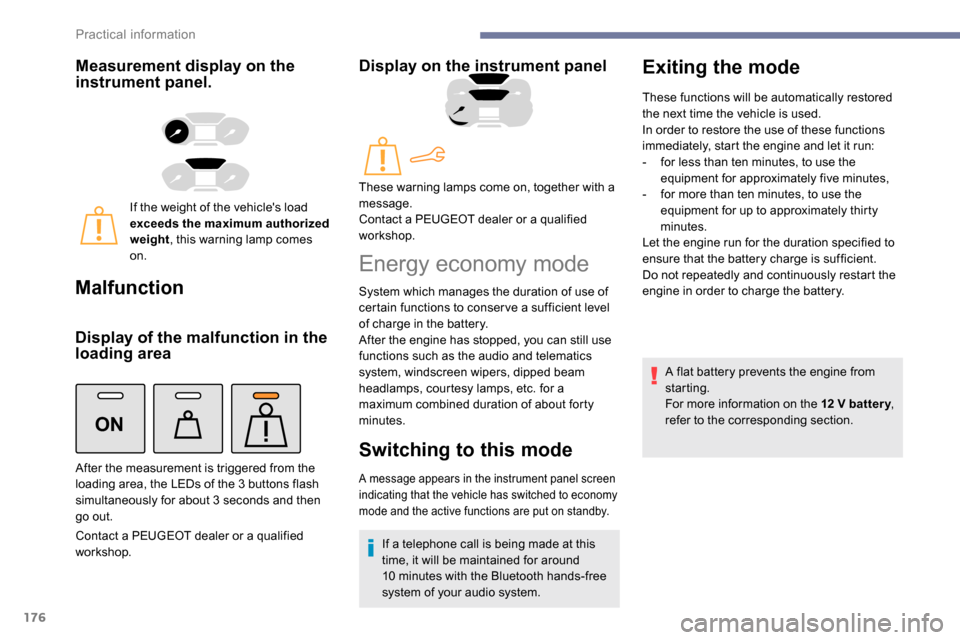
Display on the instrument panel
After the measurement is triggered from the
loading area, the LEDs of the 3 buttons flash
simultaneously for about 3
seconds and then
go out. These warning lamps come on, together with a
message.
Contact a PEUGEOT dealer or a qualified
workshop.
Energy economy mode
System which manages the duration of use of
certain functions to conser ve a sufficient level
of charge in the battery.
After the engine has stopped, you can still use
functions such as the audio and telematics
system,
windscreen wipers, dipped beam
headlamps,
courtesy lamps, etc. for a
maximum combined duration of about forty
minutes.
Switching to this mode
A message appears in the instrument panel screen
indicating that the vehicle has switched to economy
mode and the active functions are put on standby.
If a telephone call is being made at this
time, it will be maintained for around
10
minutes with the Bluetooth hands-free
system of your audio system.
Exiting the mode
These functions will be automatically restored
the next time the vehicle is used.
In order to restore the use of these functions
immediately, start the engine and let it run:
-
f
or less than ten minutes, to use the
equipment for approximately five minutes,
-
f
or more than ten minutes, to use the
equipment for up to approximately thirty
minutes.
Let the engine run for the duration specified to
ensure that the battery charge is sufficient.
Do not repeatedly and continuously restart the
engine in order to charge the battery.
A flat battery prevents the engine from
starting.
For more information on the 12
V batter y,
refer to the corresponding section.
Practical information
Page 179 of 312
177
Load reduction mode
System which manages the use of certain
functions according to the level of charge
remaining in the battery.
When the vehicle is being driven, the load
reduction function temporarily deactivates
certain functions, such as air conditioning,
heated rear screen, etc.
The deactivated functions are reactivated
automatically as soon as conditions permit.
Roof bars/Roof rack
Recommendations
Distribute the load uniformly, taking care
to avoid overloading one of the sides.
Arrange the heaviest part of the load as
close as possible to the roof.
Secure the load firmly.
Drive gently: the vehicle will be more
susceptible to the effects of side winds
and its stability may be affected.
Regularly check the security and tight
fastening of the roof bars and racks, at
least before each trip.As a safety measure and to avoid
damaging the roof, it is essential to use
the roof bars and racks approved for your
vehicle.
Obser ve the instructions on fitting and use
contained in the guide supplied with the
roof bars and racks. In the event of loading (
not exceeding
40 cm in height) on the roof, do not
exceed the following loads:
-
T
ransverse bars on longitudinal bars:
80 kg
.
-
T
wo transverse bars bolted to the roof:
100
kg
.
-
T
hree transverse bars bolted to the
roof: 15 0
kg
.
-
A
n aluminium rack: 120
kg
.
-
A s
teel rack: 115
k g
.
If the height exceeds 40 cm, adapt the
speed of the vehicle to the profile of the
road to avoid damaging the roof bars
or the roof rack and the fixings on the
vehicle.
Be sure to refer to national legislation in
order to comply with the regulations for
transporting objects which are longer than
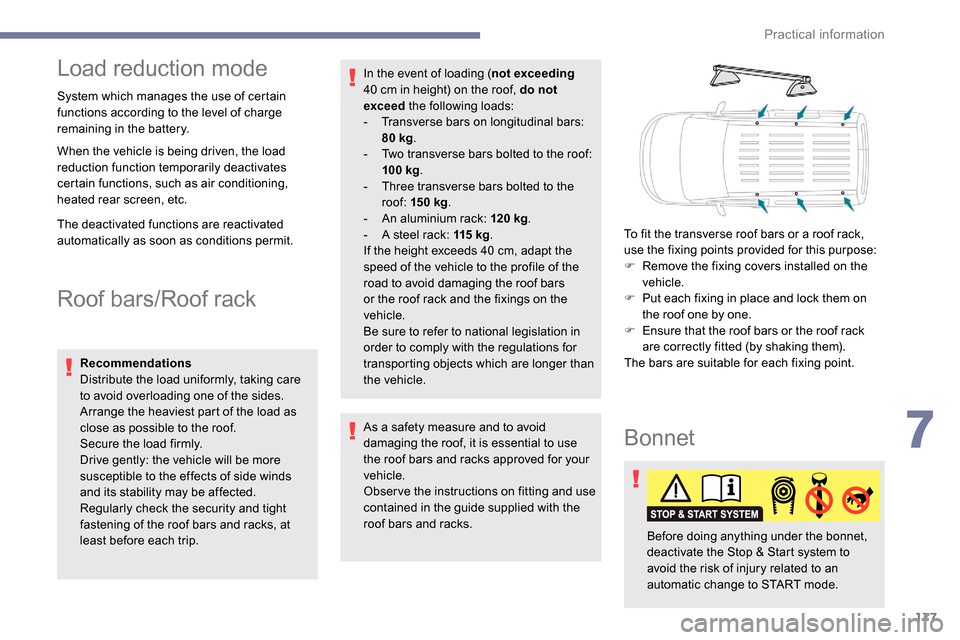
the vehicle. To fit the transverse roof bars or a roof rack,
use the fixing points provided for this purpose:
F
R
emove the fixing covers installed on the
vehicle.
F
P
ut each fixing in place and lock them on
the roof one by one.
F
E
nsure that the roof bars or the roof rack
are correctly fitted (by shaking them).
The bars are suitable for each fixing point.
Bonnet
Before doing anything under the bonnet,
deactivate the Stop & Start system to
avoid the risk of injury related to an
automatic change to START mode.
7
Practical information