2019 Peugeot Expert connect
[x] Cancel search: connectPage 5 of 324

3
.
.
Driving recommendations 138
Starting/switching off the engine 1 40
Parking brake
1
44
Hill start assist
1
44
5-speed manual gearbox
1
45
6-speed manual gearbox
1
45
Gear efficiency indicator
1
46
Automatic gearbox
1
46
Electronic gearbox
1
50
Stop & Start
1
52
Tyre under-inflation detection
1
54
Driving and manoeuvring aids - General
recommendations
156
Head-up display
1
58
Memorising speeds
1
59
Speed Limit recognition
and recommendation
1
60
Speed limiter
1
62
Cruise control - particular
recommendations
164
Cruise control
1
65
Adaptive Cruise Control
1
67
Active Safety Brake with Distance Alert and
Intelligent emergency braking assistance
1
71
Lane departure warning system
1
74
Fatigue detection system
1
75
Blind Spot Detection
1
76
Parking sensors
1
78
Reversing camera, interior mirror
1
80
Visiopark 1
1
80Compatibility of fuels 1
85
Refuelling 185
Diesel misfuel prevention
1
87
Snow chains
1
87
Towing device
1
88
Energy economy mode
1
89
Roof bars/Roof rack
1
89
Bonnet
19 0
Engine
191
Checking levels
1
91
Checks
19
4
AdBlue
® (BlueHDi) 1 96
Advice on care 1 99
Warning triangle
2
00
Running out of fuel (Diesel)
2
00
Tool box
2
01
Temporary puncture repair kit
2
02
Spare wheel
20
6
Changing a bulb
2
11
Changing a fuse
2
17
12 V battery
2
19
Towing
222Engine technical data and towed loads
2
24
Dimensions
228
Identification markings
2
31
Driving
Practical information
In the event of a breakdown Technical data
Alphabetical index
Access to additional videos
bit.ly/helpPSA
Audio equipment and telematics
Bluetooth audio system
PEUGEOT Connect Radio
PEUGEOT Connect Nav
.
Contents
Page 6 of 324

4
Instruments and controls
Depending on the vehicle's equipment,
the storage compartments may be open
or closed. This configuration is shown for
illustrative purposes.
Steering mounted controls
1.Glove box
Deactivation of the front passenger airbag
(inside the glove box)
2. 12 V accessory socket (120 W)
Obser ve the maximum power rating to
avoid damaging the accessory 3.
USB socket
4. JACK socket
5. Instrument panel
6. Storage compartments
Cup or can holder
7. Cooled glove box (if the vehicle is so
equipped)
Via a ventilation nozzle, if opened, engine
running and air conditioning on
8. Upper glove box
9. 220 V accessory socket (150 W, if the
vehicle is so equipped)
Obser ve the maximum power rating to
avoid damaging the accessory.
10. Horn
11. Courtesy lamp
Warning lamp display for seat belts and
front passenger airbag
Interior rear view mirror
Surveillance mirror
Emergency and assistance call buttons
12 . Heating
Manual air conditioning
Dual-zone automatic air conditioning
Front demisting - defrosting
Rear screen demisting – defrosting
13. "START/STOP" button
14 . Gearbox
15. Monochrome screen with audio system
Touch screen with PEUGEOT Connect
Radio or PEUGEOT Connect Nav 16.
Bonnet release
17. Dashboard fuses
18. Head-up display
1. External lighting/direction indicator
controls
2. Wiper/screenwash/trip computer controls
3. Audio system adjustment controls
(depending on version)
Over view
Page 9 of 324

7
As a passenger, avoid connecting your
multimedia devices (film, music, video game,
etc.) to contribute towards reducing the
consumption of electrical energy, and so of
fuel.
Disconnect all portable devices before leaving
the vehicle.
Eco- driving
Optimise the use of your
gearbox
With a manual gearbox, move off gently and
change up without waiting. While accelerating,
change up early.
With an electronic gearbox, favour automatic
mode, without pressing the accelerator pedal
heavily or suddenly.
With an automatic gearbox, favour automatic
mode, without pressing the accelerator pedal
heavily or suddenly.
Drive smoothly
Maintain a safe distance between vehicles,
use engine braking rather than the brake
pedal and press the accelerator gradually.
These practices contribute towards a
reduction in fuel consumption and CO
2 emissions and also help to reduce the
background traffic noise.
If your vehicle has the steering-mounted
"CRUISE" control, make use of cruise control
at speeds above 25 mph (40 km/h) when the
traffic is flowing well.
Be proficient in the use of
electrical equipment
Before moving off, if the passenger
compartment is too warm, ventilate it by
opening the windows and air vents before
using the air conditioning.
Above 31
mph (50 km/h), close the windows
and leave the air vents open.
Consider using equipment that can help
keep the temperature in the passenger
compartment down (sunroof blind and window
blinds, etc.). Switch off the headlamps and front foglamps
when the visibility conditions do not require
their use.
Avoid running the engine before moving off,
particularly in winter; your vehicle will warm up
much faster while driving. Unless it has automatic regulation, switch off
the air conditioning as soon as the desired
temperature has been reached.
Switch off the demisting and defrosting
controls, if these are not automatically
managed.
Switch off the heated seat as soon as
possible.
Eco-driving is a range of everyday practices that allow the motorist to optimise their fuel consumption and CO
2 emissions.
The gear efficiency indicator invites you to
engage the most suitable gear: as soon as the
indication is displayed in the instrument panel,
follow it straight away.
With an electronic gearbox, this indicator
appears only in manual mode.
With an automatic gearbox, this indicator
appears only in manual mode.
.
Eco-driving
Page 25 of 324

23
Indicators
Service indicator
The ser vice indicator is displayed on the instrument panel. Depending on the vehicle version:
- t he distance recorder display line indicates the distance remaining before the next ser vice is
due, or the distance travelled since it was due preceded by the sign “-”.
-
a
n alert message indicates the distance remaining, as well as the period before the next ser vice
is due or how long it is overdue.
Warning
/ indicator
lamp State
CauseActions
/
Observations
Ser vice
spanner Lights up temporarily
when the ignition is
switched on. Between 620 and
1,860 miles (1,000
and 3,000 km) remain
before the next ser vice
is due.
Fixed, when the
ignition is switched on. The ser vice is due in
less than 620 miles
(1,000 km).Have your vehicle
serviced very soon.
+ Ser vice
spanner
flashing
Flashing then fixed,
when the ignition is
switched on.
(With BlueHDi Diesel
engines, associated
with the Ser vice
warning lamp). The servicing interval
has been exceeded.
Have your vehicle
ser viced as soon as
possible.
Resetting the service indicator
The ser vice indicator must be reset after each
service.
F
S
witch off the ignition.
F
P
ress this button and keep it pressed.
F
S
witch on the ignition; the distance recorder
display begins a countdown.
F
W
hen the display shows =0 , release the
button; the spanner disappears.
If it is necessary to disconnect the battery
after this operation, lock the vehicle and
wait at least 5 minutes for the reset to be
registered.
Retrieving the service information
The ser vice information can be accessed at
any time.
F
P
ress this button.
The ser vice information is displayed for a few
seconds, then disappears.
1
Instruments
Page 32 of 324

30
The date and time can be adjusted in the
instrument panel display.F
H
old this button down.
F
P
ress one of these buttons to
select the setting to be changed.
F
P
ress this button briefly to
confirm.
F
P
ress one of these buttons to
change the setting and confirm
again to register the change.With PEUGEOT Connect
Radio
F Select the Settings menu in
the upper banner of the touch
screen.
F
Sel
ect " System configuration ".
F
Sel
ect "Date and time ".
F
Sel
ect " Date " or "Time ".
F
C
hoose the display formats.
F
C
hange the date and/or time using the
numeric keypad.
F
C
onfirm with " OK".
With PEUGEOT Connect
Nav
Setting of the time and date is only available if
synchronisation with the GPS is deactivated.
F
Sel
ect the Settings menu in the
bar of the touch screen.
F
P
ress the " OPTIONS " button to go to the
secondary page.
F
Sel
ect "Set time-date ".
With audio system
F Press the MENU button for access to the
main menu .
F
P
ress the " 7" or " 8" button to select the
" Personalisation-configuration " menu,
then confirm by pressing the OK button.
F
P
ress the " 5" or " 6" button to select the
Display configuration menu, then confirm
by pressing the OKbutton.
F
P
ress the " 5" or " 6" and " 7" or " 8" buttons
to adjust the date and time values, then
confirm by pressing the OK button.
F
Sel
ect the "Date" or "Time " tab. F
S
et the date and/or time using the numeric
keypad.
F
C
onfirm with "
OK".
Additional settings
You can choose:
-
T o change the time zone.
-
T
o change the display format of the date
and time (12h/24h).
-
T
o activate or deactivate the summer time
management function (+1 hour).
-
T
o activate or deactivate the
synchronisation with the GPS (UTC).
The system does not automatically
manage the change between winter and
summer time (depending on the country
of s a l e).
Instruments
Page 34 of 324

32
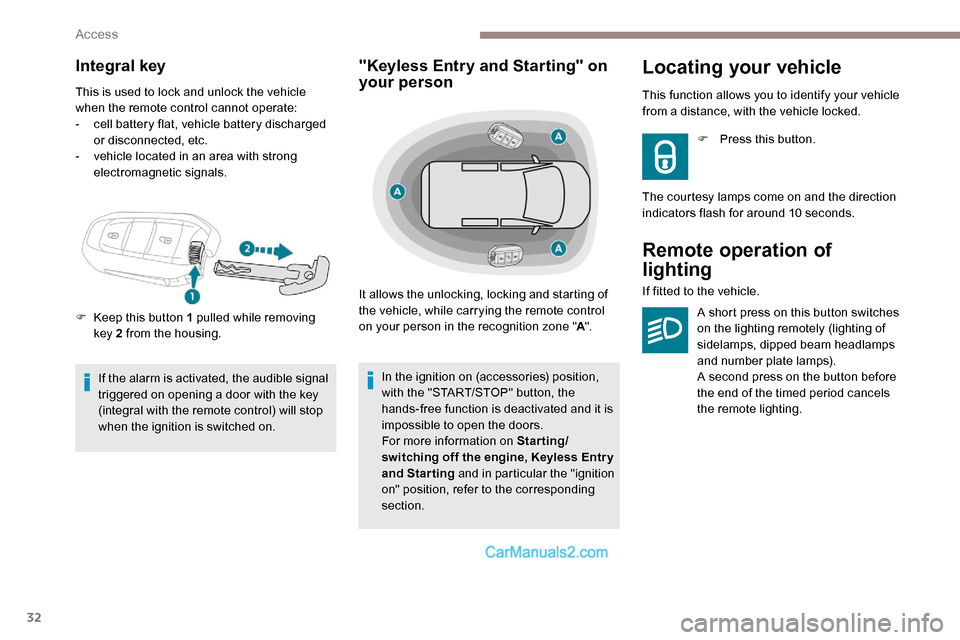
Integral key
This is used to lock and unlock the vehicle
when the remote control cannot operate:
-
c
ell battery flat, vehicle battery discharged
or disconnected, etc.
-
v
ehicle located in an area with strong
electromagnetic signals.
If the alarm is activated, the audible signal
triggered on opening a door with the key
(integral with the remote control) will stop
when the ignition is switched on.
"Keyless Entry and Starting" on
your person
It allows the unlocking, locking and starting of
the vehicle, while carrying the remote control
on your person in the recognition zone " A".
In the ignition on (accessories) position,
with the "START/STOP" button, the
hands-free function is deactivated and it is
impossible to open the doors.
For more information on Starting/
switching off the engine, Keyless Entr y
and Starting and in particular the "ignition
on" position, refer to the corresponding
section.
Locating your vehicle
F Keep this button 1 pulled while removing key 2 from the housing. This function allows you to identify your vehicle
from a distance, with the vehicle locked.
F
P
ress this button.
The courtesy lamps come on and the direction
indicators flash for around 10 seconds.
Remote operation of
lighting
If fitted to the vehicle.
A short press on this button switches
on the lighting remotely (lighting of
sidelamps, dipped beam headlamps
and number plate lamps).
A second press on the button before
the end of the timed period cancels
the remote lighting.
Access
Page 41 of 324

39
F To deadlock it, turn the key towards the rear again within 5 seconds of locking
(confirmed by the temporary lighting of the
direction indicators).
If the vehicle is fitted with an alarm, this
function will not be activated when locking
with the key.
If the alarm is activated, the siren sounds
on opening the door; switch on the ignition
to stop it.Central locking not
functioning
Use these procedures in the following cases:
- c entral locking fault,
-
b
attery disconnected or discharged.
In the event of a malfunction with the
central locking system, the battery must
be disconnected to lock the boot and thus
ensure that the vehicle is locked fully.
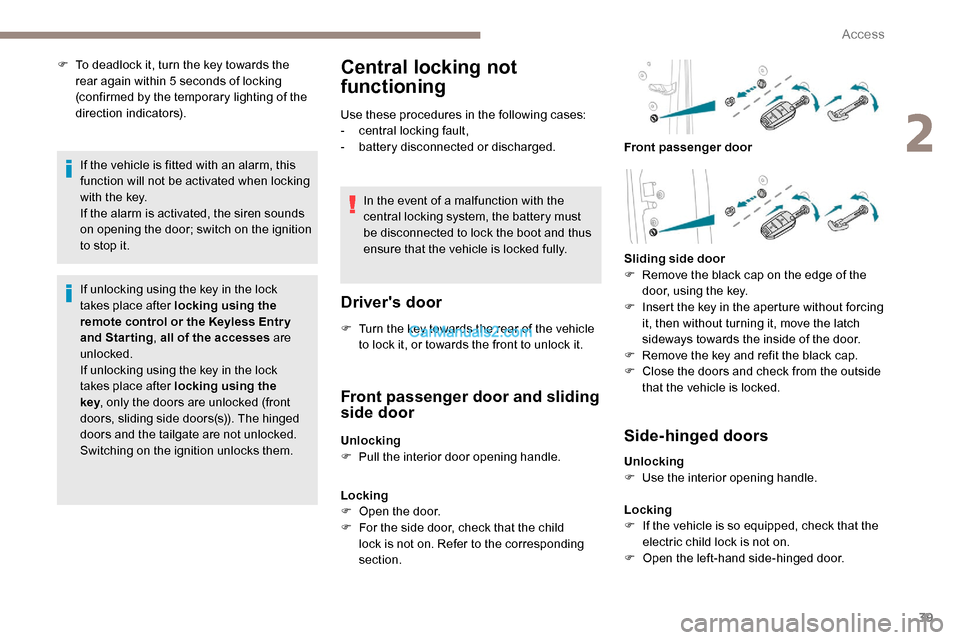
Driver's door
F Turn the key towards the rear of the vehicle to lock it, or towards the front to unlock it.
If unlocking using the key in the lock
takes place after locking using the
remote control or the Keyless Entr y
and Starting
, all of the accesses are
unlocked.
If unlocking using the key in the lock
takes place after locking using the
key , only the doors are unlocked (front
doors, sliding side doors(s)). The hinged
doors and the tailgate are not unlocked.
Switching on the ignition unlocks them.
Front passenger door and sliding
side door
Unlocking
F P ull the interior door opening handle.
Locking
F
O
pen the door.
F
F
or the side door, check that the child
lock is not on. Refer to the corresponding
section. Front passenger door
Sliding side door
F
R
emove the black cap on the edge of the
door, using the key.
F
I
nsert the key in the aperture without forcing
it, then without turning it, move the latch
sideways towards the inside of the door.
F
R
emove the key and refit the black cap.
F
C
lose the doors and check from the outside
that the vehicle is locked.Side-hinged doors
Unlocking
F U se the interior opening handle.
Locking
F
I
f the vehicle is so equipped, check that the
electric child lock is not on.
F
O
pen the left-hand side-hinged door.
2
Access
Page 55 of 324

53
Electric windows
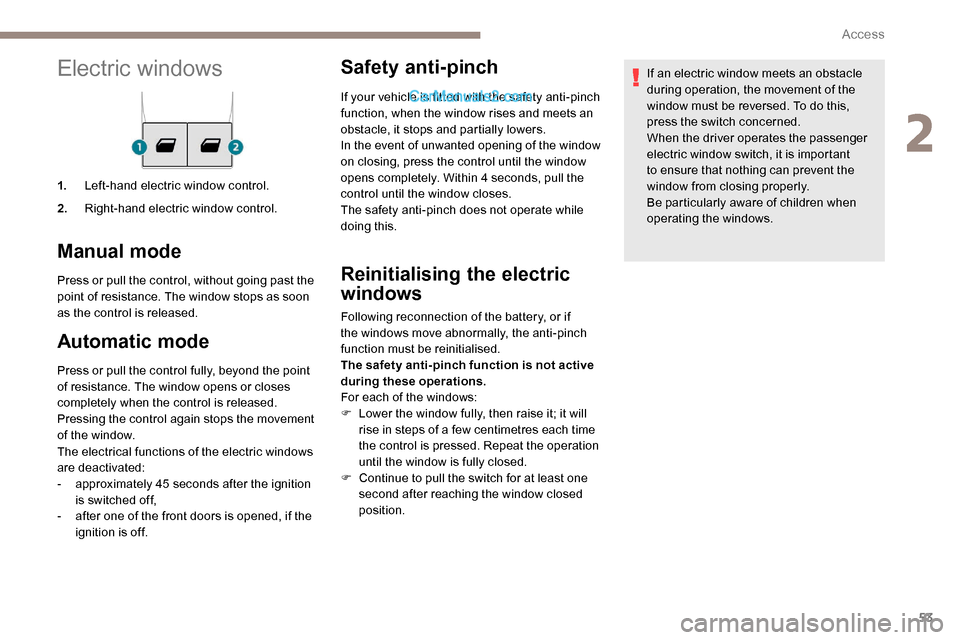
1.Left-hand electric window control.
2. Right-hand electric window control.
Manual mode
Press or pull the control, without going past the
point of resistance. The window stops as soon
as the control is released.
Automatic mode
Press or pull the control fully, beyond the point
of resistance. The window opens or closes
completely when the control is released.
Pressing the control again stops the movement
of the window.
The electrical functions of the electric windows
are deactivated:
-
a
pproximately 45 seconds after the ignition
is switched off,
-
a
fter one of the front doors is opened, if the
ignition is off.
Safety anti-pinch
If your vehicle is fitted with the safety anti-pinch
function, when the window rises and meets an
obstacle, it stops and partially lowers.
In the event of unwanted opening of the window
on closing, press the control until the window
opens completely. Within 4 seconds, pull the
control until the window closes.
The safety anti-pinch does not operate while
doing this.
Reinitialising the electric
windows
Following reconnection of the battery, or if
the windows move abnormally, the anti-pinch
function must be reinitialised.
The safety anti-pinch function is not active
during these operations.
For each of the windows:
F
L
ower the window fully, then raise it; it will
rise in steps of a few centimetres each time
the control is pressed. Repeat the operation
until the window is fully closed.
F
C
ontinue to pull the switch for at least one
second after reaching the window closed
position. If an electric window meets an obstacle
during operation, the movement of the
window must be reversed. To do this,
press the switch concerned.
When the driver operates the passenger
electric window switch, it is important
to ensure that nothing can prevent the
window from closing properly.
Be particularly aware of children when
operating the windows.
2
Access