2019 Peugeot Expert Electric
[x] Cancel search: ElectricPage 3 of 324

Welcome
Thank you for choosing a Peugeot Expert or a Peugeot Traveller.
Your vehicle will be fitted with only some of the equipment described in
this document, depending on its trim level, version and the specification
for the country in which it was sold.
The descriptions and illustrations are given as indications only.
Automobiles PEUGEOT reser ves the right to modify the technical
specifications, equipment and accessories without having to update this
edition of the guide.
If ownership of your vehicle is transferred, please ensure this
Handbook is passed on to the new owner.
All of the operating instructions and recommendations are provided
in detail there to make the most of your vehicle. It is strongly
recommended that you familiarise yourself with it as well as the
Maintenance and Warranty Guide, which provides information about
the warranties, ser vicing and roadside assistance associated with the
vehicle.
Key
Safety warning
Additional information
Contributes to the protection of the environment
Left-hand drive vehicle
Right-hand drive vehicle
Location of the equipment /button described with a black area
Key
This key allows the special features of the vehicle to be identified: Van
Crew cab with mechanical child lock
Crew cab with electrical child lock
Combi, Business, Active, Allure, Business VIP
Page 4 of 324

2
.
.
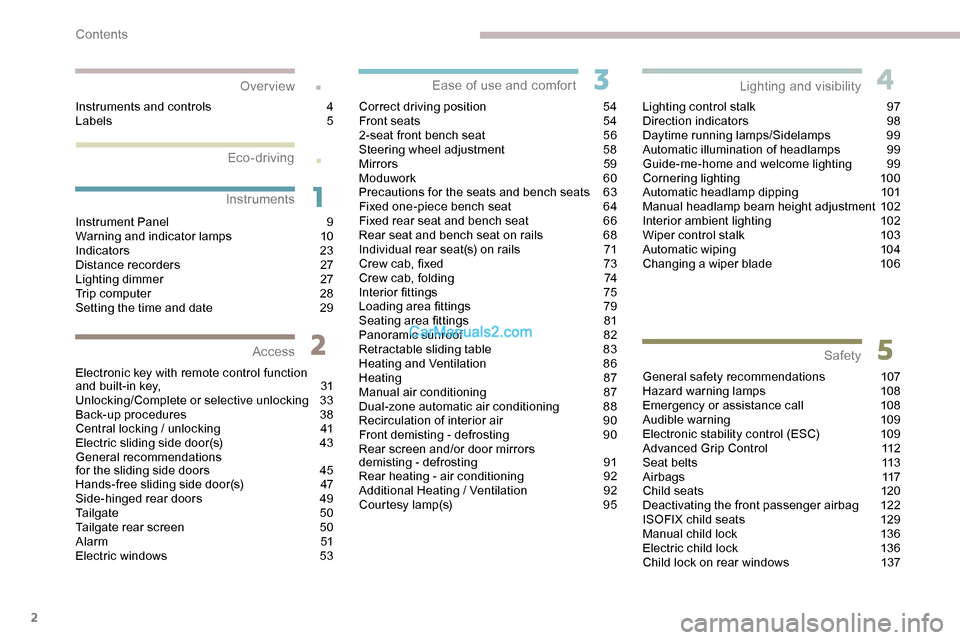
Instrument Panel 9
W arning and indicator lamps 1 0
Indicators
23
Distance recorders
2
7
Lighting dimmer
2
7
Trip computer
2
8
Setting the time and date
2
9
Electronic key with remote control function
and built-in key,
3
1
Unlocking/Complete or selective unlocking
3
3
Back-up procedures
3
8
Central locking / unlocking
4
1
Electric sliding side door(s)
4
3
General recommendations
for the sliding side doors
4
5
Hands-free sliding side door(s)
4
7
Side-hinged rear doors
4
9
Tailgate
5
0
Tailgate rear screen
5
0
Alarm
51
Electric windows
5
3Correct driving position
5
4
Front seats
5
4
2-seat front bench seat
5
6
Steering wheel adjustment
5
8
Mirrors 59
Moduwork
6
0
Precautions for the seats and bench seats
6
3
Fixed one-piece bench seat 6 4
Fixed rear seat and bench seat 6 6
Rear seat and bench seat on rails 6 8
Individual rear seat(s) on rails
7
1
Crew cab, fixed
7
3
Crew cab, folding
7
4
Interior fittings
7
5
Loading area fittings
7
9
Seating area fittings
8
1
Panoramic sunroof
8
2
Retractable sliding table
8
3
Heating and Ventilation
8
6
Heating
87
Manual air conditioning
8
7
Dual-zone automatic air conditioning
8
8
Recirculation of interior air
9
0
Front demisting - defrosting
9
0
Rear screen and/or door mirrors
demisting - defrosting
9
1
Rear heating - air conditioning
9
2
Additional Heating / Ventilation
9
2
Courtesy lamp(s)
9
5Lighting control stalk
9
7
Direction indicators
9
8
Daytime running lamps/Sidelamps
9
9
Automatic illumination of headlamps
9
9
Guide-me-home and welcome lighting
9
9
Cornering lighting
1
00
Automatic headlamp dipping
1
01
Manual headlamp beam height adjustment 1 02
Interior ambient lighting 1 02
Wiper control stalk 1 03
Automatic wiping
1
04
Changing a wiper blade
1
06
General safety recommendations
1
07
Hazard warning lamps
1
08
Emergency or assistance call
1
08
Audible warning
1
09
Electronic stability control (ESC)
1
09
Advanced Grip Control
1
12
Seat belts
1
13
Airbags
117
Child seats
1
20
Deactivating the front passenger airbag
1
22
ISOFIX child seats
1
29
Manual child lock
1
36
Electric child lock
1
36
Child lock on rear windows
1
37
Over view
Instruments
Access Ease of use and comfort
Safety
Lighting and visibility
Instruments and controls 4
L abels 5
Eco-driving
Contents
Page 7 of 324

5
4.Controls for speed limiter/cruise control/
adaptive cruise control
5. Instrument panel display mode selection
wheel
6. Voice synthesis control (depending on
ve r s i o n)
Volume adjustment (depending on
ve r s i o n)
7. Audio system adjustment controls
(depending on version)
Central switch panel
1.Locking/unlocking from the inside
2. Left-hand electric sliding side door
3. Electric child lock
4. Right-hand electric sliding side door
5. Cab/loading area selectivity
6. Hazard warning lamps
7. DSC/ASR system
8. Tyre under-inflation detection
9. Stop & Start
10. Heated windscreen
Side control bar
1.Grip control
2. Head-up display
3. Parking sensors
4. Additional Heating / Ventilation
5. Alarm
6. Manual headlamp beam height
adjustment
7. Lane departure warning system
8. Blind spot monitoring system
9. Automatic headlamp dipping
Labels
Side-hinged rear doors section.
Moduwork section.
.
Over view
Page 9 of 324

7
As a passenger, avoid connecting your
multimedia devices (film, music, video game,
etc.) to contribute towards reducing the
consumption of electrical energy, and so of
fuel.
Disconnect all portable devices before leaving
the vehicle.
Eco- driving
Optimise the use of your
gearbox
With a manual gearbox, move off gently and
change up without waiting. While accelerating,
change up early.
With an electronic gearbox, favour automatic
mode, without pressing the accelerator pedal
heavily or suddenly.
With an automatic gearbox, favour automatic
mode, without pressing the accelerator pedal
heavily or suddenly.
Drive smoothly
Maintain a safe distance between vehicles,
use engine braking rather than the brake
pedal and press the accelerator gradually.
These practices contribute towards a
reduction in fuel consumption and CO
2 emissions and also help to reduce the
background traffic noise.
If your vehicle has the steering-mounted
"CRUISE" control, make use of cruise control
at speeds above 25 mph (40 km/h) when the
traffic is flowing well.
Be proficient in the use of
electrical equipment
Before moving off, if the passenger
compartment is too warm, ventilate it by
opening the windows and air vents before
using the air conditioning.
Above 31
mph (50 km/h), close the windows
and leave the air vents open.
Consider using equipment that can help
keep the temperature in the passenger
compartment down (sunroof blind and window
blinds, etc.). Switch off the headlamps and front foglamps
when the visibility conditions do not require
their use.
Avoid running the engine before moving off,
particularly in winter; your vehicle will warm up
much faster while driving. Unless it has automatic regulation, switch off
the air conditioning as soon as the desired
temperature has been reached.
Switch off the demisting and defrosting
controls, if these are not automatically
managed.
Switch off the heated seat as soon as
possible.
Eco-driving is a range of everyday practices that allow the motorist to optimise their fuel consumption and CO
2 emissions.
The gear efficiency indicator invites you to
engage the most suitable gear: as soon as the
indication is displayed in the instrument panel,
follow it straight away.
With an electronic gearbox, this indicator
appears only in manual mode.
With an automatic gearbox, this indicator
appears only in manual mode.
.
Eco-driving
Page 13 of 324

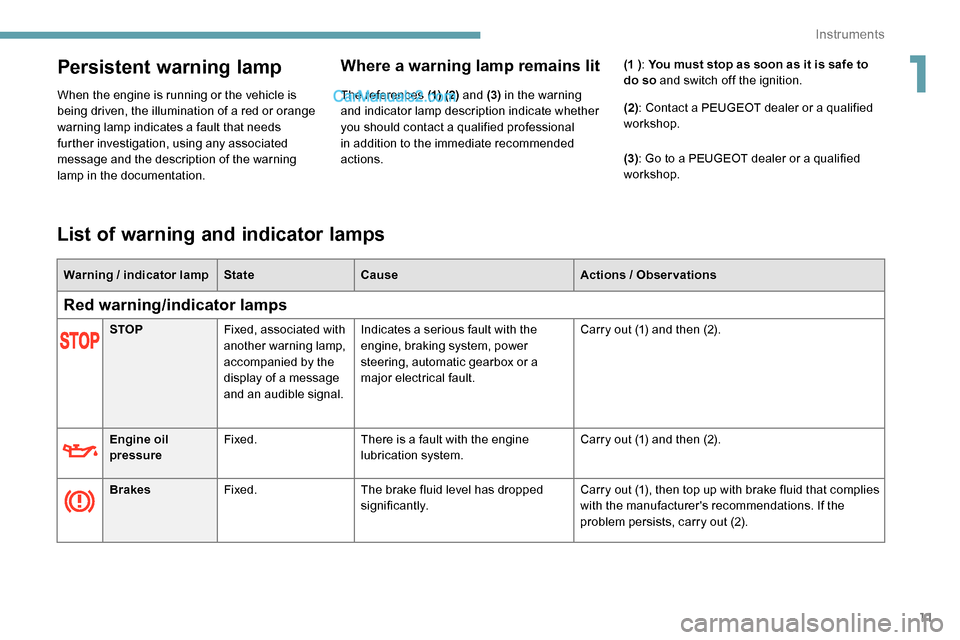
11
Persistent warning lamp
When the engine is running or the vehicle is
being driven, the illumination of a red or orange
warning lamp indicates a fault that needs
further investigation, using any associated
message and the description of the warning
lamp in the documentation.
Where a warning lamp remains lit
The references (1) (2) and (3) in the warning
and indicator lamp description indicate whether
you should contact a qualified professional
in addition to the immediate recommended
actions. (1 )
: You must stop as soon as it is safe to
do so and switch off the ignition.
(2): Contact a PEUGEOT dealer or a qualified
workshop.
(3) : Go to a PEUGEOT dealer or a qualified
workshop.
STOP Fixed, associated with
another warning lamp,
accompanied by the
display of a message
and an audible signal. Indicates a serious fault with the
engine, braking system, power
steering, automatic gearbox or a
major electrical fault.
Carry out (1) and then (2).
Engine oil
pressure Fixed.
There is a fault with the engine
lubrication system. Carry out (1) and then (2).
Brakes Fixed. The brake fluid level has dropped
significantly. Carry out (1), then top up with brake fluid that complies
with the manufacturer's recommendations. If the
problem persists, carry out (2).
List of warning and indicator lamps
Warning
/ indicator lamp State Cause Actions / Observations
Red warning/indicator lamps
1
Instruments
Page 26 of 324

24
The distance indicated (in miles or
kilometres) is calculated according to the
distance covered and the time elapsed
since the last ser vice.
The alert may be triggered close to a due
date.
Engine coolant temperature
With the engine running, when the needle or
bar graph (depending on version) is:
-
i
n zone A , the temperature of the engine
coolant is correct,
-
i
n zone B , the temperature of the engine
coolant is too high; the maximum
temperature and central STOP warning
lamps come on, accompanied by an audible
signal and a warning message.
You must stop the vehicle as soon as it is
safe to do so.
Checking
After driving for a few minutes, the temperature
and pressure in the cooling system increase.
To top up the level:
F
w
ait at least one hour for the engine to cool,
F
u
nscrew the cap by two turns to allow the
pressure to drop,
F
w
hen the pressure has dropped, remove the
cap,
F
t
op up the level to the "MA X" mark.
For more information on Checking levels ,
refer to the corresponding section.
Be aware of the risk of scalding when
topping up the coolant. Do not fill above
the maximum level (indicated on the
reservoir).
Wait a few minutes before switching off the
engine.
Contact a PEUGEOT dealer or a qualified
workshop.
The level read will only be correct if
the vehicle is on level ground and the
engine has been stopped for more than
30
minutes.
Oil level correct
This is indicated by a message in the
instrument panel.
Oil level incorrect
This is indicated by a message in the
instrument panel.
If the low oil level is confirmed by a check using
the dipstick, the level must be topped up to
avoid damage to the engine.
Engine oil level indicator
On versions fitted with an electric oil level
indicator, the state of the engine oil level is
displayed in the instrument panel for a few
seconds when the ignition is switched on, at
the same time as the ser vicing information.
Instruments
Page 36 of 324

34
The separation of the cab and loading
area unlocking is a security measure.
It is used to prevent access to the part
of the vehicle in which the driver is not
present.
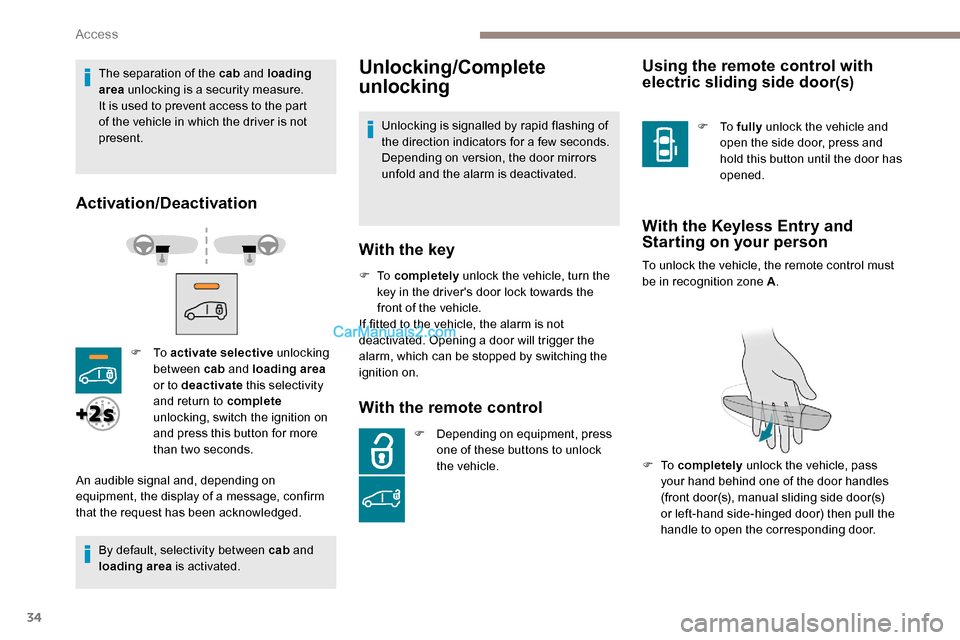
Activation/Deactivation
By default, selectivity between cab and
loading area is activated.
Unlocking/Complete
unlocking
F To activate selective unlocking
between cab and loading area
or to deactivate this selectivity
and return to complete
unlocking, switch the ignition on
and press this button for more
than two seconds.
An audible signal and, depending on
equipment, the display of a message, confirm
that the request has been acknowledged. Unlocking is signalled by rapid flashing of
the direction indicators for a few seconds.
Depending on version, the door mirrors
unfold and the alarm is deactivated.
With the key
F To
completely unlock the vehicle, turn the
key in the driver's door lock towards the
front of the vehicle.
If fitted to the vehicle, the alarm is not
deactivated. Opening a door will trigger the
alarm, which can be stopped by switching the
ignition on.
With the remote control
F Depending on equipment, press one of these buttons to unlock
the vehicle.
Using the remote control with
electric sliding side door(s)
F To fully unlock the vehicle and
open the side door, press and
hold this button until the door has
opened.
With the Keyless Entry and
Starting on your person
To unlock the vehicle, the remote control must
be in recognition zone A .
F
To completely unlock the vehicle, pass
your hand behind one of the door handles
(front door(s), manual sliding side door(s)
or left-hand side-hinged door) then pull the
handle to open the corresponding door.
Access
Page 37 of 324

35
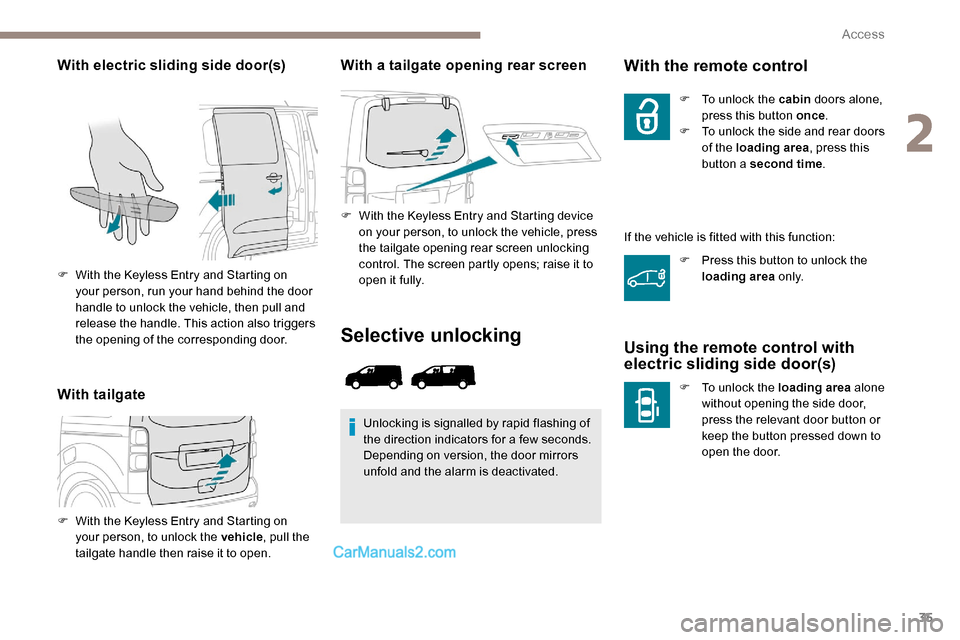
With electric sliding side door(s)
With tailgateWith a tailgate opening rear screen
F With the Keyless Entry and Starting device
on your person, to unlock the vehicle, press
the tailgate opening rear screen unlocking
control. The screen partly opens; raise it to
open it fully.
F
W
ith the Keyless Entry and Starting on
your person, run your hand behind the door
handle to unlock the vehicle, then pull and
release the handle. This action also triggers
the opening of the corresponding door.
F
W
ith the Keyless Entry and Starting on
your person, to unlock the vehicle , pull the
tailgate handle then raise it to open.
Selective unlocking
Unlocking is signalled by rapid flashing of
the direction indicators for a few seconds.
Depending on version, the door mirrors
unfold and the alarm is deactivated.
With the remote control
F To unlock the cabin doors alone,
press this button once .
F
T
o unlock the side and rear doors
of the loading area , press this
button a second time .
If the vehicle is fitted with this function: F
P
ress this button to unlock the
loading area o n l y.
Using the remote control with
electric sliding side door(s)
F To unlock the loading area alone
without opening the side door,
press the relevant door button or
keep the button pressed down to
open the door.
2
Access