2019 Peugeot 508 door lock
[x] Cancel search: door lockPage 92 of 320
90
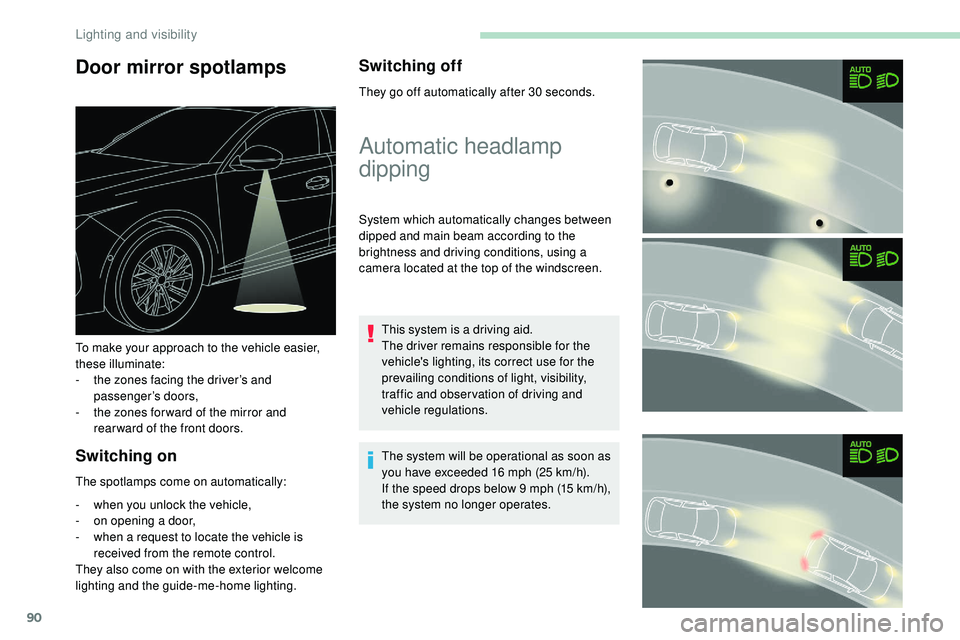
Door mirror spotlamps
Switching on
The spotlamps come on automatically:
-
w
hen you unlock the vehicle,
-
o
n opening a door,
-
w
hen a request to locate the vehicle is
received from the remote control.
They also come on with the exterior welcome
lighting and the guide-me-home lighting.
Switching off
They go off automatically after 30 seconds.
To make your approach to the vehicle easier,
these illuminate:
-
t
he zones facing the driver’s and
passenger’s doors,
-
t
he zones for ward of the mirror and
rear ward of the front doors.
Automatic headlamp
dipping
System which automatically changes between
dipped and main beam according to the
brightness and driving conditions, using a
camera located at the top of the windscreen.
This system is a driving aid.
The driver remains responsible for the
vehicle's lighting, its correct use for the
prevailing conditions of light, visibility,
traffic and obser vation of driving and
vehicle regulations.
The system will be operational as soon as
you have exceeded 16 mph (25
km/h).
If the speed drops below 9 mph (15
km/h),
the system no longer operates.
Lighting and visibility
Page 113 of 320
111
Children at the rear
At rear seating positions, always leave
sufficient space between the front seat
and:
-
a "
rear ward facing" child seat,
-
t
he child's feet for a child seat fitted
"forward facing".
To do this, move the front seat for wards
and, if necessary, straighten its backrest.
For optimal installation of the "forward
facing" child seat, verify that its backrest is
as close as possible to the backrest of the
vehicle seat, if possible in contact with it.
Children at the front
The legislation on carrying children on the
front passenger seat is specific to each
country. Refer to the legislation in force in
the country in which you are driving.
Deactivate the front passenger airbag
when a "rear ward facing" child seat is
installed on the front passenger seats.
Other wise, there is a risk of serious or
fatal injury to the child if the airbag is
deployed. Installing a booster seat (height adjuster)
The chest part of the seat belt must be
positioned on the child's shoulder without
touching the neck.
Ensure that the lap part of the seat belt
passes correctly over the child's thighs.
We recommend using a booster seat with
a backrest, equipped with a belt guide at
shoulder level.
Additional protections
To prevent accidental opening of the doors
and rear windows, use the child lock.
Take care not to open the rear windows by
more than one third.
To protect young children from the rays
of the sun, fit side blinds on the rear
windows.
As a safety precaution, do not leave:
-
a c
hild or children alone and
unattended in a vehicle,
-
a c
hild or an animal in a vehicle
which is exposed to the sun, with the
windows closed,
-
t
he keys within reach of children inside
the vehicle.Child seat at the rear
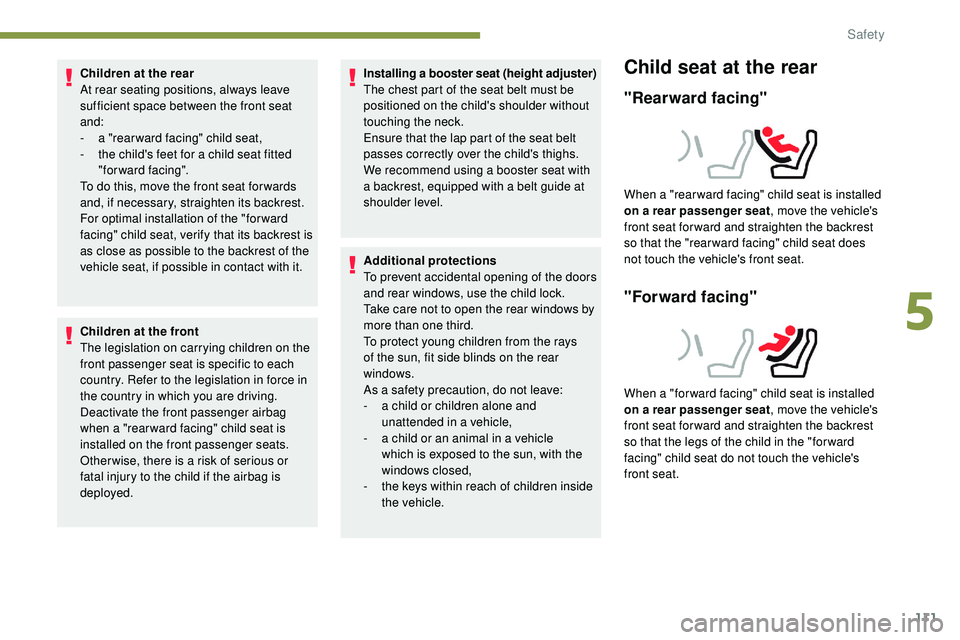
"Rearward facing"
When a "rear ward facing" child seat is installed
on a rear passenger seat , move the vehicle's
front seat for ward and straighten the backrest
so that the "rear ward facing" child seat does
not touch the vehicle's front seat.
"Forward facing"
When a "for ward facing" child seat is installed
on a rear passenger seat , move the vehicle's
front seat for ward and straighten the backrest
so that the legs of the child in the "for ward
facing" child seat do not touch the vehicle's
front seat.
5
Safety
Page 124 of 320
122
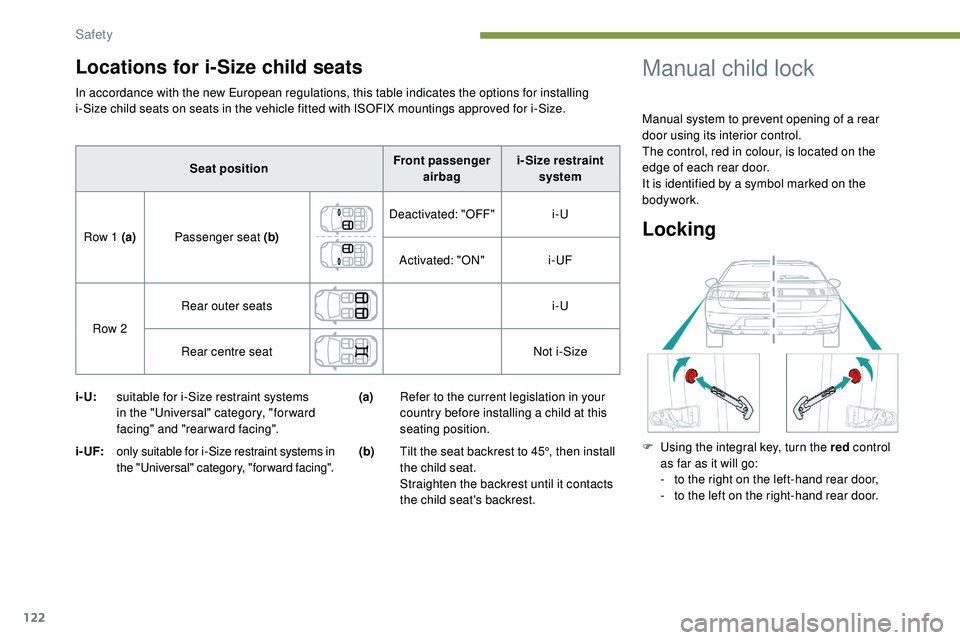
In accordance with the new European regulations, this table indicates the options for installing
i-Size child seats on seats in the vehicle fitted with ISOFIX mountings approved for i-Size.
i- U:suitable for i-Size restraint systems
in the "Universal" category, "forward
facing" and "rearward facing".
i - UF:
only suitable for i-Size restraint systems in
the "Universal" category, "forward facing".
(a) Refer to the current legislation in your
country before installing a child at this
seating position.
(b) Tilt the seat backrest to 45°, then install
the child seat.
Straighten the backrest until it contacts
the child seat's backrest.
Manual child lock
Manual system to prevent opening of a rear
door using its interior control.
The control, red in colour, is located on the
edge of each rear door.
It is identified by a symbol marked on the
bodywork.
Locking
F Using the integral key, turn the red control
as far as it will go:
-
t
o the right on the left-hand rear door,
-
t
o the left on the right-hand rear door.
Seat position
Front passenger
airbag i- Size restraint
system
Row 1 (a) Passenger seat (b) Deactivated: "OFF"
i-U
Activated: "ON" i-UF
Row 2 Rear outer seats
i-U
Rear centre seat Not i-Size
Locations for i-Size child seats
Safety
Page 125 of 320
123
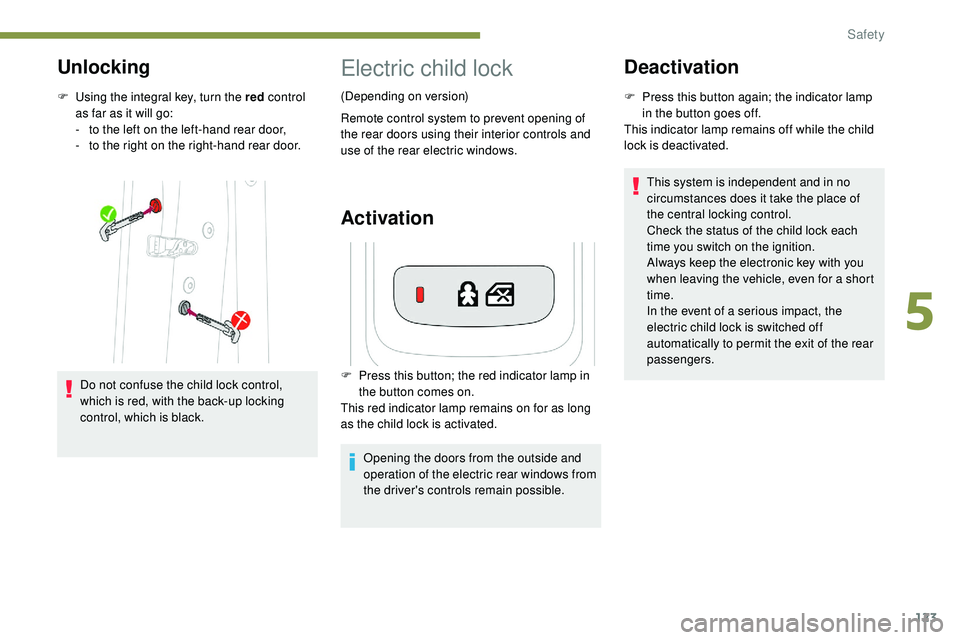
Unlocking
F Using the integral key, turn the red control
as far as it will go:
-
t
o the left on the left-hand rear door,
-
t
o the right on the right-hand rear door.
Do not confuse the child lock control,
which is red, with the back-up locking
control, which is black.
Electric child lock
(Depending on version)
Remote control system to prevent opening of
the rear doors using their interior controls and
use of the rear electric windows.
Activation
F Press this button; the red indicator lamp in the button comes on.
This red indicator lamp remains on for as long
as the child lock is activated.
Opening the doors from the outside and
operation of the electric rear windows from
the driver's controls remain possible.
Deactivation
F Press this button again; the indicator lamp in the button goes off.
This indicator lamp remains off while the child
lock is deactivated.
This system is independent and in no
circumstances does it take the place of
the central locking control.
Check the status of the child lock each
time you switch on the ignition.
Always keep the electronic key with you
when leaving the vehicle, even for a short
time.
In the event of a serious impact, the
electric child lock is switched off
automatically to permit the exit of the rear
passengers.
5
Safety
Page 129 of 320
127
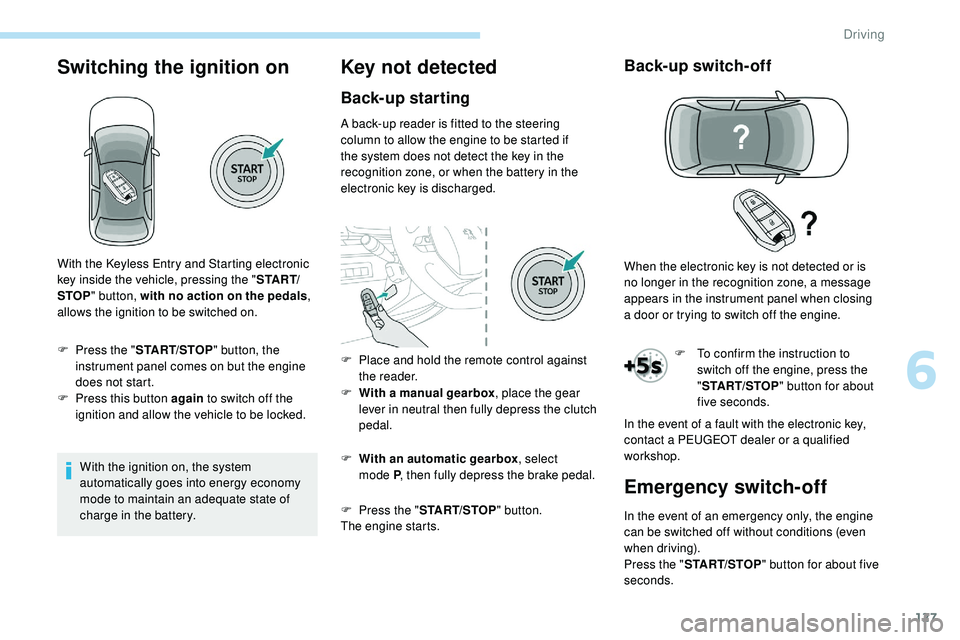
Switching the ignition on
With the ignition on, the system
automatically goes into energy economy
mode to maintain an adequate state of
charge in the battery.
Key not detected
Back-up starting
A back-up reader is fitted to the steering
column to allow the engine to be started if
the system does not detect the key in the
recognition zone, or when the battery in the
electronic key is discharged.
F
W
ith a manual gearbox , place the gear
lever in neutral then fully depress the clutch
pedal.
F
W
ith an automatic gearbox , select
mode
P, then fully depress the brake pedal.
F
P
ress the " START/STOP " button.
The engine starts.
Back-up switch-off
F To confirm the instruction to switch off the engine, press the
"START/STOP " button for about
five seconds.
With the Keyless Entry and Starting electronic
key inside the vehicle, pressing the "
S TA R T/
STOP " button, with no action on the pedals ,
allows the ignition to be switched on.
F
P
ress the "
START/STOP " button, the
instrument panel comes on but the engine
does not start.
F
P
ress this button again to switch off the
ignition and allow the vehicle to be locked. F
P
lace and hold the remote control against
the reader. When the electronic key is not detected or is
no longer in the recognition zone, a message
appears in the instrument panel when closing
a
door or trying to switch off the engine.
In the event of a fault with the electronic key,
contact a PEUGEOT dealer or a qualified
workshop.
Emergency switch-off
In the event of an emergency only, the engine
can be switched off without conditions (even
when driving).
Press the " START/STOP " button for about five
seconds.
6
Driving
Page 130 of 320
128
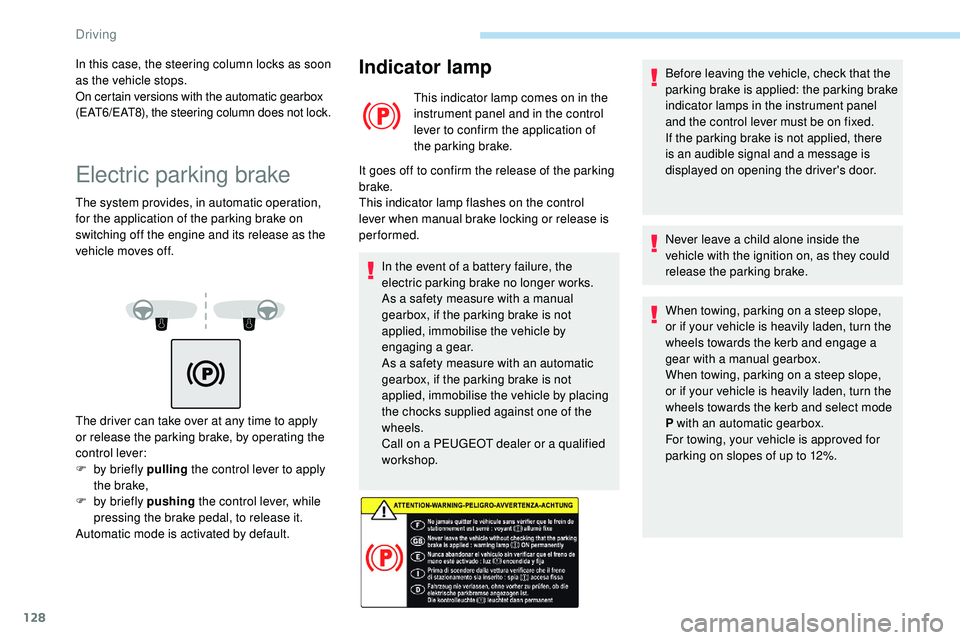
Electric parking brake
The system provides, in automatic operation,
for the application of the parking brake on
switching off the engine and its release as the
vehicle moves off.
Indicator lamp
This indicator lamp comes on in the
instrument panel and in the control
lever to confirm the application of
the parking brake.
It goes off to confirm the release of the parking
brake.
This indicator lamp flashes on the control
lever when manual brake locking or release is
performed.
In the event of a battery failure, the
electric parking brake no longer works.
As a safety measure with a manual
gearbox, if the parking brake is not
applied, immobilise the vehicle by
engaging a gear.
As a safety measure with an automatic
gearbox, if the parking brake is not
applied, immobilise the vehicle by placing
the chocks supplied against one of the
wheels.
Call on a PEUGEOT dealer or a qualified
workshop.
The driver can take over at any time to apply
or release the parking brake, by operating the
control lever:
F
b
y briefly pulling the control lever to apply
the brake,
F
b
y briefly pushing the control lever, while
pressing the brake pedal, to release it.
Automatic mode is activated by default. Before leaving the vehicle, check that the
parking brake is applied: the parking brake
indicator lamps in the instrument panel
and the control lever must be on fixed.
If the parking brake is not applied, there
is an audible signal and a message is
displayed on opening the driver's door.
Never leave a child alone inside the
vehicle with the ignition on, as they could
release the parking brake.
When towing, parking on a steep slope,
or if your vehicle is heavily laden, turn the
wheels towards the kerb and engage a
gear with a manual gearbox.
When towing, parking on a steep slope,
or if your vehicle is heavily laden, turn the
wheels towards the kerb and select mode
P with an automatic gearbox.
For towing, your vehicle is approved for
parking on slopes of up to 12%.
In this case, the steering column locks as soon
as the vehicle stops.
On certain versions with the automatic gearbox
(EAT6/EAT8), the steering column does not lock.
Driving
Page 132 of 320

130
Special cases
In some situations, you may need to operate
the parking brake manually.
Immobilisation of the vehicle
with the engine running
To immobilise the vehicle with the engine
running, briefly pull the control lever.
Application of the parking brake is confirmed
by illumination of the braking indicator lamp
and the P indicator lamp in the control lever,
accompanied by the display of the message
"Parking brake applied".
Parking the vehicle with the
brake released
In very cold conditions (ice), it is
recommended that the parking brake not
be applied.
To immobilise your vehicle, engage a gear
or fit the chocks against one of the wheels.F
R
elease the parking brake manually by
pushing the control lever while keeping your
foot on the brake pedal.
The complete release of the parking brake is
confirmed by the braking indicator lamp and the
P indicator lamp in the control lever going off,
accompanied by the display of the message
"Parking brake released".
F
S
witch off the ignition.
With an automatic gearbox, mode P is
automatically selected when the ignition is
switched off. The wheels are blocked.
For further information on the Automatic
gearbox , particularly in relation to leaving
the vehicle in free-wheeling mode, refer to
the corresponding section.
With an automatic gearbox, when mode
N is engaged, the opening of the driver's
door will cause an audible signal to sound.
It will stop when you close the driver's
door again.
Immobilisation of the vehicle with the
parking brake released.
F
S
witch off the engine.
Illumination of the indicator lamps in the
instrument panel and control lever confirm
the application of the parking brake.
F
S
witch on the ignition again, without starting
the engine.
Deactivating automatic
operation
In some situations, for example when it is
extremely cold or during towing (caravan,
recovery), it may be necessary to deactivate
automatic operation of the system.
F
S
tart the engine.
F
A
pply the parking brake with the control
lever, if it is released.
F
T
ake your foot fully off the brake pedal.
F
P
ush and hold the control lever in the
release direction for at least 10 seconds and
no more than 15 seconds.
F
R
elease the control lever.
F
P
ress and hold the brake pedal.
F
P
ull the control lever in the application
direction for 2 seconds.
Deactivation of the automatic functions
is confirmed by illumination of this
indicator lamp in the instrument panel.
Driving
Page 135 of 320

133
Steering mounted controls
In mode M or D, the steering mounted control
paddles allow the driver to change gear
manually.
These paddles cannot be used to engage
neutral, nor to select or leave reverse
g e a r.
Displays in the instrument
panel
If the driver's door is opened with the
ignition on, a message is displayed asking
you to put the gearbox into mode P .
The state of the gearbox is displayed in
the instrument panel for a few moments
after switching off the ignition.
Operation
With the engine running, if it is necessary to
press the brake pedal or the Unlock button
in order to change mode, an alert message is
displayed in the instrument panel.
Only appropriate attempted changes of mode
are accepted. With the engine running and the brakes
released, if R
, D or M is selected, the
vehicle moves off, even without pressing
the accelerator pedal.
Never press the accelerator and brake
pedals at the same time – risk of damage
to the gearbox!
In the event of a battery failure, you
must place the chock supplied with the
vehicle tools against one of the wheels to
immobilise the vehicle.
-
F
rom mode P
:
F
f
ully depress the brake pedal,
F press the
Unlock button,
F
w
hile continuing to press the brake pedal
and the Unlock button, select another
mode.
-
F
rom neutral N
, at a speed below 3 mph
(5
km/h):
F
f
ully depress the brake pedal,
F
w
hile continuing to press the brake pedal,
select another mode.
F
P
ull the right-hand "
+" paddle towards you
and release to change up a gear.
F
P
ull the left-hand "
-"
paddle towards
you
and release to change down a gear. When the ignition is switched on, the status
of the gearbox is displayed in the instrument
panel:
P
: park.
R : reverse.
N : neutral.
D1...D6 or D8 : automatic mode.
S : Sport mode.
M1...M6 or M8 : manual mode.
- : instruction not accepted in manual mode.
Unlocking the gearbox
6
Driving