2019 NISSAN ROGUE SPORT ECO mode
[x] Cancel search: ECO modePage 71 of 500
In addition to the above, certain objects
placed on the front passenger seat may
also cause the light to operate as de-
scribed above depending on their weight.
For additional information related to the
normal operation and troubleshooting of
this occupant classification sensor sys-
tem, please refer to “Normal operation”
(P.1-52) and “Troubleshooting” (P.1-53) in
this section.
Front passenger air bag:
The front passenger air bag is designed
to automatically turn OFF when the
vehicle is operated under some condi-
tions as described below as permitted by
U.S. regulations. If the front passenger air
bag is OFF, it will not inflate in a crash. The
driver air bag and other air bags in your
vehicle are not part of this system.
The purpose of the regulation is to help
reduce the risk of injury or death from an
inflating air bag to certain front passen-
ger seat occupants, such as children, by
requiring the air bag to be automatically
turned OFF.
The occupant classification sensors
(weight sensors) are on the seat cushion
frame under the front passenger seat and
are designed to detect an occupant and
objects on the seat. For example, if a child
is in the front passenger seat, the Ad-vanced Air Bag System is designed to turn
the passenger air bag OFF in accordance
with the regulations. Also, if a child
restraint of the type specified in the
regulations is on the seat, the occupant
classification sensors can detect it and
cause the air bag to turn OFF.
Front passenger seat adult occupants
who are properly seated and using the
seat belt as outlined in this manual
should not cause the passenger air bag
to be automatically turned OFF. For small
adults it may be turned OFF, however, if
the occupant does not sit in the seat
properly (for example, by not sitting up-
right, by sitting on an edge of the seat, or
by otherwise being out of position), this
could cause the sensors to turn the air
bag OFF. Always be sure to be seated and
wearing the seat belt properly for the
most effective protection by the seat belt
and supplemental air bag.
NISSAN recommends that pre-teens and
children be properly restrained in a rear
seat. NISSAN also recommends that ap-
propriate child restraints and booster
seats be properly installed in a rear seat.
If this is not possible, the occupant
classification sensors are designed to
operate as described above to turn the
front passenger air bag OFF for specified
child restraints. Failing to properly secure
child restraints and to use the Automatic
Locking Retractor (ALR) mode (child re-
straint mode) may allow the restraint to
tip or move in an accident or sudden stop.
This can also result in the passenger air
bag inflating in a crash instead of being
OFF. (See “Child restraints” (P.1-20) for
proper use and installation.)
If the front passenger seat is not occu-
pied, the passenger air bag is designed
not to inflate in a crash. However, heavy
objects placed on the seat could result in
air bag inflation, because of the object
being detected by the occupant classifi-
cation sensors. Other conditions could
also result in air bag inflation, such as if a
child is standing on the seat, or if two
children are on the seat, contrary to the
instructions in this manual. Always be
sure that you and all vehicle occupants
are seated and restrained properly.
Using the front passenger air bag status
light, you can monitor when the front
passenger air bag is automatically turned
OFF.
If an adult occupant is in the seat but the
front passenger air bag status light is
illuminated (indicating that the air bag is
OFF), it could be that the person is a small
adult, or is not sitting on the seat
properly.
If a child restraint must be used in the
Safety — Seats, seat belts and supplemental restraint system1-51
Page 81 of 500
2 Instruments and controls
Cockpit ........................................................................\
.......................... 2-3
Instrument panel ........................................................................\
.. 2-4
Meters and gauges ..................................................................... 2-5Speedometer and odometer ........................................ 2-6
Tachometer ........................................................................\
........ 2-7
Engine coolant temperature gauge ....................... 2-7
Fuel gauge ........................................................................\
........... 2-8
Instrument brightness control .................................... 2-9
Continuously Variable Transmission (CVT)
position indicator (if so equipped) ........................... 2-9
Warning lights, indicator lights and
audible reminders ..................................................................... 2-10 Checking lights ..................................................................... 2-11
Warning lights ........................................................................\
2-11
Indicator lights ...................................................................... 2-16
Audible reminders .............................................................. 2-18
Vehicle information display ............................................... 2-19 How to use the vehicle
information display ........................................................... 2-20
Startup display ...................................................................... 2-20
Settings ........................................................................\
............... 2-21
Vehicle information display warnings
and indicators ........................................................................\
2-31
Trip computer ........................................................................\
2-39
Clock and outside air temperature ...................... 2-41 Security systems ....................................................................... 2-42
Vehicle Security System .............................................. 2-42
NISSAN Vehicle Immobilizer System ................. 2-43
Wiper and washer switch ................................................... 2-45 Windshield wiper and washer operation ...... 2-45
Rear window wiper and washer switch ................. 2-46
Rear window and outside mirror
defroster switch ........................................................................\
. 2-47
Headlight and turn signal switch ................................ 2-48 Headlight switch ............................................................... 2-48
Turn signal switch ........................................................... 2-53
Fog light switch (if so equipped) ......................... 2-54
Horn ........................................................................\
............................. 2-54
Heated steering wheel (if so equipped) .................. 2-54
Heated seats (if so equipped) ......................................... 2-55
Dynamic driver assistance switch (models
without ProPILOT assist) (if so equipped) ............. 2-56
Steering assist switch (models with ProPILOT
assist) (if so equipped) .......................................................... 2-57
Vehicle Dynamic Control (VDC) off switch ........... 2-57
Intelligent 4x4 LOCK switch (if so equipped) ...... 2-58
Rear door alert ........................................................................\
.... 2-58
ECO mode switch ..................................................................... 2-59
Power outlet ........................................................................\
......... 2-60 USB (Universal Serial Bus)
charging connector ........................................................ 2-61
Page 83 of 500
WAA0056X
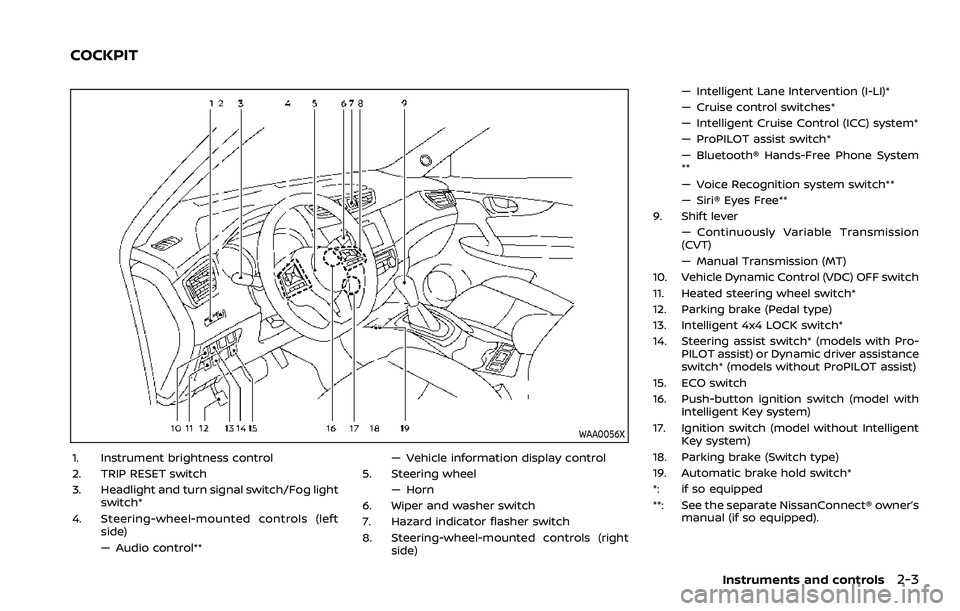
1. Instrument brightness control
2. TRIP RESET switch
3. Headlight and turn signal switch/Fog lightswitch*
4. Steering-wheel-mounted controls (left side)
— Audio control** — Vehicle information display control
5. Steering wheel — Horn
6. Wiper and washer switch
7. Hazard indicator flasher switch
8. Steering-wheel-mounted controls (right side) — Intelligent Lane Intervention (I-LI)*
— Cruise control switches*
— Intelligent Cruise Control (ICC) system*
— ProPILOT assist switch*
— Bluetooth® Hands-Free Phone System
**
— Voice Recognition system switch**
— Siri® Eyes Free**
9. Shift lever — Continuously Variable Transmission
(CVT)
— Manual Transmission (MT)
10. Vehicle Dynamic Control (VDC) OFF switch
11. Heated steering wheel switch*
12. Parking brake (Pedal type)
13. Intelligent 4x4 LOCK switch*
14. Steering assist switch* (models with Pro- PILOT assist) or Dynamic driver assistance
switch* (models without ProPILOT assist)
15. ECO switch
16. Push-button ignition switch (model with Intelligent Key system)
17. Ignition switch (model without Intelligent Key system)
18. Parking brake (Switch type)
19. Automatic brake hold switch*
*: if so equipped
**: See the separate NissanConnect® owner’s manual (if so equipped).
Instruments and controls2-3
COCKPIT
Page 86 of 500
2-6Instruments and controls
JVI1006X
Speedometer
SPEEDOMETER AND ODOMETER
Speedometer
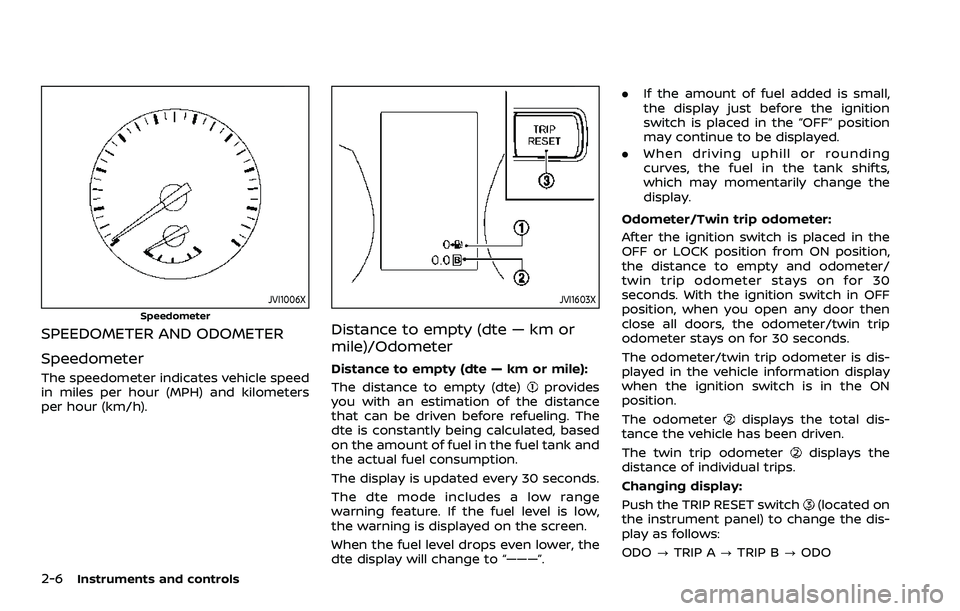
The speedometer indicates vehicle speed
in miles per hour (MPH) and kilometers
per hour (km/h).
JVI1603X
Distance to empty (dte — km or
mile)/Odometer
Distance to empty (dte — km or mile):
The distance to empty (dte)
provides
you with an estimation of the distance
that can be driven before refueling. The
dte is constantly being calculated, based
on the amount of fuel in the fuel tank and
the actual fuel consumption.
The display is updated every 30 seconds.
The dte mode includes a low range
warning feature. If the fuel level is low,
the warning is displayed on the screen.
When the fuel level drops even lower, the
dte display will change to “———”. .
If the amount of fuel added is small,
the display just before the ignition
switch is placed in the “OFF” position
may continue to be displayed.
. When driving uphill or rounding
curves, the fuel in the tank shifts,
which may momentarily change the
display.
Odometer/Twin trip odometer:
After the ignition switch is placed in the
OFF or LOCK position from ON position,
the distance to empty and odometer/
twin trip odometer stays on for 30
seconds. With the ignition switch in OFF
position, when you open any door then
close all doors, the odometer/twin trip
odometer stays on for 30 seconds.
The odometer/twin trip odometer is dis-
played in the vehicle information display
when the ignition switch is in the ON
position.
The odometer
displays the total dis-
tance the vehicle has been driven.
The twin trip odometer
displays the
distance of individual trips.
Changing display:
Push the TRIP RESET switch
(located on
the instrument panel) to change the dis-
play as follows:
ODO ?TRIP A ?TRIP B ?ODO
Page 89 of 500
JVI0644X
JVI0661M
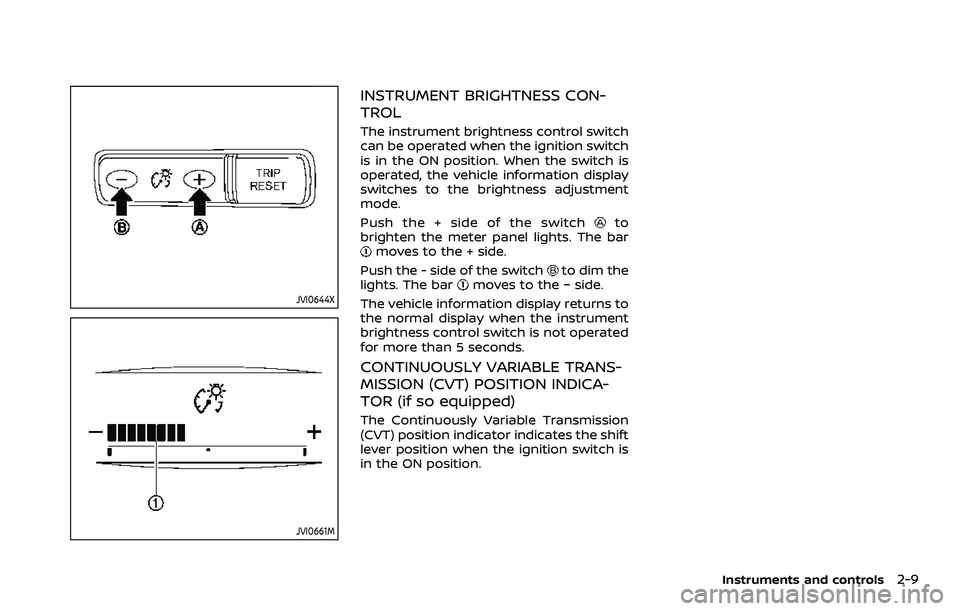
INSTRUMENT BRIGHTNESS CON-
TROL
The instrument brightness control switch
can be operated when the ignition switch
is in the ON position. When the switch is
operated, the vehicle information display
switches to the brightness adjustment
mode.
Push the + side of the switch
to
brighten the meter panel lights. The bar
moves to the + side.
Push the - side of the switch
to dim the
lights. The barmoves to the − side.
The vehicle information display returns to
the normal display when the instrument
brightness control switch is not operated
for more than 5 seconds.
CONTINUOUSLY VARIABLE TRANS-
MISSION (CVT) POSITION INDICA-
TOR (if so equipped)
The Continuously Variable Transmission
(CVT) position indicator indicates the shift
lever position when the ignition switch is
in the ON position.
Instruments and controls2-9
Page 91 of 500
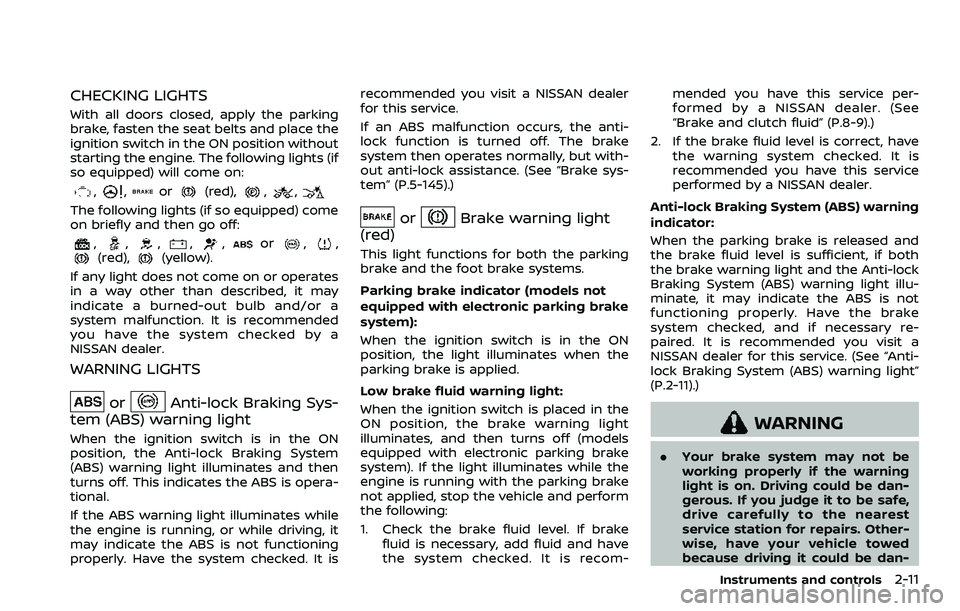
CHECKING LIGHTS
With all doors closed, apply the parking
brake, fasten the seat belts and place the
ignition switch in the ON position without
starting the engine. The following lights (if
so equipped) will come on:
,,or(red),,,
The following lights (if so equipped) come
on briefly and then go off:
,,,,,or,,(red),(yellow).
If any light does not come on or operates
in a way other than described, it may
indicate a burned-out bulb and/or a
system malfunction. It is recommended
you have the system checked by a
NISSAN dealer.
WARNING LIGHTS
orAnti-lock Braking Sys-
tem (ABS) warning light
When the ignition switch is in the ON
position, the Anti-lock Braking System
(ABS) warning light illuminates and then
turns off. This indicates the ABS is opera-
tional.
If the ABS warning light illuminates while
the engine is running, or while driving, it
may indicate the ABS is not functioning
properly. Have the system checked. It is recommended you visit a NISSAN dealer
for this service.
If an ABS malfunction occurs, the anti-
lock function is turned off. The brake
system then operates normally, but with-
out anti-lock assistance. (See “Brake sys-
tem” (P.5-145).)
orBrake warning light
(red)
This light functions for both the parking
brake and the foot brake systems.
Parking brake indicator (models not
equipped with electronic parking brake
system):
When the ignition switch is in the ON
position, the light illuminates when the
parking brake is applied.
Low brake fluid warning light:
When the ignition switch is placed in the
ON position, the brake warning light
illuminates, and then turns off (models
equipped with electronic parking brake
system). If the light illuminates while the
engine is running with the parking brake
not applied, stop the vehicle and perform
the following:
1. Check the brake fluid level. If brake fluid is necessary, add fluid and have
the system checked. It is recom- mended you have this service per-
formed by a NISSAN dealer. (See
“Brake and clutch fluid” (P.8-9).)
2. If the brake fluid level is correct, have the warning system checked. It is
recommended you have this service
performed by a NISSAN dealer.
Anti-lock Braking System (ABS) warning
indicator:
When the parking brake is released and
the brake fluid level is sufficient, if both
the brake warning light and the Anti-lock
Braking System (ABS) warning light illu-
minate, it may indicate the ABS is not
functioning properly. Have the brake
system checked, and if necessary re-
paired. It is recommended you visit a
NISSAN dealer for this service. (See “Anti-
lock Braking System (ABS) warning light”
(P.2-11).)
WARNING
. Your brake system may not be
working properly if the warning
light is on. Driving could be dan-
gerous. If you judge it to be safe,
drive carefully to the nearest
service station for repairs. Other-
wise, have your vehicle towed
because driving it could be dan-
Instruments and controls2-11
Page 94 of 500
2-14Instruments and controls
accident and could result in ser-
ious personal injury. Check the
tire pressure for all four tires.
Adjust the tire pressure to the
recommended COLD tire pressure
shown on the Tire and Loading
Information label to turn the low
tire pressure warning light OFF. If
the light still illuminates while
driving after adjusting the tire
pressure, a tire may be flat or
the TPMS may be malfunctioning.
If you have a flat tire, replace it
with a spare tire as soon as
possible. If no tire is flat and all
tires are properly inflated, it is
recommended you consult a
NISSAN dealer.
. Since the spare tire is not
equipped with the TPMS, when a
spare tire is mounted or a wheel
is replaced, the TPMS will not
function and the low tire pressure
warning light will flash for ap-
proximately 1 minute. The light
will remain on after 1 minute.
Have your tires replaced and/or
TPMS system reset as soon as
possible. It is recommended you
visit a NISSAN dealer for these
services. .
Replacing tires with those not
originally specified by NISSAN
could affect the proper operation
of the TPMS.
CAUTION
.The TPMS is not a substitute for
the regular tire pressure check.
Be sure to check the tire pressure
regularly.
. If the vehicle is being driven at
speeds of less than 16 MPH (25
km/h), the TPMS may not operate
correctly.
. Be sure to install the specified
size of tires to the four wheels
correctly.
Master warning light
When the ignition switch is in the ON
position, the master warning light illumi-
nates if any of the following are displayed
on the vehicle information display.
.No Key detected warning (if so
equipped)
. Shift to Park warning (Continuously
Variable Transmission (CVT) models) (if so equipped)
. Key battery low warning (if so
equipped)
. Engine start operation for Intelligent
Key system indicator (if so equipped)
. Key ID incorrect warning (if so
equipped)
. Release Parking Brake warning
. Low fuel level warning
. Low Washer Fluid (if so equipped)
. Door/liftgate open warning
. Key System Error: See Owner’s Manual
warning (if so equipped)
. Loose Fuel Cap
. Tire Pressure Low - Add Air warning
. Low oil pressure Stop vehicle warning
. AWD Error: See Owner’s Manual warn-
ing (if so equipped)
. AWD High Temp. Stop vehicle warning
(if so equipped)
. Tire Size Incorrect: See Owner’s Man-
ual warning (if so equipped)
. Battery Voltage Low Charge Battery
warning
. Shipping Mode On Push Storage Fuse
warning (if so equipped)
. Power will turn off to save the battery
warning
. Power turned off to save the battery
warning
Page 95 of 500
.Reminder: Turn OFF Headlights warn-
ing
. Headlight System Error: See Owner’s
Manual warning (if so equipped)
. Timer Alert - Time for a driver break?
indicator (if so equipped)
. Chassis Control System Error: See
Owner’s Manual warning
. CVT Error: See Owner’s Manual warn-
ing (for Continuously Variable Trans-
mission (CVT) models)
. Malfunction warning (if so equipped)
. Unavailable: High Cabin Temperature
warning (if so equipped)
. Not Available: Poor Road Conditions
warning (if so equipped)
. Currently unavailable warning (if so
equipped)
. Unavailable: Front Radar Obstruction
warning
. Unavailable: Side Radar Obstruction
warning
. Other warning
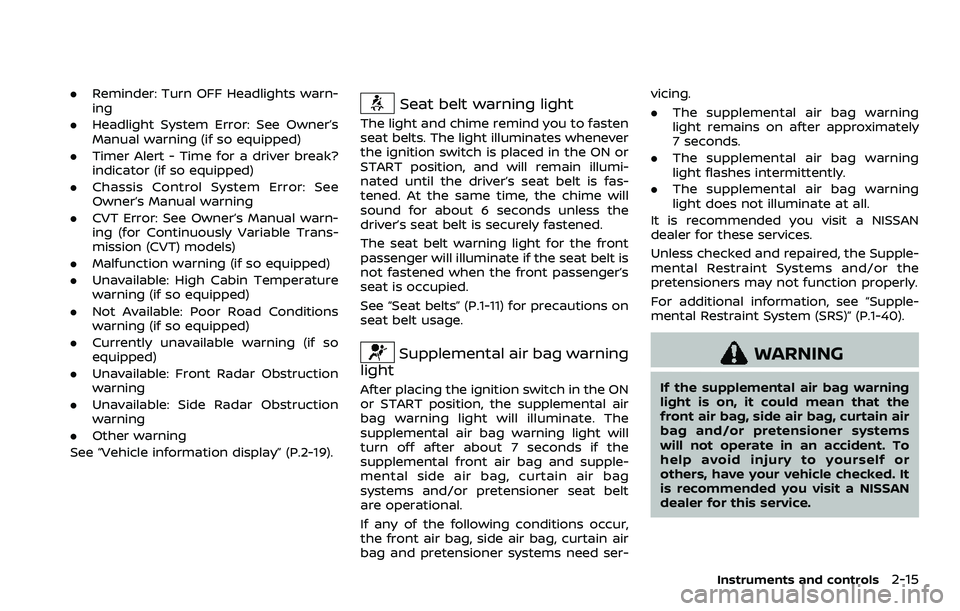
See “Vehicle information display” (P.2-19).Seat belt warning light
The light and chime remind you to fasten
seat belts. The light illuminates whenever
the ignition switch is placed in the ON or
START position, and will remain illumi-
nated until the driver’s seat belt is fas-
tened. At the same time, the chime will
sound for about 6 seconds unless the
driver’s seat belt is securely fastened.
The seat belt warning light for the front
passenger will illuminate if the seat belt is
not fastened when the front passenger’s
seat is occupied.
See “Seat belts” (P.1-11) for precautions on
seat belt usage.
Supplemental air bag warning
light
After placing the ignition switch in the ON
or START position, the supplemental air
bag warning light will illuminate. The
supplemental air bag warning light will
turn off after about 7 seconds if the
supplemental front air bag and supple-
mental side air bag, curtain air bag
systems and/or pretensioner seat belt
are operational.
If any of the following conditions occur,
the front air bag, side air bag, curtain air
bag and pretensioner systems need ser- vicing.
.
The supplemental air bag warning
light remains on after approximately
7 seconds.
. The supplemental air bag warning
light flashes intermittently.
. The supplemental air bag warning
light does not illuminate at all.
It is recommended you visit a NISSAN
dealer for these services.
Unless checked and repaired, the Supple-
mental Restraint Systems and/or the
pretensioners may not function properly.
For additional information, see “Supple-
mental Restraint System (SRS)” (P.1-40).
WARNING
If the supplemental air bag warning
light is on, it could mean that the
front air bag, side air bag, curtain air
bag and/or pretensioner systems
will not operate in an accident. To
help avoid injury to yourself or
others, have your vehicle checked. It
is recommended you visit a NISSAN
dealer for this service.
Instruments and controls2-15