Page 163 of 516

Always evenly distribute the cargo on the
tubular roof rack.The maximum total
load is 125 lbs. (56 kg) evenly distributed.
Be careful that your vehicle does not ex-
ceed the Gross Vehicle Weight Rating
(GVWR) or the Gross Axle Weight Ratings
(GAWR front and rear). The GVWR and GAWR
are located on the F.M.V.S.S. label (located
on the driver’s side door jamb pillar). For
additional information, refer to “Vehicle
loading information” in the “Technical and
consumer information” section of this
manual.
The front crossbar can be adjusted or re-
moved. Use the TORX® driver provided in
the tool kit to loosen both crossbar adjust-
ing screws.
To adjust:
1. Loosen the adjusting screws with the TORX® driver
�1by turning counter-
clockwise
�A.
2. When the clamp is loosened, move the crossbar so the cargo can be posi-
tioned on the crossbar
�B.
3. Tighten the crossbar adjusting screws with the TORX® driver by turning clock-
wise.
4. Secure the cargo with rope. 5. Always check the tightness of the
crossbar adjusting screws.
To remove: 1. Loosen the adjusting screws with the TORX® driver
�1by turning counter-
clockwise
�A.
2. Rotate the clamps
�C.
3. Remove the crossbar.
4. Reverse to install.
5. Always check the tightness of the crossbar adjusting screws.
If you hear wind noise coming from the roof
rack while driving, adjust the roof rack
crossbar to the neutral position.
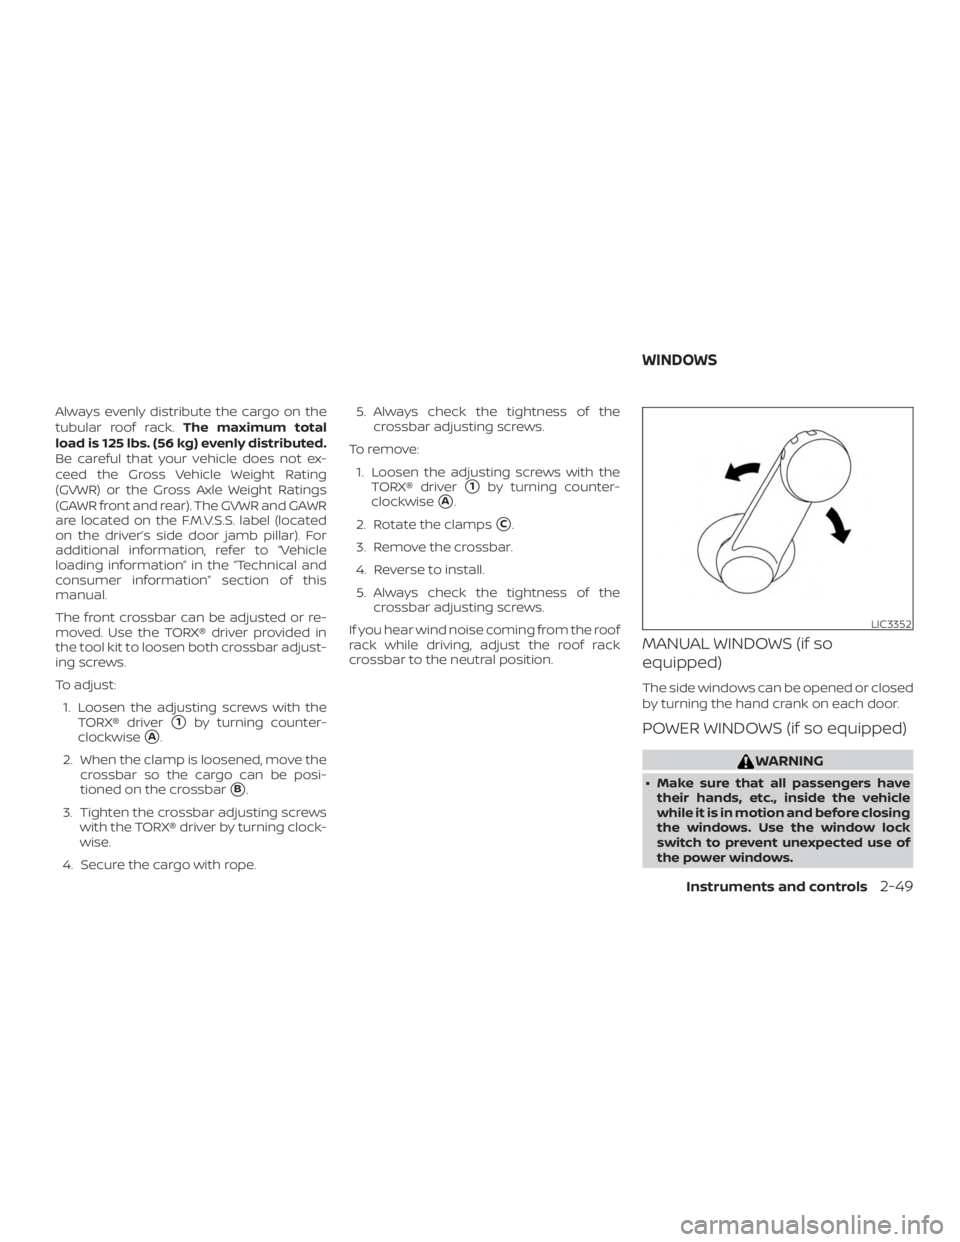
MANUAL WINDOWS (if so
equipped)
The side windows can be opened or closed
by turning the hand crank on each door.
POWER WINDOWS (if so equipped)
Page 164 of 516

∙ To help avoid risk of injury or deaththrough unintended operation of the
vehicle and/or its systems, including
entrapment in windows or inadver-
tent door lock activation, do not leave
children, people who require the as-
sistance of others or pets unattended
in your vehicle. Additionally, the tem-
perature inside a closed vehicle on a
warm day can quickly become high
enough to cause a significant risk of
injury or death to people and pets.
The power windows operate when the ig-
nition switch is placed in the ON position or
for a period of time af ter the ignition switch
is placed in the ACC or OFF position. If the
driver’s or passenger’s door is opened dur-
ing this period of time, the power to the
windows is canceled.
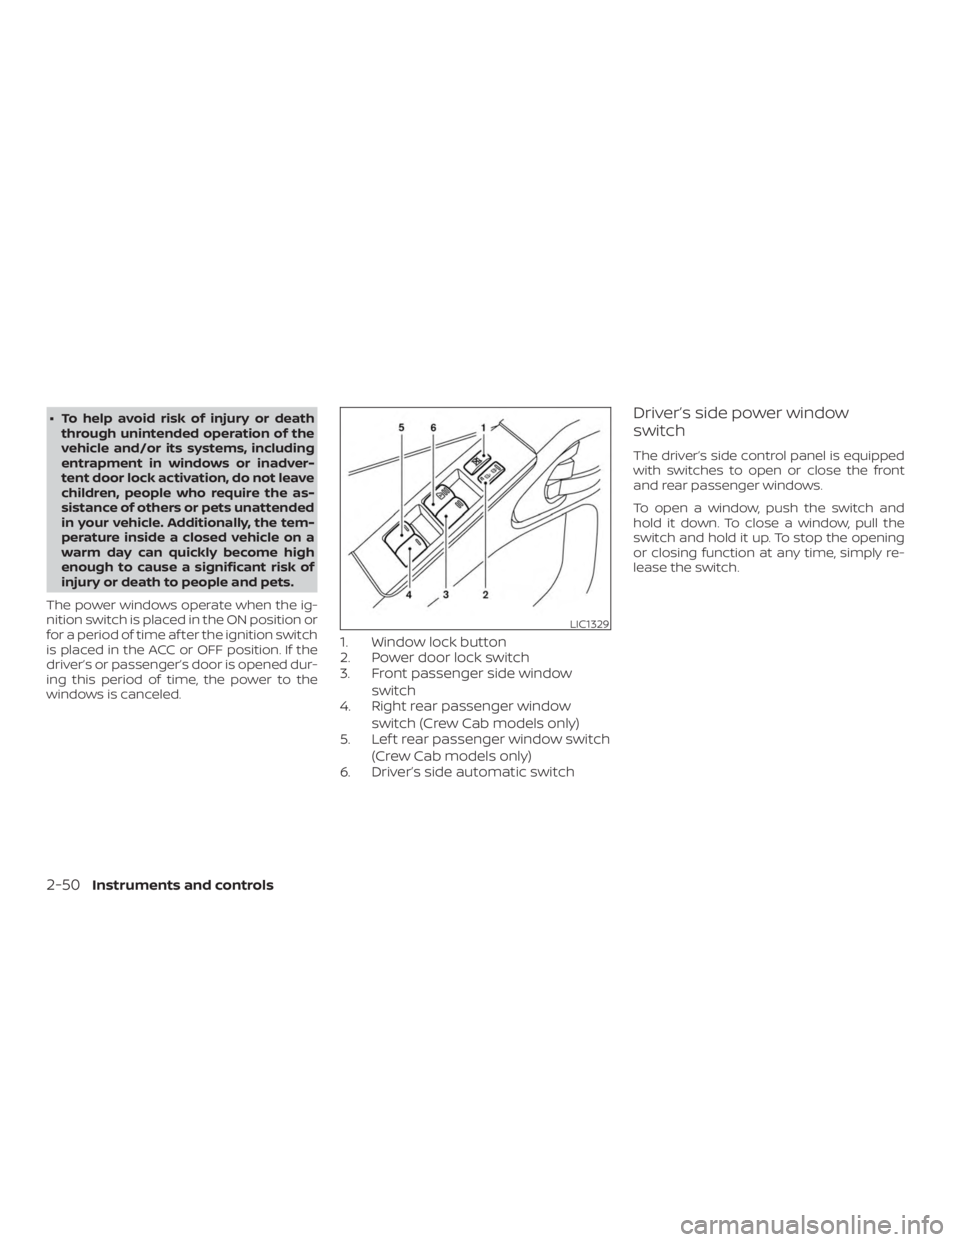
1. Window lock button
2. Power door lock switch
3. Front passenger side window switch
4. Right rear passenger window
switch (Crew Cab models only)
5. Lef t rear passenger window switch
(Crew Cab models only)
6. Driver’s side automatic switch
Driver’s side power window
switch
The driver’s side control panel is equipped
with switches to open or close the front
and rear passenger windows.
To open a window, push the switch and
hold it down. To close a window, pull the
switch and hold it up. To stop the opening
or closing function at any time, simply re-
lease the switch.
Page 168 of 516

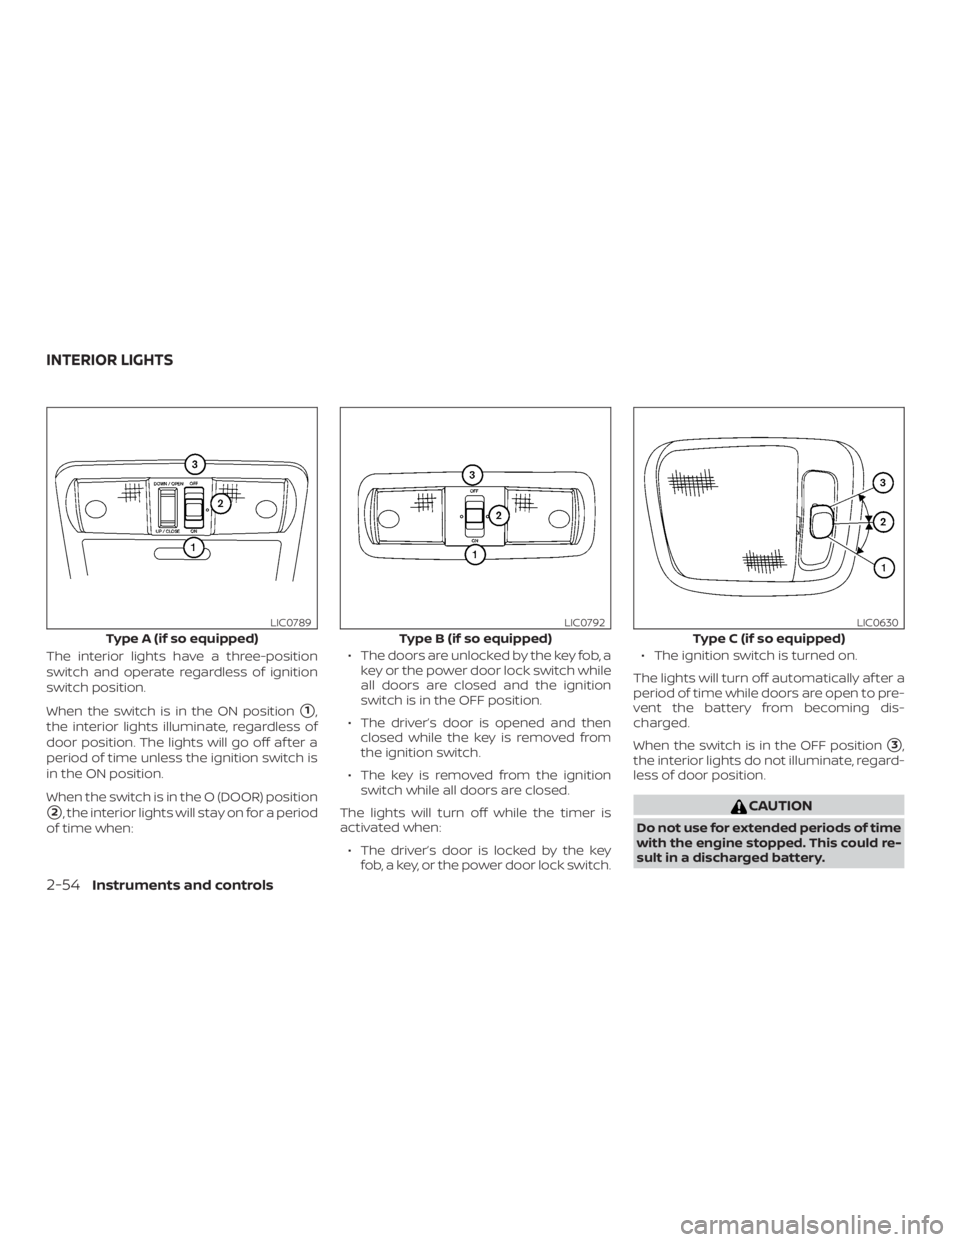
The interior lights have a three-position
switch and operate regardless of ignition
switch position.
When the switch is in the ON position
�1,
the interior lights illuminate, regardless of
door position. The lights will go off af ter a
period of time unless the ignition switch is
in the ON position.
When the switch is in the O (DOOR) position
�2, the interior lights will stay on for a period
of time when: ∙ The doors are unlocked by the key fob, a
key or the power door lock switch while
all doors are closed and the ignition
switch is in the OFF position.
∙ The driver’s door is opened and then closed while the key is removed from
the ignition switch.
∙ The key is removed from the ignition switch while all doors are closed.
The lights will turn off while the timer is
activated when: ∙ The driver’s door is locked by the key fob, a key, or the power door lock switch. ∙ The ignition switch is turned on.
The lights will turn off automatically af ter a
period of time while doors are open to pre-
vent the battery from becoming dis-
charged.
When the switch is in the OFF position
�3,
the interior lights do not illuminate, regard-
less of door position.
Page 176 of 516

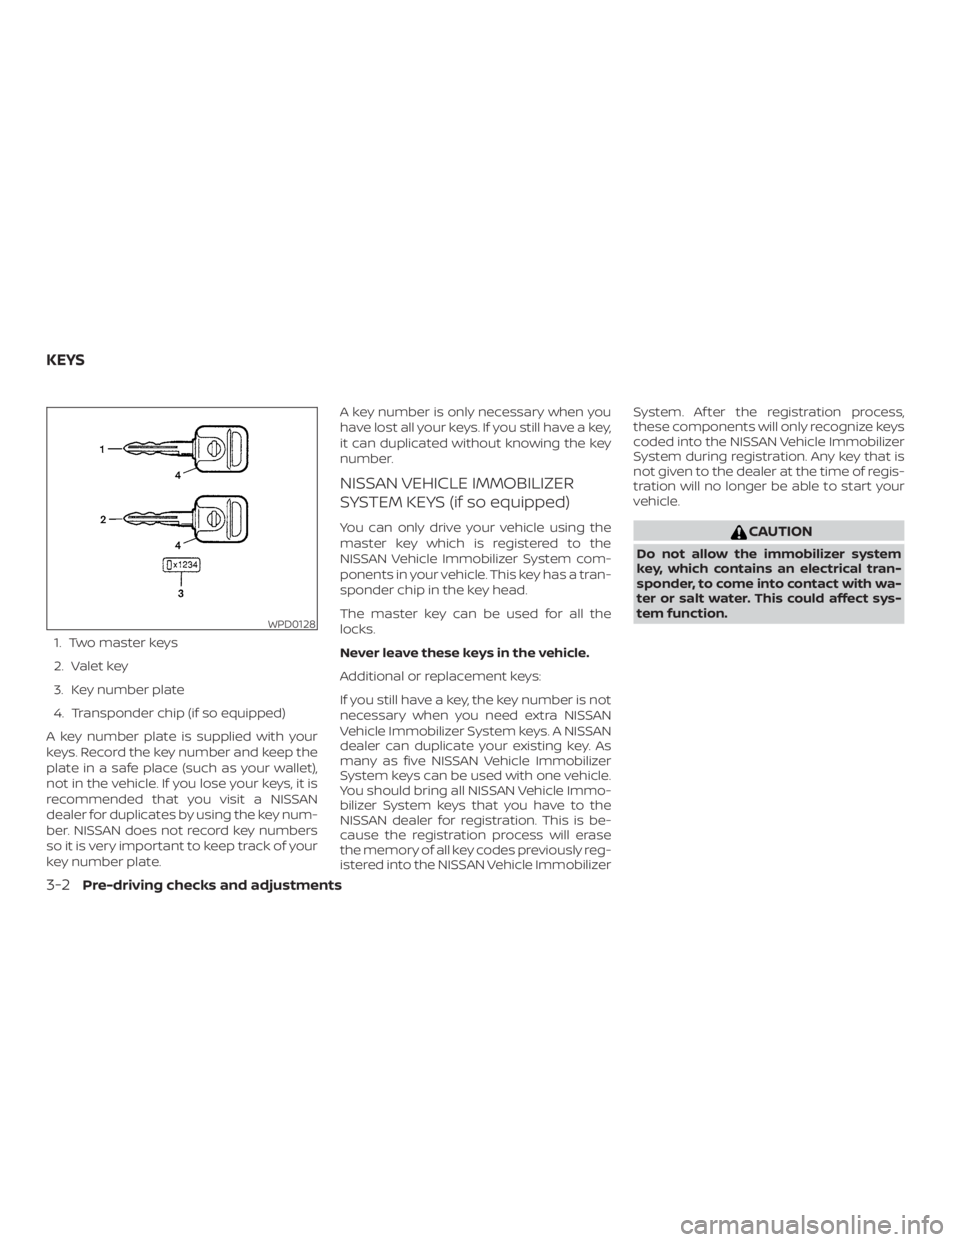
1. Two master keys
2. Valet key
3. Key number plate
4. Transponder chip (if so equipped)
A key number plate is supplied with your
keys. Record the key number and keep the
plate in a safe place (such as your wallet),
not in the vehicle. If you lose your keys, it is
recommended that you visit a NISSAN
dealer for duplicates by using the key num-
ber. NISSAN does not record key numbers
so it is very important to keep track of your
key number plate. A key number is only necessary when you
have lost all your keys. If you still have a key,
it can duplicated without knowing the key
number.
NISSAN VEHICLE IMMOBILIZER
SYSTEM KEYS (if so equipped)
You can only drive your vehicle using the
master key which is registered to the
NISSAN Vehicle Immobilizer System com-
ponents in your vehicle. This key has a tran-
sponder chip in the key head.
The master key can be used for all the
locks.
Never leave these keys in the vehicle.
Additional or replacement keys:
If you still have a key, the key number is not
necessary when you need extra NISSAN
Vehicle Immobilizer System keys. A NISSAN
dealer can duplicate your existing key. As
many as five NISSAN Vehicle Immobilizer
System keys can be used with one vehicle.
You should bring all NISSAN Vehicle Immo-
bilizer System keys that you have to the
NISSAN dealer for registration. This is be-
cause the registration process will erase
the memory of all key codes previously reg-
istered into the NISSAN Vehicle ImmobilizerSystem. Af ter the registration process,
these components will only recognize keys
coded into the NISSAN Vehicle Immobilizer
System during registration. Any key that is
not given to the dealer at the time of regis-
tration will no longer be able to start your
vehicle.
Page 177 of 516
When the doors are locked using one of the
following methods, the doors cannot be
opened using the inside or outside door
handles. The doors must be unlocked to
open the doors.
Page 180 of 516
3. Open the door to the desired position.
AUTOMATIC DOOR LOCKS (if so
equipped)
∙ All doors lock automatically when thevehicle speed reaches 15 mph
(24 km/h).
∙ All doors unlock automatically when the transmission is placed in the P (Park)
position, when the ignition is turned to
the OFF position, or when the key is re-
moved from the ignition.
CHILD SAFETY REAR DOOR LOCK
(if so equipped)
Child safety locks help prevent the rear
doors from being opened accidentally, es-
pecially when small children are in the ve-
hicle.
The child safety lock levers are located on
the edge of the rear doors.
When the lever is in the LOCK position,
the door can be opened only from the
outside.
Page 189 of 516
1. To block glare from the front, swingdown
�1the main sun visor.
2. To block glare from the side, remove the main sun visor from the center
mount and swing the visor to the side
�2.
3. To extend
�3the sun visor, slide in or
out as needed (if so equipped).
Page 196 of 516
Locking the tailgate
To lock the tailgate, turn the key toward the
passenger side of the vehicle
�1. To unlock,
turn the key toward the driver side
�2.
BED EXTENDER (if so equipped)