Page 168 of 516
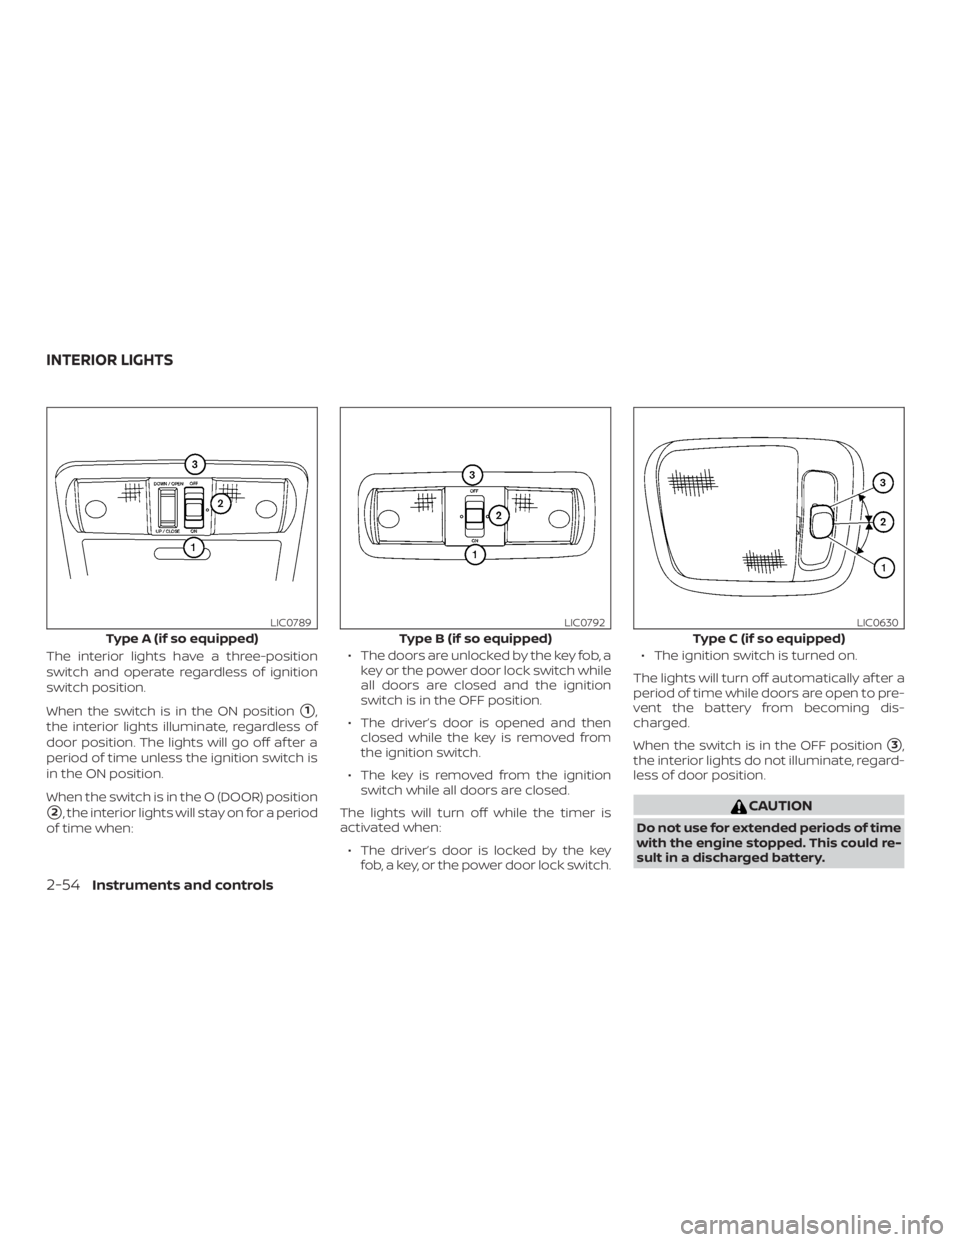
The interior lights have a three-position
switch and operate regardless of ignition
switch position.
When the switch is in the ON position
�1,
the interior lights illuminate, regardless of
door position. The lights will go off af ter a
period of time unless the ignition switch is
in the ON position.
When the switch is in the O (DOOR) position
�2, the interior lights will stay on for a period
of time when: ∙ The doors are unlocked by the key fob, a
key or the power door lock switch while
all doors are closed and the ignition
switch is in the OFF position.
∙ The driver’s door is opened and then closed while the key is removed from
the ignition switch.
∙ The key is removed from the ignition switch while all doors are closed.
The lights will turn off while the timer is
activated when: ∙ The driver’s door is locked by the key fob, a key, or the power door lock switch. ∙ The ignition switch is turned on.
The lights will turn off automatically af ter a
period of time while doors are open to pre-
vent the battery from becoming dis-
charged.
When the switch is in the OFF position
�3,
the interior lights do not illuminate, regard-
less of door position.
Page 180 of 516
3. Open the door to the desired position.
AUTOMATIC DOOR LOCKS (if so
equipped)
∙ All doors lock automatically when thevehicle speed reaches 15 mph
(24 km/h).
∙ All doors unlock automatically when the transmission is placed in the P (Park)
position, when the ignition is turned to
the OFF position, or when the key is re-
moved from the ignition.
CHILD SAFETY REAR DOOR LOCK
(if so equipped)
Child safety locks help prevent the rear
doors from being opened accidentally, es-
pecially when small children are in the ve-
hicle.
The child safety lock levers are located on
the edge of the rear doors.
When the lever is in the LOCK position,
the door can be opened only from the
outside.
Page 181 of 516
As many as five key fobs can be used with
one vehicle. For information concerning
the purchase and use of additional key
fobs, it is recommended that you visit a
NISSAN dealer.
The key fob will not function when:∙ The battery is discharged.
∙ The distance between the vehicle and the key fob is over 33 f t (10 m).
The panic alarm will not activate when
the key is in the ignition switch.
Page 260 of 516
CAUTION
∙ Do not force the USB device into theUSB port. Inserting the USB device
tilted or up-side-down into the port
may damage the port. Make sure that
the USB device is connected correctly
into the USB port.
∙ Do not grab the USB port cover (if so equipped) when pulling the USB de-
vice out of the port. This could dam-
age the port and the cover.
∙ Do not leave the USB cable in a place where it can be pulled unintentionally.
Pulling the cable may damage the
port.
For additional information, refer to your de-
vice manufacturer’s owner information re-
garding the proper use and care of the
device.
The USB port is located on the instrument
panel. Insert the USB device into the instru-
ment panel.
When a compatible storage device is
plugged into the connection port, compat-
ible audio files on the storage device can be
played through the vehicle’s audio system.
Audio file operation
AUX (auxiliary) button
Place the ignition switch in the ON or ACC
position and press the AUX button to
switch to the USB input mode. If another
audio source is playing and a USB connec-
tion port device is inserted, press the AUX
button until the center display changes to
the USB memory mode.
If the system has been turned off while the
USB memory was playing, press the ON-
OFF button to restart the USB memory.
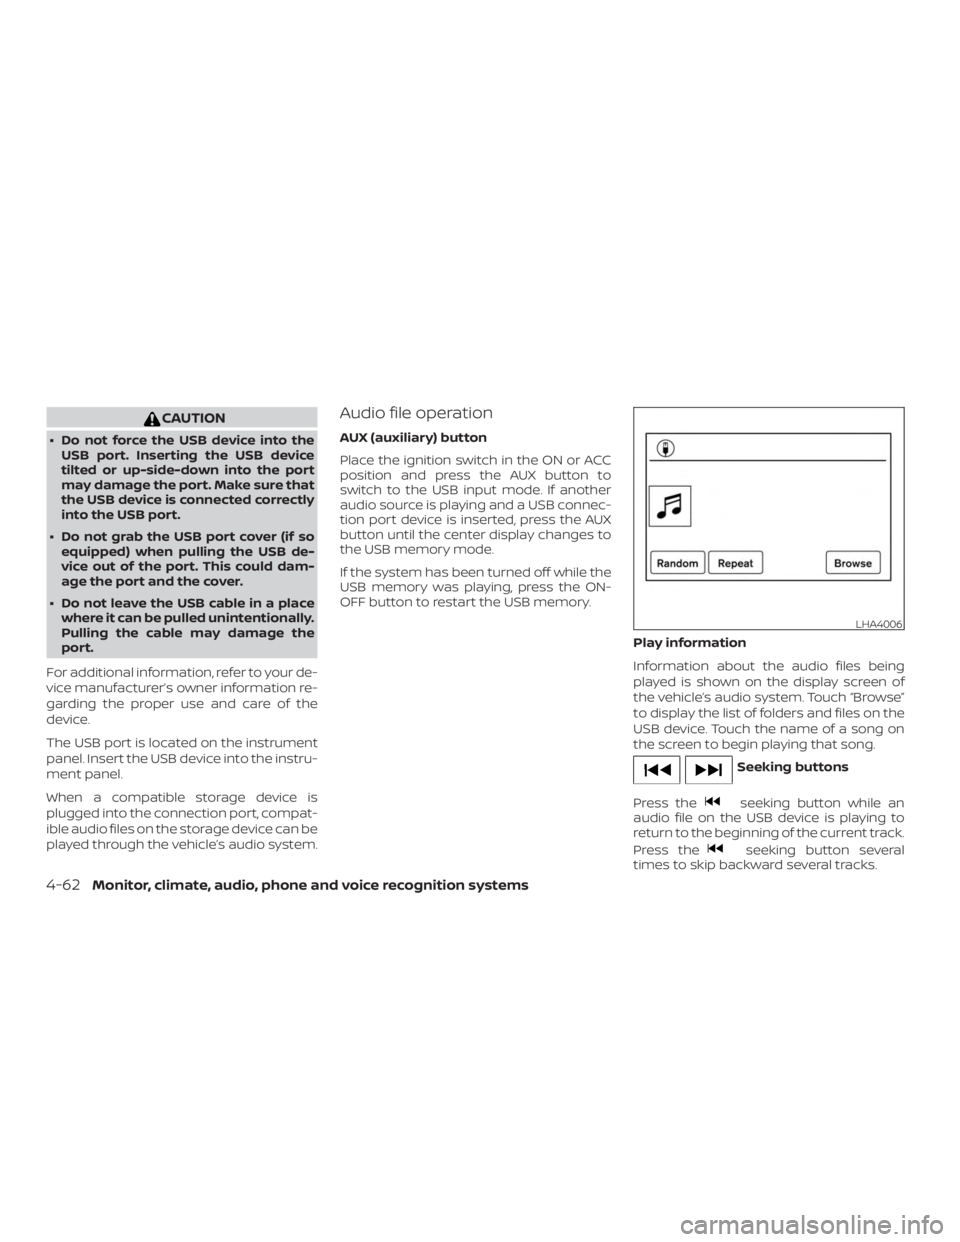
Play information
Information about the audio files being
played is shown on the display screen of
the vehicle’s audio system. Touch “Browse”
to display the list of folders and files on the
USB device. Touch the name of a song on
the screen to begin playing that song.
Page 262 of 516
CAUTION
∙ Do not force the USB device into theUSB port. Inserting the USB device
tilted or up-side-down into the port
may damage the port. Make sure that
the USB device is connected correctly
into the USB port.
∙ Do not grab the USB port cover (if so equipped) when pulling the USB de-
vice out of the port. This could dam-
age the port and the cover.
∙ Do not leave the USB cable in a place where it can be pulled unintentionally.
Pulling the cable may damage the
port.
For additional information, refer to your de-
vice manufacturer’s owner information re-
garding the proper use and care of the
device.
To connect an iPod® to the vehicle so that
the iPod® can be controlled with the audio
system controls and display screen, use
the USB connection port located on the
center console below the heater and air
conditioner controls. Connect the iPod®-
specific end of the cable to the iPod® and
the USB end of the cable to the USB con-
nection port on the vehicle. If your iPod® supports charging via a USB connection, its
battery will be charged while connected to
the vehicle with the ignition switch in the
ON position.
While connected to the vehicle, the iPod®
can only be operated by the vehicle audio
controls.
To disconnect the iPod® from the vehicle,
remove the USB end of the cable from the
USB connection port on the vehicle, then
remove the cable from the iPod®.
* iPod® is a trademark of Apple Inc., regis-
tered in the U.S. and other countries.
Compatibility
The following models are compatible:
∙ iPod® Classic 5th generation (firmware version 1.3.0 or later)
∙ iPod® Classic 6th generation (firmware version 2.0.1 or later)
∙ iPod® Classic 7th generation (firmware version 2.0.4 or later)
∙ iPod® Touch 2nd generation (firmware version 4.2.1 or later)*
∙ iPod® Touch 3rd generation (firmware version 5.1 or later) ∙ iPod® Touch 4th generation (firmware
version 5.1 or later)
∙ iPod® nano - 1st generation (firmware version 1.3.1 or later)
∙ iPod® nano - 2nd generation (firmware version 1.1.3 or later)
∙ iPod® nano - 3rd generation (firmware version 1.1.3 or later)
∙ iPod® nano - 4th generation (firmware version 1.0.4 or later)
∙ iPod® nano - 5th generation (firmware version 1.0.2 or later)
∙ iPod® nano - 6th generation (firmware version 1.1 or later)
∙ iPhone® 3G (firmware version 4.2.1 or later)
∙ iPhone® 3GS (firmware version 5.1 or later)
∙ iPhone® 4 (firmware version 5.1 or later)
∙ iPhone® 4S (firmware version 5.1 or later)
* Some features of this iPod® may not be
fully functional.
Make sure that your iPod® firmware is up-
dated to the version indicated above.
4-64Monitor, climate, audio, phone and voice recognition systems
Page 327 of 516
WARNING
∙ Never remove the ignition key or placethe ignition switch in the LOCK posi-
tion while driving. The steering wheel
will lock (for models with a steering
lock mechanism). This may cause the
driver to lose control of the vehicle
and could result in serious vehicle
damage or personal injury.
AUTOMATIC TRANSMISSION (if so
equipped)
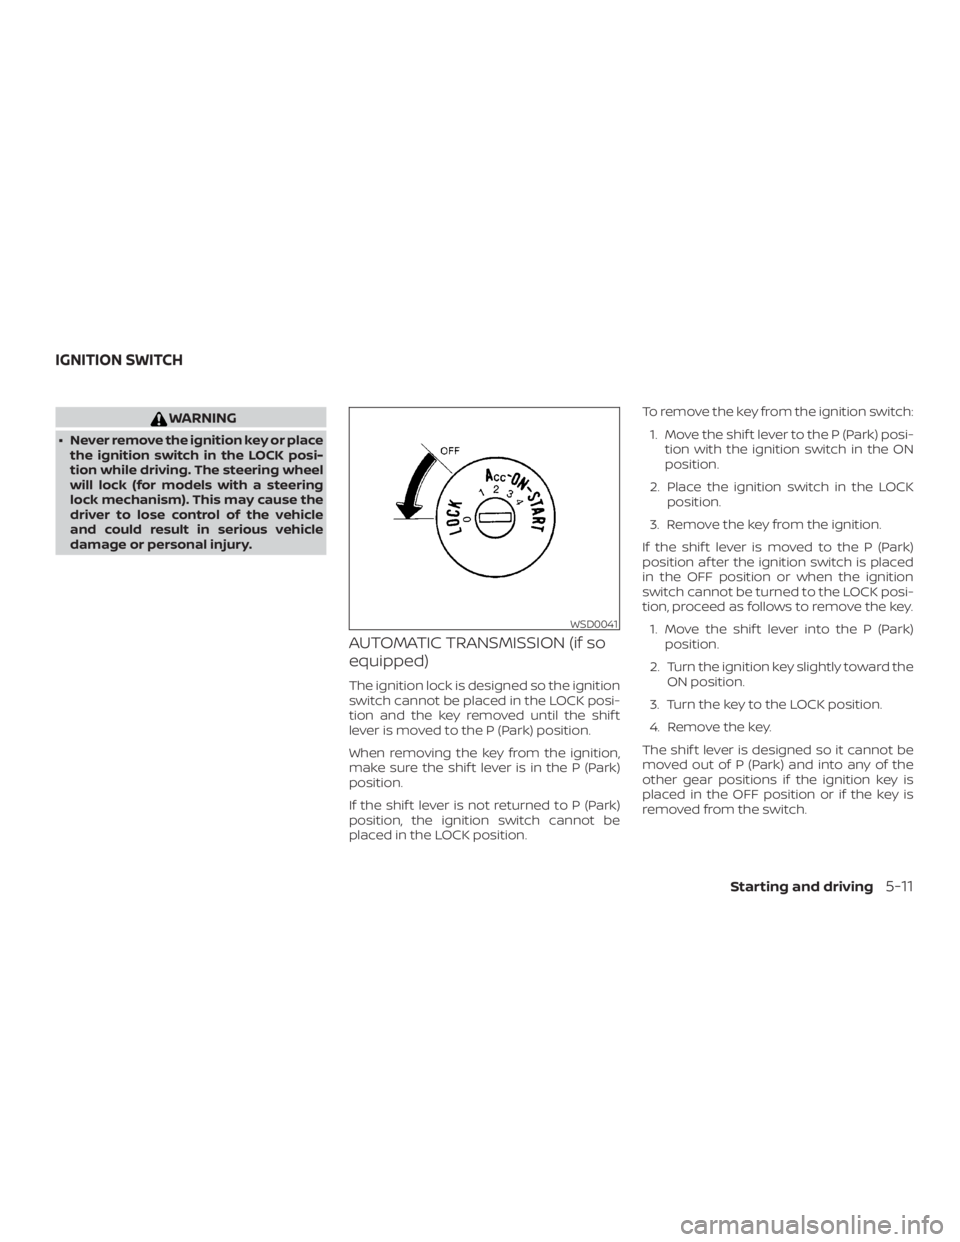
The ignition lock is designed so the ignition
switch cannot be placed in the LOCK posi-
tion and the key removed until the shif t
lever is moved to the P (Park) position.
When removing the key from the ignition,
make sure the shif t lever is in the P (Park)
position.
If the shif t lever is not returned to P (Park)
position, the ignition switch cannot be
placed in the LOCK position. To remove the key from the ignition switch:
1. Move the shif t lever to the P (Park) posi- tion with the ignition switch in the ON
position.
2. Place the ignition switch in the LOCK position.
3. Remove the key from the ignition.
If the shif t lever is moved to the P (Park)
position af ter the ignition switch is placed
in the OFF position or when the ignition
switch cannot be turned to the LOCK posi-
tion, proceed as follows to remove the key. 1. Move the shif t lever into the P (Park) position.
2. Turn the ignition key slightly toward the ON position.
3. Turn the key to the LOCK position.
4. Remove the key.
The shif t lever is designed so it cannot be
moved out of P (Park) and into any of the
other gear positions if the ignition key is
placed in the OFF position or if the key is
removed from the switch.
Page 330 of 516
∙ If the engine is very hard to start inextremely cold weather or when re-
starting, depress the accelerator
pedal a little (approximately 1/3 to the
floor) and hold it and then crank the
engine. Release the key and the ac-
celerator pedal when the engine
starts.
∙ If the engine is very hard to start be- cause it is flooded, depress the accel-
erator pedal all the way to the floor
and hold it. Crank the engine for
5-6 seconds. Af ter cranking the en-
gine, release the accelerator pedal.
Crank the engine with your foot off
the accelerator pedal by placing the
ignition in the START position. Re-
lease the key when the engine starts.
If the engine starts, but fails to run,
repeat the above procedure.
Page 331 of 516
CAUTION
∙ Except in an emergency, do not shif tto the N (Neutral) position while driv-
ing. Coasting with the transmission in
the N (Neutral) position may cause se-
rious damage to the transmission.
∙ To avoid possible damage to your ve- hicle, when stopping the vehicle on an
uphill grade, do not hold the vehicle by
depressing the accelerator pedal. The
foot brake should be used for this
purpose.
The A/T in your vehicle is electronically con-
trolled to produce maximum power and
smooth operation.
The recommended operating procedures
for this transmission are shown on the fol-
lowing pages. Follow these procedures for
maximum vehicle performance and driv-
ing enjoyment.
Starting the vehicle
1. Af ter starting the engine, fully depress the foot brake pedal before moving the
shif t lever out of the P (Park) position.
2. Keep the foot brake pedal depressed and move the shif t lever into a driving
gear. 3. Release the foot brake, then gradually
start the vehicle in motion.
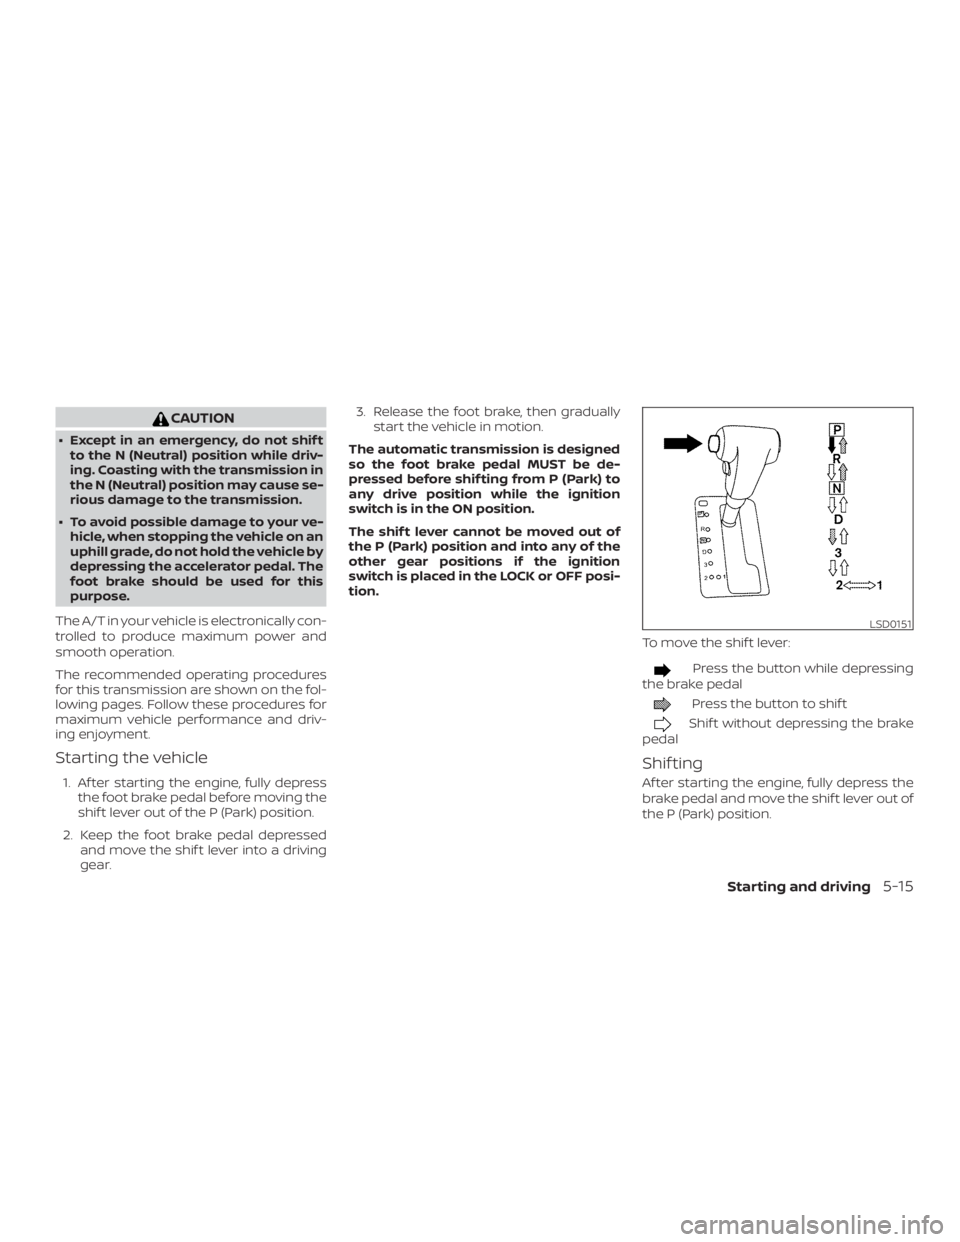
The automatic transmission is designed
so the foot brake pedal MUST be de-
pressed before shif ting from P (Park) to
any drive position while the ignition
switch is in the ON position.
The shif t lever cannot be moved out of
the P (Park) position and into any of the
other gear positions if the ignition
switch is placed in the LOCK or OFF posi-
tion.
To move the shif t lever: