Page 98 of 516
WARNING
∙ Never let children ride unrestrained orextend their hands or face out of the
window. Do not attempt to hold them
in your lap or arms. Some examples of
dangerous riding positions are shown
in the illustrations.
Page 101 of 516
WARNING
∙ The seat belts, the side air bags andcurtain air bags are most effective
when you are sitting well back and
upright in the seat. The side air bag
and curtain air bag inflate with great
force. Do not allow anyone to place
their hand, leg or face near the side air
bag on the side of the seatback of the
front seat or near the side roof rails.
Do not allow anyone sitting in the
front seats or rear outboard seats to
extend their hand out of the window
or lean against the door. Some ex-
amples of dangerous riding positions
are shown in the previous
illustrations.
Page 163 of 516
 evenly distributed.
Be careful that your vehicle does not ex-
ceed the Gross Vehicle Weight Ratin")
Always evenly distribute the cargo on the
tubular roof rack.The maximum total
load is 125 lbs. (56 kg) evenly distributed.
Be careful that your vehicle does not ex-
ceed the Gross Vehicle Weight Rating
(GVWR) or the Gross Axle Weight Ratings
(GAWR front and rear). The GVWR and GAWR
are located on the F.M.V.S.S. label (located
on the driver’s side door jamb pillar). For
additional information, refer to “Vehicle
loading information” in the “Technical and
consumer information” section of this
manual.
The front crossbar can be adjusted or re-
moved. Use the TORX® driver provided in
the tool kit to loosen both crossbar adjust-
ing screws.
To adjust:
1. Loosen the adjusting screws with the TORX® driver
�1by turning counter-
clockwise
�A.
2. When the clamp is loosened, move the crossbar so the cargo can be posi-
tioned on the crossbar
�B.
3. Tighten the crossbar adjusting screws with the TORX® driver by turning clock-
wise.
4. Secure the cargo with rope. 5. Always check the tightness of the
crossbar adjusting screws.
To remove: 1. Loosen the adjusting screws with the TORX® driver
�1by turning counter-
clockwise
�A.
2. Rotate the clamps
�C.
3. Remove the crossbar.
4. Reverse to install.
5. Always check the tightness of the crossbar adjusting screws.
If you hear wind noise coming from the roof
rack while driving, adjust the roof rack
crossbar to the neutral position.
MANUAL WINDOWS (if so
equipped)
The side windows can be opened or closed
by turning the hand crank on each door.
POWER WINDOWS (if so equipped)
Page 164 of 516

∙ To help avoid risk of injury or deaththrough unintended operation of the
vehicle and/or its systems, including
entrapment in windows or inadver-
tent door lock activation, do not leave
children, people who require the as-
sistance of others or pets unattended
in your vehicle. Additionally, the tem-
perature inside a closed vehicle on a
warm day can quickly become high
enough to cause a significant risk of
injury or death to people and pets.
The power windows operate when the ig-
nition switch is placed in the ON position or
for a period of time af ter the ignition switch
is placed in the ACC or OFF position. If the
driver’s or passenger’s door is opened dur-
ing this period of time, the power to the
windows is canceled.
1. Window lock button
2. Power door lock switch
3. Front passenger side window switch
4. Right rear passenger window
switch (Crew Cab models only)
5. Lef t rear passenger window switch
(Crew Cab models only)
6. Driver’s side automatic switch
Driver’s side power window
switch
The driver’s side control panel is equipped
with switches to open or close the front
and rear passenger windows.
To open a window, push the switch and
hold it down. To close a window, pull the
switch and hold it up. To stop the opening
or closing function at any time, simply re-
lease the switch.
Page 166 of 516
REAR SLIDING WINDOW (if so
equipped)
Page 215 of 516
WARNING
∙ Failure to follow the warnings and in-structions for proper use of the Rear-
View Monitor system could result in
serious injury or death.
∙ RearView Monitor is a convenience feature and is not a substitute for
proper backing. Always turn and look
out the windows and check mirrors to
be sure that it is safe to move before
operating the vehicle. Always back up
slowly.
∙ The system is designed as an aid to the driver in showing large stationary
objects directly behind the vehicle, to
help avoid damaging the vehicle.
∙ The distance guide line and the ve- hicle width line should be used as a
reference only when the vehicle is on a
level paved surface. The distance
viewed on the monitor is for reference
only and may be different than the
actual distance between the vehicle
and displayed objects.
Page 221 of 516
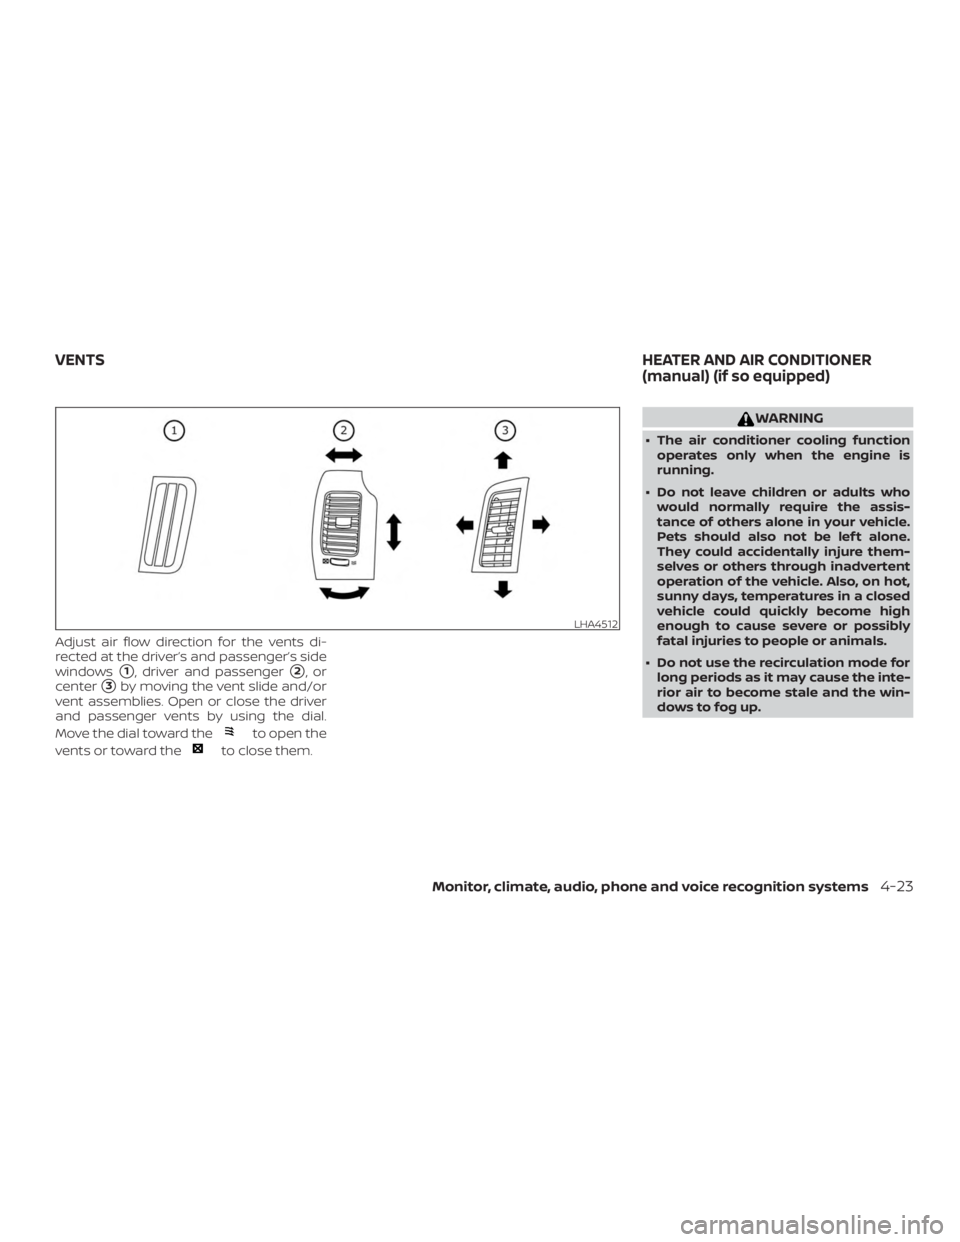
Adjust air flow direction for the vents di-
rected at the driver’s and passenger’s side
windows
�1, driver and passenger�2,or
center
�3by moving the vent slide and/or
vent assemblies. Open or close the driver
and passenger vents by using the dial.
Move the dial toward the
Page 340 of 516
,
follow these recommendations to ob-
tain maximum engine performance
and ensure the future reliability and
economy of your new vehicle. Failure to
follo")
CAUTION
During the first 1,200 miles (2,000 km),
follow these recommendations to ob-
tain maximum engine performance
and ensure the future reliability and
economy of your new vehicle. Failure to
follow these recommendations may re-
sult in shortened engine life and re-
duced engine performance.∙ Avoid driving for long periods at con- stant speed, either fast or slow, and do
not run the engine over 4,000 rpm.
∙ Do not accelerate at full throttle in any gear.
∙ Avoid quick starts.
∙ Avoid hard braking as much as pos- sible.
∙ Do not tow a trailer for the first 500 miles (805 kilometers). Your engine, axle or
other parts could be damaged. Follow these easy-to-use Fuel Efficient
Driving Tips to help you achieve the most
fuel economy from your vehicle.
1. Use Smooth Accelerator and Brake
Pedal Application
∙ Avoid rapid starts and stops.
∙ Use smooth, gentle accelerator and brake application whenever possible.
∙ Maintain constant speed while com- muting and coast whenever pos-
sible.
2. Maintain Constant Speed
∙ Look ahead to try and anticipate and minimize stops.
∙ Synchronizing your speed with traffic lights allows you to reduce your num-
ber of stops.
∙ Maintaining a steady speed can mini- mize red light stops and improve fuel
efficiency. 3.
Use Air Conditioning (A/C) at Higher
Vehicle Speeds
∙ Below 40 mph (64 km/h), it is more efficient to open windows to cool the
vehicle due to reduced engine load.
∙ Above 40 mph (64 km/h), it is more efficient to use A/C to cool the vehicle
due to increased aerodynamic drag.
∙ Recirculating the cool air in the cabin when the A/C is on reduces cooling
load.
4. Drive at Economical Speeds and Dis-
tances
∙ Observing the speed limit and not exceeding 60 mph (97 km/h) (where
legally allowed) can improve fuel effi-
ciency due to reduced aerodynamic
drag.
∙ Maintaining a safe following distance behind other vehicles reduces un-
necessary braking.
∙ Safely monitoring traffic to anticipate changes in speed permits reduced
braking and smooth acceleration
changes.
∙ Select a gear range suitable to road conditions.
BREAK-IN SCHEDULE FUEL EFFICIENT DRIVING TIPS
5-24Starting and driving


")