2019 MERCEDES-BENZ GLS SUV boot
[x] Cancel search: bootPage 70 of 729
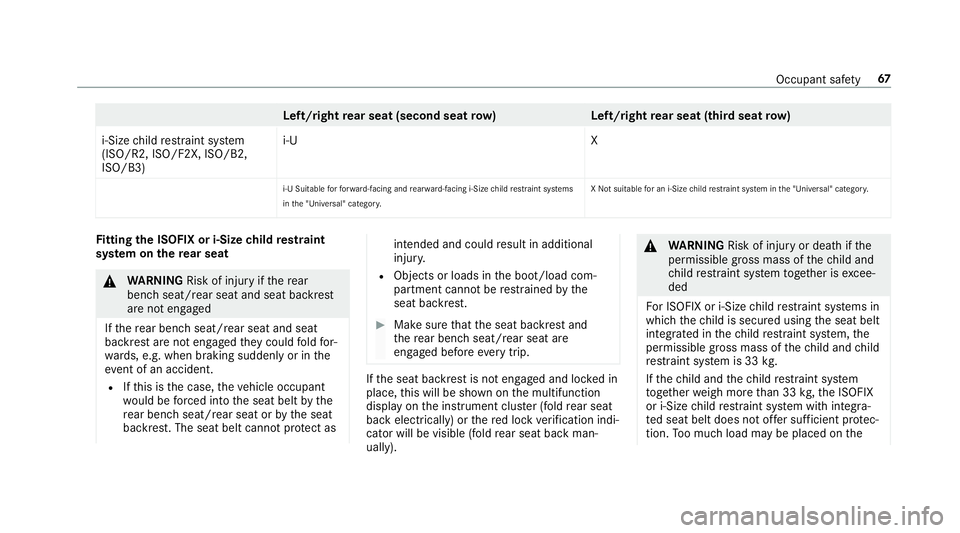
Left/right
rear seat (second seat row) Left/rightrear seat (third seat row)
i-Size child restra int sy stem
(ISO/R2, ISO/F2X, ISO/B2,
ISO/B3) i‑U
X
i-U Suitable forfo rw ard-facing and rear wa rd-facing i-Size child restra int sy stems
in the "Universal" categor y. X Not suitable
for an i-Size child restrai nt sy stem in the "Universal" categor y. Fi
tting the ISOFIX or i‑Size child restra int
sy stem on there ar seat &
WARNING Risk of inju ryifth ere ar
ben chseat/rear seat and seat backrest
are not engaged
If th ere ar ben chseat/rear seat and seat
backrest are not engaged they could fold for‐
wa rds, e.g. when braking suddenly or in the
ev ent of an accident.
R Ifth is is the case, theve hicle occupant
wo uld be forc ed into the seat belt bythe
re ar ben chseat/rear seat or bythe seat
backrest. The seat belt cann otprotect as intended and could
result in additional
injur y.
R Objects or loads in the boot/load com‐
partment cann otbe restra ined bythe
seat backrest. #
Make sure that the seat backrest and
th ere ar ben chseat/rear seat are
engaged before everytrip. If
th e seat backrest is not engaged and loc ked in
place, this will be shown on the multifunction
display on the instrument clus ter (fold rear seat
back electrically) or there d lock verification indi‐
cator will be visible (fold rear seat back man‐
ually). &
WARNING Risk of inju ryor death if the
permissible gross mass of thech ild and
ch ild restra int sy stem toget her is excee‐
ded
Fo r ISOFIX or i‑Size child restra int sy stems in
which thech ild is secured using the seat belt
integrated in thech ild restra int sy stem, the
permissible gross mass of thech ild and child
re stra int sy stem is 33 kg.
If th ech ild and thech ild restra int sy stem
to ge ther we igh more than 33 kg,th e ISOFIX
or i‑Size child restra int sy stem with integra‐
te d seat belt does not of fer suf ficient pr otec‐
tion. Too much load may be placed on the Occupant saf
ety67
Page 78 of 729
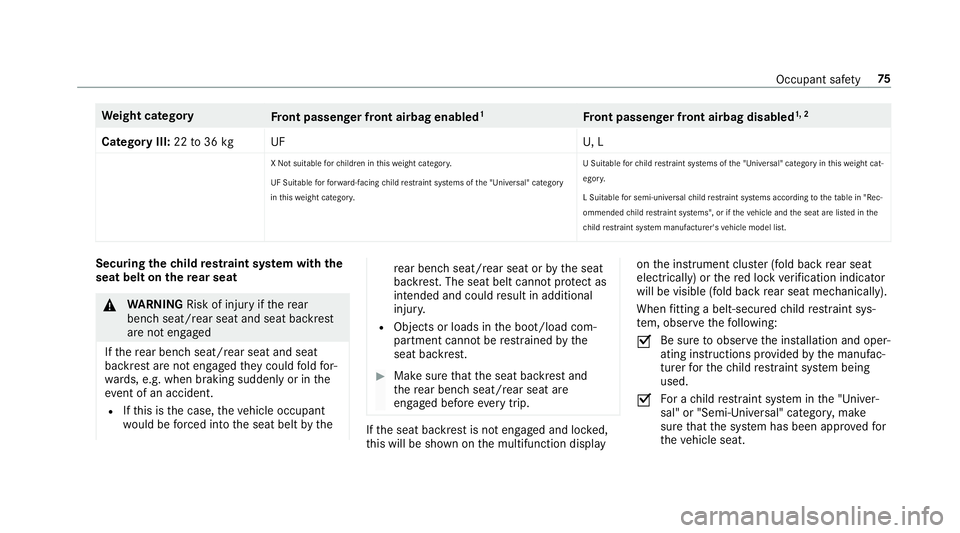
We
ight category
Front passenger front airbag enabled 1
Front passenger front airbag disabled 1, 2
Category III: 22to36 kg UF U, L
X Not suitable forch ildren in this we ight categor y.
UF Suitable forfo rw ard-facing child restrai nt sy stems of the "Universal" category
in this we ight categor y. U Suitable
forch ild restrai nt sy stems of the "Universal" category in this we ight cat‐
egor y.
L Suitable for semi-universal child restrai nt sy stems according totheta ble in "Rec‐
ommended child restra int sy stems", or if theve hicle and the seat are lis ted in the
ch ild restra int sy stem manufacturer's vehicle model list. Securing
thech ild restra int sy stem with the
seat belt on there ar seat &
WARNING Risk of inju ryifth ere ar
ben chseat/rear seat and seat backrest
are not engaged
If th ere ar ben chseat/rear seat and seat
backrest are not engaged they could fold for‐
wa rds, e.g. when braking suddenly or in the
ev ent of an accident.
R Ifth is is the case, theve hicle occupant
wo uld be forc ed into the seat belt bythe re
ar ben chseat/rear seat or bythe seat
backrest. The seat belt cann otprotect as
intended and could result in additional
injur y.
R Objects or loads in the boot/load com‐
partment cann otbe restra ined bythe
seat backrest. #
Make sure that the seat backrest and
th ere ar ben chseat/rear seat are
engaged before everytrip. If
th e seat backrest is not engaged and loc ked,
th is will be shown on the multifunction display on
the instrument clus ter (fold back rear seat
electrically) or there d lock verification indicator
will be visible (fold ba ckrear seat mechanically).
When fitting a belt-secu redch ild restra int sys‐
te m, obser vethefo llowing:
O Be sure
toobser vethe ins tallation and oper‐
ating instructions pr ovided bythe manufac‐
turer forth ech ild restra int sy stem being
used.
O Fo
r a child restra int sy stem in the "Univer‐
sal" or "Semi-Universal" categor y,make
sure that the sy stem has been appr oved for
th eve hicle seat. Occupant saf
ety75
Page 99 of 729
The
tailgate can open or close unin tentionally in
th efo llowing situations:
R If a person's arms or legs are moving in the
sensor de tection range, e.g. when polishing
th eve hicle or picking up objects.
R If objects are mo ved or placed behind the
ve hicle, e.g. tensioning stra ps or luggage.
R If clamping stra ps, tarp aulins or other co ver‐
ings are pulled over the bumper.
R If a pr otective mat with a length reaching
ove rth e boot sill down into the de tection
ra nge of the sensors is used.
R Ifth e pr otective mat is not secured cor rectly.
R When working on the trailer hitch, trailers or
re ar bicycle rack s.
Deactivate theke y functions (/ page84) or do
not car rytheke y about your person in such sit‐
uations. Limiting
the opening angle of the tailgate Ac
tivating the opening angle limiter
Yo u can limit the opening angle of theta ilgate in
th eto p half of its opening range toappr ox‐
imately 20 cm before the end position. #
Stop the opening procedure of theta ilgate at
th e desired position. #
Press and hold the closing button in theta il‐
ga te until you hear a sho rtacoustic signal.
The opening angle limiter will be activated.
The tailgate will then stop in thestored posi‐
tion when opened.
To open theta ilgate full y,pull the handle on the
outside of theta ilgate again af ter it has stopped
automaticall y.
Deactivating the opening angle limiter #
Press and hold the closing button in theta il‐
ga te until two sho rtacoustic signals sound. Un
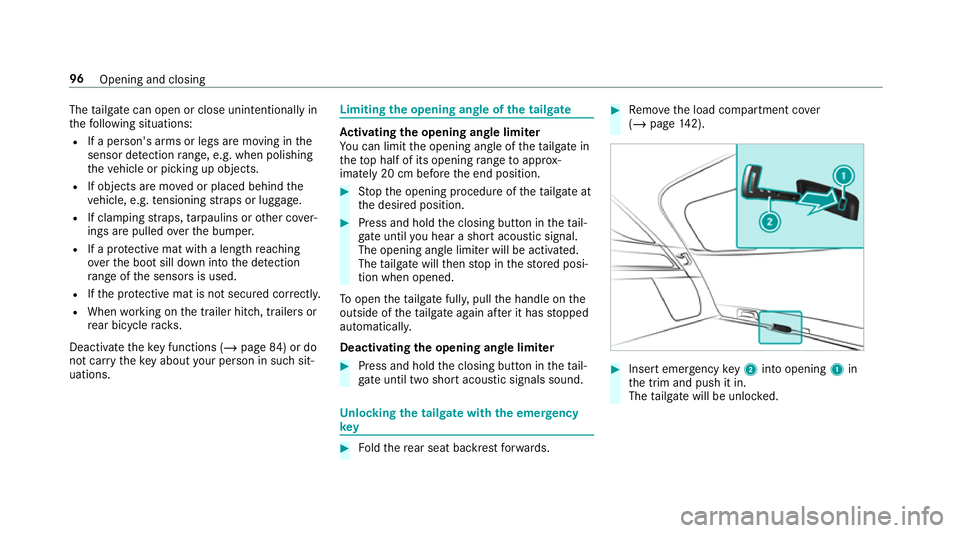
locking the tailgate with the emer gency
key #
Foldthere ar seat backrest forw ards. #
Remo vethe load compartment co ver
( / page 142). #
Insert emergency key2 into opening 1in
th e trim and push it in.
The tailgate will be unloc ked. 96
Opening and closing
Page 142 of 729
intended and could
result in additional
injur y.
R Objects or loads in the boot/load com‐
partment cann otbe restra ined bythe
seat backrest. #
Make sure that the seat backrest and
th ere ar ben chseat/rear seat are
engaged before everytrip. *
NO
TEDama getothe seat belt The seat belt could become trapped and
thus
damaged when folding back the seat back‐
re st. #
Make sure that the seat belt is not trap‐
ped when folding back the seat back‐
re st. Fo
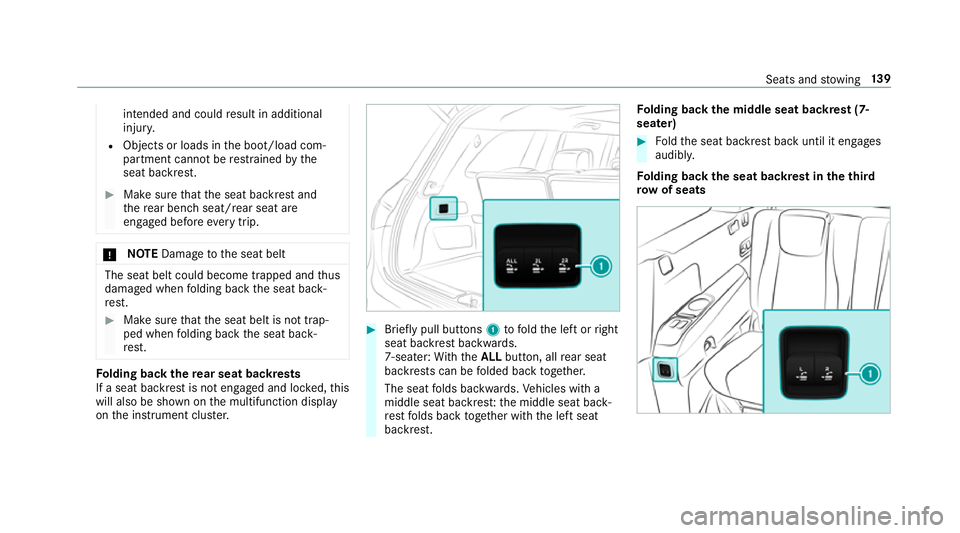
lding back there ar seat backrests
If a seat backrest is not engaged and loc ked, this
will also be shown on the multifunction display
on the instrument clus ter. #
Brief lypull buttons 1tofold the left or right
seat backrest backwards.
7-seater: With th eALL button, all rear seat
backrests can be folded back toge ther.
The seat folds backwards. Vehicles with a
middle seat backres t:the middle seat back‐
re st folds back toge ther with the left seat
backrest. Fo
lding back the middle seat backrest (7-
seater) #
Foldthe seat backrest back until it engages
audibl y.
Fo lding back the seat backrest in theth ird
ro w of seats Seats and
stowing 13 9
Page 157 of 729
Wire
lesscharging of the mobile phone and
connection with theex terior aerial Note
s on wirelessly charging the mobile
phone &
WARNING Risk of inju rydue toobjects
being stowed incor rectly
If objects in theve hicle interior are stowed
incor rectly, they can slide or be thrown
around and hit vehicle occupants. In addi‐
tion, cup holders, open stowage spaces and
mobile phone recep tacles cannot al ways
re tain all objects they contain.
The reis a risk of injur y,particularly in the
ev ent of sudden braking or a sudden change
in direction. #
Alw aysstow objects so that they can‐
not be throw n around in su chsitua‐
tions. #
Alw ays make sure that objects do not
pr otru de from stowage spaces, luggage
nets or stowage nets. #
Close the loc kable stow age spaces
before starting a journe y. #
Alw aysstow and secure heavy, hard,
poin ted, sharp-edged, fragile or bulky
objects in the boot/load compartment. Obser
vethe no tes on loading theve hicle. &
WARNING Risk offire from placing
objects in the mobile phone stowage
compartment
If yo u place objects in the mobile phone
stow age compartment, they may heat up
exc essively and even catch fire. #
Do not place additional objects, espe‐
cially those mode of me tal, in the
mobile phone stowage compartment. *
NO
TEDama getoobjects caused by
placing them in the mobile phone stow‐
age compartment If objects are placed in
the mobile phone
stow age compartment, they may be dam‐
aged byelectromagnetic fields. #
Do not place credit cards, storage
media or other objects sensitive to
electromagnetic fields in the mobile
phone stowage compartment. *
NO
TEDama getothe mobile phone
stow age compartment caused byliquids If liquids enter
the mobile phone stowage
compartment, the compartment may be
damaged. #
Ensure that no liquids enter the mobile
phone stowage compartment. R
Depending on theve hicle equipment, the
mobile phone is connected totheve hicle's
ex terior aerial via thech arging module. 15 4
Seats and stowing
Page 594 of 729
#
Obser vethe information on mounting tyres
(/ page 580). #
Open the load compartment. #
Detach the securing stra ps. #
Unhook there taining spring hooks of the
securing stra ps from the brac kets. #
Remo vethe emer gency spa rewheel bag
to ge ther with the collapsible spare wheel. #
Open the emer gency spa rewheel bag and
re mo vethe collapsible spare wheel. Inflating
the collapsible spa rewheel Re
quirements:
R Mount the collapsible spare wheel as descri‐
bed. (/ page 587)
R Remo vethe tyre inflation compressor from
th estow agewell under the boot floor.
(/ page 552) *
NO
TEDama getothe collapsible spare
wheel when lo wering theve hicle Lo
we ring theve hicle without pr eviously
inflating the collapsible spare wheel can
damage its rim. #
Inflate the collapsible spare wheel using
th e tyre inflation compressor before
lo we ring theve hicle. *
NO
TEOverheating due tothe tyre infla‐
tion compressor running too long #
Do not runth e tyre inflation compres‐
sor for longer than ten minu tes without
inter ruption. #
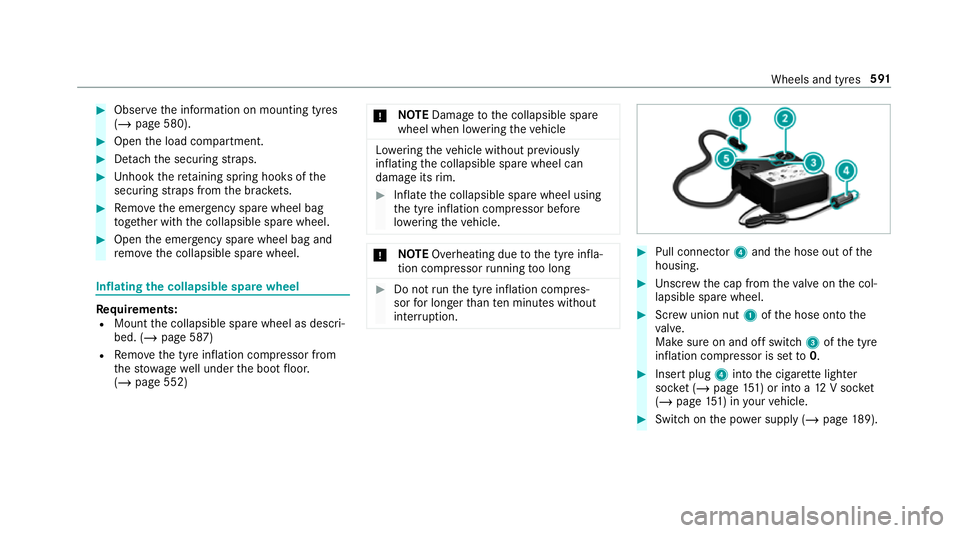
Pull connec tor4 and the hose out of the
housing. #
Unscr ew the cap from theva lve on the col‐
lapsible spare wheel. #
Screw union nut 1ofthe hose onto the
va lve.
Make sure on and off switch 3ofthe tyre
inflation compressor is set to0. #
Insert plug 4into the cigar ette lighter
soc ket (/ page 151) or in toa12 V soc ket
( / page 151) in your vehicle. #
Switch on the po wer supp ly (/ page 189). Wheels and
tyres591
Page 687 of 729
Blo
wer
see Climate control
BlueTEC see AdBlue ®
Blue tooth ®
................................................ 391
Information .......................................... 390
Setting up an Internet connection ....... 488
Switching on/off ................................. 391
Boot lid see Tailgate
Brac ket
MBUX rear tablet ................................ .521
Brake Assi stSystem
see BAS (Brake Assi stSystem)
Brake fluid Notes .................................................. 603
Brake forc e distribution
EBD (Elect ronic Brake forc e Distribu‐
tion) ..................................................... 235
Brakes ABS (Anti-lock Braking Sy stem) ........... 229
Ac tive Brake Assi st.............................. 235
Ad aptive brake lights .......................... .241 BA
S (Brake Assi stSystem) .................. 229
Driving tips .......................................... 19 3
EBD (Electronic Brake forc e Distribu‐
tion) ..................................................... 235
HOLD function .....................................2 60
Limi ted braking ef fect (salt-trea ted
ro ads) .................................................. 19 3
New/replaced brakepads/brake
discs .................................................... 19 3
Ru nning-in no tes ..................................1 93
Braking assi stance
see BAS (Brake Assi stSystem)
Breakdown Overview of the help functions .............. 18
To w- starting ........................................ 566
To wing away ........................................ 563
Tr ansporting theve hicle ......................5 64
Wheel change ...................................... 584
Breakdown see Flat tyre
Bu rm ester ®
high-end 3D sur round
sound sy stem
Ad justing the balance/fader ................5 18
Ad justing the sound optimisation ........ 51 8Ad
justing treble, mid-range and bass
settings ................................................ 51 8
Au tomatic volume adjustment ............ .518
Calling up the sound menu .................. 51 8
Information ..........................................5 17
Selecting the sound profile .................. 519
Burmes ter®
sur round sound sy stem .....5 16
Ad justing the balance/fader ................5 17
Ad justing the sound focus .................... 517
Ad justing treble, mid-range and bass
settings ................................................ 516
Au tomatic volume adjustment ............ .517
Calling up the sound menu .................. 516
Information .......................................... 516
Selecting the sound profile .................. 517
Buttons Steering wheel .................................... 320 C
Call list Deleting ............................................... 466
Making a call ....................................... 465
Overview ............................................. 465
Selecting options ................................ 465
Selecting options for suggestions ........ 465 684
Index