Page 110 of 729
#
Make sure that nobody reaches into the
sweep of the sliding sunroof whilst the
ve hicle is in motion. #
If somebody becomes trapped, briefly
push the sliding sunroof button for‐
wa rds or backwards.
The sliding sunroof lifts during opening. Problems with
the sliding sunroof %
The term "sliding sun roof" also refers to the
panoramic sliding sunroof. Problem
Possible causes/consequences and M
MSolutions
The sliding sunroof cann otbe closed
and you cannot see the cause. &
WARNING Risk of becoming trapped or fata l injury byclosing the sliding sunroof again
If yo u close the sliding sunroof again immediately af ter it has been bloc ked or reset, the sliding sunroof
closes with increased forc e.
Pa rts of the body could become trapped in the closing area in the process. #
Make sure that no parts of the body are in the closing area. #
Release the button immediately if somebody becomes trapped.
or #
Press the button in any direction during the automatic closing process.
The closing process is stopped. If
th e sliding sunroof is obstructed during closing and reopens again slightly: Opening and closing
107
Page 111 of 729
Problem
Possible causes/consequences and M
MSolutions #
Immediately af ter auto matic reve rsing, pull and hold the3 button down again tothe point of resist‐
ance until the sliding sunroof is closed.
The sliding sunroof will be closed with increased forc e.
If th e sliding sunroof is obstructed again and reopens again slightly: #
Repeat the pr evious step.
The sliding sunroof will be closed again with increased forc e.
Ve hicles without a panoramic slid‐
ing sunroof: the sliding sunroof does
not operate smoo thly. #
Push the3 button up tothe point of resis tance until the sliding sunroof is fully open. #
Press the3 button for ano ther second. #
Close the sliding sunroof.
Ve hicles with a panoramic sliding
sunroof: the sliding sunroof or the
ro ller sunblind does not opera te
smoo thly. #
Pull and hold the3 button little bylittle until the sliding sunroof is fully closed. #
Pull and hold the3 button little bylittle until thero ller sunblind is fully closed. #
Use automatic operation tofully open and then close the sliding sunroof. Anti-theft pr
otection Fu
nction of the immobiliser The immobiliser pr
events your vehicle from
being star ted without the cor rect key. The immobiliser is automatically activated when
th e ignition is switched off and deactivated when
th e ignition is switched on. ATA
(Anti-Theft Alarm sy stem) Fu
nction of theATA system
If th eATA system is primed, a visual and audible
alarm is triggered in thefo llowing situations:
R when a door is opened 108
Opening and closing
Page 115 of 729
Note
s onthe cor rect driver's seat position &
WARNING Risk of inju rythro ugh adjust‐
ing vehicle settings while theve hicle is in
motion
Yo u could lose cont rol of theve hicle in the
fo llowing situations:
R ifyo u adjust the driver's seat, the head
re stra ints, thesteering wheel or the mir‐
ro r while theve hicle is in motion
R ifyo ufast enyour seat belt while theve hi‐
cle is in motion #
Before starting the engine: adjust the
driver's seat, the head restra ints, the
st eering wheel or the mir ror and fasten
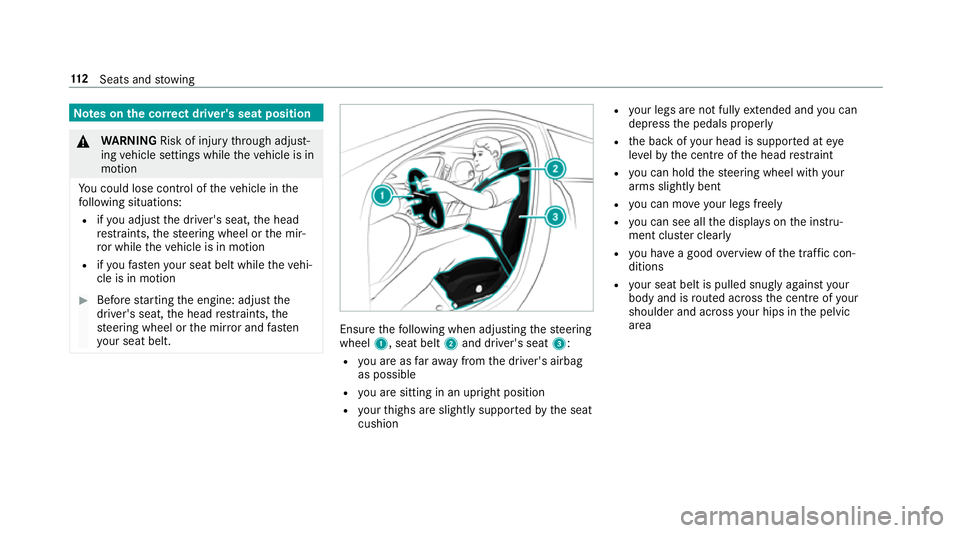
yo ur seat belt. Ensure
thefo llowing when adjusting thesteering
wheel 1, seat belt 2and driver's seat 3:
R you are as faraw ay from the driver's airbag
as possible
R you are sitting in an upright position
R your thighs are slight lysuppor tedby the seat
cushion R
your legs are not fully extended and you can
depress the pedals properly
R the back of your head is suppo rted at eye
le ve lby the cent reofthe head restra int
R you can hold thesteering wheel with your
arms slightly bent
R you can mo veyour legs freely
R you can see all the displa yson the instru‐
ment clus ter clea rly
R you ha vea good overview of the traf fic con‐
ditions
R your seat belt is pulled snug lyagainst your
body and is routed across the cent reofyour
shoulder and across your hips in the pelvic
area 11 2
Seats and stowing
Page 118 of 729
Ad
justing the front passen ger seat electri‐
cally from the driver's seat Re
quirement:
R The po wer supp lyhas been switched on
(/ page 189). Yo
u can call up thefo llowing functions forthe
front passenger sea t:
R seat adjustment R
seat heating
R seat ventilation
R memory function #
Toselect the front passenger seat: press
button 1.
When the indicator lamp lights up, the front
passenger seat is selected. #
Adjust the front passenger seat using the
buttons on the door control panel on the
driver's side. #
Select the driver's seat: Pressthe1 but‐
to n again.
When the indicator lamp goes out, the driv‐
er's seat has been selected. Ad
justing the front passen ger seat electri‐
cally from the rear #
Toselect the front passenger seat: press
button 1.
When the indicator lamp lights up, the front
passenger seat is selected. #
Adjust the front passenger seat using the
buttons on the door control panel in there ar
compartment (/ page116). Seats and
stowing 11 5
Page 125 of 729
#
Release the middle rear seat backrest and
fo ld it forw ard slightly (/ page136). #
Pull the head restra int upwards as far as it
will go. #
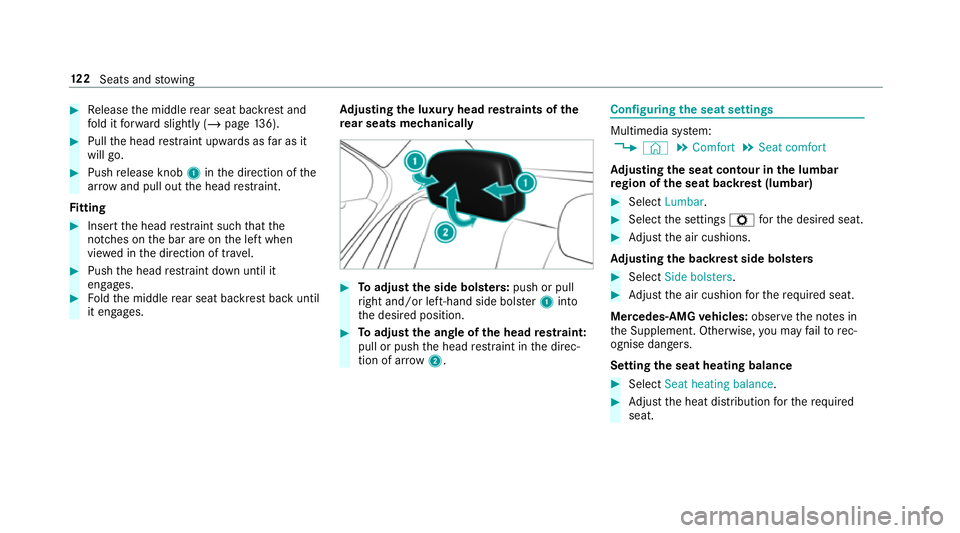
Push release knob 1inthe direction of the
ar row and pull out the head restra int.
Fi tting #
Inse rtthe head restra int such that the
notches on the bar are on the left when
vie we d in the direction of tra vel. #
Push the head restra int down until it
engages. #
Foldthe middle rear seat backrest back until
it engages. Ad
justing the luxury head restra ints of the
re ar seats mechanically #
Toadjust the side bols ters: push or pull
ri ght and/or left-hand side bols ter1 into
th e desired position. #
Toadjust the angle of the head restra int:
pull or push the head restra int in the direc‐
tion of ar row2. Configuring
the seat settings Multimedia sy
stem:
4 © 5
Comfort 5
Seat comfort
Ad justing the seat contour in the lumbar
re gion of the seat backrest (lumbar) #
Select Lumbar . #
Select the settings Zforth e desired seat. #
Adjust the air cushions.
Ad justing the backrest side bols ters #
Select Side bolsters . #
Adjust the air cushion forth ere qu ired seat.
Mercedes-AMG vehicles: observeth e no tes in
th e Supplement. Otherwise, you may failto rec‐
ognise dangers.
Setting the seat heating balance #
Select Seat heating balance. #
Adjust the heat distribution forth ere qu ired
seat. 12 2
Seats and stowing
Page 130 of 729
Seat heating in
theth ird row of seats #
Toswitch on/increase the le vel:press but‐
to n1 repeatedly until the desired heating
le ve l is set.
Depending on the heating le vel, up tothree
indicator lamps will light up. #
Toswitch off/reduce the le vel:press but‐
to n1 repeatedly until the desired heating
le ve l is set.
If all indicator lamps are off, the seat heater
is switched off.
% The seat heater will automatically switch
down from theth re e heating le vels af ter 8,
10 and 20 minutes until the seat heater
switches off. Setting
the panel heating Multimedia sy
stem:
4 © 5
Settings 5
Fahrzeug (Vehicle)
5 Panel heating
When the seat heater is switched on, the armr‐
ests, the cent repanels of the doors and the
centre console can be hea ted. #
Switch the function forth e desired seats on
or off. Switching
the seat ventilation on/off Re
quirements:
R The po wer supply has been switched on
(/ page 189). Seat
ventilation in the cockpit Seats and
stowing 127
Page 131 of 729
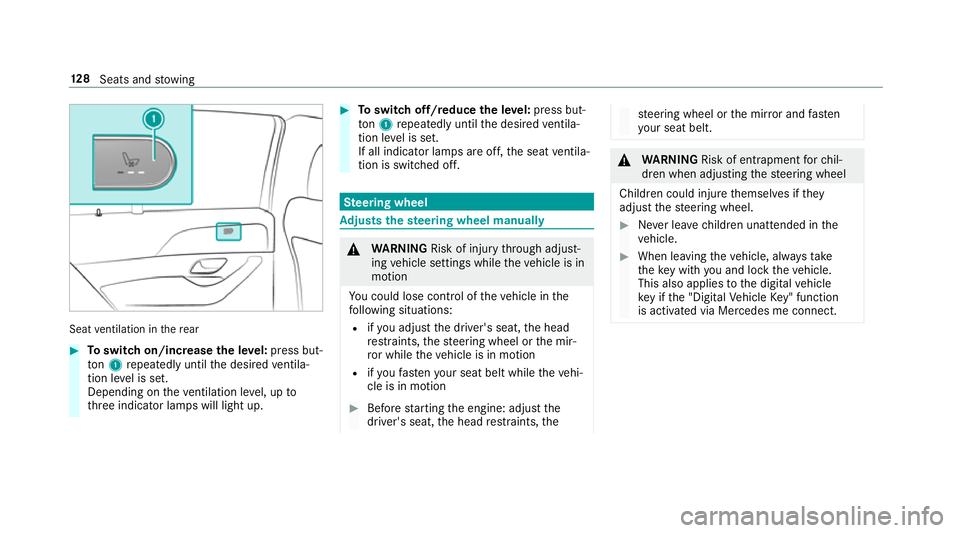
Seat
ventilation in there ar #
Toswitch on/increase the le vel:press but‐
to n1 repeatedly until the desired ventila‐
tion le vel is set.
Depending on theve ntilation le vel, up to
th re e indicator lamps will light up. #
Toswitch off/reduce the le vel:press but‐
to n1 repeatedly until the desired ventila‐
tion le vel is set.
If all indicator lamps are off, the seat ventila‐
tion is switched off. Ste
ering wheel Ad
justs the steering wheel manually &
WARNING Risk of inju rythro ugh adjust‐
ing vehicle settings while theve hicle is in
motion
Yo u could lose cont rol of theve hicle in the
fo llowing situations:
R ifyo u adjust the driver's seat, the head
re stra ints, thesteering wheel or the mir‐
ro r while theve hicle is in motion
R ifyo ufast enyour seat belt while theve hi‐
cle is in motion #
Before starting the engine: adjust the
driver's seat, the head restra ints, the st
eering wheel or the mir ror and fasten
yo ur seat belt. &
WARNING Risk of entrapment forch il‐
dren when adjusting thesteering wheel
Children could injure themselves if they
adjust thesteering wheel. #
Never lea vechildren unat tended in the
ve hicle. #
When leaving theve hicle, alw aysta ke
th eke y with you and lock theve hicle.
This also applies tothe digital vehicle
ke y if the "Digital Vehicle Key" function
is activated via Mercedes me connect. 12 8
Seats and stowing
Page 132 of 729
#
Push release le ver1 down as far as it will
go.
The steering column is unloc ked. #
Adjust height 2and di stance 3tothe
st eering wheel. #
Push release le ver1 up as far as it will go.
The steering column is loc ked. #
Check and make sure that thesteering col‐
umn is loc kedby moving thesteering wheel. Ad
justing the steering wheel electrically The
steering wheel can be adjus ted when the
ignition is switched off. 1
Adjusts the dis tance tothesteering wheel
2 Adjusts the height #
Saving the settings with the memory function
(/ page 131). Swi
tches the steering wheel heater on or off Re
quirements:
R The ignition is switched on. #
Toswitch on: pushthe switch toposition
1.
The indicator lamp 3lights up. Seats and
stowing 12 9