2019 MERCEDES-BENZ GLE SUV tire size
[x] Cancel search: tire sizePage 53 of 681

sy
stem. In this case, thech ild sits in the oppo‐
site direction tothe direction of tra vel and faces
ba ckwa rds.
Babies and small children ha vecompa ratively
we ak neck muscles in relation tothe size and
we ight of their head. The risk of injury tothe cer‐
vical spine during an accident can be reduced in
a re ar wa rd-facing child restra int sy stem.
Alw ays secure a child restra int sy stem cor‐
re ctly &
WARNING Risk of inju ryor death caused
by incor rect ins tallation of thech ild
re stra int sy stem
If th ech ild restra int sy stem is incor rectly
ins talled on a suitable seating position, it
cannot per form its intended pr otective func‐
tion.
The child cannot be restra ined in theeve nt of
an accident, heavy braking or a sudden
ch ange of direction. #
Alw ays comply with the manufacturer's
ins tallation instructions forth ech ild
re stra int sy stem and its cor rect use. #
Makesure that the entire base of the
ch ild restra int sy stem alw aysre sts on
th e sitting sur face of the seat. #
Never place objects under or behind
th ech ild restra int sy stem, e.g. cush‐
ions. #
Alw ays use child restra int sy stems with
th e original co ver designed forth em. #
Alw aysre place damaged co vers with
ge nuine co vers. &
WARNING Risk of inju ryor death from
unsecured child restra int sy stems in the
ve hicle
If th ech ild restra int sy stem is not cor rectly
ins talled or secured, it could release in the
ev ent of an accident, sudden braking or a
sudden change in direction.
The child restra int sy stem could be flung
around and hit vehicle occupants. #
Alw aysfit ch ild restra int sy stems cor‐
re ctly, even when not in use. #
Alw ays comply with thech ild restra int
sy stem manufacturer's ins tallation
instructions. R
Alw ays obser vethech ild restra int sy stem
manufacturer's ins tallation and operating
instructions as well as theve hicle-specific
information:
- Fitthe ISOFIX or i-Size child restra int sys‐
te m to there ar seat (→ page 63).
- Secure thech ild restra int sy stem with the
seat belt on there ar seat (→ page 70).
- Secure thech ild restra int sy stem with the
seat belt on the front passenger seat
(→ page 73). Obser vethe specific
instructions forth ere ar wa rd-facing and
fo rw ard-facing child restra int sy stems
(→ page 72).
If th e front passenger seat is occupied,
ensure, bo thbefore and during the jour‐
ne y,that thest atus of the front 50
Occupant saf ety
Page 74 of 681

Obser
vethe no tes under "Suitability of
seats for attaching belt-secu redch ild
re stra int sy stems" (→ page67).
O Wh
en using a category 0/0+ baby car
seat and a category I rear wa rd-facing
ch ild restra int sy stem on a rear seat:
adju stthe front seat so that the seat does
not touch thech ild restra int sy stem.
O When using a category I
forw ard-facing
ch ild restra int sy stem: remo vethe head
re stra int from there spective seat, if possi‐
ble.
When youre mo vethech ild restra int sys‐
te m, ins tallth e head restra int again immedi‐
ately and adjust all the head restra ints cor‐
re ctly.
O The ba
ckrest of thefo rw ard-facing child
re stra int sy stem must, as far as possible, be
re sting on the seat backrest of there ar
seat.
O Fo
r cer tain child restra int sy stems in weight
category II or III, there may be restrictions in
th e maximum size setting, e.g. due topossi‐
ble con tact wi th thero of. O
The
child restra int sy stem must not be put
under stra in between thero of and the seat
cushion and/or be fitted facing the wrong
direction. Where possible, adjust the seat
cushion inclination accordingly.
O The
child restra int sy stem must not be put
under stra in by the head restra ints. Adjust
th e head restra ints accordingly.
O Make sure
that thech ild's feet do not touch
th e front seat. If necessar y,mo vethe front
seat forw ard slightl y. #
Fitthech ild restra int sy stem.
The entire base of thech ild restra int sy stem
must alw aysre st on the sitting sur face of the
re ar seat. #
Alw ays make sure that the shoulder belt
st ra p is cor rectly routed from the seat belt
outlet of theve hicle tothe shoulder belt
guide on thech ild restra int sy stem.
The shoulder belt stra p must be routed for‐
wa rds and down wards from the seat belt out‐
let. Note
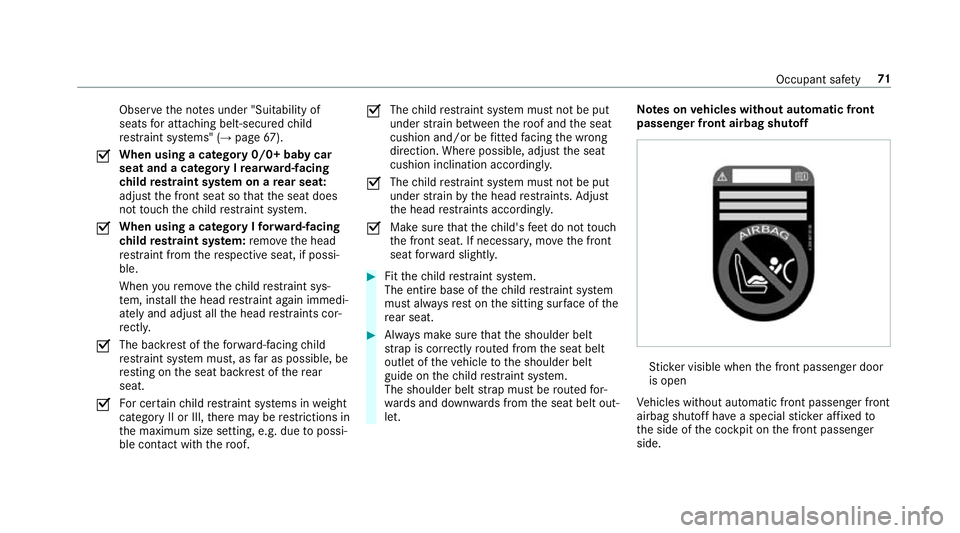
s onvehicles without automatic front
passen ger front airbag shu toff St
icke r visible when the front passenger door
is open
Ve hicles without automatic front passenger front
airbag shutoff ha vea special sticke r af fixe dto
th e side of the cockpit on the front passenger
side. Occupant saf
ety71
Page 76 of 681

R
When using a rear wa rd-facing child restra int
sy stem on the front passenger seat, the front
passenger front airbag must alw ays be disa‐
bled. This is only the case if thePA SSENGER
AIR BAG OFF indicator lamp is lit continu‐
ously (→ page44).
R Ifth ePA SSENGER AIR BAG OFF indicator
lamp is out, the front passenger front airbag
is enabled. The front passenger front airbag
may deploy during an accident.
Securing thech ild restra int sy stem with the
seat belt on the front passenger seat
When fitting a belt-secu redch ild restra int sys‐
te m on the front passenger seat, alw ays obser ve
th efo llowing:
O Obser
vethech ild restra int sy stem manufac‐
turer's ins tallation and operating instruc‐
tions.
O Fo
r a child restra int sy stem in the "Univer‐
sal" or "Semi-Universal" categor y,make
sure that the sy stem has been appr ovedfor
th eve hicle seat. Obser
vethe no tes under "Suitability of
seats for attaching belt-secu redch ild
re stra int sy stems" (→ page67).
O When using a
forw ard-facing child restra int
sy stem in Group I: remo vethe head
re stra int from there spective seat, if possi‐
ble.
When youre mo vethech ild restra int sys‐
te m, ins tallth e head restra int again immedi‐
ately and adjust all the head restra ints cor‐
re ctl y.
O The backrest of
thefo rw ard-facing child
re stra int sy stem must, as far as possible, be
re sting on the seat backrest of the front
passenger seat.
O Fo
r cer tain child restra int sy stems in weight
group II or III, there may be restrictions in
th e maximum size setting, e.g. due topossi‐
ble con tact wi th thero of.
O The
child restra int sy stem must not be put
under stra in between thero of and the seat
cushion and/or be fitted facing the wrong
direction. Adjust the seat backrest inclina‐
tion according ly. O
The
child restra int sy stem must not be put
under stra in by the head restra ints. Adjust
th e head restra ints according ly.
O Ne
ver place objects under or behind the
ch ild restra int sy stem, e.g. cushions. #
Set the front passenger seat as far back as
possible and mo vethe seat into the highest
position. #
Fully retract the seat cushion length adjust‐
ment. #
Adjust the seat cushion inclination so that
th e front edge of the seat cushion is in the
highest position and there ar edge of the
seat cushion is in the lo west position. #
Set the seat backrest toan almost vertical
position. #
Fitthech ild restra int sy stem.
The entire base of thech ild restra int sy stem
must alw aysre st on the sitting sur face of the
front passenger seat. #
Alw ays make sure that the shoulder belt
st ra p is cor rectly routed from the seat belt Occupant saf
ety73
Page 540 of 681

#
Switch on the ESP ®
and adapt your
driving style accordingly. #
Use M+S tyres at outside temp eratures
of less than 50 °F. Obse
rveth efo llowing when selecting, fitting and
re placing tyres:
R Countr y-specific requirements for tyre
appro valth at define a specific tyre type for
yo ur vehicle.
Fu rthermore, the use of cer tain tyre types in
cer tain regions and areas of operation can
be highly beneficial.
R Only use tyres and wheels of the same type
(summer tyres, winter tyres, MOEx tended
tyres) and the same make.
R Only fit wheels of the same size on one axle
(left and right).
It is only permissible tofit a di fferent wheel
size in theeve nt of a flat tyre in order to
drive tothe specialist workshop.
R Only fit tyres of the cor rect size onto the
wheels. R
Do not make any modifications tothe brake
sy stem, the wheels or the tyres.
The use of shims or brake dust shields is not
permitted and may in validate theve hicle's
ge neral operating pe rmit.
R Vehicles with a tyre pressure monitoring
sy stem: allfitted wheels mu stbe equipped
with functioning sensors forth e tyre pres‐
sure monitoring sy stem.
R Attemp eratures below 7 °C, use winter tyres
or all-season tyres mar ked M+S for all
wheels.
Wi nter tyres bearing thei snowflake
symbol in addition tothe M+S marking pro‐
vide the best possible grip in wintry road
conditions.
R For M+S tyres, only use tyres with the same
tread.
R Obser vethe maximum permissible speed for
th e M+S tyres fitted.
If th is is below theve hicle's maximum speed,
th is must be indicated byan appropriate
label in the driver's field of vision. R
Run in new tyres at moderate speeds forthe
fi rs t10 0 km.
R Replace the tyres af ter six years at the latest,
re ga rdless of wear.
R When replacing with tyres that do not
fe ature run-flat characteristics: vehicles
with MOExtended tyres are not equipped
with a TIREFIT kit at thefa ctor y.Equip the
ve hicle with a TIREFIT kit af terre placing with
tyres that do not feature run-flat characteris‐
tics, e.g. winter tyres.
Fo r more information on wheels and tyres, con‐
ta ct a qualified specialist workshop.
Be sure toalso obse rveth efo llowing fur ther
re lated subjects:
R Notes on tyre pressure (→ page 526)
R Tyre pressure table (→ page 527)
R Notes on the emer gency spa rewheel
(→ page 544) Wheels and
tyres537