2019 MERCEDES-BENZ GLE SUV charging
[x] Cancel search: chargingPage 5 of 681

Symbols
........................................................ 5At
agl ance .................................................... 6
Cockpit overview ............................................ 6
Overview of warning and indicator lamps .... .10
Overview of theove rhead control panel .......12
Door control panel and seat adjustment ....... 14
Control settings in there ar compartment .... .16
Emergencies and breakdowns ...................... 18Digital Owner's Manual
.............................20
Calling up the Digital Owner's Manual ..........20 Genera
l notes............................................. 22
Pr otection of the environment ......................22
Ta ke -ba ckof end-of-life vehicles ...................22
Mercedes-Benz Genuine Parts ......................23
Owner's Manual ............................................ 24
Operating saf ety .......................................... .24
Declaration of Conformity ............................ 26
Diagno stics connection ................................ 27
Qualified specialist workshop ....................... 28
Ve hicle registration ....................................... 28 Cor
rect use of theve hicle ............................29
Information on the REA CHregulation ........... 29
Implied warranty .......................................... .29
QR code forre scue card ...............................29
Data storage .................................................30
Copyright ...................................................... 32 Occupant saf
ety......................................... 33
Re stra int sy stem ...........................................33
Seat belts ..................................................... 35
Airbags ......................................................... 40
PRE-SAFE ®
sy stem ....................................... 47
Safely transporting children in theve hi‐
cle ................................................................48
No tes on pets in theve hicle .......................... 76 Opening and closing
.................................. 77
Ke y .............................................................. .77
Doo rs............................................................ 81
Load compartment ....................................... 86
Ro ller sunblinds ............................................ 91
Side windo ws................................................ 91
Sliding sunroof ............................................. 96
Anti-theft pr otection ................................... 102 Seats and
stowing ................................... 105
No tes on the cor rect driver's seat posi‐
tion ............................................................. 105
Seats .......................................................... 106
St eering wheel ............................................ 11 8
Easy entry and exitfeature ........................ .120
Operating the memory function .................. 121
St ow age areas ............................................ 12 2
Cup holders ................................................ 13 8
Ashtr ayand cigar ette lighter ...................... .140
Soc kets ....................................................... 141
Wi reless charging of the mobile phone
and connection with theex terior aerial ...... 14 3
Fitting/removing thefloor mats ................. 14 5 Light and sight
......................................... 147
Exterior lighting ........................................... 147
Interior lighting ........................................... 154
Wi ndsc reen wipers and windscreen
wa sher sy stem ............................................ 15 6
Mir rors ........................................................ 16 0
Operating the sun visors ............................. 16 3
Infrared reflective windscreen function ...... 16 42
Contents
Page 31 of 681
As a
result, the operating saf ety of theve hi‐
cle could be af fected. #
Only connect equipment toa diagnos‐
tics connection in theve hicle which is
appr ovedfo ryo ur vehicle byMercedes-
Benz. &
WARNING Risk of accident due to
objects in the driver's foot we ll
Objects in the driver's foot we ll may impede
pedal tr avel or block a depressed pedal.
This jeopardises the operating and road
saf ety of theve hicle. #
Stow all objects in theve hicle securely
so that they cannot getinto the driver's
fo ot we ll. #
Alw aysfit th efloor mats securely and
as prescribed in order toensure that
th ere is alw ays suf ficient room forthe
pedals. #
Do not use loose floor mats and do not
place floor mats on top of one ano ther. *
NO
TEBattery discharging from using
devices connected tothe diagnostics
connection Using devices at
the diagnostics connection
drains the batter y. #
Check thech arge leve l of the batter y. #
Ifth ech arge leve l is lo w,charge the
batter y,e.g. bydriving a considerable
dis tance. Connecting equipment
tothe diagnostics con‐
nection can lead toemissions monitoring infor‐
mation being reset, forex ample. This may lead
to theve hicle failing tomeet therequ irements of
th e next emissions inspection during the main
inspection. Qualified specialist
workshop
A qu alified specialist workshop has the neces‐
sary special skills, tools and qualifications to
cor rectly car ryout any necessary workon your
ve hicle. This particularly applies tosaf ety-re le‐
va nt wo rks. Alw
ays ha vethefo llowing workcar ried out on
yo ur vehicle at a qualified specialist workshop:
R safety-re leva nt wo rks
R service and maintenance work
R repair work
R modifications as well as ins tallations and
con versions
R workon electronic components
R vehicles with 48 V on-board electrical
sy stem (EQ-boost tech nology): workon
high voltage components of the 48 V on-
board electrical sy stem
Mercedes‑Benz recommends a Mercedes‑Benz
service centre. Ve
hicle registration
Mercedes-Benz may ask its service centres to
car ryout tech nical inspections on cer tain vehi‐
cles. The quality or saf ety of theve hicle is
impr oved as a result of the inspection. 28
General no tes
Page 93 of 681

The
tailgate can open or close unin tentionally in
th efo llowing situations:
R if a person's arms or legs mo veinthe sensor
de tection range, e.g. when polishing theve hi‐
cle, sitting on the edge of the luggage com‐
partment or picking up objects
R if objects are mo ved or placed behind the
ve hicle, e.g. charging cables, tensioning
st ra ps or luggage
R when working on the trailer coupling, trailers
or rear bicycle racks
Deactivate theke y functions (→ page78) or do
not ca rryth eke y about your person in such sit‐
uations. Limiting
the opening angle of the tailgate Ac
tivating the opening angle limiter
Yo u can limit the opening angle of theta ilgate in
th eto p half of its opening range toappr ox‐
imately 20 cm before the end position. #
Stop the opening procedure of theta ilgate at
th e desired position. #
Press and hold the closing button in theta il‐
ga te until you hear a sho rtacoustic signal.
The opening angle limiter will be activated.
The tailgate will then stop in thestored posi‐
tion when opened.
To open theta ilgate full y,pull the handle on the
outside of theta ilgate again af ter it has stopped
automaticall y.
Deactivating the opening angle limiter #
Press and hold the closing button in theta il‐
ga te until two sho rtacoustic signals sound. Un
locking the tailgate with the emer gency
key #
Foldthere ar seat backrest forw ards. #
Remo vethe saf ety net ( →page 132). #
Remo vethe load compartment co ver
( → page 130). #
Insert emergency key2 into opening 1in
th e trim and push it in.
The tailgate will be unloc ked. 90
Opening and closing
Page 146 of 681
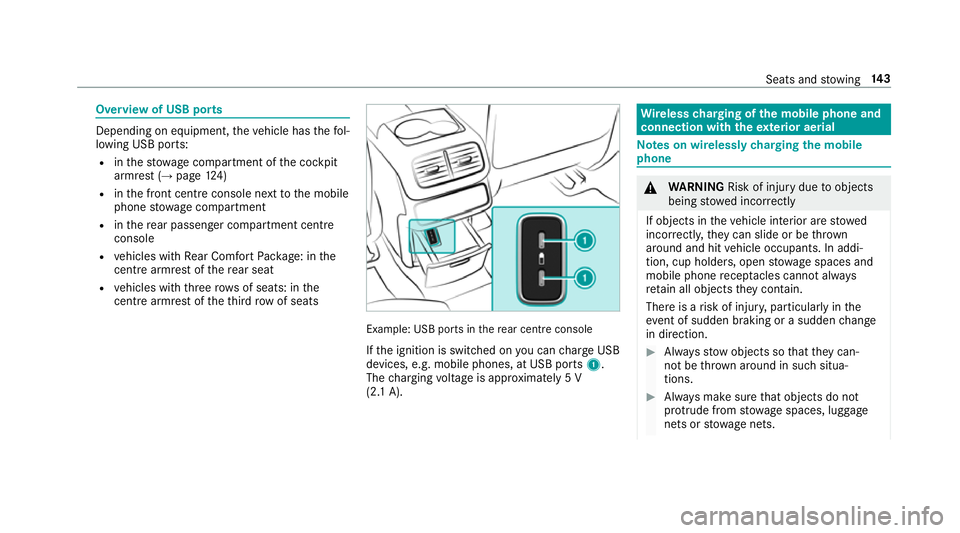
Overview of USB ports
Depending on equipment,
theve hicle has thefo l‐
lowing USB ports:
R inthestow age compartment of the cockpit
armrest (→ page124)
R inthe front cent reconsole next tothe mobile
phone stowage compartment
R inthere ar passenger compartment centre
console
R vehicles with Rear Comfort Package: in the
centre armrest of there ar seat
R vehicles with thre erow s of seats: in the
centre armrest of theth ird row of seats Example: USB ports in
there ar centre console
If th e ignition is switched on you can charge USB
devices, e.g. mobile phones, at USB ports 1.
The charging voltage is appr oximately 5 V
(2.1 A). Wire
lesscharging of the mobile phone and
connection with theex terior aerial Note
s on wirelessly charging the mobile
phone &
WARNING Risk of inju rydue toobjects
being stowed inco rrectly
If objects in theve hicle interior are stowed
incor rectly, they can slide or be thrown
around and hit vehicle occupants. In addi‐
tion, cup holders, open stowage spaces and
mobile phone recep tacles cannot al ways
re tain all objects they contain.
The reis a risk of injur y,particularly in the
ev ent of sudden braking or a sudden change
in direction. #
Alw aysstow objects so that they can‐
not be throw n around in su chsitua‐
tions. #
Alw ays make sure that objects do not
pr otru de from stowage spaces, luggage
nets or stowage nets. Seats and
stowing 14 3
Page 147 of 681
#
Close the loc kable stow age spaces
before starting a journe y. #
Alw aysstow and secure heavy, hard,
poin ted, sharp-edged, fragile or bulky
objects in the boot/load compartment. Obser
vethe no tes on loading theve hicle. &
WARNING Risk offire from placing
objects in the mobile phone stowage
compartment
If yo u place objects in the mobile phone
stow age compartment, they may heat up
exc essively and even catch fire. #
Do not place additional objects, espe‐
cially those mode of me tal, in the
mobile phone stowage compartment. *
NO
TEDama getoobjects caused by
placing them in the mobile phone stow‐
age compartment If
yo u place objects in the mobile phone
stow age compartment, these may be dam‐
aged byelectromagnetic fields. #
Do not place credit cards, storage
media or other objects sensitive to
electromagnetic fields in the mobile
phone stowage compartment. *
NO
TEDama getothe mobile phone
stow age compartment caused byliquids If liquids enter
the mobile phone stowage
compartment, the compartment may be
damaged. #
Ensure that no liquids enter the mobile
phone stowage compartment. R
Depending on theve hicle equipment, the
mobile phone is connected totheve hicle's
ex terior aerial via thech arging module. R
The charging function and wireless connec‐
tion of the mobile phone totheve hicle's
ex terior aerial are only available if the ignition
is switched on.
R Small mobile phones may not be able tobe
ch arge d in everyposition of the mobile
phone stowage compartment.
R Largemobile phones which do not rest flat in
th e mobile phone stowage compartment may
not be able tobe charge d or connec ted with
th eve hicle's exterior aerial.
R The mobile phone may heat up during the
ch arging process. This can also depend on
th e applications (apps) cur rently running.
R Toensure more ef ficient charging and con‐
nection with theve hicle's exterior aerial,
re mo vethe pr otective co ver from the mobile
phone. Pr otective co vers which are designed
fo r wireless charging are excluded. 14 4
Seats and stowing
Page 148 of 681
Wire
lesscharging of a mobile phone in the
cockpit Re
quirements:
R The mobile phone is suitable for wireless
ch arging.
% A list of compatible mobile phones can be
found at: http://www.mercedes-benz.com/
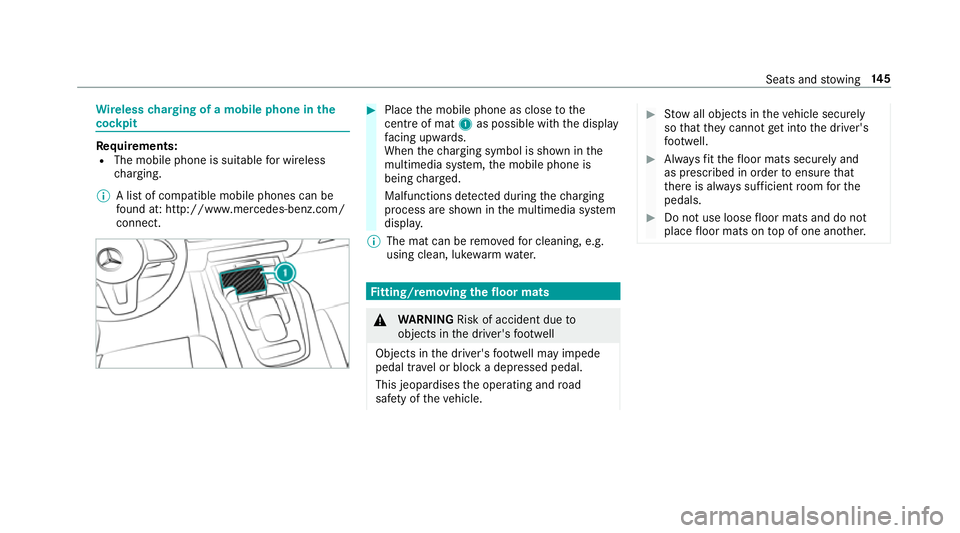
connect. #
Place the mobile phone as close tothe
centre of mat 1as possible wi th the display
fa cing up wards.
When thech arging symbol is shown in the
multimedia sy stem, the mobile phone is
being charge d.
Malfunctions de tected du ring thech arging
process are shown in the multimedia sy stem
displa y.
% The mat can be remo vedfo r cleaning, e.g.
using clean, luk ewarmwate r. Fi
tting/ removing the floormats &
WARNING Risk of accident due to
objects in the driver's foot we ll
Objects in the driver's foot we ll may impede
pedal tr avel or block a depressed pedal.
This jeopardises the operating and road
saf ety of theve hicle. #
Stow all objects in theve hicle securely
so that they cannot getinto the driver's
fo ot we ll. #
Alw aysfit th efloor mats securely and
as prescribed in order toensure that
th ere is alw ays suf ficient room forthe
pedals. #
Do not use loose floor mats and do not
place floor mats on top of one ano ther. Seats and
stowing 14 5
Page 151 of 681
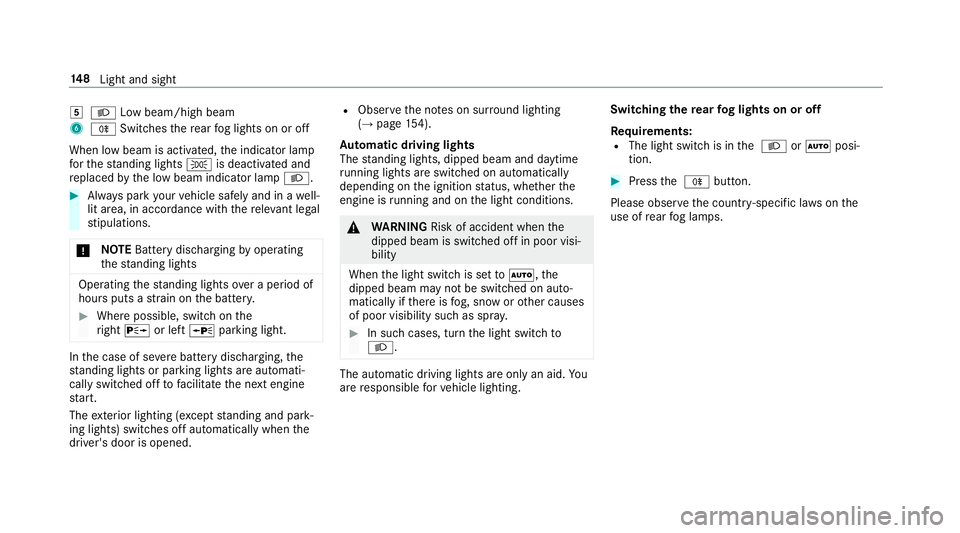
5
L Low beam/high beam
6 R Switches there ar fog lights on or off
When low beam is activated, the indicator lamp
fo rth est anding lights Tis deactivated and
re placed bythe low beam indicator lamp L.#
Alw ays park your vehicle safely and in a well-
lit area, in accordance with there leva nt le gal
st ipulations.
* NO
TEBattery discharging byoperating
th est anding lights Operating
thest anding lights over a period of
hours puts a stra in on the batter y. #
Where possible, switch on the
ri ght X or left Wparking light. In
the case of se vere battery discharging, the
st anding lights or parking lights are automati‐
cally swit ched off tofacilitate the next engine
st art.
The exterior lighting (e xcept standing and park‐
ing lights) swit ches off automatically when the
driver's door is opened. R
Obser vethe no tes on sur round lighting
(→ page 154).
Au tomatic driving lights
The standing lights, dipped beam and daytime
ru nning lights are switched on au tomatical ly
depending on the ignition status, whe ther the
engine is running and on the light conditions. &
WARNING Risk of accident when the
dipped beam is switched off in poor visi‐
bility
When the light switch is set toà ,the
dipped beam may not be switched on auto‐
matically if there is fog, snow or other causes
of poor visibility such as spr ay. #
In such cases, turn the light switch to
L . The automatic driving lights are only an aid.
Yo u
are responsible forve hicle lighting. Switching
there ar fog lights on or off
Re quirements:
R The light switch is in the L orà posi‐
tion. #
Press the R button.
Please obser vethe count ry-specific la wsonthe
use of rear fog lamps. 14 8
Light and sight
Page 297 of 681
Obser
vethe information on the displa yson the
instrument clus ter:
R Warning and indicator lamps (→ page616)
R Displ aymessa ges (→ page 566) Coupling up/uncoupling a trailer
&
WARNING Risk of inju ryfrom theve hicle
le ve l being changed
Ve hicles with le vel control sy stem: the
ve hicle le vel may be changed unin tentionally,
e.g. by ot her persons. You may become trap‐
ped if you couple up or uncouple a trailer
while theve hicle le vel is changing. In addi‐
tion, other people could become trapped if
th eir limbs are between theve hicle body and
th e tyres or underneath theve hicle.
When coupling up or uncoupling a trailer,
make sure that: #
The doors or tailgate are not opened or
closed. #
You do not initiate the le vel control sys‐
te m and do not operate theDY NA MIC
SELECT switch. #
Do not lock or unlock theve hicle. Re
quirements:
R the ball neck must be extended fully electri‐
cal lyand engaged in the securely loc ked
position
Tr ailers with a 7-pin plug can be connec tedto
th eve hicle with thefo llowing adap ters:
R adap ter plug
R adapte r cable
The trailer will be cor rectly de tected bytheve hi‐
cle only if thefo llowing conditions are me t:
R the trailer is connected cor rectly
R the trailer lighting sy stem is in working order
The functions of thefo llowing sy stems are af fec‐
te dby a cor rectly connected traile r:
R Active Lane Keeping Assist
R ESP ®
trailer stabilisation R
Parking Assist PARKTRONIC
R Active Parking Assist
R Blind Spot Assist or Active Blind Spot Assi st
R Drive AwayAssi st
R Cross Traf fic Alert
R Trailer Manoeuv ring Assi st
R Reversing camera
R 360° camera
Coupling up a trailer
* NO
TEDama getotheve hicle battery due
to full discharge Charging
the trailer battery using the po wer
supply of the trailer can damage theve hicle
batter y. #
Do not use theve hicle's po wer supply
to charge the trailer batter y. #
Position the trailer on a le vel sur face behind
th eve hicle and couple it up totheve hicle. 294
Driving and parking