2019 MERCEDES-BENZ GLE SUV display
[x] Cancel search: displayPage 131 of 681
*
NO
TEDama getothe seat belt The seat belt could become trapped and
thus
damaged when folding back the seat back‐
re st. #
Make sure that the seat belt is not trap‐
ped when folding back the seat back‐
re st. Fo
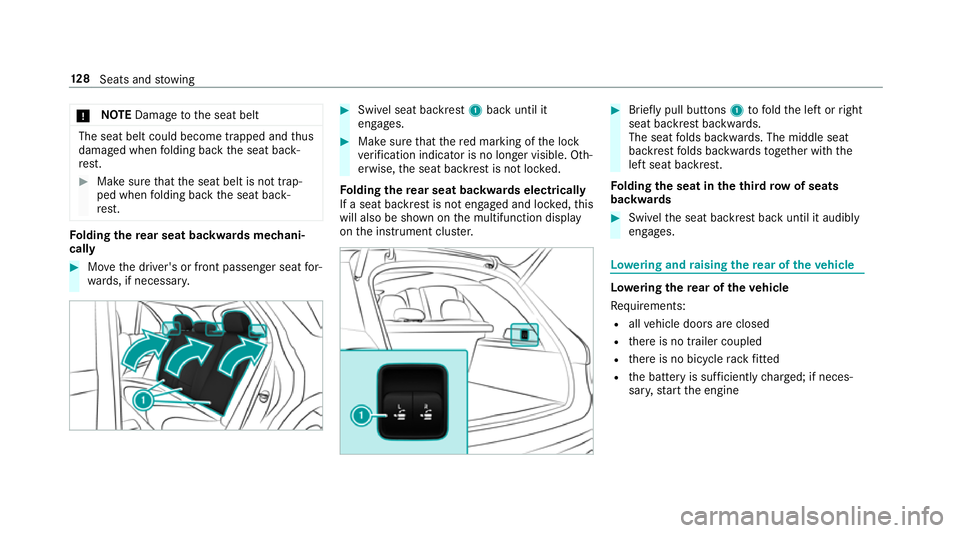
lding there ar seat backwards mechani‐
cally #
Movethe driver's or front passenger seat for‐
wa rds, if necessar y. #
Swi vel seat backrest 1back until it
engages. #
Make sure that there d marking of the lock
ve rification indicator is no longer visible. Oth‐
erwise, the seat backrest is not loc ked.
Fo lding there ar seat backwards electrical ly
If a seat backrest is not engaged and loc ked, this
will also be shown on the multifunction display
on the instrument clus ter. #
Brief lypull buttons 1tofold the left or right
seat backrest backwards.
The seat folds backwards. The middle seat
backrest folds backwards toge ther with the
left seat backrest.
Fo lding the seat in theth ird row of seats
backwards #
Swi velth e seat backrest back until it audibly
engages. Lo
weri ng and raising there ar of theve hicle Lo
weri ngthere ar of theve hicle
Re quirements:
R allvehicle doors are closed
R there is no trailer coupled
R there is no bicycle rack fitted
R the battery is suf ficiently charge d; if neces‐
sar y,start the engine 12 8
Seats and stowing
Page 148 of 681
Wire
lesscharging of a mobile phone in the
cockpit Re
quirements:
R The mobile phone is suitable for wireless
ch arging.
% A list of compatible mobile phones can be
found at: http://www.mercedes-benz.com/
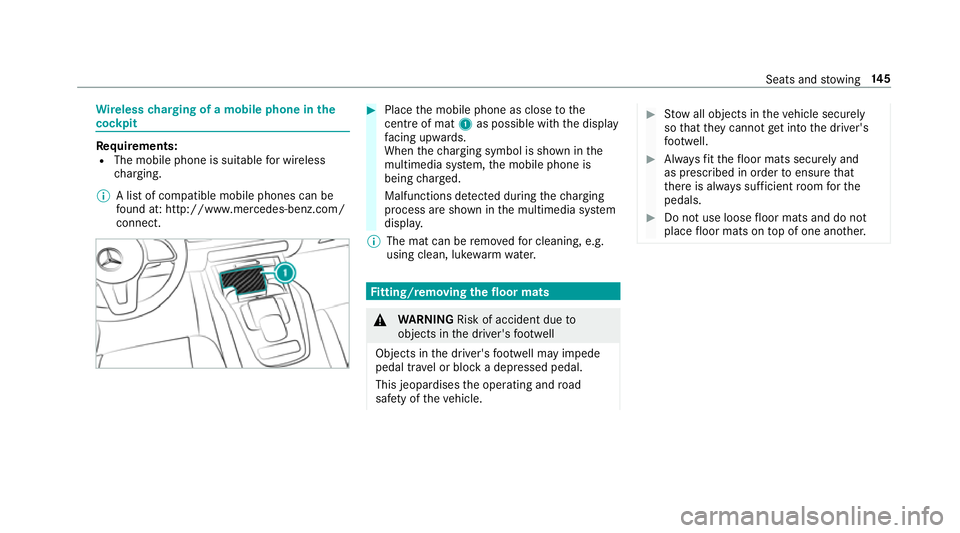
connect. #
Place the mobile phone as close tothe
centre of mat 1as possible wi th the display
fa cing up wards.
When thech arging symbol is shown in the
multimedia sy stem, the mobile phone is
being charge d.
Malfunctions de tected du ring thech arging
process are shown in the multimedia sy stem
displa y.
% The mat can be remo vedfo r cleaning, e.g.
using clean, luk ewarmwate r. Fi
tting/ removing the floormats &
WARNING Risk of accident due to
objects in the driver's foot we ll
Objects in the driver's foot we ll may impede
pedal tr avel or block a depressed pedal.
This jeopardises the operating and road
saf ety of theve hicle. #
Stow all objects in theve hicle securely
so that they cannot getinto the driver's
fo ot we ll. #
Alw aysfit th efloor mats securely and
as prescribed in order toensure that
th ere is alw ays suf ficient room forthe
pedals. #
Do not use loose floor mats and do not
place floor mats on top of one ano ther. Seats and
stowing 14 5
Page 156 of 681
Ad
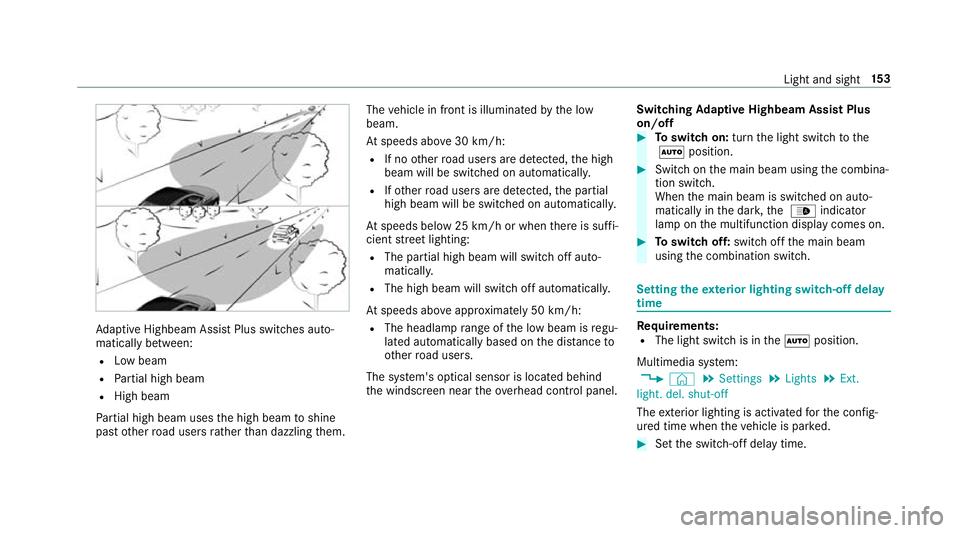
aptive Highbeam Assist Plus swit ches auto‐
matically between:
R Low beam
R Partial high beam
R High beam
Pa rtial high beam uses the high beam toshine
past other road users rath er than dazzling them. The
vehicle in front is illuminated bythe low
beam.
At speeds abo ve30 km/h:
R If no other road users are de tected, the high
beam will be switched on automaticall y.
R Ifot her road users are de tected, the partial
high beam will be switched on automaticall y.
At speeds below 25 km/h or when there is suf fi‐
cient stre et lighting:
R The partial high beam will switch off auto‐
maticall y.
R The high beam will switch off automaticall y.
At speeds abo veappr oximately 50 km/h:
R The headlamp range of the low beam is regu‐
lated automatically based on the dis tance to
ot her road users.
The sy stem's optical sensor is located behind
th e windscreen near theov erhead control panel. Switching
Adaptive Highbeam Assist Plus
on/off #
Toswitch on: turnthe light switch tothe
à position. #
Switch on the main beam using the combina‐
tion switch.
When the main beam is switched on auto‐
matically in the dar k,the _ indicator
lamp on the multifunction display comes on. #
Toswitch off: switch offthe main beam
using the combination switch. Setting
theex terior lighting switch-off delay
time Re
quirements:
R The light switch is in theà position.
Multimedia sy stem:
, © .
Settings .
Lights .
Ext.
light. del. shut-off
The exterior lighting is activated forth e confi g‐
ured time when theve hicle is par ked. #
Set the switch-off delay time. Light and sight
15 3
Page 161 of 681
Fi
tting the wiper blades #
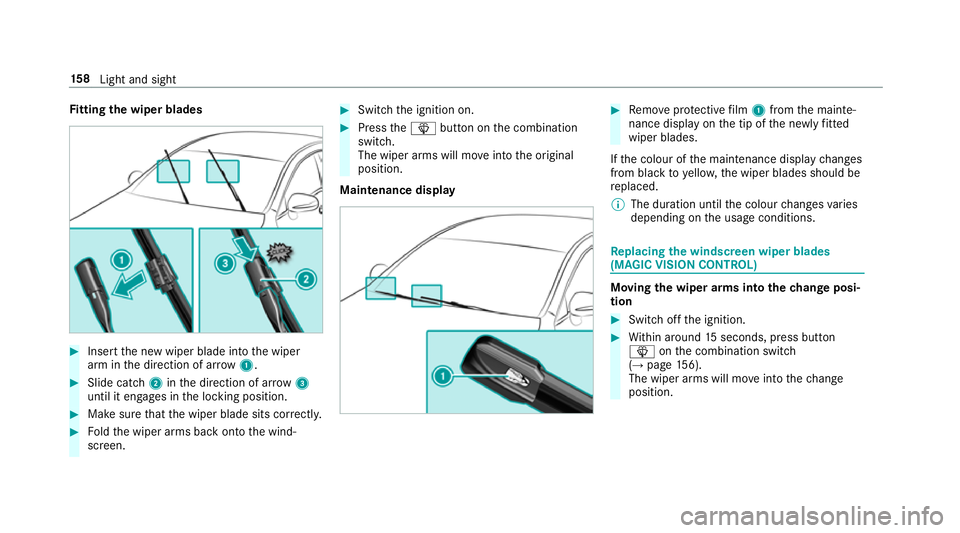
Inse rtthe new wiper blade into the wiper
arm in the direction of ar row1. #
Slide catch 2inthe direction of ar row 3
until it engages in the locking position. #
Make sure that the wiper blade sits cor rectly. #
Foldthe wiper arms back onto the wind‐
screen. #
Switch the ignition on. #
Press theî button on the combination
switch.
The wiper arms will mo veinto the original
position.
Maintenance display #
Remo veprotective film 1 from the mainte‐
nance display on the tip of the newly fitted
wiper blades.
If th e colour of the maintenance display changes
from black to yellow, the wiper blades should be
re placed.
% The duration until the colour changes varies
depending on the usage conditions. Re
placing the windsc reen wiper blades
(MAGIC VISION CONT ROL) Moving
the wiper arms into thech ange posi‐
tion #
Switch off the ignition. #
Within around 15seconds, press button
î onthe combination switch
(→ page 156).
The wiper arms will mo veinto thech ange
position. 15 8
Light and sight
Page 170 of 681
Operating
the clima tecont rol sy stem Switching clima
tecont rol on/off #
Toswitch on: setthe air flow toleve l 1 or
higher using theH button. #
Toswitch off: setthe air flow toleve l 0 using
th eH button.
% If climate control is switched off, the win‐
do ws may mist up more quickl y.Switch off
climate control only brie fly. Switching
rear climate control on/off #
Press button 5.
% When rear climate control is swit ched off,
th e indicator lamp is activated and OFFis
shown on there ar displa y. Switching
the A/C function on or off via the
cont rol panel The A/C function heats, cools and dehumidifies
th
eve hicle's interior air. #
Press theÁ button. Switch off
the A/C function only brief lyother‐
wise the windo wsmay mist up more quickl y.
Condensation may drip from the underside of
th eve hicle when cooling mode is active. This is
not a sign that there is a malfunction. Calling up
the air conditioning menu Calling up
the air conditioning menu using
th e multimedia sy stem #
Select thete mp erature display at the lo wer
edge of the media displa y.
Calling up the air conditioning menu using
th e but ton on the control panel #
Press thet button on the control panel. Ac
tivating/deactivating the A/C function
using the multimedia sy stem The A/C function heats, cools and dehumidifies
th
eve hicle's interior air. #
Call up the climate control menu
(→ page 167). #
Select A/C.
Depending on the pr evious status, the func‐
tion is activated or deactivated. Setting climate control
toautomatic mode In auto
matic mode, the set temp erature is con‐
trolled and maintained at a const ant levelby the
air suppl y. #
Press the à button. #
Toswitch tomanual mode: pressthe Ã
button.
In automatic mode, you can choose between five
dif fere nt air quantities using the H button.
Au tomatic mode is retained. Setting
rear climate control toautomatic
mode In auto
matic mode, the set temp erature is regu‐
lated bythete mp erature of the dispensed air
and the air flow. #
Press the à button (→ page166). Clima
tecontrol 167
Page 171 of 681
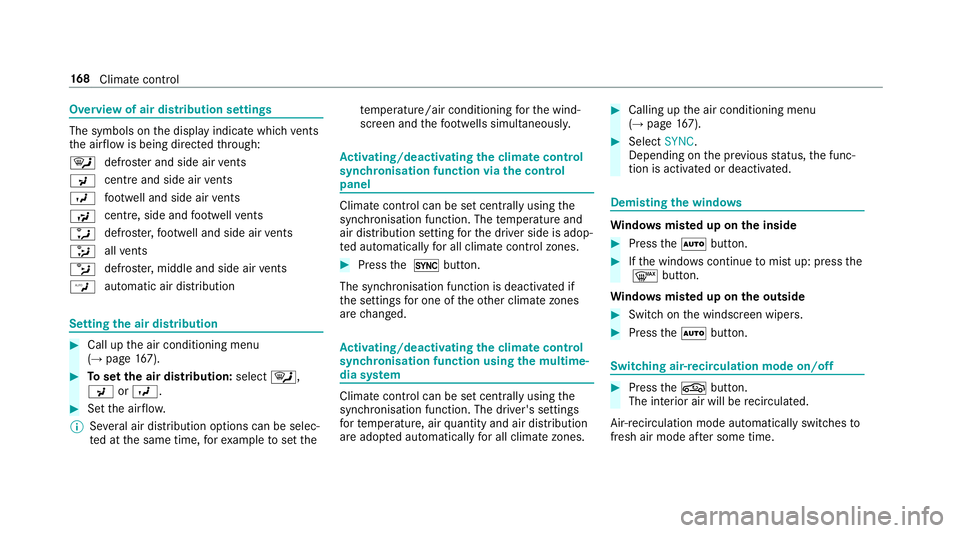
Overview of air distribution settings
The symbols on
the display indicate which vents
th e air flow is being directed thro ugh:
¯ def
rost er and side air vents
P centre and side air
vents
O fo
ot we ll and side air vents
S centre, side and
foot we llve nts
a defros
ter,fo ot we ll and side air vents
_ all
vents
b defros
ter,middle and side air vents
W au
tomatic air distribution Setting
the air distribution #
Call up the air conditioning menu
(→ page 167). #
Toset the air distribution: select¯,
P orO. #
Set the air flow.
% Several air distribution options can be selec‐
te d at the same time, forex ample toset the te
mp erature/air conditioning forth e wind‐
screen and thefo ot we lls simultaneousl y. Ac
tivating/deactivating the climate control
syn chro nisation function via the control
panel Climate control can be set centrally using
the
synchronisation function. The temp erature and
air distribution setting forth e driver side is adop‐
te d automatically for all clima tecontrol zones. #
Press the 0 button.
The synchronisation function is deactivated if
th e settings for one of theot her climate zones
are changed. Ac
tivating/deactivating the climate control
syn chro nisation function using the multime‐
dia sy stem Climate control can be set centrally using
the
synchronisation function. The driver's settings
fo rte mp erature, air quantity and air distribution
are adop ted automatically for all clima tezones. #
Calling up the air conditioning menu
(→ page 167). #
Select SYNC.
Depending on the pr evious status, the func‐
tion is activated or deactivated. Demisting
the windo ws Wi
ndo wsmis ted up on the inside #
Press theà button. #
Ifth e windo wscontinue tomist up: press the
¬ button.
Wi ndo wsmis ted up on the outside #
Switch on the windscreen wipers. #
Press theà button. Switching air-recirculation mode on/off
#
Press theg button.
The interior air will be recirculated.
Air-reci rculation mode automatically swit ches to
fresh air mode af ter some time. 16 8
Climate cont rol
Page 182 of 681
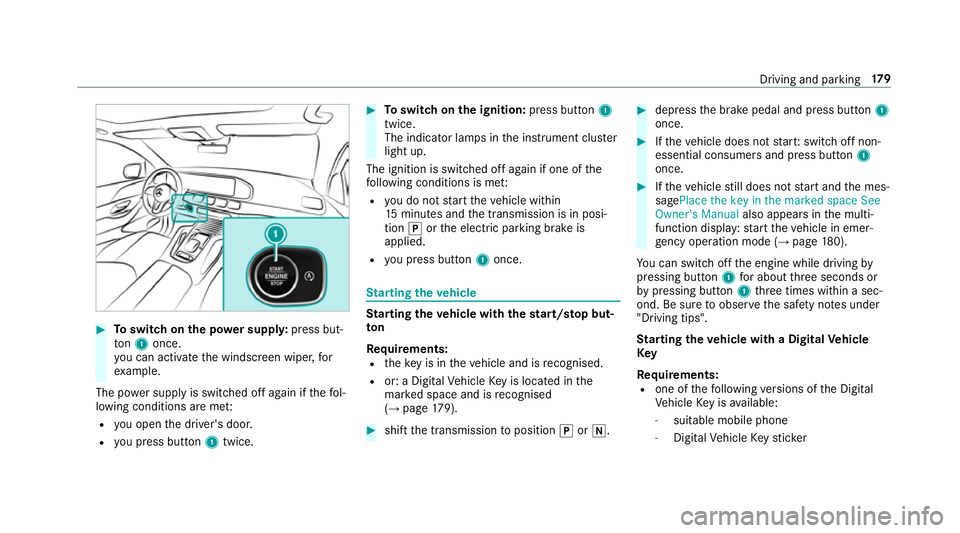
#
Toswitch on the po wer supp ly:press but‐
to n1 once.
yo u can activate the windscreen wiper, for
ex ample.
The po wer supp lyis switched off again if thefo l‐
lowing conditions are me t:
R you open the driver's door.
R you press but ton1 twice. #
Toswitch on the ignition: press button 1
twice.
The indicator lamps in the instrument clus ter
light up.
The ignition is switched off again if one of the
fo llowing conditions is me t:
R you do not start theve hicle within
15 minutes and the transmission is in posi‐
tion jorthe electric parking brake is
applied.
R you press but ton1 once. St
arting theve hicle St
arting theve hicle with thest art/s top but‐
ton
Requ irements:
R theke y is in theve hicle and is recognised.
R or: a Digi talVe hicle Key is located in the
mar ked space and is recognised
(→ page 179). #
shif tth e transmission toposition jori. #
depress the brake pedal and press button 1
once. #
Ifth eve hicle does not star t:switch off non-
essential consumers and press button 1
once. #
Ifth eve hicle still does not start and the mes‐
sagePlace the key in the marked space See
Owner's Manual also appears inthe multi‐
function display: start theve hicle in emer‐
ge ncy operation mode (→ page 180).
Yo u can swit choff the engine while driving by
pressing button 1for about thre e seconds or
by pressing button 1thre e times within a sec‐
ond. Be sure toobser vethe saf ety no tes under
"Driving tips".
St arting theve hicle with a Digital Vehicle
Key
Re quirements:
R one of thefo llowing versions of the Digital
Ve hicle Key is available:
- suitable mobile phone
- Digital Vehicle Keyst icker Driving and pa
rking 17 9
Page 190 of 681
R
Ifth eF orG drive program is selec‐
te d: select the;, =, CorA
drive prog ram.
R Shift the transfer case tothe on-ro ad posi‐
tion HIGH RANGE.
R Swit chDSR off.
R Lowe rth eve hicle le vel again toa le vel suita‐
ble tothero ad conditions, e.g. tothe normal
le ve l.
R Apply the brakes todry them af terfo rd ing.
R Clean thefo llowing components everytime
af te r driving off-road:
- licence plate number
- headlamps and tail lamps
- tyres, wheels and wheel ar ches
- underbody
R After driving thro ugh sand, mud, water or
gr ave l, ha vethefo llowing components
ch ecked and cleaned:
- brake discs and brakepads
- tyres and wheels
- axle joints ECO
start/s top function Ope
ration of the ECO start/s top function
The engine is au tomatical lyswitched off if the
fo llowing conditions are me t:
R you brake theve hicle toast andstill in trans‐
mission position hori.
R all conditions for an auto matic engine stop
are met.
R vehicles with 48 V on-board electrical
sy stem (EQ Boost tech nology): you
depress the brake pedal when driving at
speeds below 20 km/h.
R vehicles with a 48 V on-board electrical
sy stem (EQ Boost technology): you en gage
transmission position j.
The è symbol appears in the multifunction
display when theve hicle is stationar y.If not all
th eve hicle conditions are met, theç symbol
appears in the multifunction displa y.
The engine is restar ted automatically if:
R you en gage transmission position hork.
R you depress the accelera tor pedal. R
vehicles with 48 V on-board electrical
sy stem (EQ Boost tech nology): youre lease
th e brake pedal in transmission position h
when the HOLD function is not active and the
ve hicle is not in drive program Aor;
and theve hicle does not start tomo ve.
R vehicles with 48 V on-board electrical
sy stem (EQ Boost tech nology): youre lease
th e brake pedal, theve hicle is not in Glide
mode and it starts tomo veat a speed abo ve
appr ox. 3 km/h.
R vehicles without a 48 V on-board electri‐
cal sy stem (without EQ Boost tech nol‐
ogy): you shift from transmission position
j.
R an automatic engine start is necessar y.
If th e engine was switched off bythe ECO start/
st op function and you lea vetheve hicle, a warn‐
ing tone sounds. In addition, the message Vehi-
cle is operational Switch off the ignition before
exiting appears in the multifunction displa y.If
yo u do not swit choff the ignition, the ignition is
automatically switched off af terth re e minutes. Driving and parking
187