2019 MERCEDES-BENZ GLE SUV light
[x] Cancel search: lightPage 289 of 681
R
The windscreen is dirty in the area of the
multifunction camera, or the camera is mis‐
te d up, damaged or co vered.
R Ifth e traf fic signs are ha rdtodetect, e.g. due
to dirt or sno w,or because they are co vered,
or due toinsuf ficient lighting.
R Ifth e information in the navigation sy stem's
digital map is incor rect or out-of-da te.
R The signs are ambiguous, e.g. traf fic signs on
construction sites or in adjacent lanes.
R Ifyo u turn sharpl y,yo u may pass traf fic signs
th at are outside the camera's field of vision.
Setting Traf fic Sign Assist
Re quirements:
R For automatic ado ption of speed limits:
Ac tive Dis tance Assi stDISTRONIC is acti va‐
te d. Multimedia sy
stem:
, © .
Settings .
Assistance .
Traf-
fic Sign Assist
Ac tivating/deactivating automatic adoption
of speed limits #
Select Adopt limit . #
Activate or deacti vate the function.
The speed limits de tected byTraf fic Sign
Assi stare automatically adop tedby Active
Dis tance Assi stDISTRONIC.
% When DISTRONIC, cruise control or theva ri‐
able limiter are activated, the speed de tec‐
te d can be manually adop ted as the speed
limit (→ page 235).
Displaying de tected traf fic signs in the
media display #
Select Display in head unit . #
Activate or deacti vate the function.
Ad justing the type of warning #
Select Visual & audible ,Visual orNone. Ad
justing the warning threshold
This value de term ines the speed at which a
wa rning is issued when exceeded. #
Select Warning threshold. #
Set the desired speed. Blind Spot Assist and
Active Blind Spot
Assi st Fu
nction of Blind Spot Assist and Active
Blind Spot Assi stwith exitwa rning
Blind Spot Assist and Active Blind Spot Assi st
use two lateral, rear-facing radar sensors to
monitor the area up to40 m behind your vehicle
and 3 m directly next to yourvehicle.
If a vehicle is de tected at speeds ab ove appr ox‐
imately 12km/h and this vehicle subsequently
enters the monitoring range di rectly next to your
ve hicle, thewa rning lamp in the outside mir ror
lights up red.
If a vehicle is de tected close tothe side of your
ve hicle, there dwa rning lamp in the outside mir‐
ro rflashes. If you swit chon the turn signal indi‐
cator in the cor responding direction, a warning 286
Driving and parking
Page 292 of 681
In
rare cases, the sy stem may make an inappro‐
priate brake application. This brake application
may be inter rupte d at any time if yousteer
slightly in the opposite direction or accelera te.
Sy stem limitations
Either a course-cor recting brake application
appropria teto the driving situation, or none at
all, may occur in thefo llowing situations:
R Vehicles or obs tacles, e.g. crash ba rriers, are
located on bo thsides of your vehicle.
R Ave hicle approaches too closely on the side.
R You ha veadop ted a sporty driving style with
high cornering speeds.
R You brake or accelerate significantl y.
R A driving sa fety sy stem inter venes, e.g. ESP ®
or Active Brake Assi st.
R ESP ®
is deacti vated.
R A loss of tyre pressure or a defective tyre is
de tected.
R You are driving with a trailer and the electri‐
cal connection tothe trailer hitch has been
cor rectly es tablished. Ac
tivating/deactivating Blind Spot Assi stor
Ac tive Blind Spot Assi st
Multimedia sy stem:
, © .
Settings .
Assistance #
Activate or deacti vate Blind Spot Assist . Ac
tive Lane Keeping Assist Fu
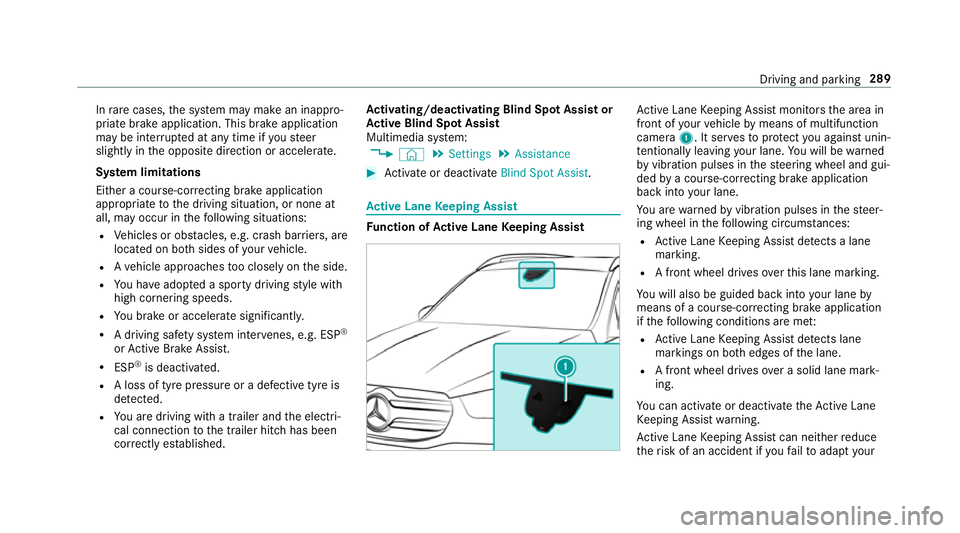
nction of Active Lane Keeping Assist Ac
tive Lane Keeping Assist monitors the area in
front of your vehicle bymeans of multifunction
camera 1. It ser vesto protect you against unin‐
te ntional lyleaving your lane. You will be warned
by vibration pulses in thesteering wheel and gui‐
ded bya course-cor recting brake application
ba ck into your lane.
Yo u are warned byvibration pulses in thesteer‐
ing wheel in thefo llowing circums tances:
R Active Lane Keeping Assist de tects a lane
marking.
R A front wheel drives overth is lane marking.
Yo u will also be guided back into your lane by
means of a course-cor recting brake application
if th efo llowing conditions are me t:
R Active Lane Keeping Assist de tects lane
markings on bo thedges of the lane.
R A front wheel drives over a solid lane mark‐
ing.
Yo u can activate or deactivate theAc tive Lane
Ke eping Assist warning.
Ac tive Lane Keeping Assist can neither reduce
th erisk of an accident if youfa ilto adapt your Driving and parking
289
Page 295 of 681
Do not
exceed thefo llowing values:
R permissible towing capacity
R permissible rear axle load of theto wing vehi‐
cle
R permissible gross mass of theto wing vehicle
R permissible gross mass of the trailer
R maximum permissible speed of the trailer
Ensure thefo llowing before starting a journey:
R the tyre pressure on there ar axle of theto w‐
ing vehicle is set for a maximum load
R the lighting of the connected trailer is opera‐
tional
In theev ent of increased rear axle load, the car/
trailer combination may not exceed a maximum
speed of 100 km/h forre asons concerning the
operating permit. This also applies in countri es
in which the permissible maximum speed for
car/trailer combinations is ab ove10 0 km/h.
% When reve rsing with a trailer, remember to
use theTr ailer Manoeuv ring Assi stfunction
(→ page 265). Extending/
retracting the ball ne ckfully elec‐
trically &
WARNING Risk of accident due tothe
ball neck not being engaged
If th e ball neck is not engaged, the trailer
may come loose. #
Make sure that the ball neck securely
engages and loc ksinto place. *
NO
TEDama getothe full y-electric trailer
hitch The fully-elect
ric trailer hitch could be
mechanically damaged byapplying additional
pressure when the ball neck is being exten‐
ded or retracted. #
Do not ma kethe ball neck extend/
re tract faster by applying additional
pressure. Re
quirements:
Make sure of thefo llowing before extending/
re tracting the ball neck fully electrically:
R Shift the transmission toposition jori.
R The range of mo vement is clear.
R Only when retracting: remo vethe trailer
cables or adap ter plugs. 292
Driving and parking
Page 296 of 681
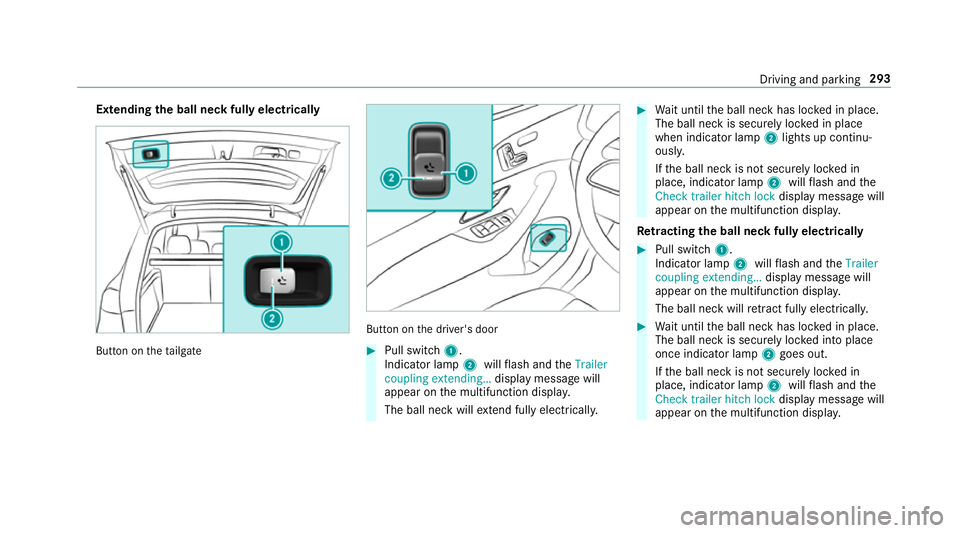
Extending
the ball neck fully electrically But
ton on theta ilgate But
ton on the driver's door #
Pull switch 1.
Indicator lamp 2willflash and theTrailer
coupling extending… display message will
appear on the multifunction displa y.
The ball neck will extend fully electrically. #
Wait until the ball neck has loc ked in place.
The ball neck is securely loc ked in place
when indicator lamp 2lights up continu‐
ousl y.
If th e ball neck is not securely loc ked in
place, indicator lamp 2willflash and the
Check trailer hitch lock displaymessa gewill
appear on the multifunction displa y.
Re tracting the ball ne ckfully electrical ly #
Pull switch 1.
Indicator lamp 2willflash and theTrailer
coupling extending… display message will
appear on the multifunction displa y.
The ball neck will retract fully electrically. #
Wait until the ball neck has loc ked in place.
The ball neck is securely loc ked into place
once indicator lamp 2goes out.
If th e ball neck is not securely loc ked in
place, indicator lamp 2willflash and the
Check trailer hitch lock displaymessa gewill
appear on the multifunction displa y. Driving and pa
rking 293
Page 297 of 681
Obser
vethe information on the displa yson the
instrument clus ter:
R Warning and indicator lamps (→ page616)
R Displ aymessa ges (→ page 566) Coupling up/uncoupling a trailer
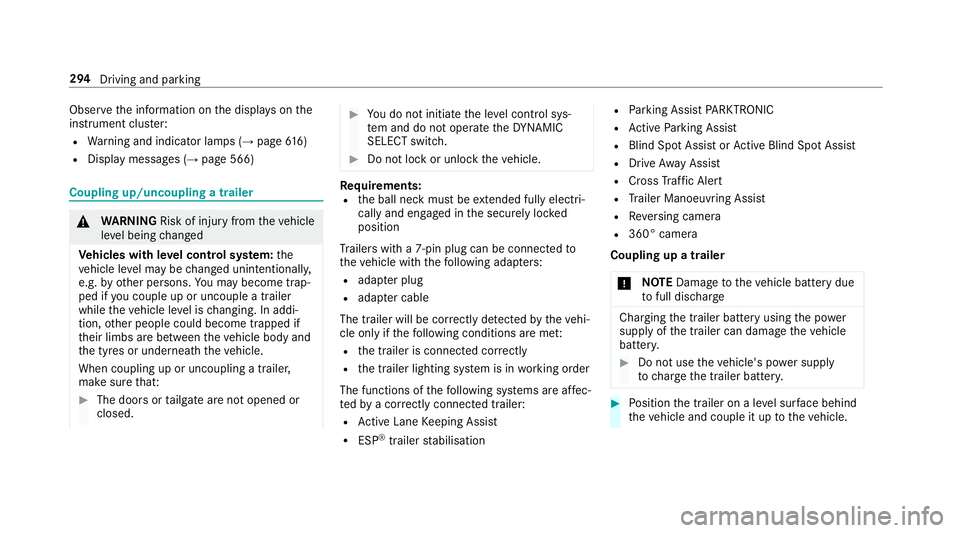
&
WARNING Risk of inju ryfrom theve hicle
le ve l being changed
Ve hicles with le vel control sy stem: the
ve hicle le vel may be changed unin tentionally,
e.g. by ot her persons. You may become trap‐
ped if you couple up or uncouple a trailer
while theve hicle le vel is changing. In addi‐
tion, other people could become trapped if
th eir limbs are between theve hicle body and
th e tyres or underneath theve hicle.
When coupling up or uncoupling a trailer,
make sure that: #
The doors or tailgate are not opened or
closed. #
You do not initiate the le vel control sys‐
te m and do not operate theDY NA MIC
SELECT switch. #
Do not lock or unlock theve hicle. Re
quirements:
R the ball neck must be extended fully electri‐
cal lyand engaged in the securely loc ked
position
Tr ailers with a 7-pin plug can be connec tedto
th eve hicle with thefo llowing adap ters:
R adap ter plug
R adapte r cable
The trailer will be cor rectly de tected bytheve hi‐
cle only if thefo llowing conditions are me t:
R the trailer is connected cor rectly
R the trailer lighting sy stem is in working order
The functions of thefo llowing sy stems are af fec‐
te dby a cor rectly connected traile r:
R Active Lane Keeping Assist
R ESP ®
trailer stabilisation R
Parking Assist PARKTRONIC
R Active Parking Assist
R Blind Spot Assist or Active Blind Spot Assi st
R Drive AwayAssi st
R Cross Traf fic Alert
R Trailer Manoeuv ring Assi st
R Reversing camera
R 360° camera
Coupling up a trailer
* NO
TEDama getotheve hicle battery due
to full discharge Charging
the trailer battery using the po wer
supply of the trailer can damage theve hicle
batter y. #
Do not use theve hicle's po wer supply
to charge the trailer batter y. #
Position the trailer on a le vel sur face behind
th eve hicle and couple it up totheve hicle. 294
Driving and parking
Page 298 of 681
#
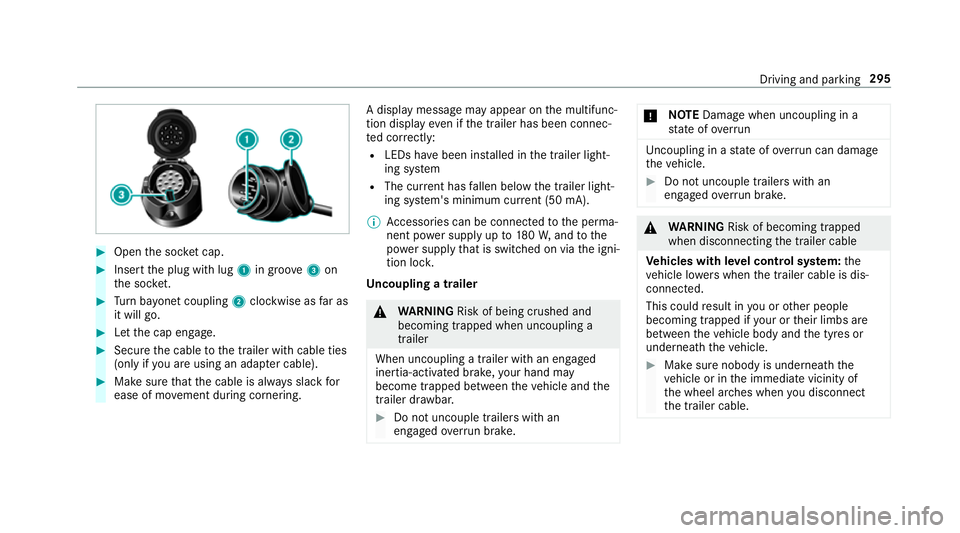
Open the soc ket cap. #
Inse rtthe plug with lug 1in groo ve3 on
th e soc ket. #
Turn bayonet coupling 2clockwise as far as
it will go. #
Let the cap engage. #
Secure the cable tothe trailer with cable ties
(only if you are using an adap ter cable). #
Make sure that the cable is alw ays slack for
ease of mo vement during cornering. A display messa
gemay appear on the multifunc‐
tion display even if the trailer has been connec‐
te d cor rectly:
R LEDs ha vebeen ins talled in the trailer light‐
ing sy stem
R The cur rent has fallen below the trailer light‐
ing sy stem's minimum cur rent (50 mA).
% Accessories can be connected tothe perma‐
nent po wer supp lyup to180W, and tothe
po we r supp lythat is swit ched on via the igni‐
tion loc k.
Un coupling a trailer &
WARNING Risk of being crushed and
becoming trapped when uncoupling a
trailer
When uncoupling a trailer wi than engaged
ine rtia-activated brake, your hand may
become trapped between theve hicle and the
trailer dr awbar. #
Do not uncouple trailers with an
engaged overrun brake. *
NO
TEDama gewhen uncoupling in a
st ate of overrun Uncou
pling in a state of overru n can dama ge
th eve hicle. #
Do not uncouple trailers with an
engaged overrun brake. &
WARNING Risk of becoming trapped
when disconnecting the trailer cable
Ve hicles with le vel control sy stem: the
ve hicle lo werswhen the trailer cable is dis‐
connected.
This could result in you or other people
becoming trapped if your or their limbs are
between theve hicle body and the tyres or
underneath theve hicle. #
Make sure nobody is underneath the
ve hicle or in the immediate vicinity of
th e wheel ar ches when you disconnect
th e trailer cable. Driving and parking
295
Page 308 of 681

Ve
hicles with Traf fic Sign Assis t:de tected
instructions and traf fic signs (→ page 284).
Fo r an overview of thewa rning and indicator
lamps, see (→ page616). Ad
justing the in strument lighting #
Turn brightness control 1up or down.
The lighting of the instrument display and in
th e control elements of theve hicle interior is
adjus ted. Menus and submenus
Fu
nctions on the service menu of the on-
board compu ter On-board computer:
, Service #
Toselect the function: swipe upwards or
down wards on the left-hand Touch Control. #
Press the left-hand Touch Control.
Fu nctions on theService menu:
R Message memory (→ page 566)
R AdBlue :Ad blue ®
ra nge and fill le vel
R Tyres:
- Restart the tyre pressure loss warning
sy stem (→ page 534) -
Check the tyre pressure with the tyre
pressure monitoring sy stem
(→ page 528)
- Restart the tyre pressure monitoring sys‐
te m (→ page 529)
R ASSYST PLUS : calls upthe service due date
(→ page 487)
R Coolant : coolant temp erature display
R Engine oil level: engine oil le vel
R Consumption info: fuel life cycle consump‐
tion Calling up
the assistant display On-board computer:
, Assistance
The following displa ysare available on the assis‐
ta nt displ aymenu:
R Assis tant displ ay
R Attention le vel (→ page 281)
R Full-sur face menu displ ay Instrument Display and on-board computer
305
Page 309 of 681
#
Toswitch between the displa ys:swipe
upwards or down wards on the left-hand
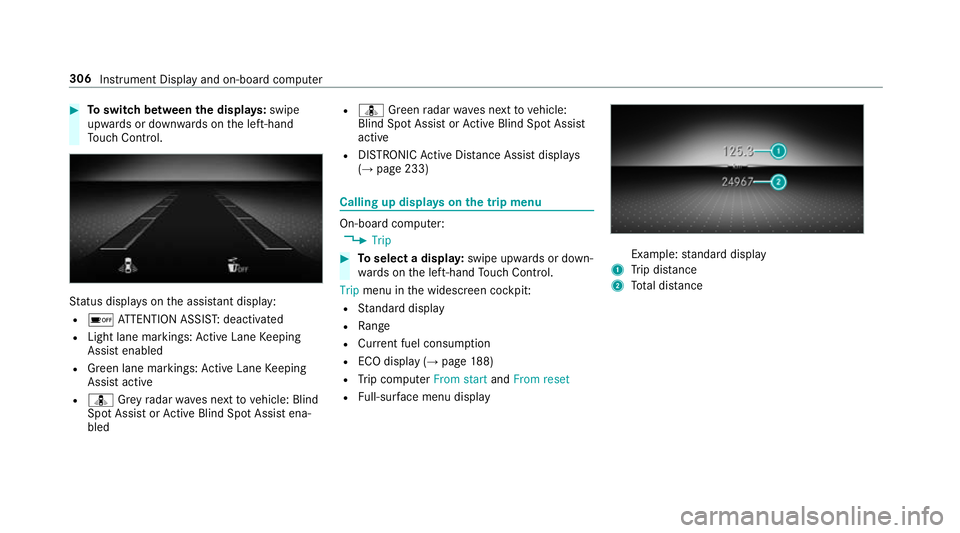
To uch Control. St
atus displa yson the assis tant displ ay:
R é ATTENTION ASSIS T:deactivated
R Light lane markings: Active Lane Keeping
Assist enabled
R Green lane markings: Active Lane Keeping
Assist active
R ¸ Grey radar waves next tovehicle: Blind
Spot Assist or Active Blind Spot Assi stena‐
bled R
¸ Green radar waves next tovehicle:
Blind Spot Assist or Active Blind Spot Assi st
active
R DISTRO NICActive Dis tance Assi stdispla ys
( → page 233) Calling up displa
yson the trip menu On-board computer:
, Trip #
Toselect a displa y:swipe upwards or down‐
wa rds on the left-hand Touch Control.
Trip menu in the widescreen cockpit:
R Standard display
R Range
R Current fuel consum ption
R ECO display (→ page188)
R Trip computer From startandFrom reset
R Full-sur face menu displ ay Example:
standard display
1 Trip dis tance
2 Total dis tance 306
Instrument Display and on-boa rdcompu ter