2019 MERCEDES-BENZ GLE COUPE length
[x] Cancel search: lengthPage 148 of 370
To ensure that you do not roll backwards when
pulling away on an uphill slope, engage the elec-
tric parking brake (Y page 130).
Applying automatically The electric parking brake is automatically
applied when the transmission is in position 005D
and
R the engine is switched off or
R the driver is not wearing a seat belt and the
driver's door is opened
To prevent the electric parking brake from being automatically applied, pull handle 0043.
The electric parking brake is also applied auto-
matically if:
R Active Distance Assist DISTRONIC brings the
vehicle to a standstill or
R the HOLD function is keeping the vehicle sta-
tionary
R Active Parking Assist or the Parking Package
with rear view camera is keeping the vehicle
stationary
In addition, at least one of the following condi-
tions must be fulfilled:
R the engine is switched off
R the driver is not wearing a seat belt and the
driver's door is opened
R there is a system malfunction
R the power supply is insufficient
R the vehicle is stationary for a lengthy period
The red 0049(USA only) or 0024(Canada only)
indicator lamp in the instrument cluster lights
up.
The electric parking brake is not automatically
applied if the engine is switched off by the ECO
start/stop function.
Releasing automatically The electric parking brake is released automat-
ically when all of the following conditions are
fulfilled:
R
The engine is running.
R The seat belt tongue is engaged in the belt
buckle.
R The transmission is in position 005Bor005E and
you depress the accelerator pedal or, on a level surface, you shift from transmission
position
005Dto005B or005E.
R If the transmission is in position 005E, the trunk
lid must be closed.
If the seat belt tongue is not engaged in the seat belt buckle, the following conditions must be
fulfilled:
R The driver's door is closed.
R You are shifting from transmission position
005D or have previously driven at speeds
greater than 2 mph (3 km/h).
R If the transmission is in position 005E, the trunk
lid must be closed.
When the electric parking brake is released,
the 0024 indicator lamp goes out in the instru-
ment cluster.
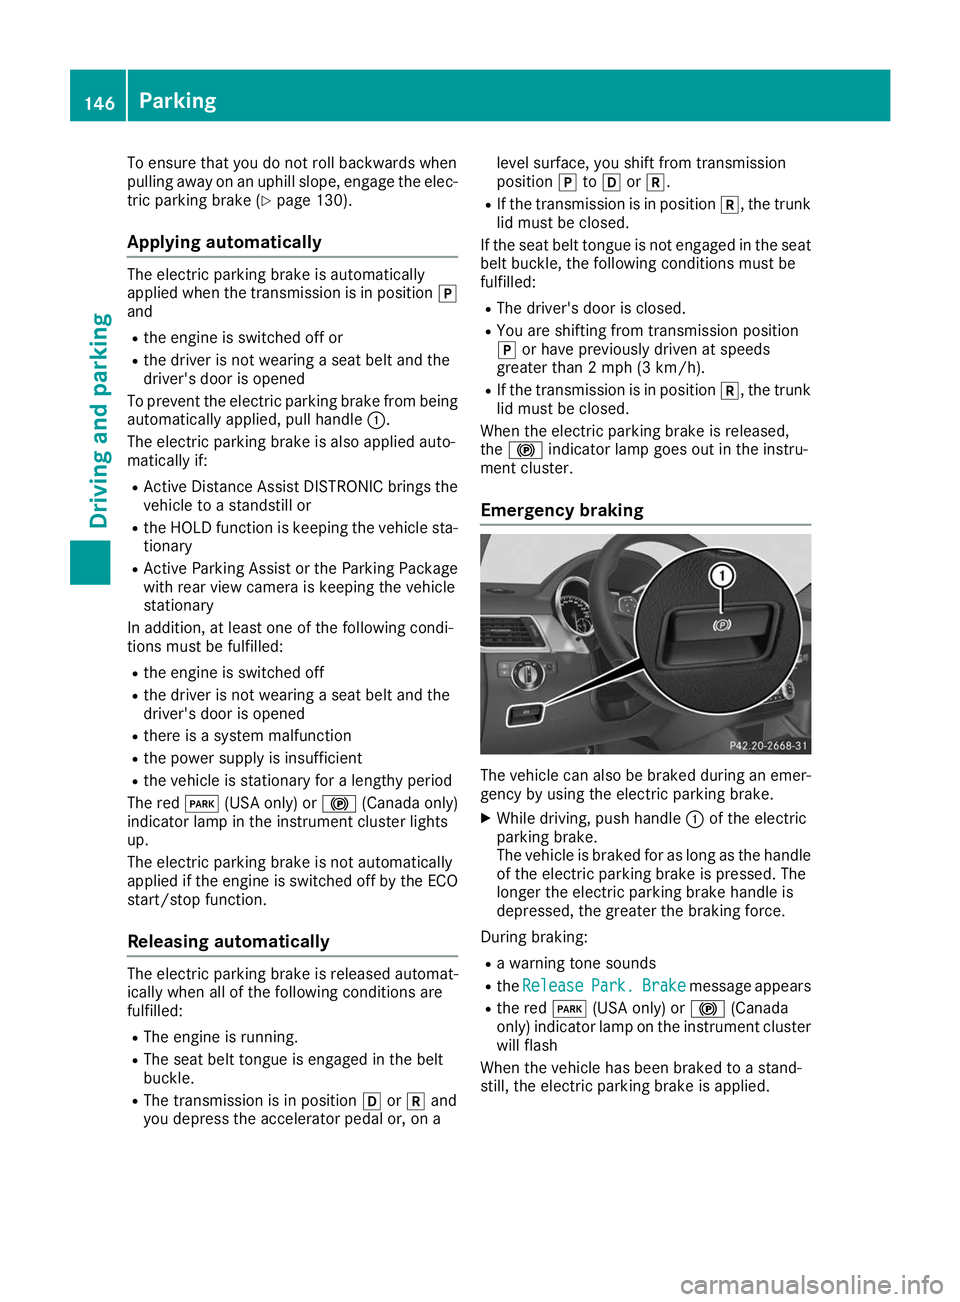
Emergency braking The vehicle can also be braked during an emer-
gency by using the electric parking brake.
X While driving, push handle 0043of the electric
parking brake.
The vehicle is braked for as long as the handle
of the electric parking brake is pressed. The
longer the electric parking brake handle is
depressed, the greater the braking force.
During braking: R a warning tone sounds
R the Release Release Park.
Park.Brake
Brakemessage appears
R the red 0049(USA only) or 0024(Canada
only) indicator lamp on the instrument cluster will flash
When the vehicle has been braked to a stand-
still, the electric parking brake is applied. 146
ParkingDriving and parking
Page 191 of 370
Exiting 360° camera display mode
The 360° camera display is stopped:
R when you select transmission position 005D, or
R when you are driving at moderate speeds
The previous display appears in the multimedia
system. You can also switch the display by
selecting the 0039symbol in the display and
pressing the controller to confirm. ATTENTION ASSIST
General notes ATTENTION ASSIST helps you during long,
monotonous journeys, such as on highways. It is
active in the 37 mph (60 km/h) to 125 mph
(200 km/h) range. If ATTENTION ASSIST
detects typical indicators of fatigue or increas-
ing lapses in concentration on the part of the
driver, it suggests taking a break.
Important safety notes ATTENTION ASSIST is only an aid to the driver. It
might not always recognize fatigue or increasing
inattentiveness in time or fail to recognize them at all. The system is not a substitute for a well-
rested and attentive driver.
The functionality of ATTENTION ASSIST is
restricted and warnings may be delayed or not
occur at all:
R if the length of the journey is less than approx-
imately 30 minutes
R if the road condition is poor, e.g. if the surface
is uneven or if there are potholes
R if there is a strong side wind
R if you have adopted a sporty driving style with
high cornering speeds or high rates of accel-
eration
R if you are predominantly driving slower than
37 mph (60 km/ h)or faster than 125 mph
(200 km/h)
R if you are driving with the Active Steering
Assist of Active Distance Assist DISTRONIC
activated
R if the time has been set incorrectly
R in active driving situations, such as when you
change lanes or change your speed The attention level evaluation is deleted and
restarts when the journey is continued, if:
R you switch off the engine
R you take off your seat belt and open the driv-
er's door, e.g. for a change of drivers or to
take a break
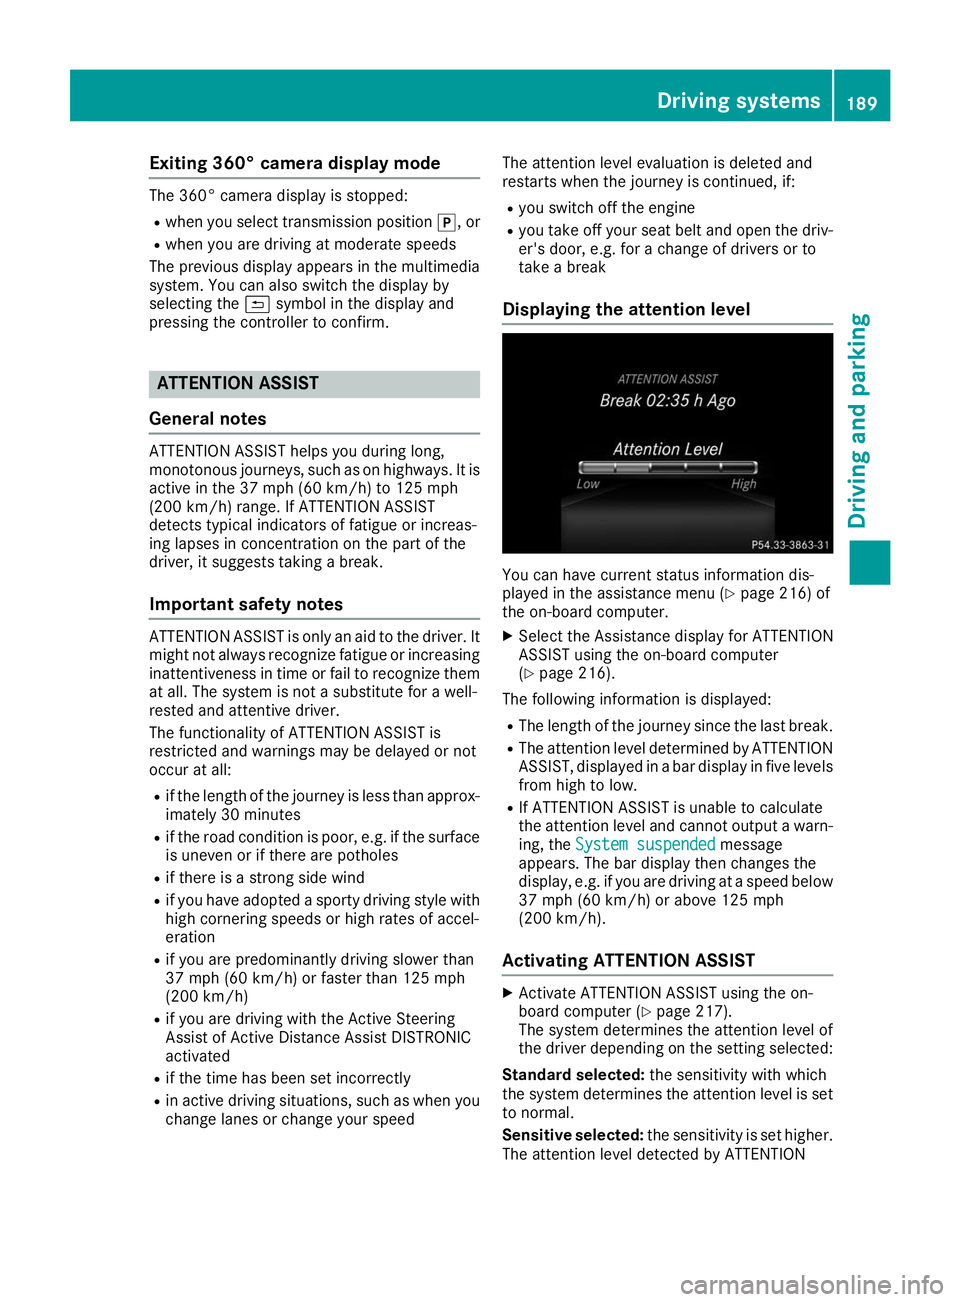
Displaying the attention level You can have current status information dis-
played in the assistance menu (Y
page 216) of
the on-board computer.
X Select the Assistance display for ATTENTION
ASSIST using the on-board computer
(Y page 216).
The following information is displayed: R The length of the journey since the last break.
R The attention level determined by ATTENTION
ASSIST, displayed in a bar display in five levelsfrom high to low.
R If ATTENTION ASSIST is unable to calculate
the attention level and cannot output a warn-
ing, the System suspended System suspended message
appears. The bar display then changes the
display, e.g. if you are driving at a speed below 37 mph (60 km/h) or above 125 mph
(200 km/h).
Activating ATTENTION ASSIST X
Activate ATTENTION ASSIST using the on-
board computer (Y page 217).
The system determines the attention level of
the driver depending on the setting selected:
Standard selected: the sensitivity with which
the system determines the attention level is set to normal.
Sensitive selected: the sensitivity is set higher.
The attention level detected by ATTENTION Driving systems
189Driving and parking Z
Page 205 of 370
X
Establish the electrical connection between
the vehicle and the trailer.
X Check that the trailer lighting system is work-
ing.
X Push the combination switch upwards/down-
wards and check whether the corresponding
turn signal on the trailer flashes.
A trailer that is connected is recognized only
when the electrical connection is established
correctly and when the lighting system is work-
ing properly. The function of other systems also depends on this, for example:
R ESP ®
R Parking Assist PARKTRONIC
R Active Parking Assist
R Parking Package with rear view camera
R Active Blind Spot Assist
R Active Lane Keeping Assist
i Vehicles with the AIRMATIC Package: if you
couple up a trailer, the vehicle always remains
at normal level. When coupling up a trailer,
please observe the following:
R If the normal level has not been set man-
ually, the vehicle is automatically lowered
to normal level. This is the case if a speed of
5 mph (8 km/h) is reached.
R The Sport drive program is not available.
These restrictions apply to all accessories
powered through a connection to the trailer
power socket of your vehicle, e.g. a bicycle
carrier.
Observe the maximum permissible trailer
dimensions (width and length).
Most U.S. states and all Canadian provinces
require by law: R Safety chains between the towing vehicle and
the trailer. The chains should be cross-woundunder the trailer drawbar. They must be fas-
tened to the vehicle's trailer coupling, not to
the bumper or the axle.
Leave enough play in the chains to make tight
cornering possible.
R A separate brake system for certain types of
trailer.
R Safety switch for braked trailers. Check the
specific legal requirements applicable to your
state.
If the trailer becomes detached from the tow-
ing vehicle, the safety feature triggers the
trailer brakes. Towing a trailer
There are numerous legal requirements con-
cerning the towing of a trailer, e.g. speed restric- tions. Make sure that your car/trailer combina-
tion complies with the local regulations:
R in your place of residence
R in the location to which you are driving
The police and local authorities can provide reli- able information.
Observe the following when towing a trailer:
R To gain driving experience and to become
accustomed to the new handling characteris-
tics, you should practice the following in a
traffic-free location:
- cornering
- stopping
- backing up
R Before driving, check:
- trailer tow hitch
- safety switch for braked trailers
- safety chains
- electrical connections
- lights
- wheels
R Adjust the exterior mirrors to provide an
unobstructed view of the rear section of the
trailer.
R If the trailer has electronically controlled
brakes, pull away carefully. Brake manually
using the brake controller and check whether
the brakes function correctly.
R Secure any objects on the trailer to prevent
the cargo from slipping when the vehicle is in
motion.
R When you couple up a trailer, check at regular
intervals that the load is firmly secured. If the trailer is equipped with trailer lights and
brakes, check the trailer to ensure that these
are working.
R Bear in mind that the handling will be less
stable when towing a trailer than when driving
without one. Avoid sudden steering move-
ments.
R The vehicle/trailer combination is heavier,
accelerates more slowly, has a decreased
gradient climbing capability and a longer
braking distance.
It is more susceptible to side winds and
requires more careful steering. Towing a trailer
203Driving and parking Z
Page 206 of 370
R
If possible, do not brake suddenly, but instead
depress the brake pedal moderately at first sothat the trailer can activate its brakes. Then
increase the pressure on the brake pedal.
R If the automatic transmission repeatedly
shifts between gears on uphill or downhill gra- dients, shift to a lower gear using the left-hand
steering wheel paddle shifter.
A lower gear and lower speed reduce the risk of engine failure.
R When driving downhill, shift to a lower gear to
utilize the engine's braking effect.
Avoid continuous brake application as this
may overheat the vehicle brakes and, if instal-
led, the trailer brakes.
R If the coolant temperature increases dramat-
ically while the air-conditioning system is
switched on, switch off the air-conditioning
system.
Coolant heat can also be dissipated by open-
ing the windows and switching the ventilation blower and the interior temperature to the
highest level.
R When overtaking, pay particular attention to
the extended length of your vehicle/trailer
combination.
Due to the length of the vehicle/trailer com-
bination, you require additional road space in relation to the vehicle you are overtaking
before you can change back to the original
lane. Decoupling a trailer
G
WARNING
If you uncouple a trailer with the overrun
brake engaged, you could trap your hand
between the vehicle and the trailer drawbar.
There is a risk of injury.
Do not uncouple a trailer if the overrun brake is engaged. G
WARNING
Vehicles with level control:
The vehicle is lowered as soon as you discon-
nect the trailer cable. This could result in your limbs or those of other people that are
between the vehicle body and tires or under- neath the vehicle being trapped. There is a
risk of injury.
Make sure that nobody is in the immediate
vicinity of the wheel housings or under the
vehicle when you disconnect the trailer cable.
! Do not disconnect a trailer with an engaged
overrun brake. Otherwise, your vehicle could
be damaged by the rebounding of the overrun brake.
X Shift the transmission to position 005D.
X Apply the vehicle's electric parking brake.
X Start the engine.
X Close the doors and tailgate.
X Apply the trailer's parking brake.
X Detach the trailer cable and decouple the
trailer.
X Switch off the engine. Permissible trailer loads and drawbar
loads
Weight specifications Maximum allowable gross mass
The gross vehicle weight of the trailer is calcu-
lated by adding the weight of the trailer to the
weight of the load and equipment on the trailer.
You will find installing dimensions and loads
under "Technical data" (Y page 367).
Permissible noseweight You will find installing dimensions and loads
under "Technical data" (Y page 367).
Loading a trailer R
When loading the trailer, make sure that nei-
ther the permissible gross weight of the trailer
nor the gross vehicle weight are exceeded.
The permissible gross vehicle weight is indi-
cated on the identification plate located on
the B-pillar on the driver's side of the vehicle.
You can find the maximum permissible values
on the type plates of your vehicle and the
trailer. When calculating how much weight 204
Towing a trailerDriving and parking
Page 224 of 370
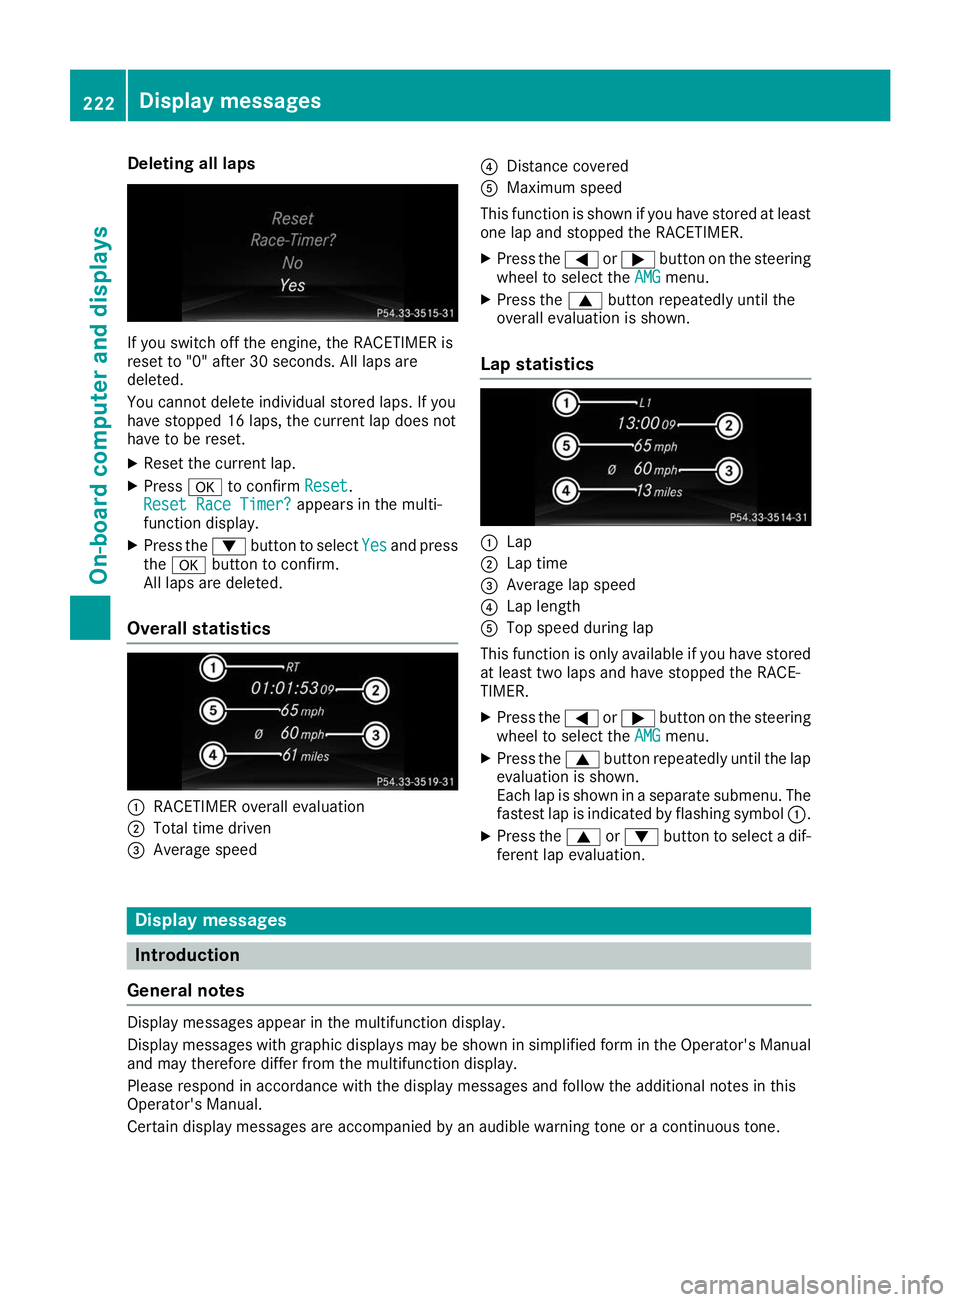
Deleting all laps
If you switch off the engine, the RACETIMER is
reset to "0" after 30 seconds. All laps are
deleted.
You cannot delete individual stored laps. If you
have stopped 16 laps, the current lap does not
have to be reset.
X Reset the current lap.
X Press 0076to confirm Reset
Reset.
Reset Race Timer? Reset Race Timer? appears in the multi-
function display.
X Press the 0064button to select Yes
Yes and press
the 0076 button to confirm.
All laps are deleted.
Overall statistics 0043
RACETIMER overall evaluation
0044 Total time driven
0087 Average speed 0085
Distance covered
0083 Maximum speed
This function is shown if you have stored at least one lap and stopped the RACETIMER.
X Press the 0059or0065 button on the steering
wheel to select the AMG
AMG menu.
X Press the 0063button repeatedly until the
overall evaluation is shown.
Lap statistics 0043
Lap
0044 Lap time
0087 Average lap speed
0085 Lap length
0083 Top speed during lap
This function is only available if you have stored
at least two laps and have stopped the RACE-
TIMER.
X Press the 0059or0065 button on the steering
wheel to select the AMG AMGmenu.
X Press the 0063button repeatedly until the lap
evaluation is shown.
Each lap is shown in a separate submenu. The fastest lap is indicated by flashing symbol 0043.
X Press the 0063or0064 button to select a dif-
ferent lap evaluation. Display messages
Introduction
General notes Display messages appear in the multifunction display.
Display messages with graphic displays may be shown in simplified form in the Operator's Manual
and may therefore differ from the multifunction display.
Please respond in accordance with the display messages and follow the additional notes in this
Operator's Manual.
Certain display messages are accompanied by an audible warning tone or a continuous tone. 222
Display
messagesOn-board computer and displays
Page 319 of 370

Have the battery charge state checked more
frequently if you use the vehicle mainly for short trips or if you leave it standing idle for a lengthy
period. Consult a qualified specialist workshop
if you wish to leave your vehicle parked for a long
period of time.
Remove the SmartKey if you park the vehicle
and do not require any electrical consumers.
The vehicle will then use very little energy, thus conserving battery power.
If the power supply has been interrupted, e.g. if
you reconnect the battery, you will have to:
R set the clock (see the Digital Operator's Man-
ual)
On vehicles with a multimedia system and
navigation system, the clock is set automati-
cally.
R reset the function for automatically folding
the exterior mirrors in/out by folding the mir-
rors out once( Ypage 103) Charging the 12 V battery
G
WARNING
During charging and jump-starting, explosive
gases can escape from the battery. There is a risk of an explosion.
Particularly avoid fire, open flames, creating
sparks and smoking. Ensure there is sufficient
ventilation while charging and jump-starting.
Do not lean over a battery. G
WARNING
Battery acid is caustic. There is a risk of injury. Avoid contact with skin, eyes or clothing. Do
not inhale any battery gases. Do not lean over
the battery. Keep children away from batter-
ies. Wash away battery acid immediately with
plenty of clean water and seek medical atten- tion. G
WARNING
A discharged battery can freeze at tempera-
tures below freezing point. When jump-start-
ing the vehicle or charging the battery, gases can escape from the battery. There is a risk of
an explosion. Allow the frozen battery to thaw out before
charging it or jump-starting.
! Only use battery chargers with a maximum
charging voltage of 14.8 V.
! Only
charge the battery using the jump-
starting connection point.
The jump-starting connection point is in the
engine compartment (Y page 318).
X Open the hood.
X Connect the battery charger to the positive
terminal and ground point in the same order
as when connecting the donor battery in the
jump-starting procedure (Y page 318).
Keep away from fire and open flames. Do not
lean over a battery. Never charge the battery if it is still installed in the vehicle, unless you use a
battery charger which has been tested and
approved by Mercedes-Benz. A battery charger
unit specially adapted for Mercedes-Benz vehi-
cles and tested and approved by Mercedes-
Benz is available as an accessory. It permits the
charging of the battery in its installed position.
Contact an authorized Mercedes-Benz Center
for further information and availability. Read the battery charger's operating instructions before
charging the battery.
If, at low temperatures, the indicator lamps/
warning lamps in the instrument cluster do not
light up, it is highly likely that the discharged
battery has frozen. In this case you may neither
jump-start the vehicle nor charge the battery.
The service life of a thawed-out battery may be
shorter. The starting characteristics can be
impaired, particularly at low temperatures. Have
the thawed-out battery checked at a qualified
specialist workshop. Replacing the 12 V battery
Observe the notes on the 12 V battery.
Mercedes-Benz recommends that you have the
12 V battery replaced at a qualified specialist
workshop, e.g. at an authorized Mercedes-Benz
Center.
If you want to replace the battery yourself,
observe the following notes:
R Always replace a defective battery with a bat-
tery which meets the specific requirements of
the vehicle. Battery (vehicle)
317Breakdown assistance Z
Page 321 of 370
!
Vehicles with a gasoline engine:
avoid repeated and lengthy starting attempts. Otherwise, the
catalytic converter could be damaged by non-combusted fuel.
If the indicator/warning lamps do not light up at low temperatures, it is very likely that the dis-
charged battery has frozen. In this case you may neither jump-start the vehicle nor charge the
battery. The service life of a thawed-out battery may be shorter. The starting characteristics can be
impaired, particularly at low temperatures. Have the thawed-out battery checked at a qualified
specialist workshop.
Do not start the vehicle using a rapid charging device. If your vehicle's battery is discharged, the
engine can be jump-started from another vehicle or from a donor battery using jumper cables.
Observe the following points:
R The battery is not accessible in all vehicles. If the other vehicle's battery is not accessible, jump-
start the vehicle using a donor battery or a jump-starting device.
R Vehicles with a gasoline engine: only jump-start the vehicle when the engine and exhaust
system are cold.
R Do not start the engine if the battery is frozen. Let the battery thaw first.
R Only jump-start from batteries with a 12 V voltage rating.
R Only use jumper cables which have a sufficient cross-section and insulated terminal clamps.
R If the battery is fully discharged, leave the battery that is being used to jump-start connected for
a few minutes before attempting to start. This charges the battery slightly.
R Make sure that the two vehicles do not touch.
Make sure that:
R The jumper cables are not damaged.
R Bare parts of the terminal clamp do not come into contact with other metal parts while the jumper
cables are connected to the battery.
R The jumper cables cannot come into contact with parts that can move when the engine is running,
such as the V-belt pulley or the fan.
X Secure the vehicle by applying the electric parking brake.
X Shift the transmission to position 005D.
X Make sure that the ignition is switched off. All indicator lamps in the instrument cluster must be
off. When using the SmartKey, turn the SmartKey to position 0092in the ignition lock and remove it
(Y page 127).
X Switch off all electrical consumers, e.g. rear window defroster, lighting, etc.
X Open the hood.
i Right-hand-drive vehicle:
the jump-starting connection points may be located on the other
side of the vehicle. Jump-starting
319Breakdown assistance Z
Page 367 of 370
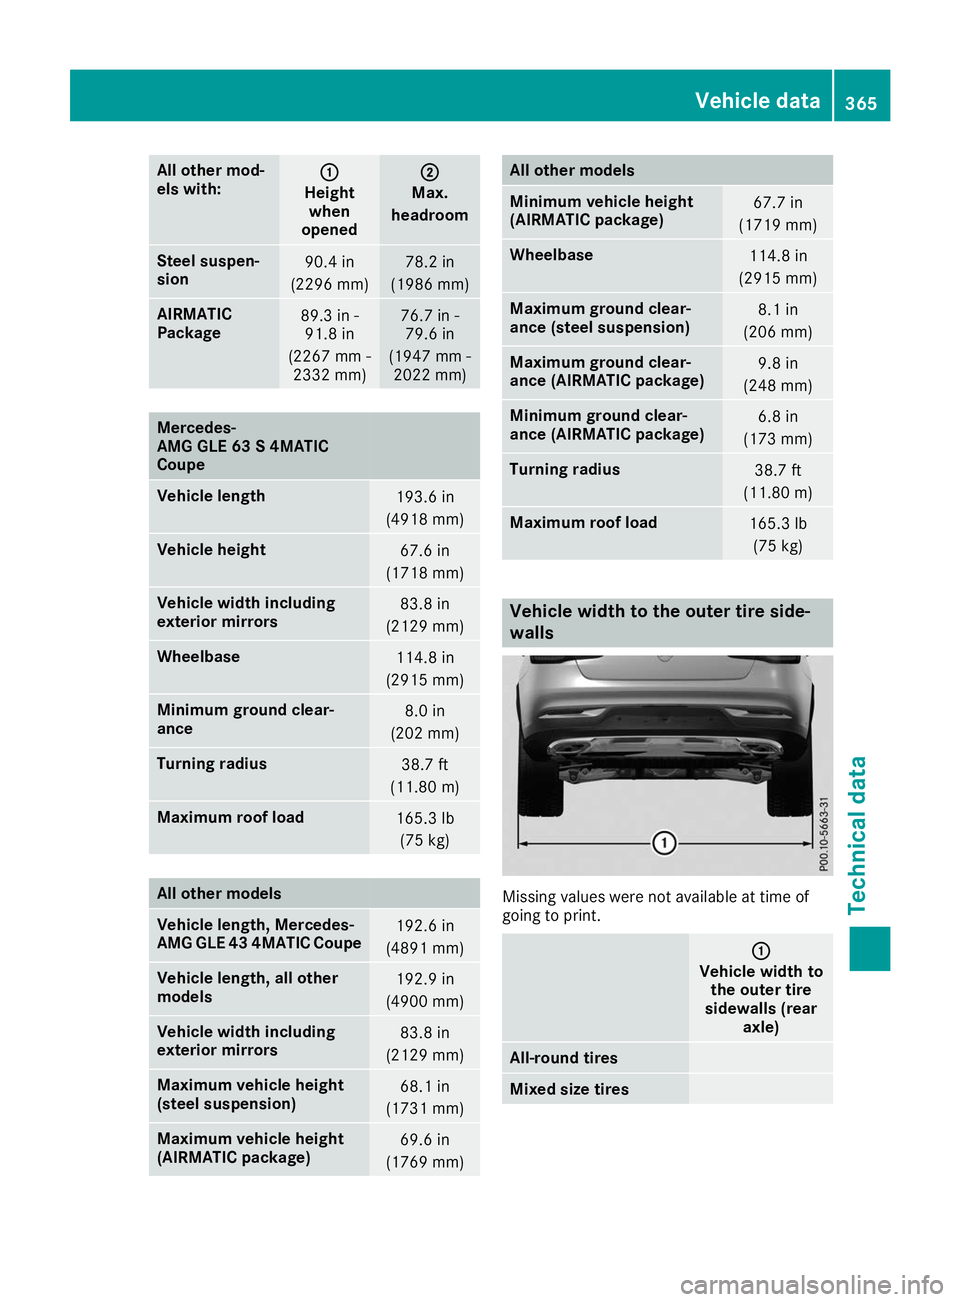
All other mod-
els with:
0043 0043
Height when
opened 0044
0044
Max.
headroom Steel suspen-
sion
90.4 in
(2296 mm) 78.2 in
(1986 mm) AIRMATIC
Package
89.3 in -
91.8 in
(2267 mm - 2332 mm) 76.7 in -
79.6 in
(1947 mm - 2022 mm) Merc
edes-
AMG GLE 63 S 4MATIC
Coupe Vehicle length
193.6 in
(4918 mm) Vehicle height
67.6 in
(1718 mm) Vehicle width including
exterior mirrors
83.8 in
(2129 mm) Wheelbase
114.8 in
(2915 mm) Minimum ground clear-
ance
8.0 in
(202 mm) Turning radius
38.7 ft
(11.80 m) Maximum roof load
165.3 lb
(75 kg) All other models
Vehicle length, Mercedes-
AMG GLE 43 4MATIC Coupe
192.6 in
(4891 mm) Vehicle length, all other
models
192.9 in
(4900 mm) Vehicle width including
exterior mirrors
83.8 in
(2129 mm) Maximum vehicle height
(steel suspension)
68.1 in
(1731 mm) Maximum vehicle height
(AIRMATIC package)
69.6 in
(1769 mm) All other models
Minimum vehicle height
(AIRMATIC package)
67.7 in
(1719 mm) Wheelbase
114.8 in
(2915 mm) Maximum ground clear-
ance (steel suspension)
8.1 in
(206 mm) Maximum ground clear-
ance (AIRMATIC package)
9.8 in
(248 mm) Minimum ground clear-
ance (AIRMATIC package)
6.8 in
(173 mm) Turning radius
38.7 ft
(11.80 m) Maximum roof load
165.3 lb
(75 kg) Vehicle width to the outer tire side-
walls
Missing values were not available at time of
going to print.
0043 0043
Vehicle width to the outer tire
sidewalls (rear axle) All-round tires
Mixed size tires Vehicle data
365Technical data Z