2019 MERCEDES-BENZ GLE COUPE transmission oil
[x] Cancel search: transmission oilPage 8 of 370
Engaging reverse gear ................... 135
Engaging the park position ............ 135
Important safety note
s.................. 135
Kickdown ....................................... 138
Manual shifting .............................. 139
Oil temperature (on-board com-
puter, Mercedes-AMG vehicles) ..... 220
Overview ........................................ 135
Problem (malfunction) ................... 141
Pulling away ................................... 130
Starting the engine ........................ 129
Steering wheel paddle shifters ...... 139
Trailer towing ................................. 138
Transmission position display ........ 136
Transmission positions .................. 137
Automatic transmission emer-
gency mode ....................................... 141
AUX jacks
CD/DVD drive ............................... 271
Axle load, permissible (trailer tow-
ing) ...................................................... 367 B
Back button ....................................... 265
Bag hook ............................................ 277
Ball coupling
Installing ........................................ 201
Removing ....................................... 205
BAS (Brake Assist System) ................. 65
Battery (SmartKey)
Checking .......................................... 77
Important safety notes .................... 77
Replacing ......................................... 77
Battery (vehicle)
Charging ........................................ 317
Display message ............................ 237
Important safety notes .................. 315
Jump starting ................................. 318
Overview ........................................ 315
Replacing ....................................... 317
Belt warning ......................................... 46
Bicycle rack ....................................... 205
Blind Spot Assist
Activating/deactivating ................. 217
Display message ............................ 241
Notes/function .............................. 191
Trailer towing ................................. 193 see Active Blind Spot Assist
Bluetooth ®
Searching for a mobile phone ........ 268
Searching for a mobile phone
(device manager) ........................... 269
see also Digital Operator's Man-
ual .................................................. 264
Telephony ...................................... 268
Brake Assist System
see BAS (Brake Assist System)
Brake fluid
Display message ............................ 229
Notes ............................................. 362
Brake force distribution
see EBD (electronic brake force
distribution)
Brake lamps
Display message ............................ 235
Brake linings
Display message ............................ 229
Brakes
ABS .................................................. 64
BAS .................................................. 65
Brake fluid (notes) ......................... 362
Braking assistance appropriate to
the situation ..................................... 66
Display message ............................ 224
Hill start assist ............................... 130
Important safety notes .................. 149
Maintenance .................................. 150
Parking brake ................................ 145
Riding tips ...................................... 149
Warning lamp ................................. 253
Braking assistance appropriate to
the situation
Function/note s................................ 66
Breakdown assistance
Where will I find...? ........................ 309
see Flat tire
see Towing away
Brightness control (instrument
cluster lighting) ................................... 36 C
California Important notice for retail cus-
tomers and lessees .......................... 27 6
Index
Page 22 of 370
T
Tachometer ........................................ 208
Tailgate
Display message ............................ 248
Emergency unlocking ....................... 85
Important safety notes .................... 82
Limiting the opening angle ............... 85
Opening dimensions ...................... 364
Opening/closing (automatically
from inside) ...................................... 84
Opening/closing (automatically
from outside) ................................... 83
Opening/closing (from outside) ....... 82
Tank content
Fuel gauge ....................................... 36
Technical data
Capacities ...................................... 359
Drawbar load (maximum) ............... 367
Information .................................... 357
Tires/wheels ................................. 352
Trailer load s................................... 367
Vehicle data ................................... 364
Telephone
Accepting a call (multifunction
steering wheel) .............................. 215
Authorizing a mobile phone (con-
necting) ......................................... 268
Authorizing a mobile phone via the device manager (connecting )......... 269
Connecting a mobile phone
(device manager) ........................... 269
Connecting a mobile phone (gen-
eral information) ............................ 268
Display message ............................ 249
Menu (on-board computer) ............ 214
Number from the phone book ........ 215
Redialing ........................................ 215
Rejecting/ending a call ................. 215
see also Digital Operator's Man-
ual .................................................. 264
Temperature
Coolant (display in the instrumentcluster) .......................................... 209
Coolant (on-board computer,
Mercedes-AMG vehicles) ............... 220
Engine oil (on-board computer,
Mercedes-AMG vehicles) ............... 220 Outside temperature ...................... 208
Setting (climate control )................ 120
Transmission oil (on-board com-
puter, Mercedes-AMG vehicles) ..... 220
Through-loading feature ................... 275
Timing (RACETIMER) ......................... 221
Tire pressure
Calling up (on-board computer) ..... 334
Checking manually ........................ 333
Display message ............................ 245
Maximum ....................................... 333
Not reached (TIREFIT) .................... 313
Notes ............................................. 332
Reached (TIREFIT) .......................... 314
Recommended ............................... 330
Tire pressure loss warning system
General notes ................................ 333
Important safety notes .................. 334
Restarting ...................................... 334
Tire pressure monitor
Checking the tire pressure elec-
tronically ........................................ 336
Function/note s............................. 334
General notes ................................ 334
Important safety notes .................. 335
Radio type approval for the tire
pressure monitor ........................... 337
Restarting ...................................... 337
Warning lamp ................................. 263
Warning message .......................... 336
Tire pressure table ............................ 331
Tire-change tool kit ........................... 310
TIREFIT kit
Important safety notes .................. 312
Storage location ............................ 310
Tire pressure not reached .............. 313
Tire pressure reached .................... 314
Using ............................................. 312
Tires
Aspect ratio (definition) ................. 347
Average weight of the vehicle
occupants (definition) .................... 345
Bar (definition) ............................... 345
Changing a whee l.......................... 347
Characteristics .............................. 345
Checking ........................................ 327
Curb weight (definition) ................. 346
Definition of terms ......................... 345 20
Index
Page 76 of 370

SmartKey
Important safety notes
G
WARNING
If children are left unsupervised in the vehicle, they could:
R open the doors, thus endangering other
people or road users.
R get out and disrupt traffic.
R operate the vehicle's equipment.
Additionally, children could set the vehicle in
motion if, for example, they:
R release the parking brake.
R shifting the automatic transmission out of
park position P
R Start the engine.
There is a risk of an accident and injury.
When leaving the vehicle, always take the
SmartKey with you and lock the vehicle. Never
leave children or animals unattended in the
vehicle. Always keep the SmartKey out of
reach of children. G
WARNING
If you attach heavy or large objects to the
SmartKey, the SmartKey could be uninten-
tionally turned in the ignition lock. This could
cause the engine to be switched off. There is a risk of an accident.
Do not attach any heavy or large objects to the
SmartKey. Remove any bulky key rings before
inserting the SmartKey into the ignition lock.
! Keep the SmartKey away from strong mag-
netic fields. Otherwise, the remote control
function could be affected.
Strong magnetic fields can occur in the vicin- ity of powerful electrical installations.
Do not keep the SmartKey: R with electronic devices, e.g. a mobile phone
or another SmartKey.
R with metallic objects, e.g. coins or metal foil.
R inside metallic objects, e.g. a metal case.
This can affect the functionality of the Smart- Key. Do not keep the KEYLESS-GO or KEYLESS-GO
Start function key in the temperature-controlled
cup holder. Otherwise, the KEYLESS-GO or KEY- LESS-GO Start function key will not be detected.
Vehicles with KEYLESS-GO start function: do
not keep the SmartKey in the cargo compart-
ment. Otherwise, the SmartKey may not be
detected, e.g. when starting the engine using
the Start/Stop button. SmartKey functions
0043
0037 Locks the vehicle
0044 0054 Opens/closes the tailgate
0087 0036 Unlocks the vehicle
X To unlock centrally: press the0036button.
If you do not open the vehicle within approx-
imately 40 seconds of unlocking:
R the vehicle is locked again
R anti-theft protection is reactivated
X To lock centrally: press the0037button.
The SmartKey centrally locks and unlocks the
following components:
R the doors
R the tailgate
R the fuel filler flap
The turn signals flash once when unlocking and three times when locking.
You can also set an audible signal to confirm
that the vehicle has been locked. The audible
signal can be activated and deactivated using
the on-board computer (Y page 219).
You will receive visual and acoustic locking con-
firmation if all components were able to be
locked. 74
SmartKeyOpening and closing
Page 129 of 370
!
Do not warm up the engine while stationary.
Pull away immediately. Avoid high engine
speeds and full throttle until the engine has
reached its operating temperature.
In vehicles with automatic transmission,
engage positions P and R only when the vehi-
cle is stationary.
Where possible, avoid spinning the drive
wheels when pulling away on slippery roads.
You could otherwise damage the drive train.
! Mercedes-AMG vehicles:
at low engine oil
temperatures below 68 ‡ (+20 †), the max-
imum engine speed is restricted in order to
protect the engine. To protect the engine and
maintain smooth engine operation, avoid driv-
ing at full throttle when the engine is cold. Key positions
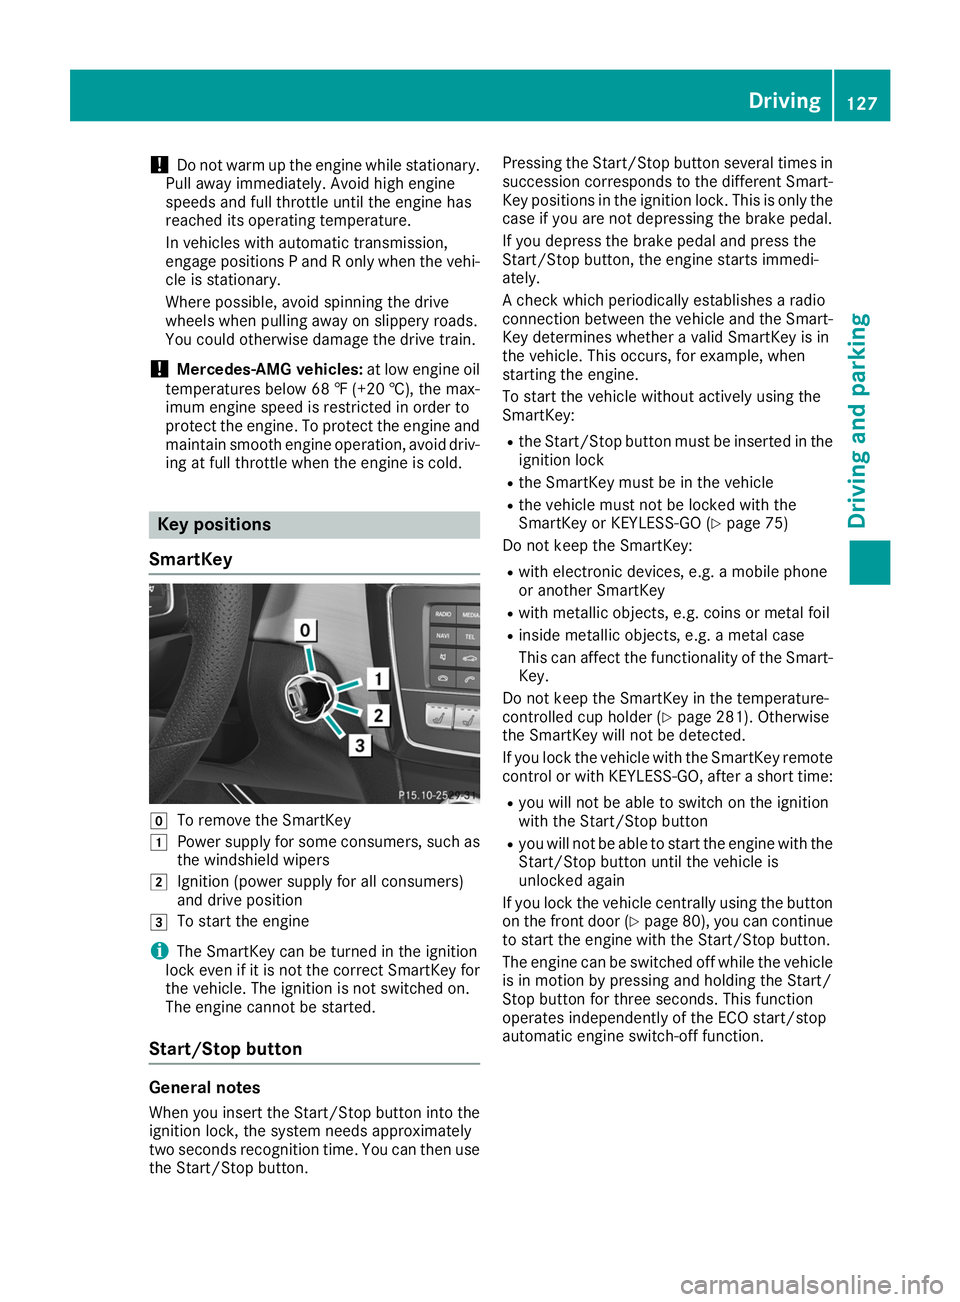
SmartKey 005A
To remove the SmartKey
0047 Power supply for some consumers, such as
the windshield wipers
0048 Ignition (power supply for all consumers)
and drive position
0049 To start the engine
i The SmartKey can be turned in the ignition
lock even if it is not the correct SmartKey for
the vehicle. The ignition is not switched on.
The engine cannot be started.
Start/Stop button General notes
When you insert the Start/Stop button into the
ignition lock, the system needs approximately
two seconds recognition time. You can then use the Start/Stop button. Pressing the Start/Stop button several times in
succession corresponds to the different Smart-
Key positions in the ignition lock. This is only the
case if you are not depressing the brake pedal.
If you depress the brake pedal and press the
Start/Stop button, the engine starts immedi-
ately.
A check which periodically establishes a radio
connection between the vehicle and the Smart-
Key determines whether a valid SmartKey is in
the vehicle. This occurs, for example, when
starting the engine.
To start the vehicle without actively using the
SmartKey:
R the Start/Stop button must be inserted in the
ignition lock
R the SmartKey must be in the vehicle
R the vehicle must not be locked with the
SmartKey or KEYLESS-GO (Y page 75)
Do not keep the SmartKey:
R with electronic devices, e.g. a mobile phone
or another SmartKey
R with metallic objects, e.g. coins or metal foil
R inside metallic objects, e.g. a metal case
This can affect the functionality of the Smart-
Key.
Do not keep the SmartKey in the temperature-
controlled cup holder (Y page 281). Otherwise
the SmartKey will not be detected.
If you lock the vehicle with the SmartKey remote control or with KEYLESS-GO, after a short time:
R you will not be able to switch on the ignition
with the Start/Stop button
R you will not be able to start the engine with the
Start/Stop button until the vehicle is
unlocked again
If you lock the vehicle centrally using the button
on the front door (Y page 80), you can continue
to start the engine with the Start/Stop button.
The engine can be switched off while the vehicle
is in motion by pressing and holding the Start/
Stop button for three seconds. This function
operates independently of the ECO start/stop
automatic engine switch-off function. Driving
127Driving and parking Z
Page 143 of 370
X
For maximum acceleration, depress the
accelerator pedal beyond the pressure point.
The automatic transmission shifts to a lower
gear depending on the engine speed.
X Shift back up once the desired speed is
reached. During kickdown, you cannot shift gears using
the steering wheel paddle shifters.
If you apply full throttle, the automatic trans-
mission shifts up to the next gear when the
maximum engine speed is reached. This pre-
vents the engine from overrevving.Problems with the transmission
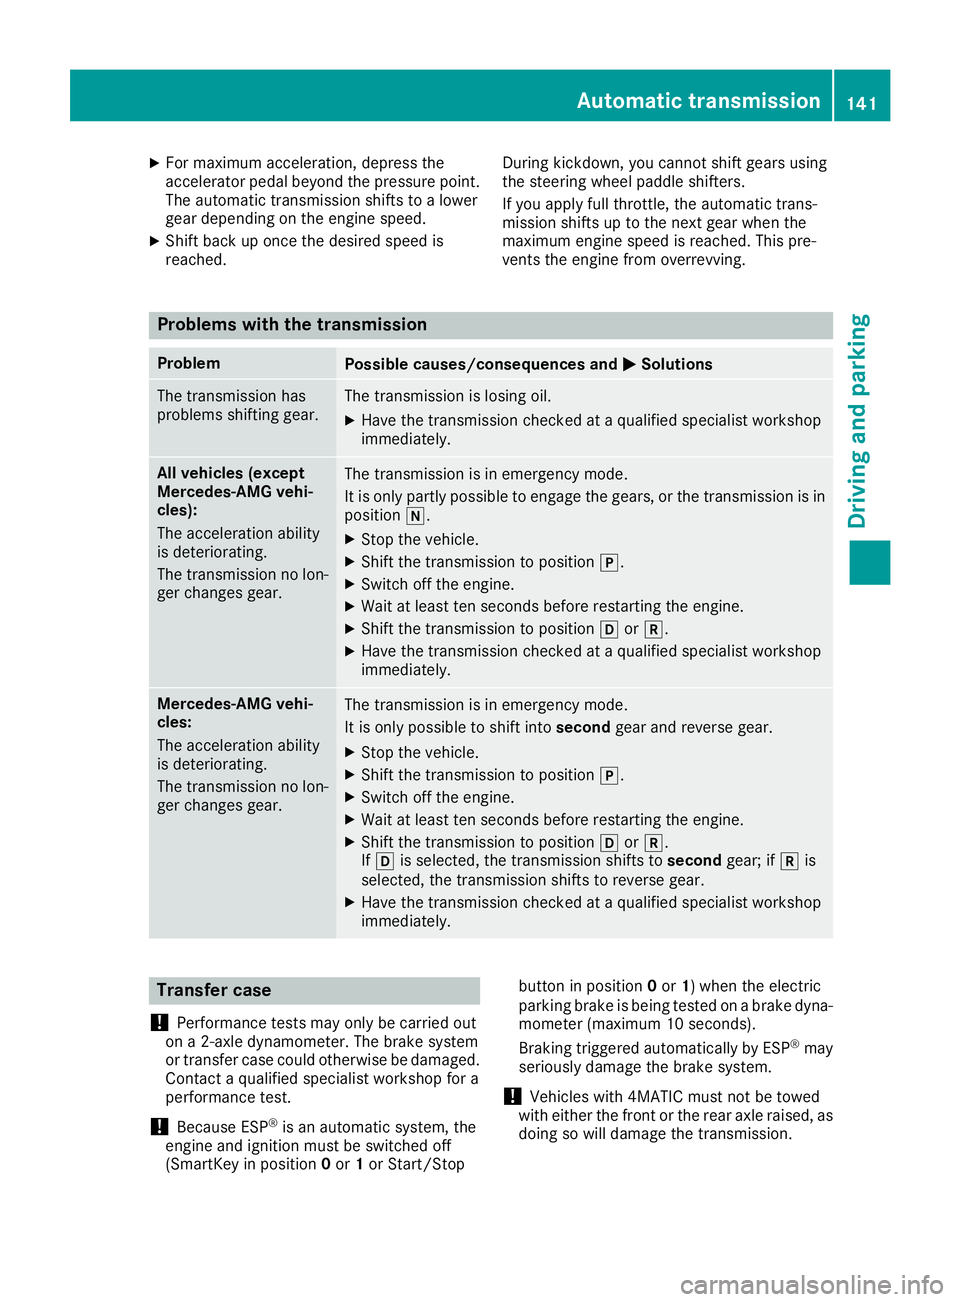
Problem
Possible causes/consequences and
0050 0050Solutions The transmission has
problems shifting gear. The transmission is losing oil.
X Have the transmission checked at a qualified specialist workshop
immediately. All vehicles (except
Mercedes-AMG vehi-
cles):
The acceleration ability
is deteriorating.
The transmission no lon-
ger changes gear. The transmission is in emergency mode.
It is only partly possible to engage the gears, or the transmission is in
position 005C.
X Stop the vehicle.
X Shift the transmission to position 005D.
X Switch off the engine.
X Wait at least ten seconds before restarting the engine.
X Shift the transmission to position 005Bor005E.
X Have the transmission checked at a qualified specialist workshop
immediately. Mercedes-AMG vehi-
cles:
The acceleration ability
is deteriorating.
The transmission no lon-
ger changes gear. The transmission is in emergency mode.
It is only possible to shift into
secondgear and reverse gear.
X Stop the vehicle.
X Shift the transmission to position 005D.
X Switch off the engine.
X Wait at least ten seconds before restarting the engine.
X Shift the transmission to position 005Bor005E.
If 005B is selected, the transmission shifts to secondgear; if005Eis
selected, the transmission shifts to reverse gear.
X Have the transmission checked at a qualified specialist workshop
immediately. Transfer case
! Performance tests may only be carried out
on a 2-axle dynamometer. The brake system
or transfer case could otherwise be damaged.
Contact a qualified specialist workshop for a
performance test.
! Because ESP ®
is an automatic system, the
engine and ignition must be switched off
(SmartKey in position 0or 1or Start/Stop button in position
0or 1) when the electric
parking brake is being tested on a brake dyna-
mometer (maximum 10 seconds).
Braking triggered automatically by ESP ®
may
seriously damage the brake system.
! Vehicles with 4MATIC must not be towed
with either the front or the rear axle raised, as
doing so will damage the transmission. Automatic transmission
141Driving and parking Z
Page 155 of 370
vehicle rectified immediately at a qualified spe-
cialist workshop.
Do not shift into transmission position 005Cwhen
driving off-road. You could lose control of the
vehicle if you attempt to brake the vehicle using
the service brake. If the gradient is too steep for
your vehicle, drive back down in reverse gear.
General notes H
Environmental note
Protection of the environment is of primary
importance. Treat nature with respect.
Observe all prohibiting signs.
Read this section carefully before driving your
vehicle off-road. Practice by driving over more
gentle off-road terrain first.
Familiarize yourself with the characteristics of
your vehicle and the gear shift operation before
driving through difficult terrain.
The following driving systems are specially
adapted to off-road driving:
R AIRMATIC package (vehicle level)
(Y page 168)
R DSR (Downhill Speed Regulation)
(Y page 167)
Observe the following notes:
R Select a vehicle level that is suitable for the
terrain. To avoid damaging the vehicle, make
sure there is always sufficient ground clear-
ance.
R Check that items of luggage and loads are
stowed safely and are well secured
(Y page 276).
R Always keep the engine running and in gear
when driving on a downhill gradient. Activate
DSR (Y page 167).
R Always keep the engine running and in gear
when driving down an incline.
R Adapt your speed to the terrain. The rougher,
steeper or more ruts on the terrain, the slower
your speed should be.
R Do not jump with the vehicle as this will inter-
rupt the vehicle's propulsion.
R Drive with extreme care on unfamiliar off-road
routes where visibility is poor. For safety rea- sons, get out of the vehicle first and survey
the off-road route.
R Look out for obstacles, such as rocks, holes,
tree stumps and furrows. R
Take care when turning on an uphill or down-
hill slope or when driving across a slope. The
vehicle could otherwise tip over.
R Always keep the doors, the tailgate, the side
windows and the sliding sunroof closed while
the vehicle is in motion.
R Do not shift the automatic transmission to
position 005C.
R Observe the notes on off-road fording
(Y page 151).
i Information about retrofitting special all-ter-
rain tires is available from any qualified spe-
cialist workshop.
i Do not use the HOLD function when driving
off-road, on steep uphill or downhill gradients
or on slippery or loose surfaces. The HOLD
function cannot hold the vehicle on such sur- faces.
Checklist before driving off-road !
If the engine oil warning lamp lights up while
the vehicle is in motion, stop the vehicle in a
safe place as soon as possible. Check the
engine oil level. The engine oil warning lamp
warning must not be ignored. Continuing the
journey while the symbol is displayed could
lead to engine damage.
X Engine oil level: check the engine oil level
and add engine oil if necessary.
When you drive on steep gradients, the engine
oil level must be sufficiently high to ensure
that oil is supplied correctly in the vehicle.
X Tire-changing tool kit: check that the jack is
working and make sure you have the lug
wrench, a robust tow cable and a folding
spade in the vehicle.
X Wheels and tires: check the tread depth and
pressure of the tires.
X Check for damage and remove any foreign
objects, e.g. small stones, from the wheels/
tires.
X Replace any missing valve caps.
X Replace dented or damaged wheels.
X Rims: dented or bent rims can result in a loss
of tire pressure and damage the tire bead.
Before driving off-road, check the wheels and replace them if necessary. Driving tips
153Driving and parking Z
Page 222 of 370
X
Press the 0059or0065 button on the steering
wheel to select the Sett.
Sett. menu.
X Press the 0064or0063 button to select the
Convenience
Convenience submenu.
X Press 0076to confirm.
X Press the 0064or0063 button to select the
Auto. Mirror Folding
Auto. Mirror Folding function.
If the Auto. Mirror Folding
Auto. Mirror Folding function is
switched on, the multifunction display shows the exterior mirror in orange.
X Press the 0076button to save the setting. If you have switched the
Auto. Mirror Fold‐
Auto. Mirror Fold‐
ing
ing on and you fold the exterior mirrors in using
button 0043, they will not fold out automatically
(Y page 103).
You can then only fold out the exterior mirrors
using button 0043.
Restoring the factory settings X
Press the 0059or0065 button on the steering
wheel to select the Sett.
Sett. menu.
X Press the 0064or0063 button to select the
Factory Setting
Factory Setting submenu.
X Press 0076to confirm.
The Reset All Settings?
Reset All Settings? message
appears.
X Press the 0064or0063 button to select No
Noor
Yes
Yes.
X Press 0076to confirm the selection.
If you select Yes
Yes, the multifunction display
shows a confirmation message.
If you want to reset the Daytime Running
Daytime Running
Lights
Lights function in the Light
Light submenu, you
must turn the SmartKey to position 0047in the
ignition lock. AMG menu (Mercedes-AMG vehicles)
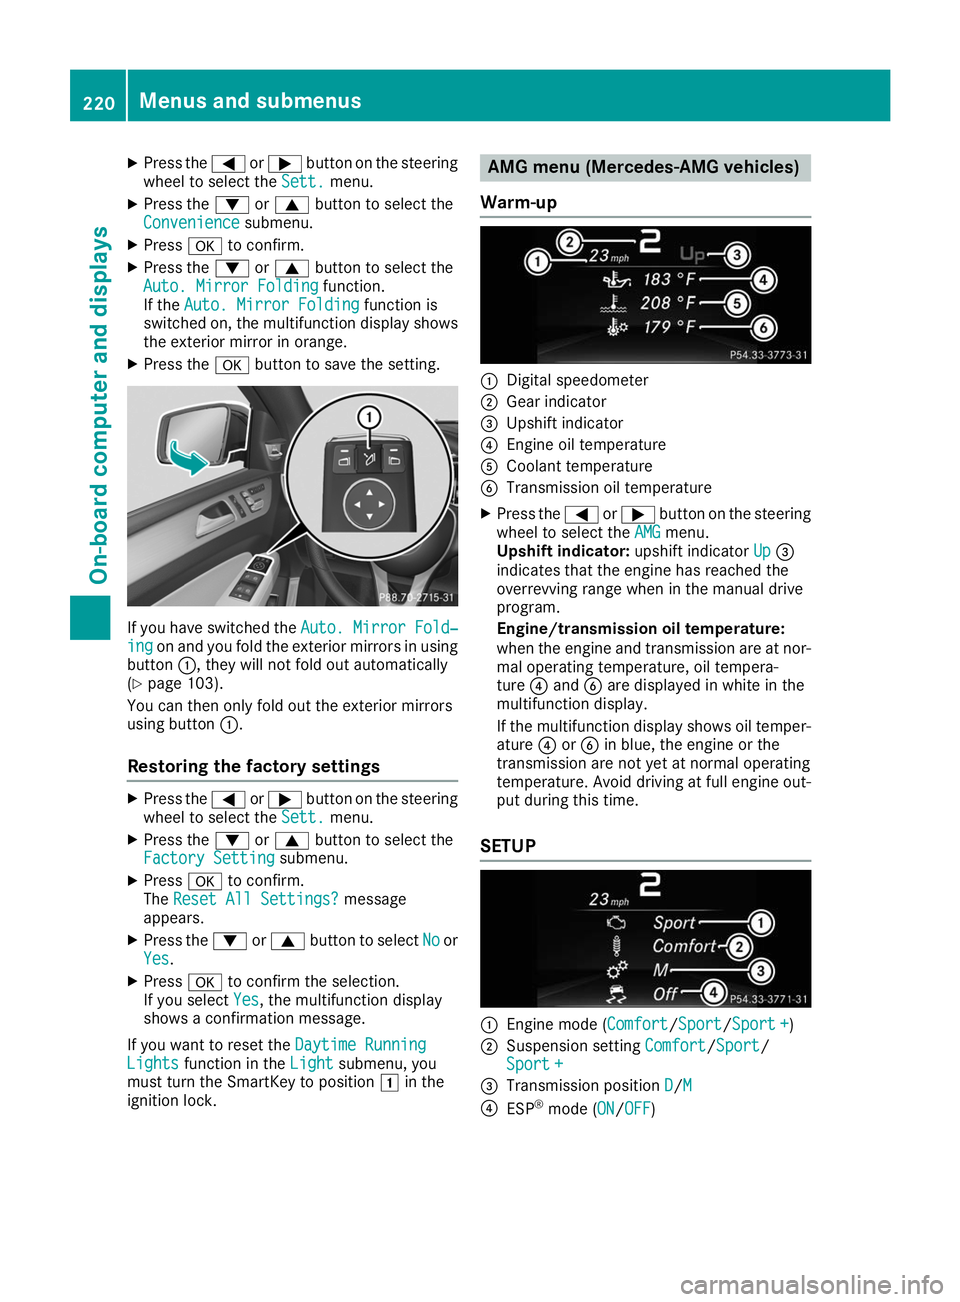
Warm-up 0043
Digital speedometer
0044 Gear indicator
0087 Upshift indicator
0085 Engine oil temperature
0083 Coolant temperature
0084 Transmission oil temperature
X Press the 0059or0065 button on the steering
wheel to select the AMG
AMGmenu.
Upshift indicator: upshift indicatorUp
Up0087
indicates that the engine has reached the
overrevving range when in the manual drive
program.
Engine/transmission oil temperature:
when the engine and transmission are at nor-
mal operating temperature, oil tempera-
ture 0085and 0084are displayed in white in the
multifunction display.
If the multifunction display shows oil temper- ature 0085or0084 in blue, the engine or the
transmission are not yet at normal operating
temperature. Avoid driving at full engine out-
put during this time.
SETUP 0043
Engine mode (Comfort Comfort/SportSport/Sport +Sport +)
0044 Suspension setting Comfort
Comfort/ Sport Sport/
Sport +
Sport +
0087 Transmission position D
D/MM
0085 ESP ®
mode (ON ON/OFFOFF) 220
Menus and submenusOn-board computer and displays
Page 350 of 370
ponents may also be damaged. There is a risk
of an accident.
Rotate front and rear wheels only if the wheels
and tires are of the same dimensions.
! On vehicles equipped with a tire pressure
monitor, electronic components are located
in the wheel.
Tire-mounting tools should not be used near
the valve. This could damage the electronic
components.
Only have tires changed at a qualified spe-
cialist workshop.
Always observe the instructions and safety
notes in the "Mounting a wheel" section
(Y page 348).
The wear patterns on the front and rear tires
differ, depending on the operating conditions.
Rotate the wheels before a clear wear pattern
has formed on the tires. Front tires typically
wear more on the shoulders and the rear tires in
the center.
On vehicles that have the same size front and
rear wheels, you can rotate the wheels accord-
ing to the intervals in the tire manufacturer's
warranty book in your vehicle documents. If no
warranty book is available, the tires should be
rotated every 3,000 to 6,000 miles (5,000 to
10,000 km). Depending on tire wear, this may
be required earlier. Do not change the direction
of wheel rotation.
Clean the contact surfaces of the wheel and the brake disc thoroughly every time a wheel is rota-
ted. Check the tire pressure and, if necessary,
restart the tire pressure loss warning system or
the tire pressure monitor (Y page 334).Direction of rotation
Tires with a specified direction of rotation have
additional benefits, e.g. if there is a risk of hydro-
planing. These advantages can only be gained if the tires are installed corresponding to the
direction of rotation.
An arrow on the sidewall of the tire indicates its
correct direction of rotation. Storing wheels
Store wheels that are not being used in a cool,
dry and preferably dark place. Protect the tires
from oil, grease, gasoline and diesel. Mounting a wheel
Preparing the vehicle X
Vehicle with emergency spare wheel:
when mounting the emergency spare wheel in
the event of a flat tire, follow the additional
notes on vehicle preparation under "Flat tire" (Y page 310).
X Stop the vehicle on solid, non-slippery and
level ground.
X Apply the electric parking brake manually.
X Bring the front wheels into the straight-ahead
position.
X Vehicles with automatic transmission:
shift the transmission to position
005D.
X Vehicles with the AIRMATIC package:
make sure that the normal vehicle level is
selected (Y page 170).
X Switch off the engine.
X Vehicles without KEYLESS-GO: remove the
SmartKey from the ignition lock.
X Vehicles with KEYLESS-GO: open the driv-
er's door.
The vehicle electronics are now in position
0092. This means no SmartKey is in the ignition lock.
X Vehicles with KEYLESS-GO: remove the
Start/Stop button from the ignition lock
(Y page 127).
X Make sure that the engine cannot be started
via your smartphone (Y page 129).
X If included in the vehicle equipment, remove
the tire-change tool kit from the vehicle.
X Safeguard the vehicle against rolling away.
i Apart from certain country-specific varia-
tions, vehicles are not equipped with a tire-
change tool kit. For more information on
which tools are required to perform a wheel
change on your vehicle, consult a qualified
specialist workshop. 348
Changing a wheelWheels and tires