2019 MERCEDES-BENZ GLE COUPE fuel type
[x] Cancel search: fuel typePage 22 of 370
T
Tachometer ........................................ 208
Tailgate
Display message ............................ 248
Emergency unlocking ....................... 85
Important safety notes .................... 82
Limiting the opening angle ............... 85
Opening dimensions ...................... 364
Opening/closing (automatically
from inside) ...................................... 84
Opening/closing (automatically
from outside) ................................... 83
Opening/closing (from outside) ....... 82
Tank content
Fuel gauge ....................................... 36
Technical data
Capacities ...................................... 359
Drawbar load (maximum) ............... 367
Information .................................... 357
Tires/wheels ................................. 352
Trailer load s................................... 367
Vehicle data ................................... 364
Telephone
Accepting a call (multifunction
steering wheel) .............................. 215
Authorizing a mobile phone (con-
necting) ......................................... 268
Authorizing a mobile phone via the device manager (connecting )......... 269
Connecting a mobile phone
(device manager) ........................... 269
Connecting a mobile phone (gen-
eral information) ............................ 268
Display message ............................ 249
Menu (on-board computer) ............ 214
Number from the phone book ........ 215
Redialing ........................................ 215
Rejecting/ending a call ................. 215
see also Digital Operator's Man-
ual .................................................. 264
Temperature
Coolant (display in the instrumentcluster) .......................................... 209
Coolant (on-board computer,
Mercedes-AMG vehicles) ............... 220
Engine oil (on-board computer,
Mercedes-AMG vehicles) ............... 220 Outside temperature ...................... 208
Setting (climate control )................ 120
Transmission oil (on-board com-
puter, Mercedes-AMG vehicles) ..... 220
Through-loading feature ................... 275
Timing (RACETIMER) ......................... 221
Tire pressure
Calling up (on-board computer) ..... 334
Checking manually ........................ 333
Display message ............................ 245
Maximum ....................................... 333
Not reached (TIREFIT) .................... 313
Notes ............................................. 332
Reached (TIREFIT) .......................... 314
Recommended ............................... 330
Tire pressure loss warning system
General notes ................................ 333
Important safety notes .................. 334
Restarting ...................................... 334
Tire pressure monitor
Checking the tire pressure elec-
tronically ........................................ 336
Function/note s............................. 334
General notes ................................ 334
Important safety notes .................. 335
Radio type approval for the tire
pressure monitor ........................... 337
Restarting ...................................... 337
Warning lamp ................................. 263
Warning message .......................... 336
Tire pressure table ............................ 331
Tire-change tool kit ........................... 310
TIREFIT kit
Important safety notes .................. 312
Storage location ............................ 310
Tire pressure not reached .............. 313
Tire pressure reached .................... 314
Using ............................................. 312
Tires
Aspect ratio (definition) ................. 347
Average weight of the vehicle
occupants (definition) .................... 345
Bar (definition) ............................... 345
Changing a whee l.......................... 347
Characteristics .............................. 345
Checking ........................................ 327
Curb weight (definition) ................. 346
Definition of terms ......................... 345 20
Index
Page 25 of 370
Transporting ..................................3
23
Unlocking (in an emergency) ........... 81
Unlocking (SmartKey) ..................... .74
Vehicle data ................................... 364
Vehicle data
Roof load (maximum) .....................3 64
Trunk load (maximum) ................... 364
Vehicle data (off-road driving)
Approach/departure angle ............ 366
Maximum gradient climbing abil-
ity ................................................. .367
Maximum water depth ................... 366
Vehicle dimensions ........................... 364
Vehicle emergency locking ................ 81
Vehicle identification number
see VIN
Vehicle identification plate .............. 358
Vehicle level
AIRMATIC ...................................... 170
Vehicle level (display message) ....... 239
Vehicle tool kit .................................. 310
Video
Operating the DVD ......................... 214
see also Digital Operator's Man-
ual ................................................. .264
VIN ...................................................... 358
Seat ............................................... 359
Type plate ...................................... 358 W
Warning and indicator lamps ABS ................................................ 254
Brakes .......................................... .253
Coolant .......................................... 260
Distance warning ........................... 262
Engine diagnostics ......................... 259
ESP ®
.............................................. 256
ESP ®
OFF ....................................... 257
Fuel tank ........................................ 259
Overview .......................................... 36
Parking brake ................................ 259
PASSENGER AIR BAG ..................... .43
Reserve fuel .................................. .259
Restraint system ............................ 259
Seat belt ........................................ 251
Tire pressure monitor .................... 263
Warranty .............................................. 27 Washer fluid
Display message ............................ 249
Weather display (COMAND)
see also Digital Operator's Man-
ual.................................................. 264
Wheel and tire combinations
Tires ............................................... 352
Wheel bolt tightening torque ........... 351
Wheel chock ...................................... 349
Wheels
Changing a whee l.......................... 347
Checking ........................................ 327
Cleaning ......................................... 304
Emergency spare wheel ................. 353
Important safety notes .................. 327
Information on driving .................... 327
Interchanging/changing ................ 347
Mounting a new whee l................... 351
Mounting a whee l.......................... 348
Overview ........................................ 327
Removing a whee l.......................... 350
Snow chains .................................. 329
Storing ........................................... 348
Tightening torque ........................... 351
Wheel size/tire size ....................... 352
Window curtain air bag
Display message ............................ 232
Operation ......................................... 49
Windows
see Side windows
Windshield
Defrosting ...................................... 122
Windshield washer fluid
see Windshield washer system
Windshield washer system
Adding washer fluid ....................... 299
Important safety notes .................. 363
Windshield wipers
Problem (malfunction) ................... 114
Replacing the wiper blades ............ 111
Replacing the wiper blades
(MAGIC VISION CONTROL) ............ 113
Switching on/of f........................... 111
Winter driving
Slippery road surfaces ................... 151
Winter operation
Overview ........................................ 329
Radiator cover ............................... 297 Index
23
Page 59 of 370
If the seat belt pre-tensioning is not reduced:
X Move the seat backrest or seat back slightly
when the vehicle is stationary.
The seat belt pre-tensioning is reduced and
the locking mechanism is released.
The seat-belt adjustment is an integral part of
the PRE-SAFE ®
convenience function. Informa-
tion about the convenience function can be
found under "Belt adjustment" (Y page 46).PRE-SAFE
®
PLUS (anticipatory occu-
pant protection system PLUS)
Introduction PRE-SAFE
®
PLUS is only available in vehicles
with the Driving Assistance PLUS package.
Using the radar sensor system, PRE-SAFE ®
PLUS is able to detect that a head-on or rear-end
collision is imminent. In certain hazardous sit-
uations, PRE-SAFE ®
PLUS takes pre-emptive
measures to protect the vehicle occupants.
Important safety notes The intervention of PRE-SAFE
®
PLUS cannot
prevent an imminent collision.
The driver is not warned about the intervention
of PRE-SAFE ®
PLUS.
PRE-SAFE ®
PLUS does not intervene if the vehi-
cle is backing up.
When driving, or when parking or exiting a park-
ing space using Active Parking Assist, PRE-
SAFE ®
PLUS will not apply the brakes.
Function PRE-SAFE
®
PLUS intervenes in certain situa-
tions if the radar sensor system detects an
imminent head-on or rear-end collision. PRE-SAFE
®
PLUS takes the following measures
depending on the hazardous situation detected:
R if the radar sensor system detects that a
head-on collision is imminent, the seat belts
are pre-tensioned.
R if the radar sensor system detects that a rear-
end collision is imminent:
- the brake pressure is increased if the driver
applies the brakes when the vehicle is sta- tionary.
- the seat belts are pre-tensioned.
The PRE-SAFE ®
PLUS braking application is can-
celed:
R if the accelerator pedal is depressed when a
gear is engaged
R if the risk of a collision passes or is no longer
detected
R if Active Distance Assist DISTRONIC indicates
an intention to intervene
If the hazardous situation passes without result- ing in an accident, the original settings are
restored. Automatic measures after an acci-
dent
Immediately after an accident, the following
measures are implemented, depending on the
type and severity of the impact:
R the hazard warning lamps are switched on
R the emergency lighting is activated
R the vehicle doors are unlocked
R the front side windows are lowered
R vehicles with a memory function: the electri-
cally adjustable steering wheel is raised when
the driver's door is opened
R the engine is switched off and the fuel supply
is cut off
R vehicles with Mercedes me connect: auto-
matic emergency call Children in the vehicle
Important safety notes
Accident statistics show that children secured
in the rear seats are safer than children secured
in the front-passenger seat. For this reason,
Mercedes-Benz strongly advises that you install Children in the vehicle
57Safety Z
Page 145 of 370
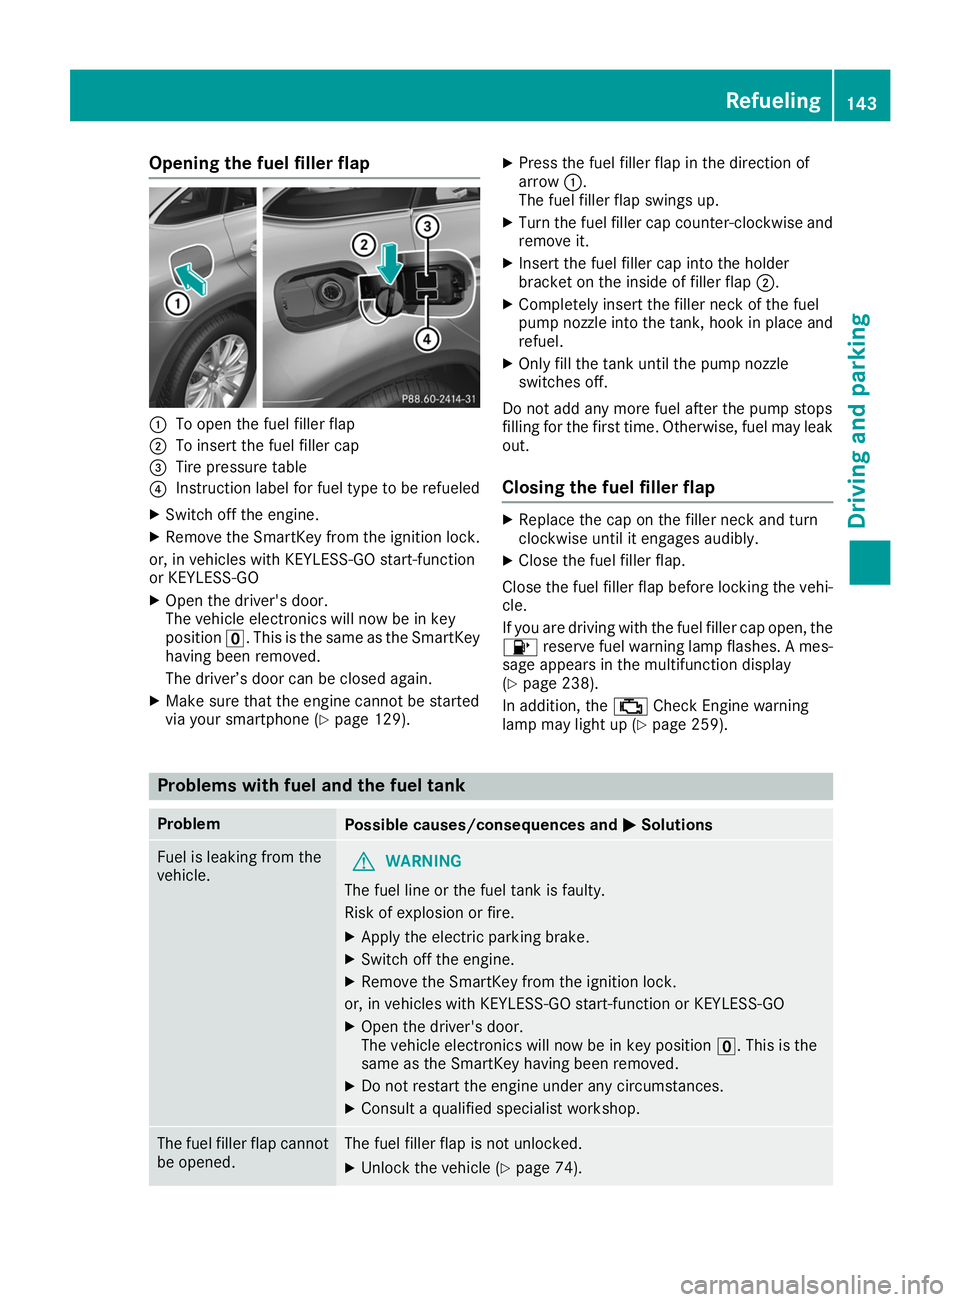
Opening the fuel filler flap
0043
To open the fuel filler flap
0044 To insert the fuel filler cap
0087 Tire pressure table
0085 Instruction label for fuel type to be refueled
X Switch off the engine.
X Remove the SmartKey from the ignition lock.
or, in vehicles with KEYLESS-GO start-function
or KEYLESS‑GO
X Open the driver's door.
The vehicle electronics will now be in key
position 0092. This is the same as the SmartKey
having been removed.
The driver’s door can be closed again.
X Make sure that the engine cannot be started
via your smartphone (Y page 129).X
Press the fuel filler flap in the direction of
arrow 0043.
The fuel filler flap swings up.
X Turn the fuel filler cap counter-clockwise and
remove it.
X Insert the fuel filler cap into the holder
bracket on the inside of filler flap 0044.
X Completely insert the filler neck of the fuel
pump nozzle into the tank, hook in place and
refuel.
X Only fill the tank until the pump nozzle
switches off.
Do not add any more fuel after the pump stops
filling for the first time. Otherwise, fuel may leak out.
Closing the fuel filler flap X
Replace the cap on the filler neck and turn
clockwise until it engages audibly.
X Close the fuel filler flap.
Close the fuel filler flap before locking the vehi-
cle.
If you are driving with the fuel filler cap open, the 00B6 reserve fuel warning lamp flashes. A mes-
sage appears in the multifunction display
(Y page 238).
In addition, the 00B9Check Engine warning
lamp may light up (Y page 259). Problems with fuel and the fuel tank
Problem
Possible causes/consequences and
0050 0050Solutions Fuel is leaking from the
vehicle.
G
WARNING
The fuel line or the fuel tank is faulty.
Risk of explosion or fire. X Apply the electric parking brake.
X Switch off the engine.
X Remove the SmartKey from the ignition lock.
or, in vehicles with KEYLESS-GO start-function or KEYLESS ‑GO
X Open the driver's door.
The vehicle electronics will now be in key position 0092. This is the
same as the SmartKey having been removed.
X Do not restart the engine under any circumstances.
X Consult a qualified specialist workshop. The fuel filler flap cannot
be opened. The fuel filler flap is not unlocked.
X Unlock the vehicle (Y page 74). Refueling
143Driving and parking Z
Page 173 of 370
Adjust the vehicle level before pulling away.
G
WARNING
Due to the high center of gravity, the vehicle
may start to skid and roll over in the event of
an abrupt steering maneuver and/or when
the vehicle's speed is not adapted to the road conditions. There is a risk of an accident.
Always adapt your speed and driving style to
the vehicle's driving characteristics and to the prevailing road and weather conditions.
! When driving on extremely rough terrain,
select a high vehicle level in good time. Make
sure there is always sufficient ground clear-
ance. You will otherwise damage the vehicle.
R Utility vehicles have a significantly higher roll-
over rate than other types of vehicles.
Failure to operate this vehicle safely may
result in an accident, rollover of the vehicle,
and severe or fatal injury.
R In a rollover crash, an unbelted person is sig-
nificantly more likely to die than a person
wearing a seat belt.
You and all vehicle occupants should always
wear your seat belts.
General notes
Only select raised level if this is appropriate for
the road conditions. Otherwise, fuel consump-
tion may increase and handling may be affected.
Make changes to the vehicle level while the
vehicle is in motion. This enables the vehicle to adjust to the new level as quickly as possible.
The vehicle level may change visibly if you park
the vehicle and the outside temperature
changes. If the temperature drops, the vehicle
level is lower; with an increase in temperature,
the vehicle level rises.
If you unlock the vehicle or open a door, the
vehicle begins to compensate for load discrep-
ancies while still parked. However, for signifi-
cant level changes, such as after the vehicle has
been stationary for a long period, the engine
must be on. For safety reasons, the vehicle is
only lowered when the doors are closed. Low-
ering is interrupted if a door is opened, and it
continues once the door has been closed.
Vehicles with no trailer coupled: below a
speed of 40 mph (64 km/h) you can choose
between the normal and raised vehicle level. Select the normal vehicle level for normal road
surfaces and the raised vehicle level for driving
with snow chains or on particularly poor road
surfaces. Your selection remains stored even if
you remove the SmartKey from the ignition lock.
If you try to select raised level at a speed above
40 mph (64 km/h), the Drive More Slowly
Drive More Slowly
message appears in the multifunction display.
Vehicles with a trailer coupled: below a speed
of 19 mph (30 km/h), you can choose between
the normal and raised vehicle level.
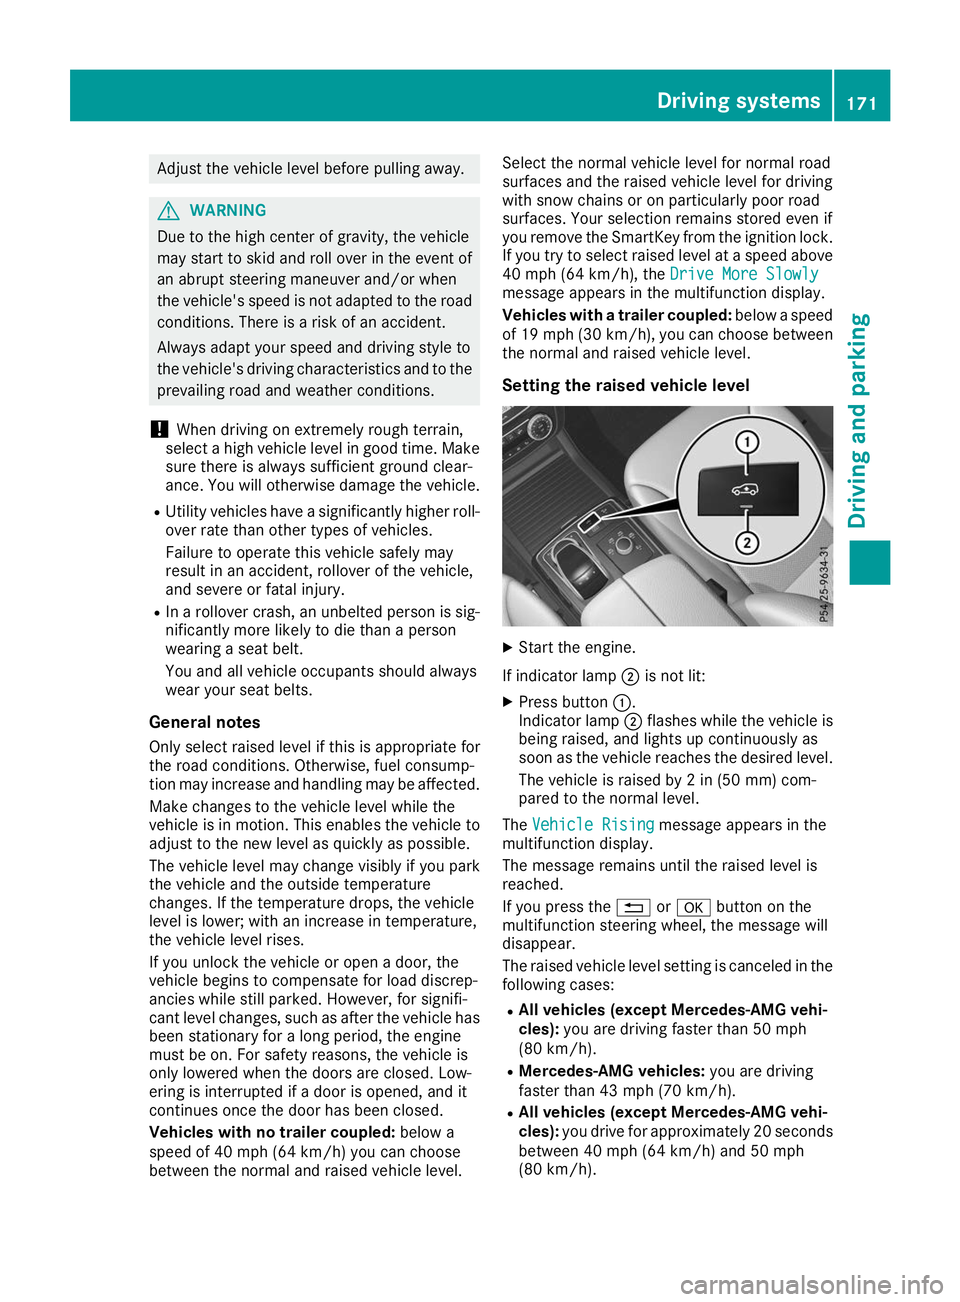
Setting the raised vehicle level X
Start the engine.
If indicator lamp 0044is not lit:
X Press button 0043.
Indicator lamp 0044flashes while the vehicle is
being raised, and lights up continuously as
soon as the vehicle reaches the desired level.
The vehicle is raised by 2 in (50 mm) com-
pared to the normal level.
The Vehicle Rising Vehicle Rising message appears in the
multifunction display.
The message remains until the raised level is
reached.
If you press the 0038or0076 button on the
multifunction steering wheel, the message will
disappear.
The raised vehicle level setting is canceled in the following cases:
R All vehicles (except Mercedes-AMG vehi-
cles): you are driving faster than 50 mph
(80 km/h).
R Mercedes-AMG vehicles: you are driving
faster than 43 mph (70 km/h).
R All vehicles (except Mercedes-AMG vehi-
cles): you drive for approximately 20 seconds
between 40 mph (64 km/h) and 50 mph
(80 km/h). Driving systems
171Driving and parking Z
Page 202 of 370
speed and do not countersteer. Apply the
brake as necessary.
Please observe the manufacturer's operating
instructions for the trailer coupling if a detach-
able trailer coupling is used.
Couple and uncouple the trailer carefully. If you do not couple the trailer to the towing vehicle
correctly, the trailer could become detached.
Make sure that the following values are not
exceeded:
R the permissible trailer drawbar noseweight
R the permissible trailer load
R the permissible rear axle load of the towing
vehicle
R the maximum permissible gross vehicle
weight of both the towing vehicle and the
trailer
The applicable permissible values, which must
not be exceeded, can be found:
R in the vehicle documents
R on the identification plates for the trailer tow
hitch and the trailer
R on the vehicle identification plate
If the values differ, the lowest value applies.
When towing a trailer, your vehicle's handling
characteristics will be different in comparison
with when driving without a trailer.
The vehicle/trailer combination:
R is heavier
R is restricted in its acceleration and gradient-
climbing capability
R has an increased braking distance
R is affected more by strong crosswinds
R demands more sensitive steering
R has a larger turning circle
This could impair the handling characteristics.
When towing a trailer, always adjust your speed to the current road and weather conditions. Do
not exceed the maximum permissible speed for
your vehicle/trailer combination. Notes on towing a trailer
General notes !
If you have a trailer tow hitch retrofitted,
changes to the cooling system and drive train may be necessary, depending on the vehicle
type.
If you have a trailer tow hitch retrofitted,
observe the anchorage points on the chassis
frame.
R Do not exceed the legally prescribed maxi-
mum speed for vehicle/trailer combinations
in the relevant country.
This lowers the risk of an accident.
R Only install an approved trailer coupling on
your vehicle.
More information on availability and installa-
tion can be obtained at any qualified special-
ist workshop.
R The bumpers of your vehicle are not suitable
for installing detachable trailer couplings.
R Do not install hired trailer couplings or other
detachable trailer couplings on the bumpers
of your vehicle.
R If you no longer need the ball coupling,
remove it from the ball coupling recess. This
will reduce the risk of damage to the ball cou- pling.
When towing a trailer, set the tire pressure on
the rear axle of the towing vehicle for the max-
imum load. You will find the values in the tire
pressure table in the fuel filler flap of the vehicle
(Y page 346).
Please note that when towing a trailer, the fol-
lowing driving systems have limited availability
or are not available at all:
R Parking Assist PARKTRONIC (Y page 173)
R Blind Spot Assist (Y page 191)
R Active Lane Keeping Assist (Y page 197)
On vehicles without level control, the height of
the ball coupling will alter according to the load
placed on the vehicle. If necessary, use a trailer
with a height-adjustable drawbar.
You will find installing dimensions and loads
under "Technical data" (Y page 367).
Driving tips Also observe the notes on pulling away with a
trailer (Y
page 130).
The maximum permissible speed for vehicle/
trailer combinations depends on the type of
trailer. Before beginning the journey, check the
trailer's documents to see what the maximum
permissible speed is for your trailer. Observe the 200
Towing a trailerDriving and parking
Page 261 of 370
Warning/
indicator
lamp
0051 0051
Signal type
Possible causes/consequences and 0050
0050Solutions 00490024
0051
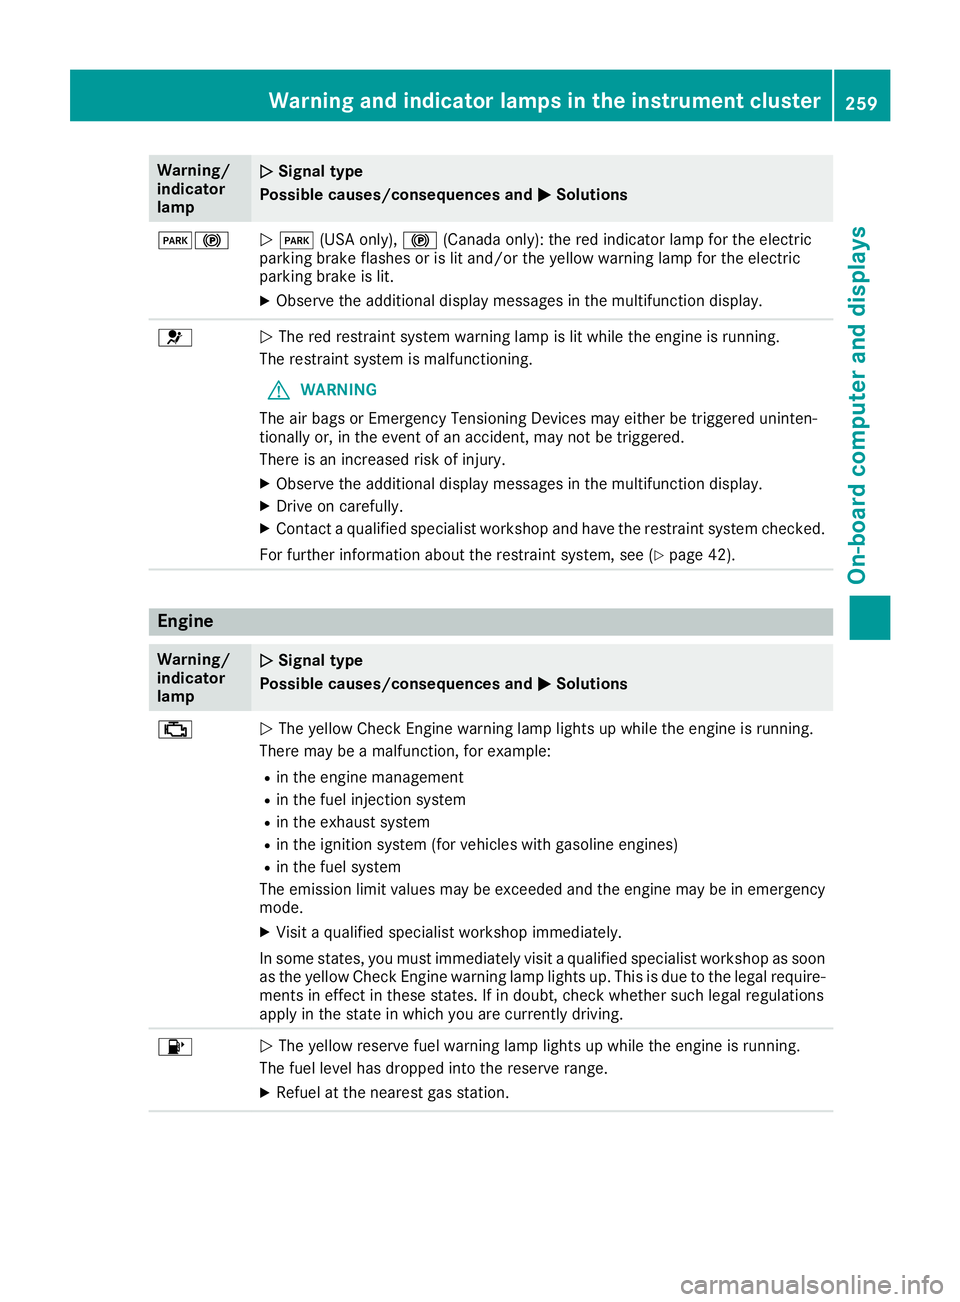
0049 (USA only), 0024(Canada only): the red indicator lamp for the electric
parking brake flashes or is lit and/or the yellow warning lamp for the electric
parking brake is lit.
X Observe the additional display messages in the multifunction display. 0075
0051
The red restraint system warning lamp is lit while the engine is running.
The restraint system is malfunctioning.
G WARNING
The air bags or Emergency Tensioning Devices may either be triggered uninten-
tionally or, in the event of an accident, may not be triggered.
There is an increased risk of injury.
X Observe the additional display messages in the multifunction display.
X Drive on carefully.
X Contact a qualified specialist workshop and have the restraint system checked.
For further information about the restraint system, see (Y page 42).Engine
Warning/
indicator
lamp
0051 0051
Signal type
Possible causes/consequences and 0050
0050Solutions 00B9
0051
The yellow Check Engine warning lamp lights up while the engine is running.
There may be a malfunction, for example:
R in the engine management
R in the fuel injection system
R in the exhaust system
R in the ignition system (for vehicles with gasoline engines)
R in the fuel system
The emission limit values may be exceeded and the engine may be in emergency mode.
X Visit a qualified specialist workshop immediately.
In some states, you must immediately visit a qualified specialist workshop as soon as the yellow Check Engine warning lamp lights up. This is due to the legal require-
ments in effect in these states. If in doubt, check whether such legal regulations
apply in the state in which you are currently driving. 00B6
0051
The yellow reserve fuel warning lamp lights up while the engine is running.
The fuel level has dropped into the reserve range.
X Refuel at the nearest gas station. Warning and indicator lamps in the instrument cluster
259On-board computer and displays Z
Page 262 of 370
Warning/
indicator
lamp
0051
0051 Signal type
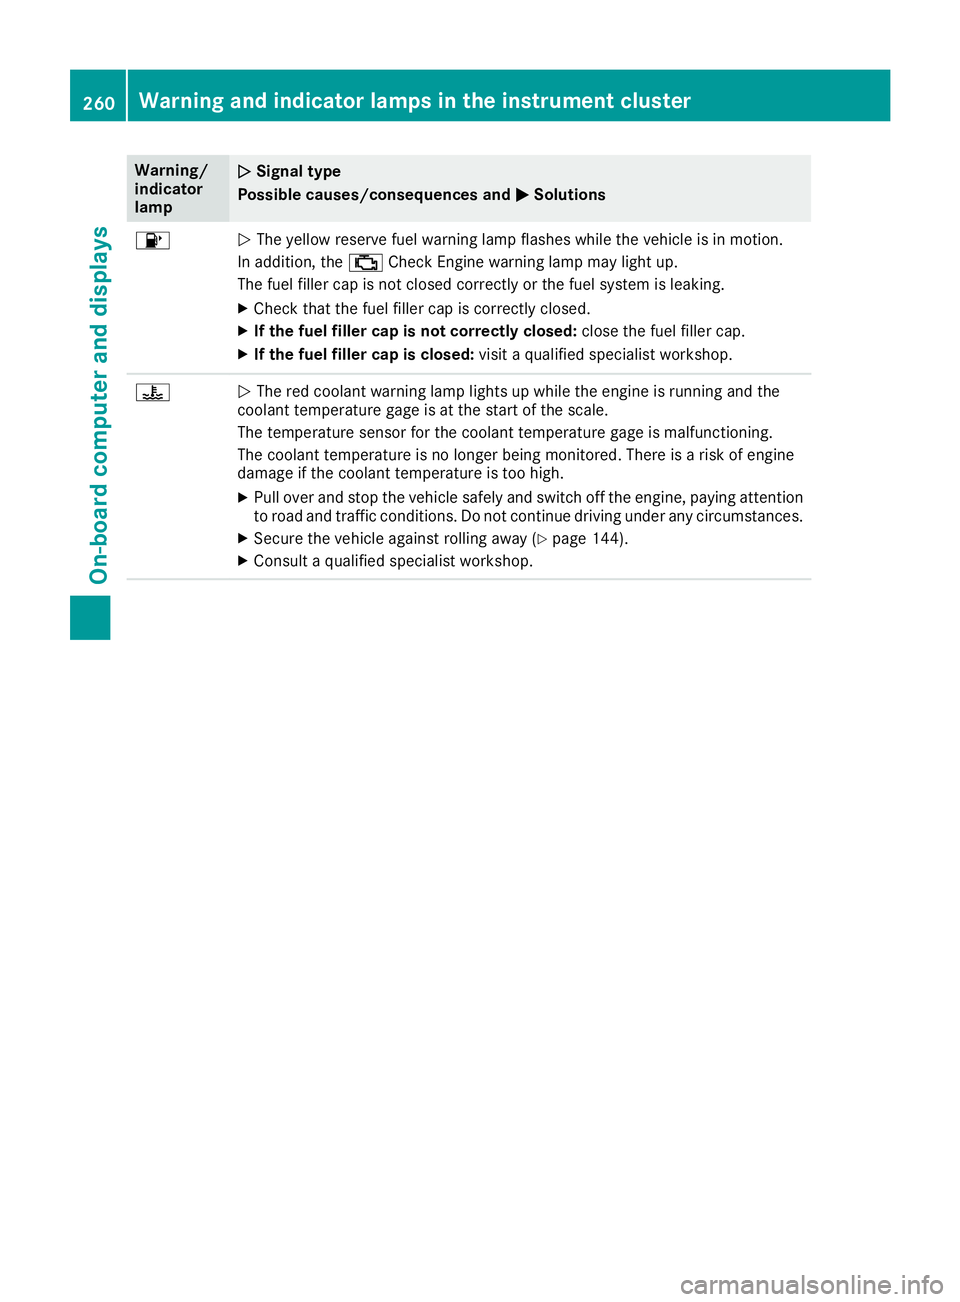
Possible causes/consequences and 0050 0050Solutions 00B6
0051
The yellow reserve fuel warning lamp flashes while the vehicle is in motion.
In addition, the 00B9Check Engine warning lamp may light up.
The fuel filler cap is not closed correctly or the fuel system is leaking.
X Check that the fuel filler cap is correctly closed.
X If the fuel filler cap is not correctly closed: close the fuel filler cap.
X If the fuel filler cap is closed: visit a qualified specialist workshop.00AC
0051
The red coolant warning lamp lights up while the engine is running and the
coolant temperature gage is at the start of the scale.
The temperature sensor for the coolant temperature gage is malfunctioning.
The coolant temperature is no longer being monitored. There is a risk of engine
damage if the coolant temperature is too high.
X Pull over and stop the vehicle safely and switch off the engine, paying attention
to road and traffic conditions. Do not continue driving under any circumstances.
X Secure the vehicle against rolling away (Y page 144).
X Consult a qualified specialist workshop. 260
Warning and indicator lamps in the instrument clusterOn-board computer and displays