Page 484 of 673
Checking
the coolant le vel &
WARNING Risk of bu rns from hot com‐
ponent parts in the engine compartment
Cer tain components in the engine compart‐
ment can be very hot, e.g. the engine, the
ra diator and parts of theex haust sy stem. #
Allow the engine tocool down and only
to uch co mponent parts described in
th efo llowing. &
WARNING Danger of bu rns when open‐
ing the bonn et
If yo u open the engine bonn etwhen the
engine has overheated or during a fire inthe
engine compartment, you could come into
contact with hot gases or other escaping
operating fluids. #
Before opening the bonn et, allow the
engine tocool down. #
Intheeve nt of a fire inthe engine com‐
partment, keep the engine bonn et
closed and call thefire service. &
WARNING Risk of scalding from hot
coolant
The engine cooling sy stem is pressurised,
particularly when the engine is warm. If you
open the cap, you could be scalded byhot
coolant spr aying out. #
Let the engine cool down before open‐
ing the cap. #
When opening the cap, wear pr otective
gl ove s and saf etygl asses. #
Open the cap slowly torelease pres‐
sure. #
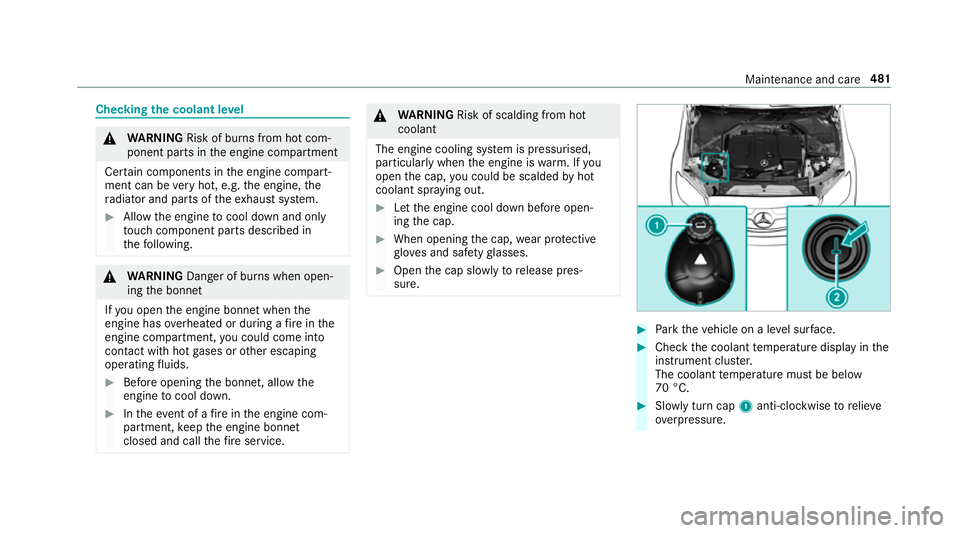
Park theve hicle on a le vel sur face. #
Check the coolant temp erature display in the
instrument clus ter.
The coolant temp erature must be below
70 °C. #
Slowly turn cap 1anti-clockwise torelie ve
ov erpressure. Maintenance and care
481
Page 485 of 673
#
Continue turning cap 1anti-clockwise and
re mo veit.
The coolant le vel is cor rect in thefo llowing
cases:
R ifth e engine is cold, up tomar ker bar 2
R ifth e engine is warm, up to1.5 cm over
mar ker bar 2 #
If necessar y,top up with coolant that has
been appr ovedfo r Mercedes-Benz.
R Further information on coolant
(/ page 547). To
pping up the windsc reen washer sy stem &
WARNING Risk of bu rns from hot com‐
ponent parts in the engine compartment
Cer tain components in the engine compart‐
ment can be very hot, e.g. the engine, the
ra diator and parts of theex haust sy stem. #
Allow the engine tocool down and only
to uch co mponent parts described in
th efo llowing. &
WARNING Danger of bu rns when open‐
ing the bonn et
If yo u open the engine bonn etwhen the
engine has overheated or during a fire inthe
engine compartment, you could come into
contact with hot gases or other escaping
operating fluids. #
Before opening the bonn et, allow the
engine tocool down. #
Intheeve nt of a fire inthe engine com‐
partment, keep the engine bonn et
closed and call thefire service. &
WARNING ‑ Risk of fire and injury due to
windscreen washer concentrate
Wi ndsc reen washer concentrate is highly
fl ammable. It could ignite if it comes into
con tact wi thhot engine component parts or
th eex haust sy stem. #
Make sure that no windsc reen washer
concentrate spills out next tothefiller
opening. #
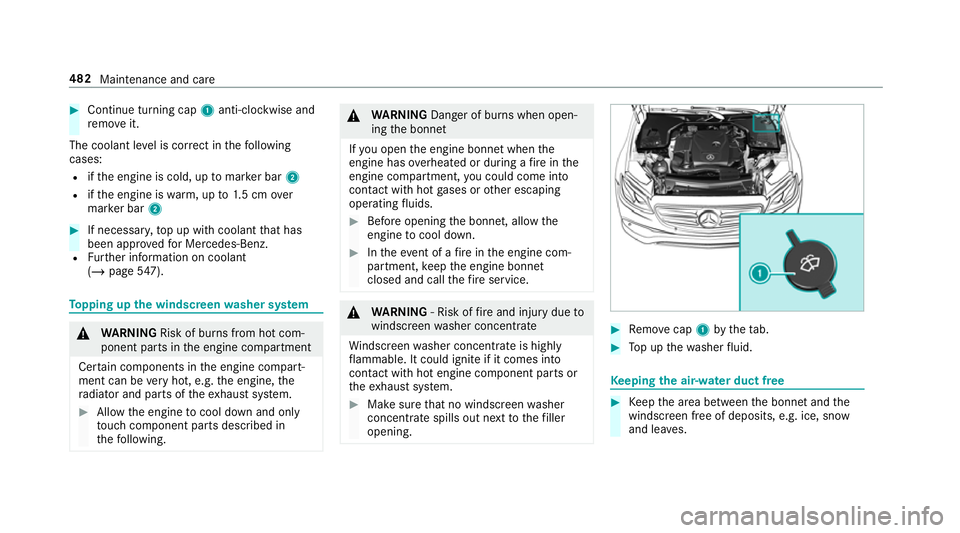
Remo vecap 1bytheta b. #
Top up thewa sher fluid. Ke
eping the air-water duct free #
Keep the area between the bonn etand the
windscreen free of deposits, e.g. ice, sn ow
and lea ves. 482
Maintenance and care
Page 515 of 673
Installing
theto wing eye #
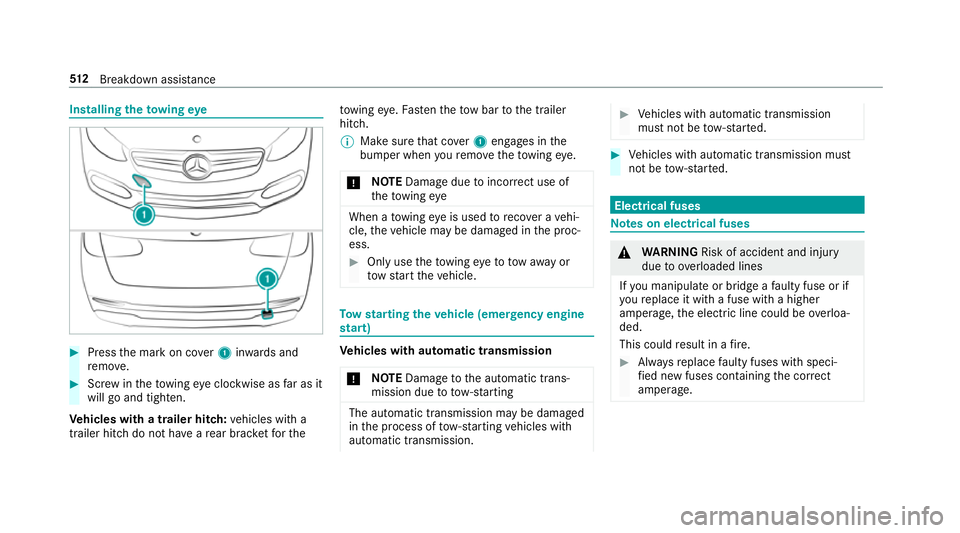
Press the mark on co ver1 inwa rds and
re mo ve. #
Screw intheto wing eyeclockwise as far as it
will go and tighten.
Ve hicles with a trailer hitch: vehicles with a
trailer hitch do not ha veare ar brac ketfo rthe to
wing eye. Fasten theto w bar tothe trailer
hitch.
% Make sure that co ver1 engages in the
bumper when youre mo vetheto wing eye.
* NO
TEDama gedue toincor rect use of
th eto wing eye When a
towing eye is used toreco ver a vehi‐
cle, theve hicle may be damaged in the proc‐
ess. #
Only use theto wing eyeto to waw ay or
to w start theve hicle. To
w starting theve hicle (eme rgency engine
st art) Ve
hicles with automatic transmission
* NO
TEDama getothe automatic trans‐
mission due to tow-starting The automatic transmission may be damaged
in the process of tow- starting vehicles with
automatic transmission. #
Vehicles with automatic transmission
must not be tow- star ted. #
Vehicles with automatic transmission must
not be tow- star ted. Electrical fuses
Note
s on electrical fuses &
WARNING Risk of accident and inju ry
due to ov erloaded lines
If yo u manipulate or bridge a faulty fuse or if
yo ure place it with a fuse with a higher
amperage, the electric line could be overloa‐
ded.
This could result in a fire. #
Alw aysre place faulty fuses with speci‐
fi ed new fuses conta iningthe cor rect
amperage. 512
Breakdown assis tance
Page 534 of 673
R
The vehicle is not on a slope.
R The vehicle is on solid, non-slippery and le vel
ground. #
Apply the electric parking brake manually. #
Movethe front wheels tothest ra ight-ahead
position. #
Vehicles with automatic transmission:
shift into position j. #
Vehicles with le vel control sy stem: setthe
normal vehicle le vel (/ page 244). #
Switch off the engine. #
Make sure that the engine cann otbe star ted. #
Place choc ks orother suitable items under
th e front and rear of the wheel that is diago‐
nally opposite the wheel you wish tochange. #
Remo vethe hub caps if necessary
(/ page 531). #
Raise theve hicle (/ page 531). Re
moving and fitting hub caps Re
quirements: R
The vehicle is prepared for a wheel change
(/ page 530).
Pla stic hub cap #
Toremo ve:turn the cent recover of the hub
cap anti-clockwise and remo vethe hub cap. #
Tofit: make sure that the cent recover of the
hub cap is turned anti-clockwise. #
Position the hub cap and turn the cent re
co ver clockwise until the hub cap engages
ph ysically and audibly.
Aluminium hub cap #
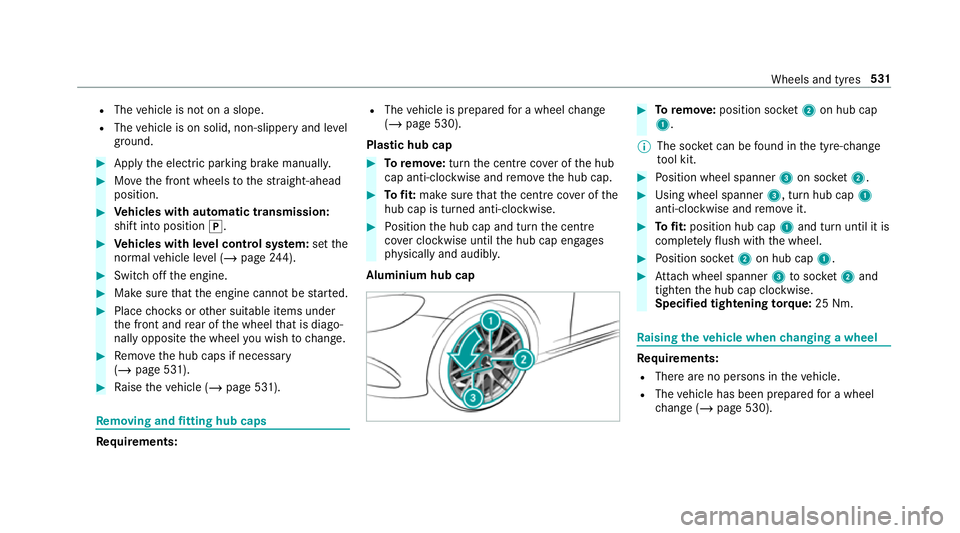
Toremo ve:position soc ket2 on hub cap
1.
% The soc ket can be found in the tyre-change
to ol kit. #
Position wheel spanner 3on soc ket2. #
Using wheel spanner 3, turn hub cap1
anti-clo ckwise and remo veit. #
Tofit: position hub cap 1and turn until it is
comple tely flush with the wheel. #
Position soc ket2 on hub cap 1. #
Attach wheel spanner 3tosoc ket2 and
tighten the hub cap clockwise.
Specified tightening torq ue: 25 Nm. Ra
ising theve hicle when changing a wheel Re
quirements:
R There are no persons in theve hicle.
R The vehicle has been prepared for a wheel
ch ange (/ page 530). Wheels and tyres
531
Page 536 of 673
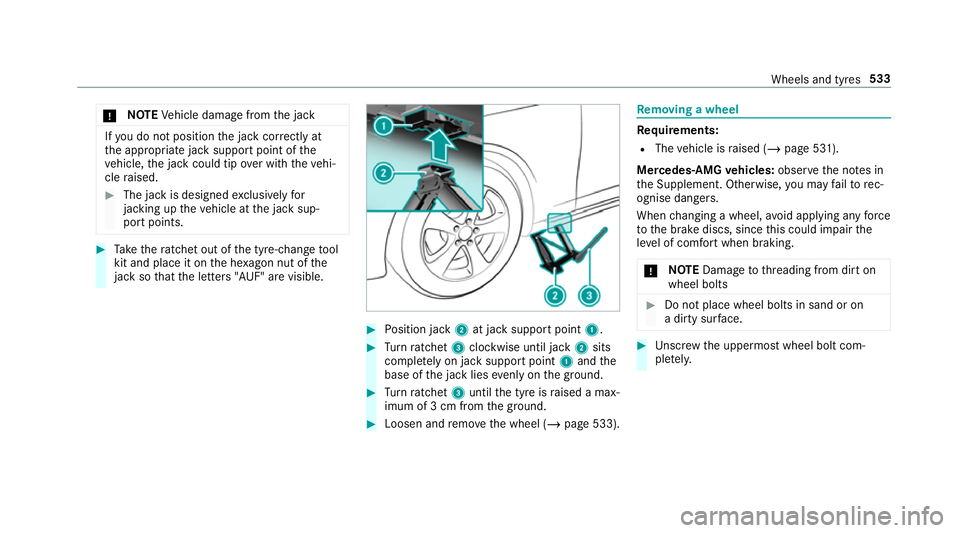
*
NO
TEVehicle damage from the jack If
yo u do not position the jack cor rectly at
th e appropriate jack support point of the
ve hicle, the jack could tip over with theve hi‐
cle raised. #
The jack is designed exclusively for
jacking up theve hicle at the jack sup‐
port points. #
Take thera tchet out of the tyre-change tool
kit and place it on the he xagon nut of the
jack so that the letters "AUF" are visible. #
Position jack 2at jack support point 1. #
Turn ratchet 3clockwise until jack 2sits
comple tely on jack support point 1and the
base of the jack lies evenly on the ground. #
Turn ratchet 3until the tyre is raised a max‐
imum of 3 cm from the ground. #
Loosen and remo vethe wheel (/ page 533). Re
moving a wheel Re
quirements:
R The vehicle is raised (/ page 531).
Mercedes-AMG vehicles: observeth e no tes in
th e Supplement. Otherwise, you may failto rec‐
ognise dangers.
When changing a wheel, avoid applying any force
to the brake discs, since this could impair the
le ve l of com fort when braking.
* NO
TEDama getothre ading from dirt on
wheel bolts #
Do not place wheel bolts in sand or on
a dirty sur face. #
Unscr ew the uppermost wheel bolt com‐
ple tely. Wheels
and tyres 533