2019 MERCEDES-BENZ GLC SUV display
[x] Cancel search: displayPage 341 of 673
Deleting a sug
gestion #
Tap on © inthe media displa y.
The home screen is shown. #
Swipe up until theSUGGESTIONS menu is
shown. #
Highlight a suggestion and press until the
OPTIONS menu is shown. #
Select Delete.
The query as towhe ther the suggestion is
dele tedte mp orarily or permanent lyappears. #
Ifth e suggestion should be shown again
at a later time: selectNot now. #
Ifth e suggestion should not be shown
again: selectNever. Favo
urites Overview of
favo urites
Fa vourites of feryo uqu ick access tofrequently
used applications. It is possible tocrea te20
fa vo urites in tota l.
Yo u can select favo urites from categories or you
add favo urites direct lyfrom an application. Calling up
favo urites
In the media display #
Tap on ©.
The home screen is shown. #
Swipe up until FAVOURITESis shown.
On thest eering wheel or theto uchpad #
Press theß rocker switch on thesteering
wheel down.
or #
Press theß button next totheto uchpad.
Ad ding favo urites
Selecting favo urites from catego ries #
Tap on © inthe media displa y.
The home screen is shown. #
Swipe up until FAVOURITESis shown. #
Select WCreate favourite .
The categories are displa yed. #
Select the categor y.
The favo urites are displ ayed. #
Select a favo urite.
The favo urite is stored at the next available
position. #
All positions in thefa vo urites are taken:
confirm the message shown with OK.
A list sho wsallthefa vo urites. #
Select a favo urite which should be overwrit‐
te n.
Ad ding a favo urite from an application
Examples of adding from an application are:
R Saving a contact.
R Storing a radio station.
R Adding a media source.
R Saving a navigation destination.
R Adding an ENE RGIZING comfort program (if
av ailable). #
Tosave a contact as a global favo urite:
select a contact (/ page418).
The de tails are displa yed. #
Press on a telephone number until the
OPTIONS menu is shown. 338
MBUX multimedia sy stem
Page 344 of 673
Calling up old notifications
If notifications ha
venot been called up af terfo ur
hours, these are stored in the ar chive. #
Swipe upwards and select Archive.#
Select the notification.
Closing theNo tifications Centre #
On the touchpad: swipe up with two fingers.
Selecting actions for a notification
The following options are available:
R Select the action directly in an application
af te r a notification is recei ved and shown.
R Select the action later af ter calling up in the
Noti fications Centre. #
An action is available: selectthe action. #
Several actions are available: ifth e notifi‐
cation is not open, select theV symbol. #
Select the action.
The notification is still available. #
IfAdditional information isavailable, select
th e action.
Ad ditional information is shown in a window
as text, ima geortext and ima ge. #
Toclose the windo w:select OK.
Editing notifications #
Call up the Notifications Centre
(/ page 340). #
Tomake settings: selectZ.
% If no settings can be made, a messa ge
appears. #
Select the service. #
Switch the options on or off.
The following options are available:
R Allow notifications
R Display in notification centre
R Show notifications
R Acoustic feedback
When Allow notifications is switched on, the
ot her options cannot be selected. #
Todel ete: touch a message on the
to uchsc reen and slide tothe left or right.
or #
Select there cycle bin. #
Select Delete orDelete all.
Delete deletes a single notification.
Delete all deletes all notifications cur rently
shown. #
With O you will exit dele temode. Global sear
ch Global sear
chove rview
Yo u can use theglobal sear chinthe home
screen and in the notifications.
The global sear chprov ides sear chresults forthe
fo llowing categories and their sub-categories:
R Navigation
R Media
R Telephone, social media, In-Car Of fice
In-Car Of fice is not available in all countries.
R User inter face and Digi tal Owner's Manual MBUX multimedia sy
stem 341
Page 348 of 673
R
For the handwriting recognition read-
aloud function: the multimedia sy stem is
equipped with a voice control sy stem.
R The read-aloud function is available forthe
selected sy stem language.
R The handwriting recognition read-aloud func‐
tion is activated.
Character ent rycan be car ried out with these
control elements:
R Touch Control
R Touchsc reen (media display)
R Touchpad
Character input can be star ted with a control
element and resumed with ano ther. #
When theke ypad is shown, en terth ech arac‐
te rs on the control element byswiping and
pressing or bytapping (touchscreen).
or #
Write thech aracters on theto uchpad or the
to uchsc reen.
Character input on theto uchpad is suppo rted by
th efo llowing functions:
R The handwriting recognition suppo rts ch arac‐
te r entry with character suggestions.
R Ifth ere ad aloud function is activated for
handwriting recognition then the entered
ch aracters are read aloud. Examples of
character ent ry:
R Renaming a favo urite
R Entering a de stination address in the naviga‐
tion sy stem
R Ente ring a web address
Entering characters on theto uchpad
Re quirements:
R Ifyo u wish tohave thech aracter input read
aloud: there ad aloud function of the hand‐
writing recognition is switched on
(/ page 324).
R An online connection is requiredfor some
functions. MBUX multimedia sy
stem 345
Page 354 of 673
If
av ailable, thep symbol allo wsyouto
ch ange tovoice input. #
Call up thech aracter ent ryto rename a
fa vo urite, forex ample (/ page 339).
The keyboard is shown. #
Brief lypress on a character.
The character is entered in input line 1.
Suggestions are shown in 2. #
Toselect a suggestion: select one ofthe
entri es. #
Ifav ailable, display additional suggestions
with q orr. #
Resume character input. #
Toenter an alternative character: press
and hold a character. #
Select thech aracter. #
Toend character entr y:press briefly on
G.
% The available editing functions depend on
th e editing task, the language set and the
ch aracter le vel. MBUX multimedia sy
stem 351
Page 356 of 673
#
Toselect a suggestion: select one ofthe
entri es. #
Ifav ailable, display additional suggestions
with q orr. #
Resume character input. The letters can be
written next toeach other or abo veeach
ot her. #
Toend character entr y:press briefly on
G.
Setting theke yboard forch aracter entry
Multimedia sy stem:
4 Settings 5
System 5
Controls
5 Keyboards and handwriting #
Confirm Select keyboards.
Select theke yboard language in the list. Sy
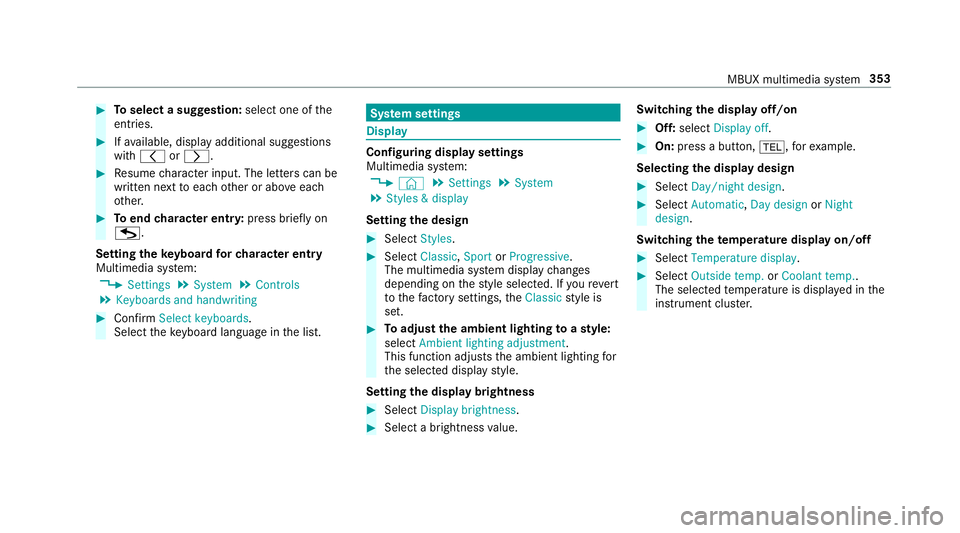
stem settings Display
Configuring display settings
Multimedia sy
stem:
4 © 5
Settings 5
System
5 Styles & display
Setting the design #
Select Styles. #
Select Classic ,Sport orProgressive .
The multimedia sy stem display changes
depending on thest yle selected. If youre ve rt
to thefa ctory settings, theClassic style is
set. #
Toadjust the ambient lighting toastyl e:
select Ambient lighting adjustment.
This function adjusts the ambient lighting for
th e selected display style.
Setting the display brightness #
Select Display brightness . #
Select a brightness value. Switching
the display off/on #
Off: select Display off . #
On: press a button, %,forex ample.
Selecting the display design #
Select Day/night design . #
Select Automatic, Day design orNight
design .
Switching thetemp erature display on/off #
Select Temperature display . #
Select Outside temp. orCoolant temp..
The selec tedte mp erature is displa yed in the
instrument clus ter. MBUX multimedia sy
stem 353
Page 360 of 673
#
Select Connect using WPS PIN input .
The multimedia sy stem generates an eight-
digit PIN. #
Enter this PIN on the device tobe connec ted. #
Confirm the entry.
Connecting using a but ton#
Select the options rofthe desired Wi-Fi
networ k. #
Select Connect via WPS PBC .#
Select "Connect via WPS PBC" in the options
on the device tobe connec ted (see the man‐
ufacturer's operating instructions). #
Press the WPS button on the device tobe
connec ted. #
Select Continue inthe multimedia sy stem.
Ac tivating automatic connection #
Select Connect via Wi-Fi . #
Select the options rofthe desired Wi-Fi
networ k. #
Activate Permanent Internet connection .Connecting with a known
Wi-Fi #
Select Connect via Wi-Fi . #
Select a Wi-Fi networ k.
The connection is es tablished again.
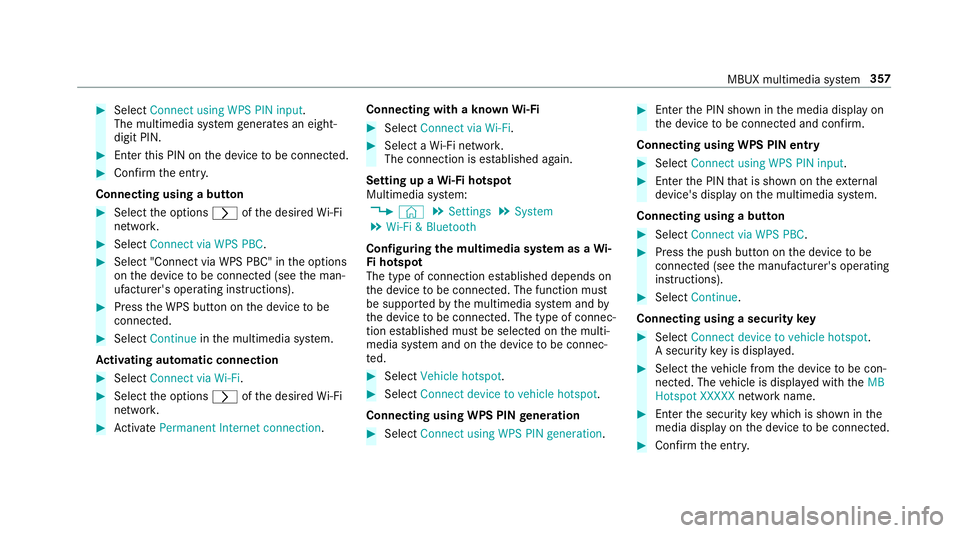
Setting up a Wi-Fi hotspot
Multimedia sy stem:
4 © 5
Settings 5
System
5 Wi-Fi & Bluetooth
Configuring the multimedia sy stem as a Wi-
Fi hotspot
The type of connection es tablished depends on
th e device tobe connec ted. The function must
be suppor tedby the multimedia sy stem and by
th e device tobe connec ted. The type of connec‐
tion es tablished must be selected on the multi‐
media sy stem and on the device tobe connec‐
te d. #
Select Vehicle hotspot. #
Select Connect device to vehicle hotspot .
Connecting using WPS PIN generation #
Select Connect using WPS PIN generation. #
Ente rth e PIN shown in the media display on
th e device tobe connec ted and con firm.
Connecting using WPS PIN entry #
Select Connect using WPS PIN input. #
Enterth e PIN that is shown on theex tern al
device's display on the multimedia sy stem.
Connecting using a button #
Select Connect via WPS PBC. #
Press the push button on the device tobe
connec ted (see the manufacturer's operating
instructions). #
Select Continue.
Connecting using a security key #
Select Connect device to vehicle hotspot .
A secu rity key is displa yed. #
Select theve hicle from the device tobe con‐
nec ted. The vehicle is displa yed with theMB
Hotspot XXXXX network name. #
Ente rth e security key which is shown in the
media display on the device tobe connec ted. #
Confirm the entry. MBUX multimedia sy
stem 357
Page 370 of 673
Re
quirement forth e integration of the sleep
data:
R The GARMIN fitness trac ker is synchronised
with the GARMIN account before the begin‐
ning of the journe y.
% IfAT TENTION ASSIST de term ines an exces‐
sive lack of attention, ENERG IZINGCOACH
makes no fur ther suggestions. Further infor‐
mation about ATTENTION ASSIST
(/ page 267).
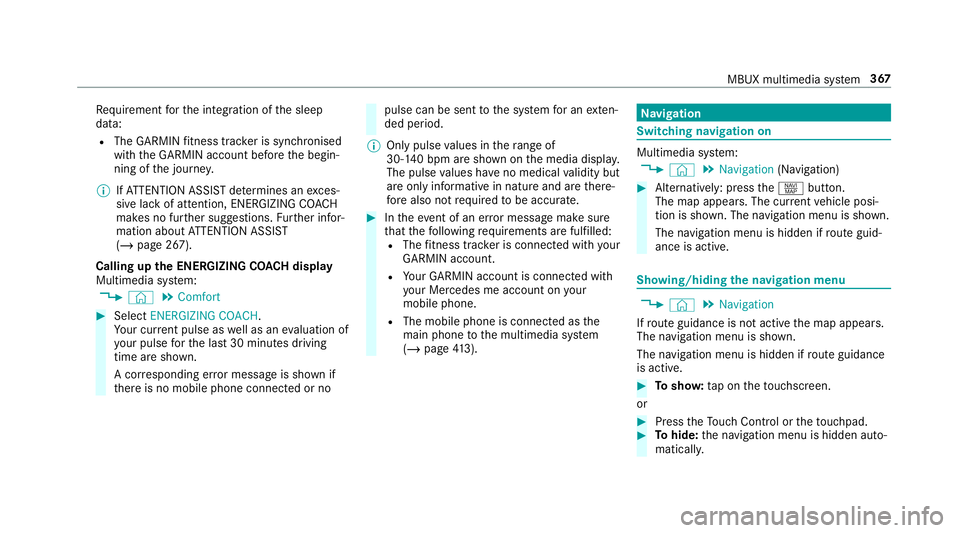
Calling up the ENERGIZING CO ACH display
Multimedia sy stem:
4 © 5
Comfort #
Select ENERGIZING COACH.
Yo ur cur rent pulse as well as an evaluation of
yo ur pulse forth e last 30 minutes driving
time are shown.
A cor responding er ror messa geis shown if
th ere is no mobile phone connected or no pulse can be sent
tothe sy stem for an exten‐
ded pe riod.
% Only pulse values in thera nge of
30‑140 bpm are shown on the media displa y.
The pulse values ha veno medical validity but
are only informative in nature and are there‐
fo re also not requ ired tobe accura te. #
Intheeve nt of an er ror messa gemake sure
th at thefo llowing requ irements are fulfilled:
R The fitness trac ker is connected with your
GARMIN account.
R Your GARMIN account is connected with
yo ur Mercedes me account on your
mobile phone.
R The mobile phone is connected as the
main phone tothe multimedia sy stem
(/ page 413). Na
vigation Switching navigation on
Multimedia sy
stem:
4 © 5
Navigation (Navigation) #
Alternatively: press thez button.
The map appears. The cur rent vehicle posi‐
tion is shown. The navigation menu is shown.
The navigation menu is hidden if route guid‐
ance is active. Showing/hiding
the navigation menu 4
© 5
Navigation
If ro ute guidance is not active the map appears.
The navigation menu is shown.
The navigation menu is hidden if route guidance
is active. #
Tosho w:tap on theto uchsc reen.
or #
Press theTo uch Control or theto uchpad. #
Tohide: the navigation menu is hidden auto‐
maticall y. MBUX multimedia sy
stem 367
Page 375 of 673
Using online sear
ch
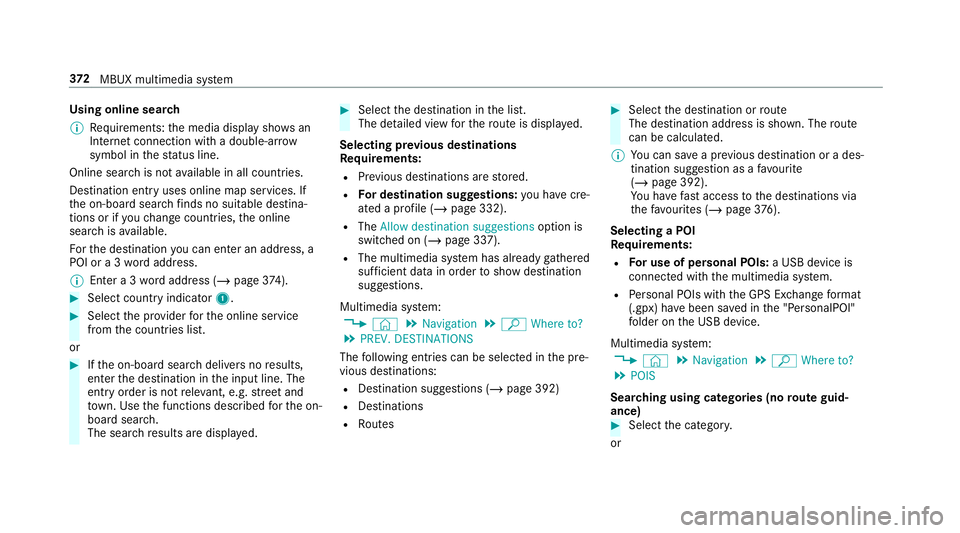
% Requirements: the media display sho wsan
In te rn et connection wi tha double-ar row
symbol in thest atus line.
Online sear chis not available in all countries.
De stination ent ryuses online map services. If
th e on-board sear chfinds no suitable de stina‐
tions or if youch ange countries, the online
sear chisavailable.
Fo rth e destination you can en ter an addre ss, a
POI or a 3 wordaddress.
% Enter a 3 wordaddress (/ page374). #
Select country indica tor1. #
Select the pr ovider forth e online service
from the count ries list.
or #
Ifth e on-board sear chdelivers no results,
enter the destination in the input line. The
entry order is not releva nt, e.g. stre et and
to wn. Use the functions described forth e on-
board sear ch.
The sear chresults are displa yed. #
Select the destination in the list.
The de tailed view forth ero ute is displ ayed.
Selecting pr evious destinations
Re quirements:
R Prev ious destinations are stored.
R For destination sug gestions: you ha vecre‐
ated a profile (/ page 332).
R The Allow destination suggestions option is
switched on (/ page 337).
R The multimedia sy stem has already gathered
suf ficient da tain order toshow destination
suggestions.
Multimedia sy stem:
4 © 5
Navigation 5
ª Where to?
5 PREV. DESTINATIONS
The following ent ries can be selected in the pre‐
vious destinations:
R Destination suggestions (/ page 392)
R Destinations
R Routes #
Select the destination or route
The destination address is shown. The route
can be calculated.
% You can sa vea pr evious destination or a des‐
tination suggestion as a favo urite
(/ page 392).
Yo u ha vefast access tothe destinations via
th efa vo urites (/ page376).
Selec ting a POI
Requ irements:
R For use of personal POIs: a USB device is
connected wi th the multimedia sy stem.
R Personal POIs with the GPS Ex change form at
(.gpx) ha vebeen sa ved in the "PersonalPOI"
fo lder on the USB device.
Multimedia sy stem:
4 © 5
Navigation 5
ª Where to?
5 POIS
Sear ching using categories (no route guid‐
ance) #
Select the categor y.
or 372
MBUX multimedia sy stem