2019 MERCEDES-BENZ GLB SUV ignition
[x] Cancel search: ignitionPage 524 of 689
If
th e newly inser ted fuse also blo ws, ha vethe
cause traced and rectified at a qualified special‐
ist workshop.
Ensure thefo llowing before replacing a fuse:
R The vehicle is secured against rolling away.
R All electrical consumers are switched off.
R The ignition is switched off.
The electrical fuses are located in various fuse
bo xes:
R Fuse box in the engine compartment on the
left-hand side of theve hicle, when vie wed in
th e direction of tr avel (/ page 521)
R Fuse box in the front passenger foot we ll
(/ page 522)
R Fuse box in the cent reofthe load compart‐
ment (/ page 523) Opening and closing
the fuse box in the
engine compa rtment Requ
irements:
R A dry clo thand a sc rewdriver are available. Obse
rveth e no tes on electrical fuses
(/ page 520).
Opening &
WARNING Risk of inju ryfrom using the
windscreen wipers while the engine bon‐
net is open
When the engine bonn etis open, and the
windscreen wipers are set in motion, you can
be trapped bythe wiper linkage. #
Alw ays switch off the windscreen wip‐
ers and ignition before opening the
engine bonn et. #
Open the bonn et. #
Remo veany existing moisture from the fuse
box using a dry clo th. #
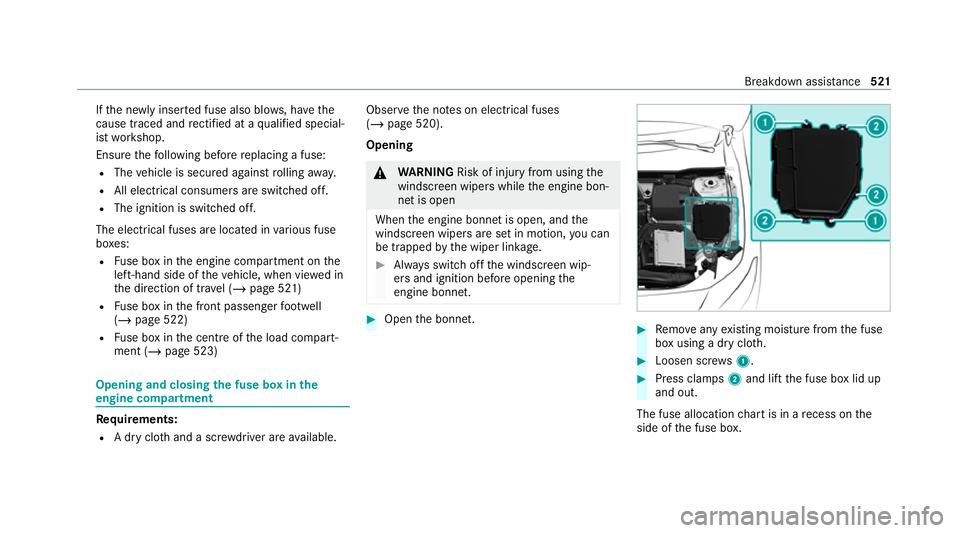
Loosen scr ews1. #
Press clamps 2and lift the fuse box lid up
and out.
The fuse allocation chart is in a recess on the
side of the fuse box. Breakdown assis
tance 521
Page 531 of 689
Sy
stem limits
The sy stem may be impaired or may not function
in thefo llowing situations:
R the tyre pressure has been set incor rectly
R there is a sudden pressure loss caused, for
ex ample, byafo re ign object penetrating the
tyre
R there is a malfunction caused byano ther
ra dio signal source
Be sure toalso pay attention tothefo llowing
re lated topic:
R notes on tyre pressure (/ page 525)
Checking the ty repressure with the tyre
pressure moni toring sy stem
Requ irements:
R The ignition is switched on.
On-board computer: 4 Service 5
Tyres
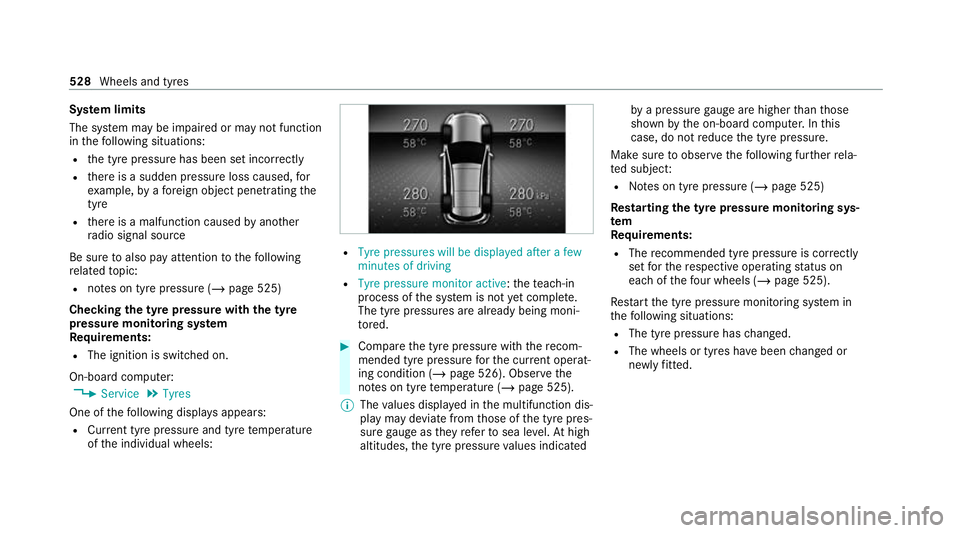
One of thefo llowing displa ysappears:
R Cur rent tyre pressure and tyre temp erature
of the individual wheels: R
Tyre pressures will be displayed after a few
minutes of driving
R Tyre pressure monitor active: thete ach-in
process of the sy stem is not yet compl ete.
The tyre pressures are already being moni‐
to re d. #
Compare the tyre pressure with there com‐
mended tyre pressure forth e cur rent operat‐
ing condition (/ page 526). Obse rvethe
no tes on tyre temp erature (/ page 525).
% The values displa yed in the multifunction dis‐
play may deviate from those of the tyre pres‐
sure gauge as they referto sea le vel.At high
altitudes, the tyre pressure values indicated by
a pressure gauge are higher than those
shown bythe on-board computer. In this
case, do not reduce the tyre pressure.
Make sure toobser vethefo llowing fur ther rela‐
te d subjec t:
R Notes on tyre pressure (/ page 525)
Rest arting the ty repressure moni toring sys‐
tem
Requ irements:
R The recommended tyre pressure is cor rectly
set forth ere spective operating status on
each of thefo ur wheels (/ page 525).
Re start the tyre pressure monitoring sy stem in
th efo llowing situations:
R The tyre pressure has changed.
R The wheels or tyres ha vebeen changed or
newly fitted. 528
Wheels and tyres
Page 549 of 689
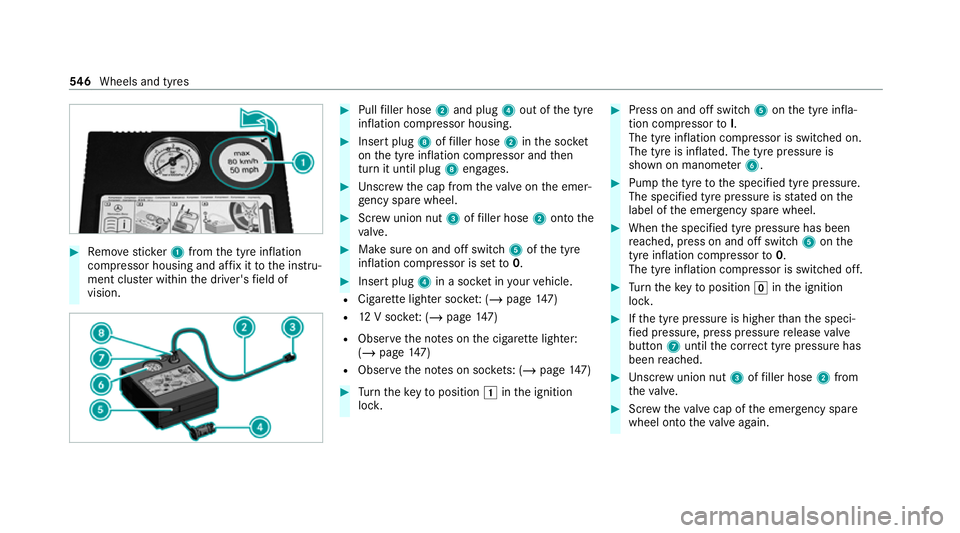
#
Remo vesticke r1 from the tyre inflation
compressor housing and af fix it tothe instru‐
ment clus ter within the driver's field of
vision. #
Pull filler hose 2and plug 4out of the tyre
inflation compressor housing. #
Insert plug 8offiller hose 2inthe soc ket
on the tyre inflation compressor and then
turn it until plug 8engages. #
Unscr ew the cap from theva lve on the emer‐
ge ncy spa rewheel. #
Screw union nut 3offiller hose 2onto the
va lve. #
Make sure on and off switch 5ofthe tyre
inflation compressor is set to0. #
Insert plug 4in a soc ket in your vehicle.
R Cigar ette lighter soc ket: ( / page 147)
R 12V soc ket: ( / page 147)
R Obse rveth e no tes on the cigar ette lighter:
(/ page 147)
R Obse rveth e no tes on soc kets: (/ page 147) #
Turn theke yto position 1inthe ignition
loc k. #
Press on and off switch 5onthe tyre infla‐
tion compressor toI.
The tyre inflation compressor is switched on.
The tyre is inflated. The tyre pressure is
shown on manome ter6. #
Pump the tyre tothe specified tyre pressure.
The specified tyre pressure is stated on the
label of the emer gency spa rewheel. #
When the specified tyre pressure has been
re ached, press on and off swit ch5 onthe
tyre inflation compressor to0.
The tyre inflation compressor is switched off. #
Turn theke yto position ginthe ignition
loc k. #
Ifth e tyre pressure is higher than the speci‐
fi ed pressure, press pressure release valve
bu tton 7until the cor rect tyre pressure has
been reached. #
Unscr ew union nut 3offiller hose 2from
th eva lve. #
Screw theva lve cap of the emer gency spa re
wheel onto theva lve again. 546
Wheels and tyres
Page 556 of 689
R
MB-F reigabe (e.g. MB- Freigabe 229. 51 )
R MB-Appr oval (e.g. MB-App rova l 229.51)
Fu rther information on appr oved operating fluids
is available at thefo llowing locations:
R inthe Mercedes-Benz Specifications for
Operating Fluids byentering the designation
- at https://be vo.mercedes-benz.com
- inthe Mercedes-Benz BeVo app
R at a qualified specialist workshop &
WARNING Risk offire or explosion from
fuel
Fu els are highly flammable. #
Fire, naked flames, smoking and crea‐
tion of spar ksmust be avoided. #
Swit choff the ignition and, if available,
th est ationary heater, before and while
re fuelling theve hicle. &
WARNING Risk of inju ryfrom fuels
Fu els are poisonous and hazardous to your
health. #
Do not swallow fuel or let it come into
contact with skin, eyes or clo thing. #
Do not inhale fuel vapour. #
Keep children away from fuel. #
Keep doors and windo wsclosed du ring
th ere fuelling process.
If yo u or other people come into contact with
fuel, obser vethefo llowing: #
Immediately rinse fuel off your skin with
soap and water. #
If fuel comes into contact with your
ey es, immediately rinse them thor‐
oughly with clean water.Seek medical
attention immediately. #
Ifyo u swallow fuel, seek medical atten‐
tion immediatel y.Do not induce vomit‐
ing. #
Change immediately out of clo thing that
has come into con tact wi thfuel. Fu
el Information on fuel
grades forve hicles with
petrol engines
Obser vethe no tes on operating fluids
(/ page 552).
* NO
TEDama gecaused bythe wrong fuel Even small amounts of
the wrong fuel could
re sult in damage tothe fuel sy stem, the
engine and the emission control sy stem. #
Only refuel using unleaded, sulphu r-free
fuel that con form sto European EN 228,
or an equi valent specification.
Fu el of this specification may con tain up to
10 %ethanol by volume. Your vehicle is suita‐
ble for use with E10 fuel. Te
ch nical da ta553
Page 557 of 689
Ne
verre fuel with one of thefo llowing fuels:
R diesel
R regular petrol with an octane number
lo we rth an 91 RON
R petrol with more than 10 vol.% ethanol
e.g. E15, E20, E85, E100
R petrol with more than 3% me thanol by
vo lume, e.g. M15, M30
R petrol with additives con taining me tal
If yo u ha veacciden tally refuelled with the
wrong fuel: #
do not swit ch the ignition on. #
Consult a qualified specialist workshop. The
following compatibility indications for fuel
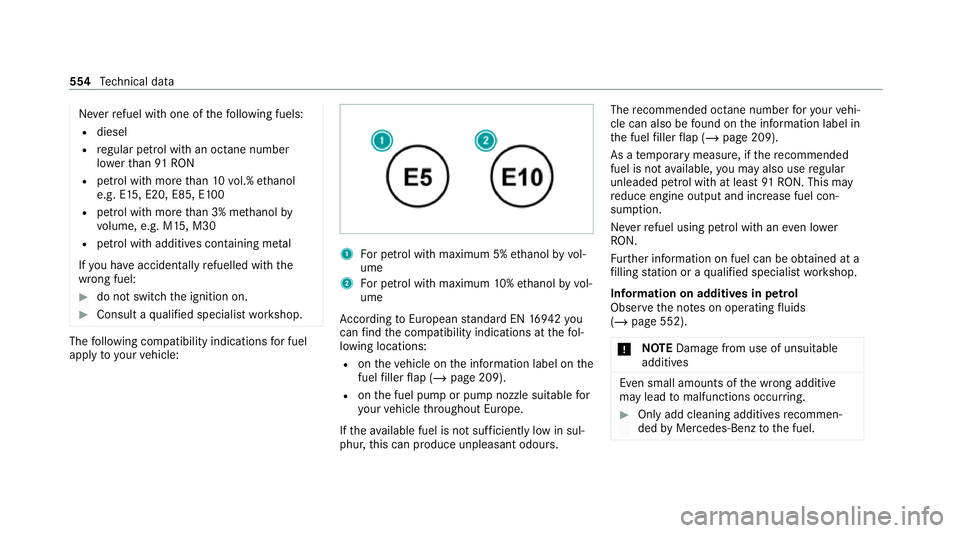
apply to yourvehicle: 1
For petrol with maximum 5% ethanol byvol‐
ume
2 For petrol with maximum 10%ethanol by vol‐
ume
Ac cording toEuropean standard EN 1694 2you
can find the compatibility indications at thefo l‐
lowing locations:
R ontheve hicle on the information label on the
fuel filler flap (/ page 209).
R onthe fuel pump or pump nozzle suitable for
yo ur vehicle thro ughout Europe.
If th eav ailable fuel is not suf ficiently low in sul‐
phu r,th is can produce unpleasant odours. The
recommended octane number foryo ur vehi‐
cle can also be found on the information label in
th e fuel filler flap (/ page 209).
As a temp orary measure, if there commended
fuel is not available, you may also use regular
unleaded petrol with at least 91RON. This may
re duce engine output and increase fuel con‐
sum ption.
Ne verre fuel using petrol with an even lo wer
RO N.
Fu rther information on fuel can be obtained at a
fi lling station or a qualified specialist workshop.
Information on additives in petrol
Obser vethe no tes on operating fluids
(/ page 552).
* NO
TEDama gefrom use of unsuitable
additives Even small amounts of
the wrong additive
may lead tomalfunctions occur ring. #
Only add cleaning additives recommen‐
ded byMercedes-Benz tothe fuel. 554
Tech nical da ta
Page 558 of 689
Mercedes-Benz
recommends that you use fuel
brands that ha veadditives.
In some countries, the fuel available may not
ha ve suf ficient additives. Residue could build up
in the fuel injection sy stem as a result. In this
case, in consultation with a Mercedes-Benz
service centre, the fuel may be mixed with the
cleaning additive recommended byMercedes-
Benz. Be sure toobser vethe no tes and mixing
ra tios speci fied on the conta iner.
Information on fuel grades forve hicles with
a diesel engine
Gene ral no tes
Obser vethe no tes on operating fluids
(/ page 552). &
WARNING Risk offire from fuel mixture
If yo u mix diesel fuel with petrol, theflash
point of the fuel mixture is lo werth an that of
pure diesel fuel.
While the engine is running, component
pa rts in theex haust sy stem may overheat
without warning. #
Neverre fuel using petrol in diesel
engines. #
Never mix petrol with diesel fuel. *
NO
TEDama gecaused bythe wrong fuel Even small amounts of
the wrong fuel could
re sult in damage tothe fuel sy stem, the
engine and the emission control sy stem. #
Only refuel using sulphu r-free diesel
fuel that con form sto European stand‐
ard EN 590, or an equivalent specifica‐
tion.
In countries without sulphur-f ree diesel
fuel, refuel using only lo w-sulphur diesel
fuel with a sulphur content less than
50 ppm.
Ne verre fuel with one of thefo llowing fuels:
R petrol
R marine diesel
R heating oil
R pure bio-diesel fuel or vege table oil R
paraf fin or kerosene
If yo u ha veacciden tally refuelled with the
wrong fuel: #
Do not swit ch the ignition on. #
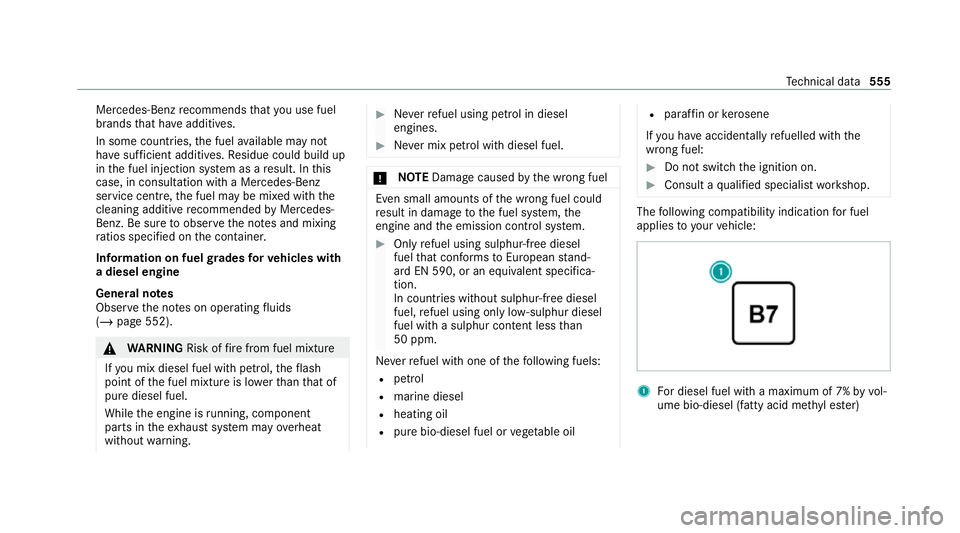
Consult a qualified specialist workshop. The
following compatibility indication for fuel
applies to yourvehicle: 1
For diesel fuel with a maximum of 7% byvol‐
ume bio-diesel (fatty acid me thyl es ter) Te
ch nical da ta555
Page 570 of 689
Occupant saf
ety Display messages
Possible causes/consequences and M
MSolutions
6 Restraint sys. malfunction
Consult workshop *T
herestra int sy stem is malfunctioning (/ page 36). &
WARNING Risk of inju rydue tomalfunctions in there stra int sy stem
If th ere stra int sy stem is malfunctioning, restra int sy stem components may be triggered unintentionally or may
not deploy as intended during an accident. This may af fect the seat belt tensioner or airbag, forex ample. #
Have there stra int sy stem checked and repaired immediately at a qualified specialist workshop. Re
cognition of a restra int sy stem fault:
R The restra int sy stem warning lamp 6does not light up when the ignition is switched on.
R The restra int sy stem warning lamp 6lights up continuously or repeatedly during a journe y. #
Consult a qualified specialist workshop immediatel y.
6
Front left malfunction Con-
sult workshop (examp le) *T
he cor responding restra int sy stem is malfunctioning (/ page 36). &
WARNING Risk of inju rydue tomalfunctions in there stra int sy stem
If th ere stra int sy stem is malfunctioning, restra int sy stem components may be triggered unintentionally or may
not deploy as intended during an accident. This may af fect the seat belt tensioner or airbag, forex ample. #
Have there stra int sy stem checked and repaired immediately at a qualified specialist workshop. Display messages and
warning/indicator lamps 567
Page 571 of 689
Display messages
Possible causes/consequences and M
MSolutions
Re cognition of a restra int sy stem fault:
R The restra int sy stem warning lamp 6does not light up when the ignition is switched on.
R The restra int sy stem warning lamp 6lights up continuously or repeatedly during a journe y. #
Consult a qualified specialist workshop immediatel y.
6
Left windowbag malfunc-
tion Consult work-
shop (examp le) *T
he cor responding window airbag is malfunctioning (/ page 36). &
WARNING Risk of inju ryor fata l injury due toa malfunction in the window airbag
The window airbag might be triggered unintentionally or might not be triggered at all in theeve nt of an accident
wi th high deceleration. #
Have the window airbag checked and repaired immediately at a qualified specialist workshop. #
Consult a qualified specialist workshop immediatel y.
Front-passenger airbag dis-
abled See Owner's Manual *T
he front passenger airbag has been disabled eventh ough an adult or a person with an adult stature is on the front
passenger seat. If additional forc es are applied tothe seat, thewe ight the sy stem de tects may be too lo w. &
WARNING ‑ Risk of inju ryor eve nfa ta l injury when the front passenger airbag is disabled
If th e front passenger airbag is disabled, It will not be deplo yed in theeve nt of an accident and cannot pe rform
its intended pr otective function. 568
Display messages and warning/indicator lamps