2019 MERCEDES-BENZ GLA fuel cap
[x] Cancel search: fuel capPage 13 of 346

Deactivating/activating (except
Mercedes‑AMG vehicles) ................. 64
Deactivating/activating (on-
board computer, except
Mercedes-AMG vehicles) ............... 197
Display message ............................ 204
Function/notes................................ 63
General notes .................................. 63
Important safety information ........... 64
Trailer stabilization ........................... 66
Warning lamp ................................. 235
ETS/4ETS (Electronic Traction
System)................................................ 64
Exhaust
see Exhaust pipe
Exhaust check................................... 149
Exhaust pipe
Cleaning ......................................... 283
Exterior lighting
Cleaning ......................................... 282
see Lights
Exterior mirrors
Adjusting ......................................... 98
Dipping (automatic) ......................... 99
Folding in when locking (on-
board computer) ............................ 200
Folding in/out (automatically)......... 99
Folding in/out (electrically) ............. 99
Out of position (troubleshooting) ..... 99
Setting ............................................. 99
Storing settings (memory func-
tion) ............................................... 101
Storing the parking position .......... 100
Eyeglasses compartment................. 251
F
Favorites
Overview ........................................ 244
Filler cap
see Refueling
Flat tire
MOExtended tires.......................... 288
Preparing the vehicle ..................... 287
TIREFIT kit ...................................... 289
see Emergency spare wheel
Floormats........................................... 272
Fog lamps
Switching on/off........................... 103
Frequencies
Mobile phone ................................. 332
Two-way radio ................................ 332
Front fog lamps
Display message ............................ 215
Switching on/off........................... 103
Front-passenger seat
Folding the backrest forward/
back ............................................... 252
Fuel
Additives ........................................ 336
Consumption statistics .................. 192
Displaying the current consump-
tion ................................................ 192
Displaying the range ...................... 192
Driving tips .................................... 149
E10 ................................................ 335
Fuel gauge....................................... 32
Grade (gasoline)............................ 335
Important safety notes .................. 335
Problem (malfunction) ................... 145
Refueling ........................................ 142
Tank content/reserve fuel............. 335
Fuel filler flap
Opening ......................................... 144
Fuel level
Calling up the range (on-board
computer) ...................................... 192
Fuel tank
Capacity ........................................ 335
Problem (malfunction) ................... 145
Fuses
Allocation chart ............................. 302
Before changing ............................. 301
Fuse box in the engine compart-
ment .............................................. 302
Fuse box in the front-passenger
footwell .......................................... 302
Important safety notes .................. 301
G
Garage door opener
Clearing the memory ..................... 271
General notes ................................ 268
Important safety notes .................. 268
Index11
Page 21 of 346

Segments ...................................... 188
Selecting the display unit............... 198
SPORT handling mode
Deactivating/activating
(Mercedes-AMG vehicles) ................ 65
Warning lamp ................................. 236
Standing lamps
Display message ............................ 215
Switching on/off........................... 103
Start-off assist
Activating ....................................... 166
Important safety notes .................. 166
Start/Stop button
Removing ....................................... 126
Starting the engine ........................ 127
Start/stop function
see ECO start/stop function
Starting (engine)................................ 126
STEER CONTROL.................................. 67
Steering
Display message ............................ 228
Steering assistant STEER CON-
TROL
see STEER CONTROL
Steering wheel
Adjusting (manually) ........................ 97
Button overview ............................... 33
Buttons (on-board computer) ......... 189
Cleaning ......................................... 284
Important safety notes .................... 97
Paddle shifters ............................... 140
Steering wheel paddle shifters........ 140
Stopwatch (RACETIMER)................... 201
Stowage compartments
Armrest (front) ............................... 251
Armrest (under) ............................. 252
Center console .............................. 251
Center console (rear) ..................... 252
Cup holders ................................... 257
Eyeglasses compartment ............... 251
Glove box ....................................... 251
Important safety information ......... 250
Map pockets .................................. 252
Stowage net ................................... 252
Stowage net....................................... 252
Summer opening
see Convenience opening feature
Summer tires..................................... 306
Sun visor............................................ 258
Suspension setting
AMG adaptive sport suspension
system ........................................... 168
SVHC (Substances of Very High
Concern)............................................... 28
Switching air-recirculation mode
on/off................................................. 122
Switching on media mode
Via the device list .......................... 248
T
Tachometer........................................ 188
Tail lamps
see Lights
Tailgate
Display message ............................ 227
Emergency unlocking ....................... 82
Important safety notes .................... 77
Limiting the opening angle ............... 82
Obstruction detection...................... 78
Opening dimensions ...................... 339
Opening/closing (from outside) ....... 78
Opening/closing automatically
from inside ....................................... 81
Opening/closing automatically
from outside .................................... 79
Tank
see Fuel tank
Tank content
Fuel gauge ....................................... 32
Technical data
Capacities ...................................... 334
Information .................................... 332
Tires/wheels ................................. 329
Vehicle data ................................... 339
Telephone
Accepting a call (multifunction
steering wheel) .............................. 196
Authorizing a mobile phone (con-
necting) ......................................... 246
Authorizing a mobile phone via
the device manager (connecting) ... 247
Connecting a mobile phone
(device manager) ........................... 247
Index19
Page 145 of 346
GWARNING
Fuels are toxic and harmful to health. There
is a risk of injury.
You must avoid fuels coming into contact
with skin, eyes and clothes or being swal-
lowed.
Do not inhale the fuel vapors. Keep children
away from fuels.
Keep doors and windows closed during the
refueling process.
If you or others come into contact with fuel,
observe the following points:
RImmediately rinse the fuel off your skin
with soap and water.
RIf you get fuel into your eyes, immediately
rinse your eyes throughly with clean
water. Seek medical attention immedi-
ately.
RSeek medical attention immediately if fuel
has been swallowed. Do not induce vomit-
ing.
RImmediately change out of clothing which
has come into contact with fuel.
GWARNING
Electrostatic charging can lead to the crea-
tion of sparks and ignite fuel vapor. There is
a risk of fire and explosion.
Touch the metallic body of the vehicle
before you open the fuel filler cap or handle
the pump nozzle. Any possible electrostatic
charge present will in this way be depleted.
Do not get into the vehicle again during the
refueling process. Otherwise, electrostatic
charge could build up again.
!Do not use diesel to refuel vehicles with agasoline engine. Do not switch on the igni-tion if you accidentally refuel with the wrongfuel. Otherwise, the fuel will enter the fuelsystem. Even small amounts of the wrongfuel could result in damage to the fuel sys-tem and the engine. Notify a qualified spe-cialist workshop and have the fuel tank andfuel lines drained completely.
!Overfilling the fuel tank could damage thefuel system.
!Take care not to spill any fuel on paintedsurfaces. You could otherwise damage thepaintwork.
!Use a filter when adding fuel from a fuelcan. The fuel lines and/or the fuel injectionsystem could otherwise be blocked by parti-cles from the fuel can.
Do not get into the vehicle again during therefueling process. Otherwise, electrostaticcharge could build up again.
If you overfill the fuel tank, fuel could sprayout when the fuel pump nozzle is removed.
For further information on fuel and fuel quality(Ypage 334).
Refueling
General information
Pay attention to the important safety notes(Ypage 142).
The fuel filler flap is unlocked/locked automat-ically when you unlock/lock the vehicle withthe SmartKey.
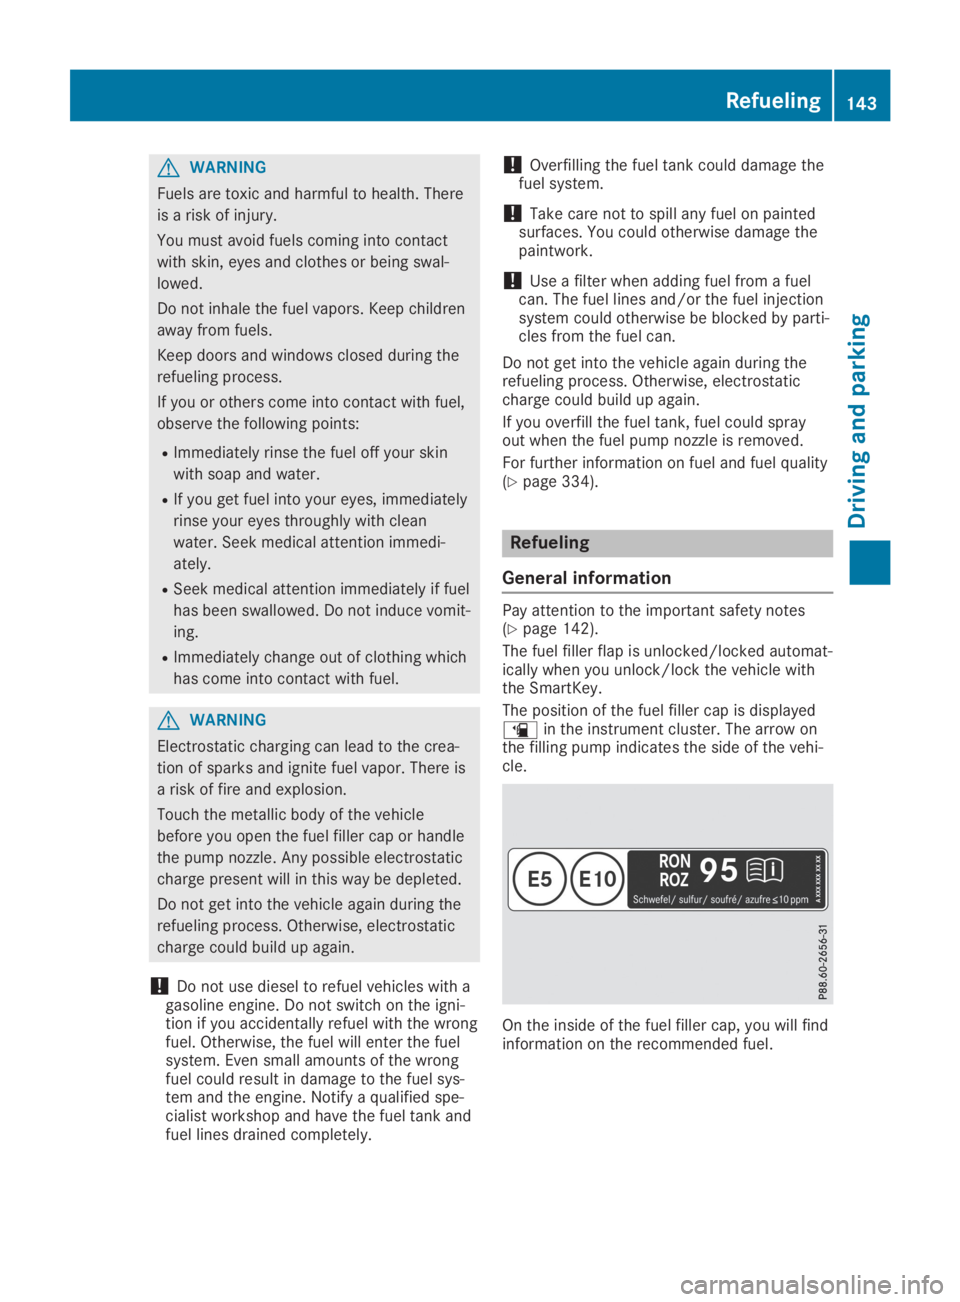
The position of the fuel filler cap is displayed�
Page 157 of 346
RDrive slowly and evenly, if necessary at awalking pace.
REnsure that the wheels are in contact withthe ground at all times.
RDrive with extreme care on unfamiliar off-road routes where visibility is poor. Forsafety reasons, get out of the vehicle firstand survey the off-road route.
RCheck the depth of water before fording riv-ers and streams.
RWatch out for obstacles.
RTake care when turning on an uphill ordownhill slope or when driving across aslope. The vehicle could otherwise tip over.
RAlways keep the side windows and the pan-orama roof with power tilt/sliding panelclosed during the journey.
RDo not deviate from marked routes.
RDo not use the HOLD function when drivingoff-road, on steep uphill or downhill gradi-ents or on slippery or loose surfaces. TheHOLD function cannot hold the vehicle onsuch surfaces.
Checklist before driving off-road
XEngine oil level:check the engine oil leveland add oil if necessary.
When driving on steep gradients, the engineoil level must be sufficiently high to ensure acorrect oil supply in the vehicle.
XWheels and tires:check the tire treaddepth and tire pressure.
XCheck for damage and remove any foreignobjects, e.g. small stones, from the wheels/tires.
XReplace any missing valve caps.
XReplace dented or damaged wheels.
XRims:dented or bent rims can result in aloss of tire pressure and damage the tirebead. Before driving off-road, check thewheels and replace them if necessary.
Checklist after driving off-road
!If you detect damage to the vehicle afterdriving off-road, have the vehicle checkedimmediately at a qualified specialist work-shop.
XDeactivate off-road program (Ypage 132).
XDeactivate DSR (Ypage 169).
XClean the headlamps and rear lights andcheck for damage.
XClean the front and rear license plates.
XClean the wheels and tires with a water jetand remove any foreign objects.
XClean the wheels, wheel housings and thevehicle underside with a water jet; check forany foreign objects and damage.
XCheck whether twigs or other parts of plantshave become trapped. These increase therisk of fire and can damage fuel pipes, brakehoses or the air bellows of the axle jointsand propeller shafts.
XAfter the trip, examine without fail the entireundercarriage, wheels, tires, brakes, body-work structure, steering, chassis andexhaust system for damage.
XAfter driving in sand, mud, gravel, water orsimilar dirty conditions, have the followingchecked and cleaned:
Rbrake discs
Rwheels
Rbrake pads
Raxle joints
XIf you detect strong vibrations after off-roadtravel, check for foreign objects in thewheels and drive train and remove them ifnecessary. Foreign objects can disturb thebalance and cause vibrations.
Driving over poor road surfaces places greaterdemands on your vehicle than driving on nor-mal roads. After driving off-road, check thevehicle. This allows you to detect damagepromptly and reduce the risk of an accident toyourself and other road users.
Driving on sand
Observe the following rules when driving onsand:
RActivate the off-road program (Ypage 132).
RAvoid high engine speeds.
RUse the left-hand steering wheel paddleshifter to shift to a lower gear appropriate tothe terrain.
Drivingtips155
Driving an d parking
Z
Page 293 of 346
Tire pressure not reached
If a pressure of 180 kPa (1.8 bar/26 psi) hasnot been attained after five minutes:
XSwitch off the tire inflation compressor.
XUnscrew the filler hose from the valve of thefaulty tire.
Note that tire sealant may escape when youunscrew the filler hose.
XUSA only:very slowly drive the vehicle for-wards or reverse approximately 30 ft(10m).
XPump upthe tire again.
After a maximum of five minutes the tirepressure must be at least 180 kPa (1.8 bar/26 psi).
GWARNING
If the required tire pressure is not reached
after the specified time, the tire is too badly
damaged. The tire sealant cannot repair the
tire in this instance. Damaged tires and a
tire pressure that is too low can significantly
impair the vehicle's braking and driving
characteristics. There is a risk of accident.
Do not continue driving. Contact a qualified
specialist workshop.
Tire pressure reached
GWARNING
A tire temporarily sealed with tire sealant
impairs the vehicle's driving characteristics
and is not suitable for driving at higher
speeds. There is a risk of an accident.
Adapt your driving style accordingly and
drive carefully. Do not exceed the maximum
permissible speed for a tire sealed with tire
sealant.
USA only:The maximum permissible speedfor a tire sealed with tire sealant is 50 mph(80 km/h). The upper part of the TIREFITsticker must be affixed to the instrument clus-ter in the driver's field of vision.
If a tire pressure of 180 kPa (1.8 bar/26 psi)has been attained after five minutes:
XSwitch off the tire inflation compressor.
XUnscrew the filler hose from the valve of thefaulty tire.Note that tire sealant may escape when youunscrew the filler hose.
XUSA only:Stow the tire sealant bottle andthe tire inflation compressor.
XPull away immediately.
XStop after driving for approximately tenminutes and check the tire pressure withthe tire inflation compressor.The tire pressure must now be at least130 kPa (1.3 bar/19 psi).
GWARNING
If the required tire pressure is not reached
after driving for a short period, the tire is too
badly damaged. The tire sealant cannot
repair the tire in this instance. Damaged
tires and a tire pressure that is too low can
significantly impair the vehicle's braking and
driving characteristics. There is a risk of
accident.
Do not continue driving. Contact a qualified
specialist workshop.
iUSA only:In cases such as the one men-tioned above, contact an authorizedMercedes-Benz Center. Or call1-800-FOR-MERCedes (in the USA) or1-800-387-0100 (in Canada).
XUSA only:Correct the tire pressure if it isstill at least 130 kPa (1.3 bar/19 psi). Seethe Tire and Loading Information placard onthe driver's side B-pillar or the tire pressuretable in the fuel filler flap for values.
XTo increase the tire pressure:switch onthe tire inflation compressor.
Flat tire291
Roadside Assistance
Z
Page 298 of 346
GWARNING
During the charging process, a battery produces hydrogen gas. If a short circuit occurs or
sparks are created, the hydrogen gas can ignite. There is a risk of an explosion.
RMake sure that the positive terminal of a connected battery does not come into contact with
vehicle parts.
RNever place metal objects or tools on a battery.
RIt is important that you observe the described order of the battery terminals when connect-
ing and disconnecting a battery.
RWhen jump-starting, make sure that the battery poles with identical polarity are connected.
RIt is particularly important to observe the described order when connecting and disconnect-
ing the jumper cables.
RNever connect or disconnect the battery terminals while the engine is running.
GWARNING
A discharged battery can freeze at temperatures below freezing point. When jump-starting the
vehicle or charging the battery, gases can escape from the battery. There is a risk of an explo-
sion.
Allow the frozen battery to thaw out before charging it or jump-starting.
!Avoid repeated and lengthy starting attempts. Otherwise, the catalytic converter could bedamaged by the non-combusted fuel.
If the indicator/warning lamps do not light up in the instrument cluster at low temperatures, it isvery likely that the discharged battery has frozen. In this case you may neither jump-start thevehicle nor charge the battery. Let the battery thaw first. The service life of a thawed-out batterymay be shorter. The starting characteristics can be impaired, particularly at low temperatures.Have the thawed-out battery checked at a qualified specialist workshop.
Do not start the vehicle using a rapid charging device. If your vehicle's battery is discharged, theengine can be jump-started from another vehicle or from a second battery using jumper cables.Observe the following points:
RThe battery is not accessible in all vehicles. If the other vehicle's battery is not accessible,jump-start the vehicle using a second battery or a jump-starting device.
RYou may only jump-start the vehicle when the engine and exhaust system are cold.
RDo not start the engine if the battery is frozen. Let the battery thaw first.
ROnly jump-start from batteries with a 12 V voltage rating.
ROnly use jumper cables that are not damaged and have a sufficient cross-section and insula-ted terminal clamps.
RMake sure that the two vehicles do not touch.
Make sure that:
RThe jumper cables are not damaged.
RNon-insulated parts of the terminal clamps do not come into contact with other metal partswhile the jumper cables are connected to the battery.
RThe jumper cables cannot come into contact with parts that can move when the engine is run-ning, such as the V-belt pulley or the fan.
XSecure the vehicle by applying the electric parking brake.
XShift the transmission to position�].
XTurn the SmartKey to position�Zin the ignition lock and remove it.
296Jump-starting
Roadside Assistance
Page 311 of 346
If the tire pressures have been set to the lowervalues for lighter loads and/or lower roadspeeds, the pressures should be reset to thehigher values:
Rif you want to drive with an increased loadand/or
Rif you want to drive at higher speeds
iThe tire pressures for increased loadsand/or higher road speeds, shown in thetire pressure table, may have a negativeeffect on driving comfort.
If the tire pressure is not set correctly, this canlead to an excessive build-up of heat and asudden loss of pressure.
For more information, contact a qualified spe-cialist workshop.
Important notes on tire pressure
GWARNING
If the tire pressure drops repeatedly, the
wheel, valve or tire may be damaged. Tire
pressure that is too low may result in a tire
blow-out. There is a risk of an accident.
RCheck the tire for foreign objects.
RCheck whether the wheel is losing air or
the valve is leaking.
If you are unable to rectify the damage, con-
tact a qualified specialist workshop.
GWARNING
If you fit unsuitable accessories onto tire
valves, the tire valves may be overloaded
and malfunction, which can cause tire pres-
sure loss. Due to their design, retrofitted tire
pressure monitors keep the tire valve open.
This can also result in tire pressure loss.
There is a risk of an accident.
Only screw the standard valve cap or other
valve caps approved by Mercedes-Benz for
your vehicle onto the tire valve.
Use a suitable pressure gauge to check thetire pressure. The outer appearance of a tiredoes not permit any reliable conclusion aboutthe tire pressure. On vehicles equipped withthe electronic tire pressure monitor, the tire
pressure can be checked in the on-board com-puter.
The tire temperature and pressure increasewhen the vehicle is in motion. This is depend-ent on the driving speed and the load.
Therefore, you should only correct tire pres-sures when the tires are cold.
The tires are cold:
Rif the vehicle has been parked with the tiresout of direct sunlight for at least three hoursand
Rif the vehicle has been driven less than1 mile (1.6 km)
The tire temperature changes depending onthe outside temperature, the vehicle speedand the tire load. If the tire temperaturechanges by 18 ‡ (10 †), the tire pressurechanges by approximately 10 kPa (0.1 bar/1.5 psi). Take this into account when checkingthe pressure of warm tires. Only correct thetire pressure if it is too low for the currentoperating conditions. If you check the tirepressure when the tires are warm, the result-ing value will be higher than if the tires werecold. This is normal. Do not reduce the tirepressure to the value specified for cold tires.The tire pressure would otherwise be too low.
Observe the recommended tire pressures forcold tires:
Ron the Tire and Loading Information placardon the B-pillar on the driver's side
Rin the tire pressure table in the fuel filler flap(Ypage 144)
Underinflated or overinflated tires
Underinflated tires
GWARNING
Tires with pressure that is too low can over-
heat and burst as a consequence. In addi-
tion, they also suffer from excessive and/or
irregular wear, which can severely impair the
braking properties and the driving character-
istics. There is a risk of an accident.
Avoid tire pressures that are too low in all
the tires, including the spare wheel.
Tire pressure309
Wheels and tires
Z
Page 312 of 346
Underinflated tires may:
Roverheat, leading to tire defects
Radversely affect handling
Rwear excessively and/or unevenly
Rhave an adverse effect on fuel consumption
Overinflated tires
GWARNING
Tires with excessively high pressure can
burst because they are damaged more eas-
ily by road debris, potholes etc. In addition,
they also suffer from irregular wear, which
can severely impair the braking properties
and the driving characteristics. There is a
risk of an accident.
Avoid tire pressures that are too high in all
the tires, including the spare wheel.
Overinflated tires may:
Rincrease the braking distance
Radversely affect handling
Rwear excessively and/or unevenly
Rhave an adverse effect on ride comfort
Rbe more susceptible to damage
Maximum tire pressures
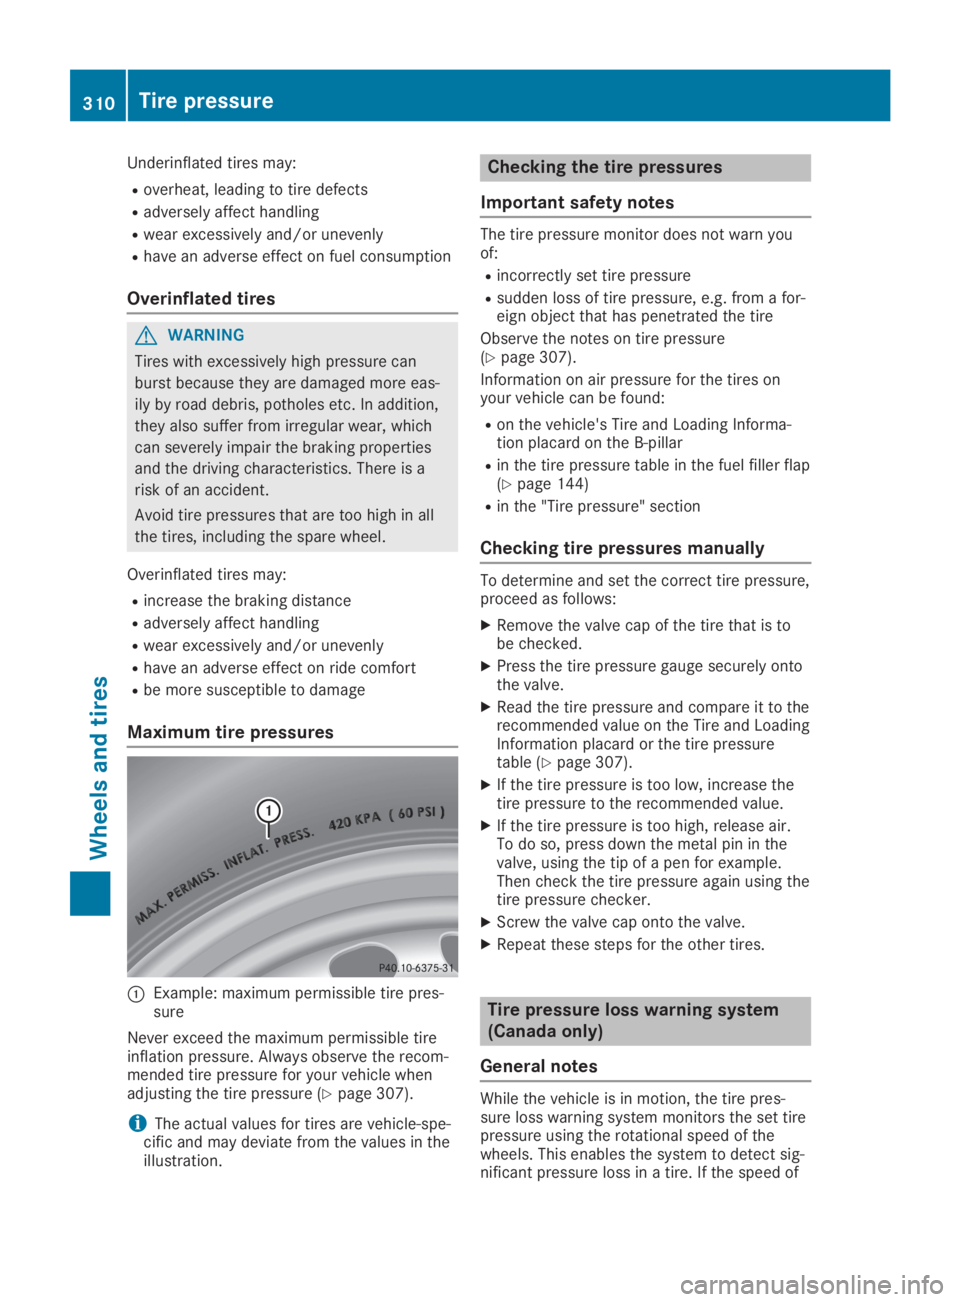
�CExample: maximum permissible tire pres-sure
Never exceed the maximum permissible tireinflation pressure. Always observe the recom-mended tire pressure for your vehicle whenadjusting the tire pressure (Ypage 307).
iThe actual values for tires are vehicle-spe-cific and may deviate from the values in theillustration.
Checking the tire pressures
Important safety notes
The tire pressure monitor does not warn youof:
Rincorrectly set tire pressure
Rsudden loss of tire pressure, e.g. from a for-eign object that has penetrated the tire
Observe the notes on tire pressure(Ypage 307).
Information on air pressure for the tires onyour vehicle can be found:
Ron the vehicle's Tire and Loading Informa-tion placard on the B-pillar
Rin the tire pressure table in the fuel filler flap(Ypage 144)
Rin the "Tire pressure" section
Checking tire pressures manually
To determine and set the correct tire pressure,proceed as follows:
XRemove the valve cap of the tire that is tobe checked.
XPress the tire pressure gauge securely ontothe valve.
XRead the tire pressure and compare it to therecommended value on the Tire and LoadingInformation placard or the tire pressuretable (Ypage 307).
XIf the tire pressure is too low, increase thetire pressure to the recommended value.
XIf the tire pressure is too high, release air.To do so, press down the metal pin in thevalve, using the tip of a pen for example.Then check the tire pressure again using thetire pressure checker.
XScrew the valve cap onto the valve.
XRepeat these steps for the other tires.
Tire pressure loss warning system
(Canada only)
General notes
While the vehicle is in motion, the tire pres-sure loss warning system monitors the set tirepressure using the rotational speed of thewheels. This enables the system to detect sig-nificant pressure loss in a tire. If the speed of
310Tire pressure
Wheels and tires