2019 MERCEDES-BENZ CLA tires
[x] Cancel search: tiresPage 270 of 330
To clean, use plenty of water and a mild cleaningagent without additional or abrasive products,e.g. use a car shampoo approved for Mercedes-Benz.
XDry vehicles covered with film using a soft,absorbent cloth after every wash.Water marks could otherwise form.
Scratches, corrosive deposits, areas affected bycorrosion and damage caused by inadequatecare cannot always be completely repaired. Insuch cases, visit a qualified specialist workshop.
XRemove dirt immediately, where possible,while avoiding rubbing too hard.The decorative film may be irreparably dam-aged.
XSoak insect remains with insect remover andrinse off the treated areas afterwards.
XSoak bird droppings with water and rinse offthe treated areas afterwards.
The Paint Cleaner cleaning product, which hasbeen approved and recommended byMercedes-Benz, should be used when dirt haspenetrated the decorative film surface or thedecorative film has become dull.
The manufacturer can provide you with infor-mation on special care and cleaning products.
Laminated surfaces may exhibit optical differ-ences to surfaces which were not protected by adecorative film when the decorative film isremoved.
iHave work or repairs on decorative film car-ried out at a qualified specialist workshop.Mercedes-Benz recommends that you use anauthorized Mercedes-Benz Center for thispurpose.
Cleaning the vehicle parts
Cleaning the wheels
GWARNING
The water jet from a circular jet nozzle (dirt
blasters) can cause invisible exterior damage
to the tires or chassis components. Compo-
nents damaged in this way may fail unexpect-
edly. There is a risk of an accident.
Do not use power washers with circular jet
nozzles to clean the vehicle. Have damaged
tires or chassis components replaced imme-
diately.
!Do not use acidic wheel cleaning productsto remove brake dust. This could damagewheel bolts and brake components.
!Do not park your vehicle for a long period oftime directly after cleaning, particularly aftercleaning the wheel rim with wheel cleaner.Wheel cleaner can lead to the increased cor-rosion of the brake discs and pads. Therefore,drive for a few minutes after cleaning. Byheating up the brakes, the brake discs andpads dry. The vehicle can then be parked for along period of time.
Cleaning the windows
GWARNING
You could become trapped by the windshield
wipers if they start moving while cleaning the
windshield or wiper blades. There is a risk of
injury.
Always switch off the windshield wipers and
the ignition before cleaning the windshield or
wiper blades.
!Only fold the windshield wipers away fromthe windshield when vertical. Otherwise, youwill damage the hood.
!Do not use dry cloths, abrasive products,solvents or cleaning agents containing sol-vents to clean the inside of the windows. Donot touch the insides of the windows withhard objects, e.g. an ice scraper or ring. Thereis otherwise a risk of damaging the windows.
!Clean the water drainage channels of thewindshield and the rear window at regularintervals. Deposits such as leaves, petals andpollen may under certain circumstances pre-vent water from draining away. This can leadto corrosion damage and damage to elec-tronic components.
XClean the inside and outside of the windowswith a damp cloth and a cleaning product thatis recommended and approved by Mercedes-Benz.
268Care
Maintenance and care
Page 277 of 330
XMake sure that the engine cannot be startedvia your smartphone (Ypage 124).
XMake sure that the passengers are not endan-gered as they do so. Make sure that no one isnear the danger area while a wheel is beingchanged. Anyone who is not directly assistingin the wheel change should, for example,stand behind the barrier.
XGet out of the vehicle. Pay attention to trafficconditions when doing so.
XClose the driver's door.
MOExtended tires (tires with run-flat
properties)
General notes
With MOExtended tires (tires with run flat char-acteristics), you can continue to drive your vehi-cle even if there is a total loss of pressure in oneor more tires. The affected tire must not showany clearly visible damage.
You can recognize a MOExtended tire by theMOExtended marking which appears on thesidewall of the tire. You will find this markingnext to the tire size designation, the load-bear-ing capacity and the speed index (Ypage 305).
MOExtended tires may be used only in conjunc-tion with an activated tire pressure loss warningsystem (Canada only) or tire pressure monitor(USA only).
If a pressure loss warning message appearsin the multifunction display:
Robserve the instructions in the display mes-sages (Ypage 213).
Rcheck the tire for damage
Rif driving on, observe the following notes
The driving distance possible in run-flat mode isapproximately 50 miles (80 km) when the vehi-cle is partially laden. When the vehicle is fullyladen it is approximately 19 miles (30 km).
In addition to the vehicle load, the driving dis-tance possible depends upon:
Rvehicle speed
Rroad condition
Routside temperature
The driving distance possible in run-flat modemay be reduced by extreme driving conditionsor maneuvers, or it can be increased through amoderate style of driving.
The driving distance possible in run-flat mode iscounted from the moment the tire pressure losswarning appears in the multifunction display.
You must not exceed a maximum speed of50 mph (80 km/h).
When replacing one or all tires, please observethe following specifications for your vehicle'stires:
Rsize
Rtype and
Rthe "MOExtended" marking
If a tire has gone flat and cannot be replacedwith a MOExtended tire, a standard tire may beused as a temporary measure. Make sure thatyou use the proper size and type (summer orwinter tire).
Vehicles equipped with MOExtended tires arenot equipped with a TIREFIT kit at the factory. Itis therefore recommended that you additionallyequip your vehicle with a TIREFIT kit if you mounttires that do not feature run-flat properties, e.g.winter tires. A TIREFIT kit may be obtained froma qualified specialist workshop.
Important safety notes
GWARNING
When driving in emergency mode, the driving
characteristics deteriorate, e.g. when corner-
ing, accelerating quickly and when braking.
There is a risk of an accident.
Do not exceed the stated maximum speed.
Avoid abrupt steering and driving maneuvers,
and driving over obstacles (curbs, potholes,
off-road). This applies in particular to a laden
vehicle.
Stop driving in emergency mode if:
Ryou hear banging noises.
Rthe vehicle starts to shake.
Ryou see smoke and smell rubber.
RESP®is intervening constantly.
Rthere are tears in the sidewalls of the tire.
After driving in emergency mode, have the
wheel rims checked at a qualified specialist
workshop with regard to their further use. The
defective tire must be replaced in every case.
Flat tire275
Breakdown assistance
Z
Page 280 of 330
Tire pressure reached
GWARNING
A tire temporarily sealed with tire sealant
impairs the driving characteristics and is not
suitable for higher speeds. There is a risk of
accident.
You should therefore adapt your driving style
accordingly and drive carefully. Do not exceed
the specified maximum speed with a tire that
has been repaired using tire sealant.
USA only:The maximum permissible speed fora tire sealed with tire sealant is 50 mph(80 km/h). The upper part of the TIREFIT stickermust be affixed to the instrument cluster in thedriver's field of vision.
If a tire pressure of 200 kPa (2.0 bar/29 psi) hasbeen attained after ten minutes:
XSwitch off the tire inflation compressor.
XUnscrew the filler hose from the valve of thefaulty tire.Note that tire sealant may escape when youunscrew the filler hose.
XUSA only:Stow the tire sealant bottle and thetire inflation compressor.
XPull away immediately.
XStop after driving for approximately tenminutes and check the tire pressure with thetire inflation compressor.The tire pressure must now be at least130 kPa (1.3 bar/19 psi).
GWARNING
If the required tire pressure is not reached
after driving for a short period, the tire is too
badly damaged. The tire sealant cannot repair
the tire in this instance. Damaged tires and a
tire pressure that is too low can significantly
impair the vehicle's braking and driving char-
acteristics. There is a risk of accident.
Do not continue driving. Contact a qualified
specialist workshop.
iUSA only:In cases such as the one men-tioned above, contact an authorizedMercedes-Benz Center. Or call1-800-FOR-MERCedes (in the USA) or1-800-387-0100 (in Canada).
XUSA only:Correct the tire pressure if it is stillat least 130 kPa (1.3 bar/19 psi). See the Tireand Loading Information placard on the driv-er's side B-pillar or the tire pressure table inthe fuel filler flap for values.
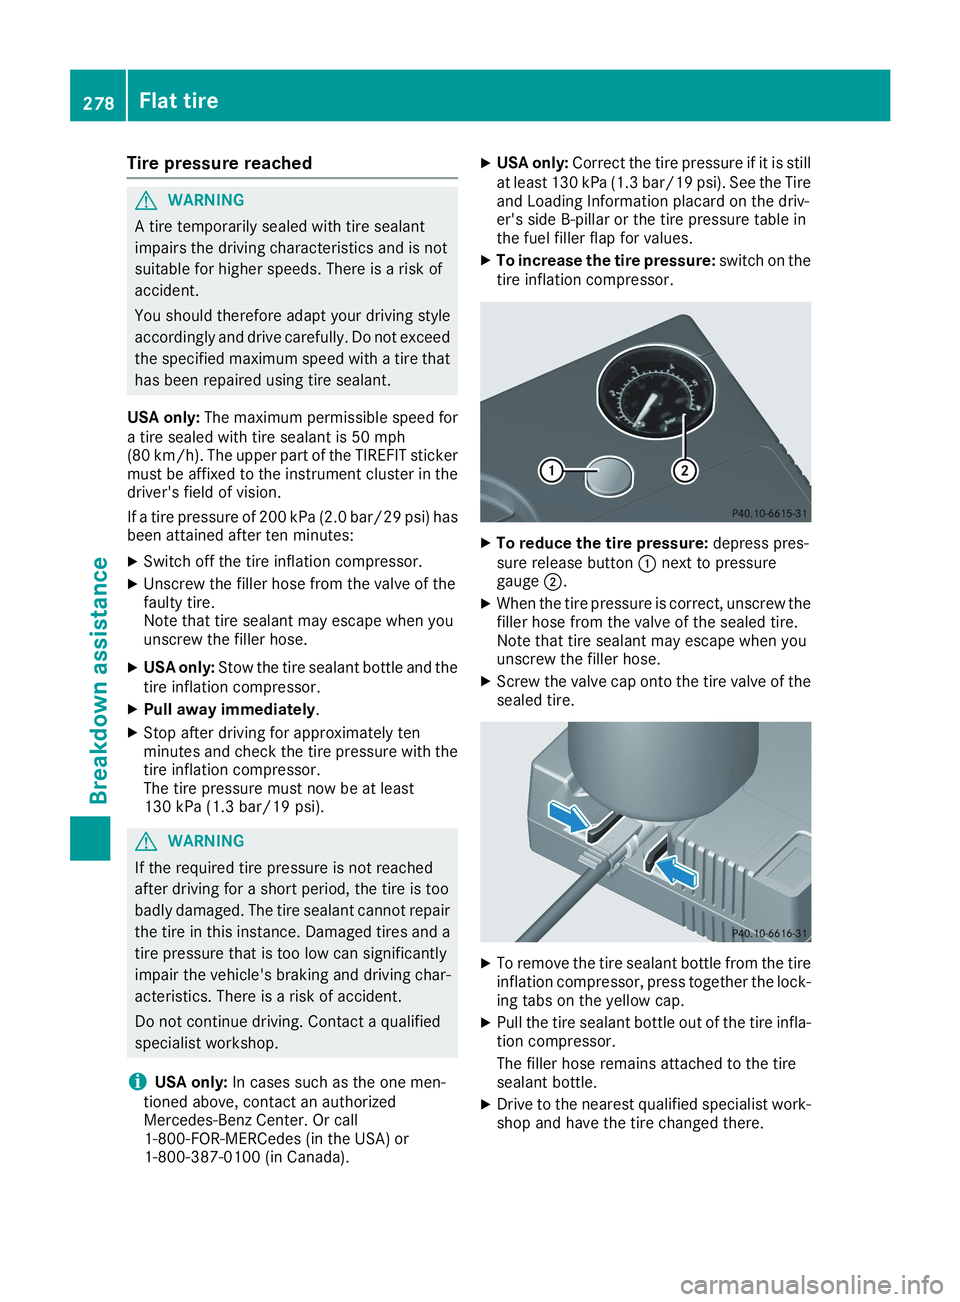
XTo increase the tire pressure:switch on thetire inflation compressor.
XTo reduce the tire pressure:depress pres-sure release button�Cnext to pressuregauge�D.
XWhen the tire pressure is correct, unscrew thefiller hose from the valve of the sealed tire.Note that tire sealant may escape when youunscrew the filler hose.
XScrew the valve cap onto the tire valve of thesealed tire.
XTo remove the tire sealant bottle from the tireinflation compressor, press together the lock-ing tabs on the yellow cap.
XPull the tire sealant bottle out of the tire infla-tion compressor.
The filler hose remains attached to the tiresealant bottle.
XDrive to the nearest qualified specialist work-shop and have the tire changed there.
278Flat tire
Breakdown assistance
Page 292 of 330
Important safety notes
GWARNING
If wheels and tires of the wrong size are used,
the wheel brakes or suspension components
may be damaged. There is a risk of an acci-
dent.
Always replace wheels and tires with those
that fulfill the specifications of the original
part.
When replacing wheels, make sure to use the
correct:
Rdesignation
Rmodel
When replacing tires, make sure to use the
correct:
Rdesignation
Rmanufacturer
Rmodel
GWARNING
A flat tire severely impairs the driving, steer-
ing and braking characteristics of the vehicle.
There is a risk of accident.
Tires without run-flat characteristics:
Rdo not drive with a flat tire.
Rimmediately replace the flat tire with your
emergency spare wheel or spare wheel, or
consult a qualified specialist workshop.
Tires with run-flat characteristics:
Rpay attention to the information and warn-
ing notices on MOExtended tires (tires with
run-flat characteristics).
Accessories that are not approved for your vehi-cle by Mercedes-Benz or are not being used cor-rectly can impair the operating safety.
Before purchasing and using non-approvedaccessories, visit a qualified specialist work-shop and inquire about:
Rsuitability
Rlegal stipulations
Rfactory recommendations
Further information regarding wheels and tirescan be found under "Wheel/tire combinations"(Ypage 315).
You can ask for information regarding permittedwheel/tire combinations at an authorizedMercedes-Benz Center.
Information on tire pressure can be found:
Ron the Tire and Loading Information placardon the B-pillar on the driver's side(Ypage 301)
Rin the tire pressure table in the fuel filler flap(Ypage 141)
Runder "Tire pressure" (Ypage 293)
Operation
Information on driving
Check the tire pressure when the vehicle isheavily laden and adjust prior to a trip.
While driving, pay attention to vibrations, noisesand unusual handling characteristics, e.g. pull-ing to one side. This may indicate that thewheels or tires are damaged. If you suspect thata tire is defective, reduce your speed immedi-ately. Stop the vehicle as soon as possible tocheck the wheels and tires for damage. Hiddentire damage could also be causing the unusualhandling characteristics. If you find no signs ofdamage, have the tires and wheels checked at aqualified specialist workshop.
When parking your vehicle, make sure that thetires do not get deformed by the curb or otherobstacles. If they cannot be avoided, drive overobstacles such as curbs slowly and at an obtuseangle. Otherwise, you may damage the wheelsor tires.
Regular checking of wheels and tires
GWARNING
Damaged tires can cause tire inflation pres-
sure loss. As a result, you could lose control of
your vehicle. There is a risk of accident.
Check the tires regularly for signs of damage
and replace any damaged tires immediately.
290Operation
Wheels and ti res
Page 293 of 330
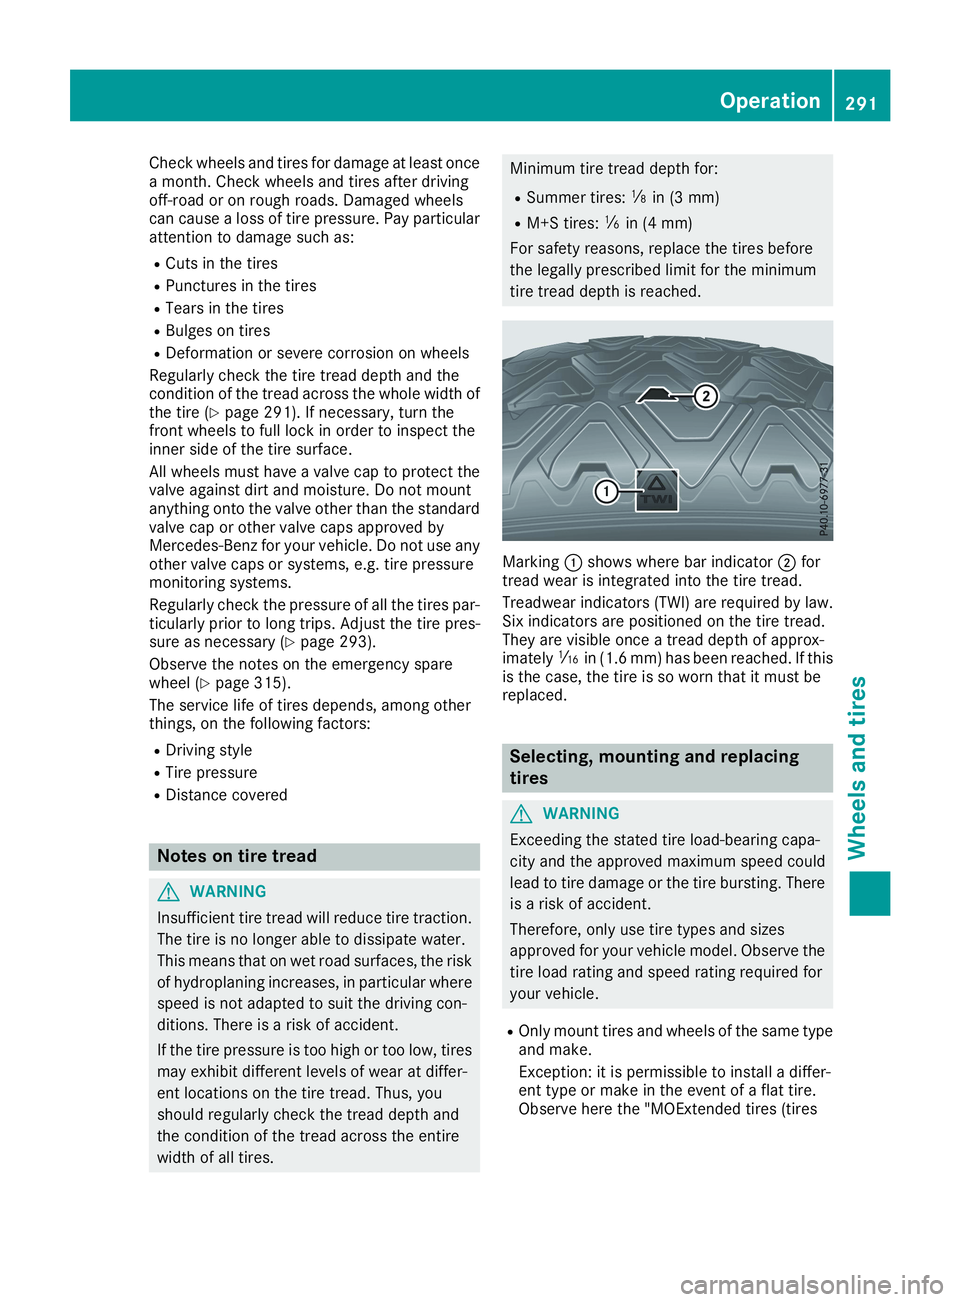
Check wheels and tires for damage at least oncea month. Check wheels and tires after drivingoff-road or on rough roads. Damaged wheelscan cause a loss of tire pressure. Pay particularattention to damage such as:
RCuts in the tires
RPunctures in the tires
RTears in the tires
RBulges on tires
RDeformation or severe corrosion on wheels
Regularly check the tire tread depth and thecondition of the tread across the whole width ofthe tire (Ypage 291). If necessary, turn thefront wheels to full lock in order to inspect theinner side of the tire surface.
All wheels must have a valve cap to protect thevalve against dirt and moisture. Do not mountanything onto the valve other than the standardvalve cap or other valve caps approved byMercedes-Benz for your vehicle. Do not use anyother valve caps or systems, e.g. tire pressuremonitoring systems.
Regularly check the pressure of all the tires par-ticularly prior to long trips. Adjust the tire pres-sure as necessary (Ypage 293).
Observe the notes on the emergency sparewheel (Ypage 315).
The service life of tires depends, among otherthings, on the following factors:
RDriving style
RTire pressure
RDistance covered
Notes on tire tread
GWARNING
Insufficient tire tread will reduce tire traction.
The tire is no longer able to dissipate water.
This means that on wet road surfaces, the risk
of hydroplaning increases, in particular where
speed is not adapted to suit the driving con-
ditions. There is a risk of accident.
If the tire pressure is too high or too low, tires
may exhibit different levels of wear at differ-
ent locations on the tire tread. Thus, you
should regularly check the tread depth and
the condition of the tread across the entire
width of all tires.
Minimum tire tread depth for:
RSummer tires:�
Page 294 of 330
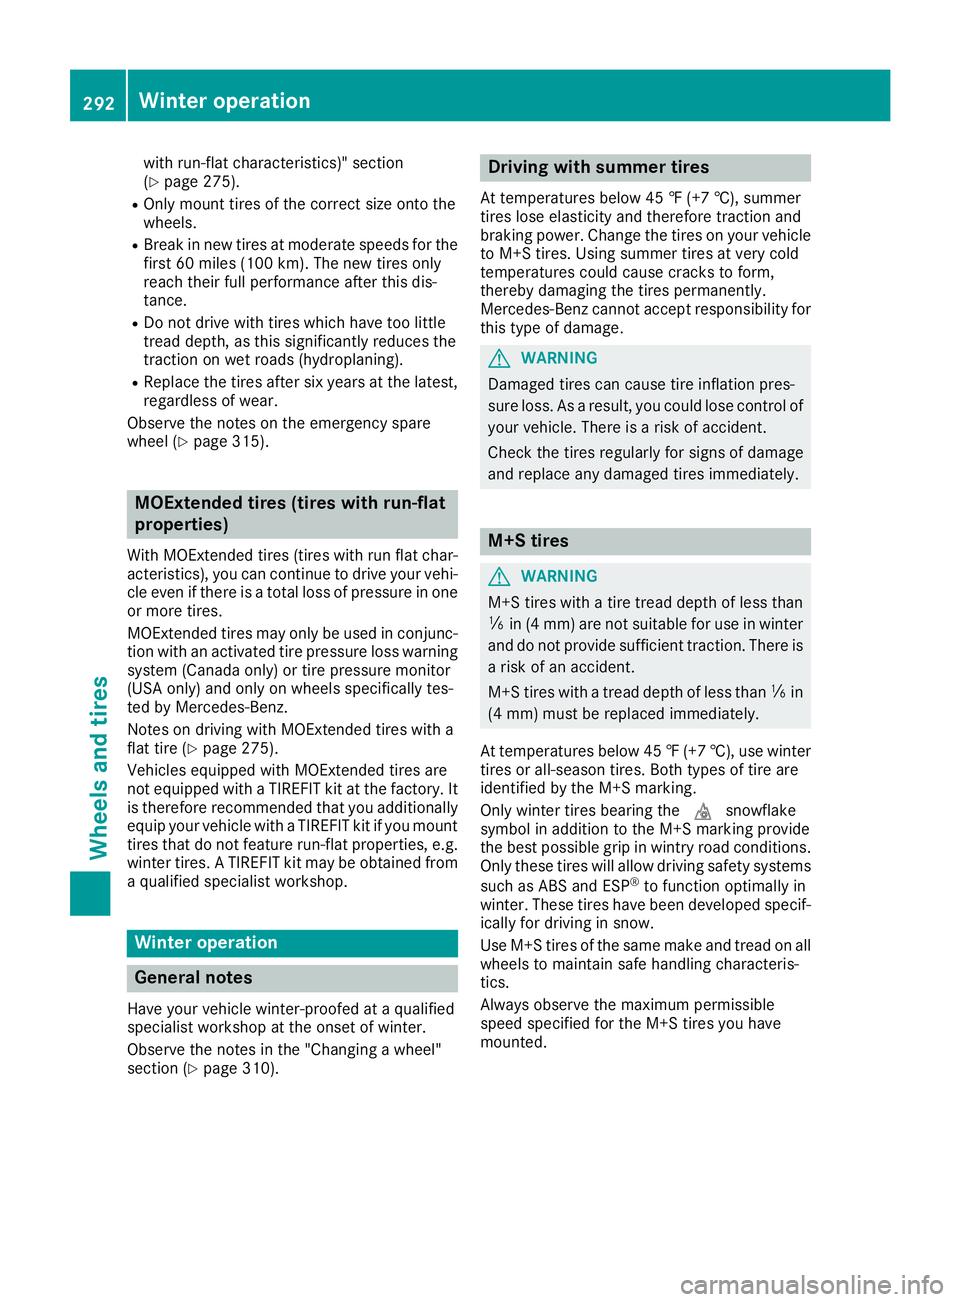
with run-flat characteristics)" section(Ypage 275).
ROnly mount tires of the correct size onto thewheels.
RBreak in new tires at moderate speeds for thefirst 60 miles(100 km). The new tires onlyreach their full performance after this dis-tance.
RDo not drive with tires which have too littletread depth, as this significantly reduces thetraction on wet roads (hydroplaning).
RReplace the tires after six years at the latest,regardless of wear.
Observe the notes on the emergency sparewheel (Ypage 315).
MOExtended tires (tires with run-flat
properties)
With MOExtended tires (tires with run flat char-acteristics), you can continue to drive your vehi-cle even if there is a total loss of pressure in oneor more tires.
MOExtended tires may only be used in conjunc-tion with an activated tire pressure loss warningsystem (Canada only) or tire pressure monitor(USA only) and only on wheels specifically tes-ted by Mercedes-Benz.
Notes on driving with MOExtended tires with aflat tire (Ypage 275).
Vehicles equipped with MOExtended tires arenot equipped with a TIREFIT kit at the factory. Itis therefore recommended that you additionallyequip your vehicle with a TIREFIT kit if you mounttires that do not feature run-flat properties, e.g.winter tires. A TIREFIT kit may be obtained froma qualified specialist workshop.
Winter operation
General notes
Have your vehicle winter-proofed at a qualifiedspecialist workshop at the onset of winter.
Observe the notes in the "Changing a wheel"section (Ypage 310).
Driving with summer tires
At temperatures below 45 ‡(+7 †), summertires lose elasticity and therefore traction andbraking power. Change the tires on your vehicleto M+S tires. Using summer tires at very coldtemperatures could cause cracks to form,thereby damaging the tires permanently.Mercedes-Benz cannot accept responsibility forthis type of damage.
GWARNING
Damaged tires can cause tire inflation pres-
sure loss. As a result, you could lose control of
your vehicle. There is a risk of accident.
Check the tires regularly for signs of damage
and replace any damaged tires immediately.
M+S tires
GWARNING
M+S tires with a tire tread depth of less than
�
Page 295 of 330
When you have mounted the M+S tires:
XCheck the tire pressures (Ypage 293).
XRestart the tire pressure monitor (USA only)(Ypage 300).
XRestart the tire pressure loss warning system(Canada) (Ypage 297)
Snow chains
GWARNING
If snow chains are mounted on the rear
wheels, the snow chains could cause abrasion
to the vehicle body or to chassis components.
This could cause damage to the vehicle or the
tires. There is a risk of an accident.
To avoid hazardous situations:
Rnever mount snow chains on the rear
wheels
Ronly mount snow chains in pairs on the
front wheels.
!On some tire sizes there is not enough spacefor snow chains. To avoid damage to the vehi-cle or tires, observe the "Wheel and tire com-binations" section under "Tires and wheels".
For safety reasons, Mercedes-Benz recom-mends that you only use snow chains that havebeen specially approved for your vehicle byMercedes-Benz, or are of a correspondingstandard of quality. For more information,please contact a qualified specialist workshop.
If you intend to mount snow chains, please bearthe following points in mind:
RSnow chains may not be mounted on allwheel/tire combinations. Permissible wheel-tire combinations (Ypage 315).
ROnly use snow chains when driving on roadscompletely covered by snow. Remove thesnow chains as soon as possible when youcome to a road that is not snow-covered.
RLocal regulations may restrict the use of snowchains. Observe the appropriate regulations ifyou wish to mount snow chains.
RDo not exceed the maximum permissiblespeed of 30mph (50 km/h).
RIf snow chains are installed, you cannot useActive Parking Assist (Ypage 167).
You may wish to deactivate ESP®when pullingaway with snow chains installed . This allows thewheels to spin in a controlled manner, achievingincreased propulsive force (cutting action).
RDeactivate ESP®(all vehicles exceptMercedes-AMG vehicles) (Ypage 65)
RDeactivate ESP®(Mercedes-AMG vehicles)(Ypage 66)
Information about driving with an emergencyspare wheel (Ypage 315).
Tire pressure
Tire pressure specifications
Important safety notes
GWARNING
Underinflated or overinflated tires pose the
following risks:
Rthe tires may burst, especially as the load
and vehicle speed increase.
Rthe tires may wear excessively and/or
unevenly, which may greatly impair tire
traction.
Rthe driving characteristics, as well as steer-
ing and braking, may be greatly impaired.
There is a risk of an accident.
Follow recommended tire inflation pressures
and check the pressure of all the tires includ-
ing the spare wheel:
Rmonthly, at least
Rif the load changes
Rbefore beginning a long journey
Runder different operating conditions, e.g.
off-road driving
If necessary, correct the tire pressure.
iThe data on the Tire and Loading Informa-tion placard and tire pressure table shownhere are examples. Tire pressure specifica-tions are vehicle-specific and may deviatefrom the data shown here. The tire pressurespecifications that are valid for your vehiclecan be found on the Tire and Loading Infor-mation placard and tire pressure table on thevehicle.
Tire pressure293
Wheels and tires
Z
Page 296 of 330
General notes
The recommended tire pressures for the tiresmounted at the factory can be found on thelabels described here.
Operation with an emergency spare wheel:information on operation with an emergencyspare wheel can be found in the general notes inthe "Emergency spare wheel" section(Ypage 315).
Further information on tire pressures can beobtained at a qualified specialist workshop.
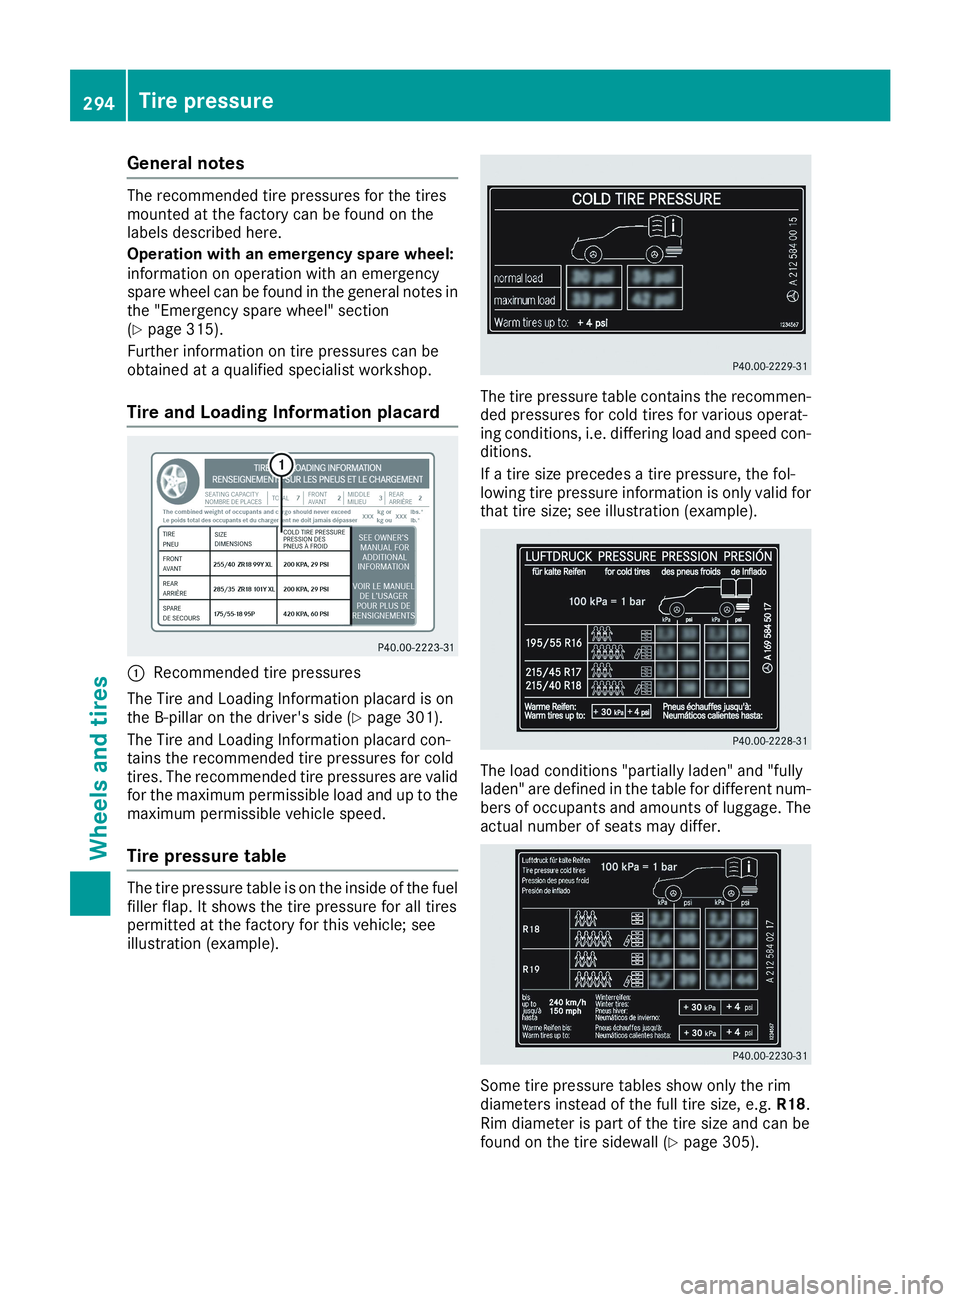
Tire and Loading Information placard
�CRecommended tire pressures
The Tire and Loading Information placard is onthe B-pillar on the driver's side (Ypage 301).
The Tire and Loading Information placard con-tains the recommended tire pressures for coldtires. The recommended tire pressures are validfor the maximum permissible load and up to themaximum permissible vehicle speed.
Tire pressure table
The tire pressure table is on the inside of the fuelfiller flap. It shows the tire pressure for all tirespermitted at the factory for this vehicle; seeillustration (example).
The tire pressure table contains the recommen-ded pressures for cold tires for various operat-ing conditions, i.e. differing load and speed con-ditions.
If a tire size precedes a tire pressure, the fol-lowing tire pressure information is only valid forthat tire size; see illustration (example).
The load conditions "partially laden" and "fullyladen" are defined in the table for different num-bers of occupants and amounts of luggage. Theactual number of seats may differ.
Some tire pressure tables show only the rimdiameters instead of the full tire size, e.g.R18.Rim diameter is part of the tire size and can befound on the tire sidewall (Ypage 305).
294Tire pressure
Wheels and tires