2019 MERCEDES-BENZ CLA COUPE check oil
[x] Cancel search: check oilPage 177 of 645
Glide mode is activated if
thefo llowing condi‐
tions are me t:
R drive program ;is selected.
R the speed is within a suitable range.
R thero ad's course is suitable, e.g. no steep
uphill or downhill inclines or tight bends.
R there is no trailer coupled tothe trailer hitch,
and no bicycle rack fitted.
R you are no lon ger depressing the accelera tor
or brake pedal.
% Glide mode can also be activated if you ha ve
selected the "Eco" setting forth e drive in the
drive prog ram =. Glide mode is deactivated again if one of
the
conditions is no longer met.
Ve hicles with Active Di stance Assist
DISTRO NIC:when Active Dis tance Assi st
DISTRONIC is acti ve,th eglide mode function is
not available.
Glide mode can also be pr evented bythefo llow‐
ing parame ters:
R incline
R downhill gradient
R temp erature
R height R
Speed
R operating status of the engine
R traffic situation
% Glide mode can be ended bypressing the
ri ght-hand steering wheel gearshift paddle
(/ page 172). Problems with
the transmission Problem
Possible causes/consequences and M
MSolutions
The transmission has a faulty gear
shift. The transmission is losing oil. #
Have the transmission checked at a qualified specialist workshop immediatel y.
The acceleration characteristics are
de teriorating. The transmission is in emer
gency operation mode. #
Pull over and stop theve hicle, paying attention toroad and traf fic conditions. 174
Driving and pa rking
Page 194 of 645
%
Standby mode is automatically deactivated
when the ignition is switched on.
Ac tivating/deactivating standby mode (park‐
ing up theve hicle)
Re quirements:
R The engine is switched off.
Multimedia sy stem:
4 © 5
Settings 5
Fahrzeug (Vehicle) #
Activate or deacti vate Standby mode.
When you activate the function, a prom pt
appears. #
Select Yes.
St andby mode is activated. Driving and driving saf
ety sy stems Driving sy
stems and your responsibility Yo
ur vehicle is equipped with driving sy stems
which assist you in driving, parking and manoeu‐
vring theve hicle. The driving sy stems are aids
and do not relie ve you of your responsibility per‐
ta ining toroad traf fic la w.Pay attention tothe traf
fic conditions at all times and inter vene
when necessa ry. Be aware of the limitations
re ga rding the safe use of these sy stems. Information about
radar senso rs Some driving and driving sa
fety sy stems use
ra dar sensors tomonitor the area in front of,
behind or next totheve hicle (depending on the
ve hicle's equipment).
Depending on theve hicle's equipment, thera dar
sensors are integrated behind the bumpers
and/or behind the Mercedes star. Keep these
parts free of dirt, ice and slush (/ page 458).
The sensors must not be co vered, forex ample
by cycle rack s, overhanging loads, sticke rs,fo il
or foils toprotect against stone chipping. In the
eve nt of dama getothe bumpers or radiator
grille, or following a collision impacting the
bumpers or radiator grille, ha vethe function of
th era dar sensors checked at a qualified special‐
ist workshop. The driving sy stems and driving
saf ety sy stems may no longer function proper ly
in such cases. Overview of driving sy
stems and driving
saf ety sy stems In
this section, you will find information about
th efo llowing driving sy stems and driving saf ety
sy stems:
R 360° Camera (/ page 230)
R ABS (Anti-lock Braking System)
(/ page 192)
R Active Dis tance Assi stDISTRONIC
(/ page 207)
R Adaptive Brake Lights (/ page 203)
R Active Brake Assi st (/ page 197)
R Active Lane Keeping Assist (/ page249)
R ATTENTION ASSIST (/ page240)
R BAS (Brak eAssist System) (/ page192)
R Hill Start Assist (/ page219)
R Suspension wi thadaptive damping adjust‐
ment (/ page 221)
R EBD (Electronic Brakeforc eDistribution)
(/ page 196) Driving and parking
191
Page 449 of 645
fi
ed based on the actual operating conditions
and/or loads.
Examples of arduous operating conditions:
R regular city driving with frequent intermedi‐
ate stops
R mainly short-dis tance driving
R frequent operation in mountainous terrain or
on poor road sur faces
R when the engine is of ten le ftidling for long
periods
R operation in particula rly dusty conditions
and/or if air-recirculation mode is frequently
used
In these or similar operating conditions, ha vethe
interior air filter, engine air cleaner, engine oil
and oil filter etc. changed more frequent ly. The
ty re s must be checked more frequently if the
ve hicle is operated under increased loads. Fur‐
th er information can be obtained at a qualified
specialist workshop. Battery disconnection periods
The ASS
YST PLUS se rvice inter val display
can only calculate the service due da tewhen
th e bat tery is connected. #
Notedown the service due date displa yed on
th e instrument display before disconnecting
th e battery (/ page445). Engine comp
artment Ac
tive bonn et(pedestrian pr otection) Operation of
the active bonnet (pedestrian
pr otection)
In cer tain accident situations, therisk of injury
to pedestrians can be reduced bythe actuation
of the active bonn et. The rear area of the engine
bonn etisraised byappr oximately 70 mm.
Fo rth e drive tothewo rkshop, reset the trig‐
ge red active bonn etyourself. Af terth e active
bonn ethas been triggered, pedestrian pr otection
may be limited.
A qu alified specialist workshop must re-ins tate
th e full functionality of the active bonn et. The active bonnet is not
available in all coun‐
tries.
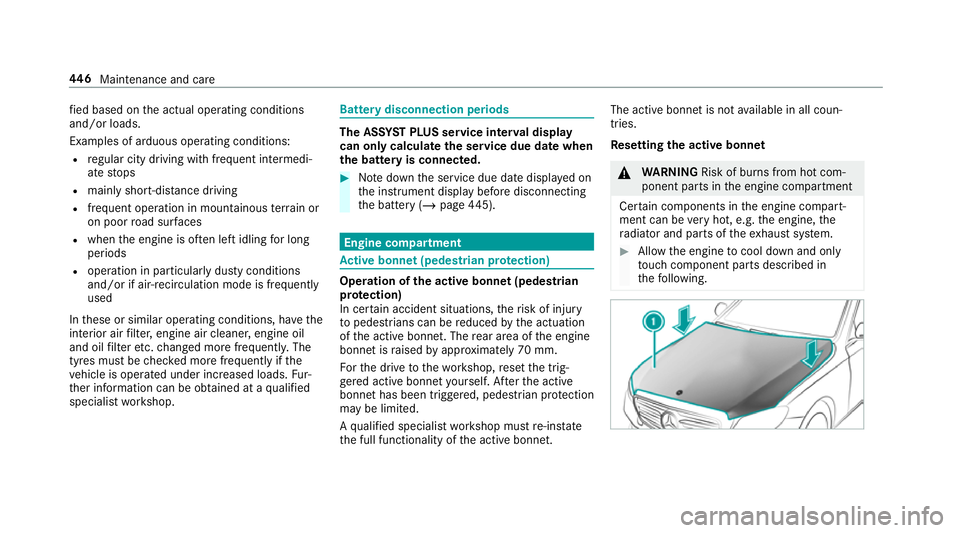
Re setting the active bonnet &
WARNING Risk of bu rns from hot com‐
ponent parts in the engine compartment
Cer tain components in the engine compart‐
ment can be very hot, e.g. the engine, the
ra diator and parts of theex haust sy stem. #
Allow the engine tocool down and only
to uch co mponent parts described in
th efo llowing. 446
Maintenance and care
Page 452 of 645
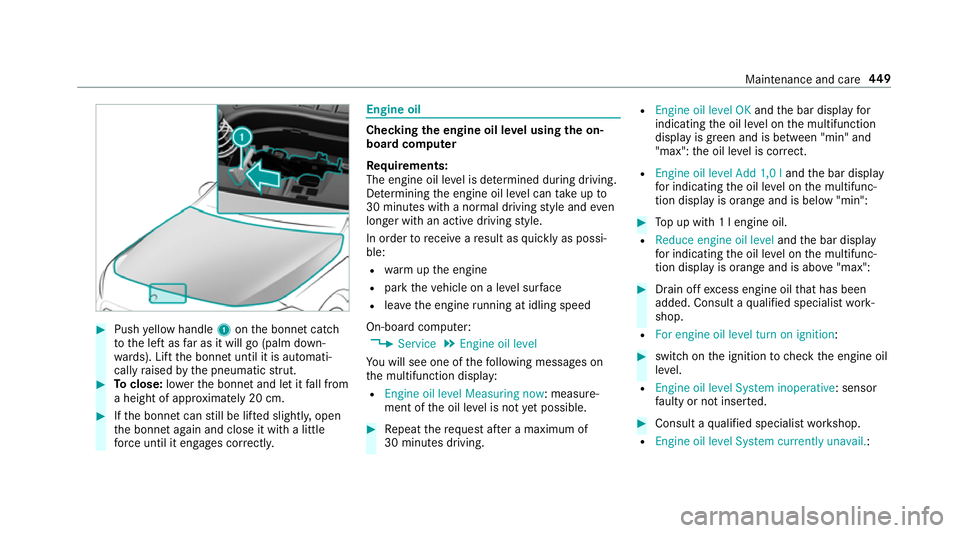
#
Push yellow handle 1onthe bonn etcatch
to the left as far as it will go (palm down‐
wa rds). Lift the bonn etuntil it is automati‐
cally raised bythe pneumatic stru t. #
Toclose: lowe rth e bonn etand let it fall from
a height of appr oximately 20 cm. #
Ifth e bonn etcan still be lif ted slightl y,open
th e bonn etagain and close it with a little
fo rc e until it engages cor rectl y. Engine oil
Checking
the engine oil le vel using the on-
board compu ter
Re quirements:
The engine oil le vel is de term ined during driving.
De term ining the engine oil le vel can take up to
30 minutes with a normal driving style and even
longer with an active driving style.
In order torecei veare sult as quickly as possi‐
ble:
R warm upthe engine
R park theve hicle on a le vel sur face
R leave the engine running at idling speed
On-board compu ter:
4 Service 5
Engine oil level
Yo u will see one of thefo llowing messages on
th e multifunction display:
R Engine oil level Measuring now : measure‐
ment of the oil le vel is not yet possible. #
Repeat there qu est af ter a maximum of
30 minutes driving. R
Engine oil level OK andthe bar display for
indicating the oil le vel on the multifunction
display is green and is between "min" and
"max": the oil le vel is cor rect.
R Engine oil level Add 1,0 l andthe bar display
fo r indicating the oil le vel on the multifunc‐
tion display is orange and is below "min": #
Top up with 1 l engine oil.
R Reduce engine oil level andthe bar display
fo r indicating the oil le vel on the multifunc‐
tion display is orange and is abo ve"max": #
Drain off excess engine oil that has been
added. Consult a qualified specialist work‐
shop.
R For engine oil level turn on ignition: #
switch on the ignition tocheck the engine oil
le ve l.
R Engine oil level System inoperative : sensor
fa ulty or not inser ted. #
Consult a qualified specialist workshop.
R Engine oil level System currently unavail. : Maintenance and care
449
Page 453 of 645
#
close the bonn et.
To pping up engine oil &
WARNING Risk of bu rns from hot com‐
ponent parts in the engine compartment
Cer tain components in the engine compart‐
ment can be very hot, e.g. the engine, the
ra diator and parts of theex haust sy stem. #
Allow the engine tocool down and only
to uch co mponent parts described in
th efo llowing. &
WARNING Risk offire and injury from
engine oil
If engine oil comes into con tact wi thhot
component parts in the engine compart‐
ment, it may ignite. #
Make sure that no engine oil is spilled
next tothefiller opening. #
Allow the engine tocool off and thor‐
oughly clean the engine oil from compo‐
nent parts before starting theve hicle. *
NO
TEEngine dama gecaused byan
incor rect oil filter, incor rect oil or addi‐
tives #
Do not use engine oils or oil filters
which do not cor respond tothe specifi‐
cations explicitly prescribed forthe
service inter vals. #
Do not alter the engine oil or oil filter in
order toachie velonger change inter vals
th an presc ribed. #
Do not use additives. #
Follow the instructions in the service
inter val display rega rding the oil
ch ange. *
NO
TEDama gecaused bytopping up too
much engine oil To
o much engine oil can damage the engine
or the catalytic con verter. #
Have excess engine oil remo ved at a
qu alified specialist workshop. #
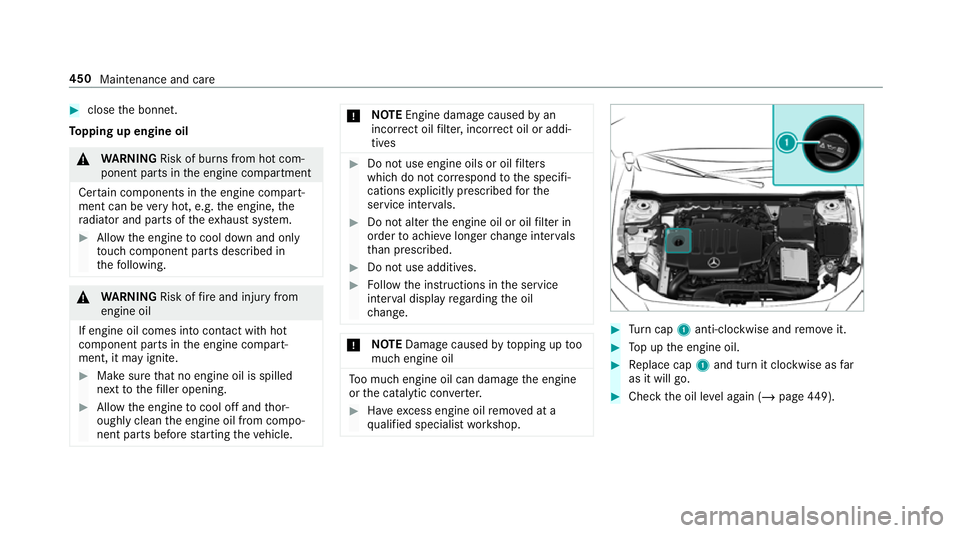
Turn cap 1anti-clockwise and remo veit. #
Top up the engine oil. #
Replace cap 1and turn it clockwise as far
as it will go. #
Check the oil le vel again (/ page449). 450
Maintenance and care
Page 522 of 645
*
NO
TEMalfunctions due tothe dilution of
Ad Blue ®
or the use of additive-enhanced
Ad Blue ® The function of
the NOx exhaust gas af ter‐
treatment can be impaire dby the use of
unsuitable denoxification agents. #
Only use AdBlue ®
in accordance wi th
ISO 222 41 . #
Do not dilu teAd Blue ®
wi th wate r. #
Do not use additive-enhanced AdBlue ®
. *
NO
TEDama geand malfunctions due to
impurities in AdBlue ® Consequences of impu
rities in AdBlue ®
:
R increased emission values
R damage tothe catalytic con verter
R NOx exhaust gas af tertre atment malfunc‐
tions #
Avoid impurities in AdBlue ®
. Ad
Blue ®
re sidues cr ystallise af ter a period of
time, and contamina tethe sur faces wi thwhich
th ey come into contact. Clean the dirty sur faces
wi th wate r as soon as possible.
When you open theAd Blue ®
tan k,small
amounts of ammonia vapour may escape. Do
not inhale any ammonia vapours that may be
re leased. Only fill th eAd Blue ®
tank in well-venti‐
lated areas.
Ad Blue ®
capacity
To tal capacity of AdBlue ®
tank Mode
lT otal capacity
All models 23.8 l Ad
Blue ®
consu mption
Like fuel consu mption, AdBlue ®
consu mption is
highly dependent upon driving style and operat‐
ing conditions. Forth is reason, your vehicle's
actual consum ption figures under normal operat‐
ing conditions may dif fer from the consum ption
fi gures calculated. AdBlue ®
consu mption is
between 1% and 5% of fuel consumption. Ha veth
eAd Blue ®
supply checked at a qualified spe‐
cialist workshop before making journe ysoutside
of Europe. Before a longer stay outside of
Europe, consult a qualified specialist workshop.
Display theAd Blue ®
ra nge and le vel
( / page 264). Engine oil
Note
s on engine oil
Obser vethe no tes on operating fluids
(/ page 514). Te
ch nical da ta519
Page 558 of 645
Display messages
Possible causes/consequences and M
MSolutions #
When next refuelling, add 1 litre of engine oil.
To p up engine oil (/ page 450).
No tes on engine oil (/ page519).
4 Engine oil level Stop vehi-
cle Switch engine off *D
isplay message only for cer tain engines:
The engine oil le vel is too lo w.
* NO
TEEngine dama gecaused bydriving with insuf ficient engine oil #
Avoid long journe yswith insuf ficient engine oil. #
Pull over and stop theve hicle safely as soon as possible in accordance with the tra ffic conditions. Do not con‐
tinue driving under any circums tances. #
Switch off the engine. #
Top up with 1 l engine oil. #
Check the engine oil le vel.
To p up engine oil (/ page 450).
No tes on engine oil (/ page519). Displ
aymessa ges and warning/indicator lamps 555
Page 607 of 645
Options ................................................ 396
Saving as a favo urite .......................... .397
Selecting options for suggestions ........ 396
St oring ................................................ 395
Con venience closing ................................. 91
Con venience opening ................................ 90
Coolant (engine) Check le vel .......................................... 451
No tes ................................................... 521
Cooling see Climate control
Co pyright ...................................................33
Cornering light ........................................ .132
Cross Traf fic Alert .................................. .240
Crosswind Assist Function/no tes ................................... 19 6
Cruise control .......................................... 203
Ac tivating ............................................ 205
Buttons ................................................ 205
Calling up a speed ............................... 205
Deactivating ........................................ 205
Fu nction .............................................. 203
Re quirements ...................................... 205 Selecting ............................................
.205
Setting a speed ................................... 205
St oring a speed ................................... 205
Sy stem limitations ...............................2 03
Cup holder ......................................... 116, 11 8
Fitting/removing (centre console)
....................................................... 116, 11 8
Re ar .................................................... .120 D
Damage de tection (pa rked vehicle) .......189
Damping adjustment ............................... 221
Dash cam Starting/ending a video recording ...... 384
Dashboard see Co ckpit
Dashboard lighting see Instrument lighting
Dashcam Configuring the settings ......................3 85
Deleting a video recording ................... 385
Selecting a USB device ....................... 384 Data acquisition
Vehicle .................................................. 30
Data import/export ................................ 332
Fu nction/no tes ................................... 332
Importing/exporting ........................... 333
Data storage
Electronic control units ........................ .30
Online services ...................................... 32
Ve hicle .................................................. 30
Date Setting the time and date automati‐
cally ..................................................... 327
Deactivating the alarm (A TA).................... 98
Dealership see Qualified specialist workshop
Declaration of conformity Electromagnetic compatibility ............... 24
Jack ...................................................... .27
TIREFIT kit ............................................. 28
Wi reless vehicle components ................24
Decorative foil (cleaning instructions)
.................................................................. .456 604
Index