2019 MERCEDES-BENZ CLA COUPE change wheel
[x] Cancel search: change wheelPage 6 of 645
Climate control
........................................ 14 6
Overview of climate contro l systems ..........1 46
Operating the climate control sy stem ......... 147 Driving and pa
rking ................................. 15 6
Driving ........................................................ 15 6
DY NA MIC SELECT switch ............................1 66
Manual transmission .................................. 16 8
Au tomatic transmission .............................. 17 0
Fu nction of the 4MATIC .............................. 175
Re fuelling .................................................... 175
Pa rking ........................................................ 181
Driving and driving sa fety sy stems .............. 191
Tr ailer hit ch................................................ 252
Bicycle rack function .................................. 255
Ve hicle towing instructions ........................ .257 Instrument Display and on-board
compu ter.................................................. 258
Instrument display overview ...................... .258
Overview of the buttons on thesteering
wheel ..........................................................2 59
Operates the on-board computer ............... 260 Ad
justing the design of the instrument
display ........................................................ 261
Showing display conte nt onthe instru‐
ment clus ter ............................................... 262
Overview of displa yson the multifunc‐
tion display .................................................2 63
Ad justing the instrument lighting ............... 264
Menus and submenus ................................ 264
Head-up Display .......................................... 271 LINGU
ATRO NIC ......................................... 272
No tes on operating saf ety .......................... .272
Operation ................................................... 272
Using LINGU ATRO NIC ef fectively ................ 275
Essential voice commands .......................... 276 MBUX multimedia sy
stem ...................... 290
Overview and operation .............................. 290
Sy stem settings .......................................... 326
Fit & Healt hy............................................... 336
Na vigation ................................................... 341
Te lephone .................................................. .386
Online and Internet functions ..................... 421
Media ........................................................ .430 Ra
dio .......................................................... 438
Sound .........................................................4 41 Maintenance and care
.............................445
ASS YST PLUS service inter val display ........ 445
Engine compartment .................................. 446
Cleaning and care ...................................... .452 Breakdown assi
stance ............................ 462
Emergency ................................................. .462
Flat tyre ...................................................... 464
Battery (vehicle) ......................................... 470
To w- starting or towing away ....................... 476
Electrical fuses ........................................... 482 Wheels and tyres
..................................... 485
No tes on noise or unusual handling char‐
acteristics .................................................. .485
No tes on regular lyinspecting wheels and
tyres .......................................................... .485
No tes on snow chains ................................ 485
Ty re pressure .............................................. 486
Wheel change ............................................ .495 Contents
3
Page 35 of 645
or MP3 pla
yer). If this data is stored in theve hi‐
cle, you can dele teit at any time. This data is
sent tothird parties only at your requ est, partic‐
ularly when you use online services in accord‐
ance with the settings that you ha veselected.
Yo u can store or change con venience settings/
individualisations in theve hicle at any time.
Depending on the equipment, this includes, for
ex ample:
R settings forth e seat and steering wheel posi‐
tions
R suspension and climate control settings
R customisations such as interior lighting
If yo ur vehicle is accordingly equipped, you can
connect your smartphone or ano ther mobile end
device totheve hicle. You can cont rolth is by
means of the control elements integrated in the
ve hicle. Images and audio from the smartphone
can be output via the multimedia sy stem. Cer‐
tai n information is simultaneously trans ferred to
yo ur smartphone. Depending on
the type of integration, this can
include:
R general vehicle data
R position data
This allo wsyouto use selected apps on your
smartphone, such as navigation or music play‐
bac k.There is no fur ther interaction between the
smartphone and theve hicle; in particular, vehi‐
cle data is not directly accessible. Which type of
fur ther data processing occurs is de term ined by
th e pr ovider of the specific app used. Which set‐
tings you can make, if an y,depends on the spe‐
cific app and the operating sy stem of your
smartphone. Online services
Wire
less network connection
If yo ur vehicle has a wireless network connec‐
tion, it enables data tobe exc hanged between
yo ur vehicle and additional sy stems. The wire‐
less network connection is enabled via theve hi‐
cle's transmission and reception unit or via con‐
nected mobile end devices (e.g. sma rtphones). Online functions can be used via
the wireless
network connection. This includes online serv‐
ices and applications/apps pr ovided bythe man‐
ufacturer or other pr oviders.
Manu factu rer's se rvices
Re garding online services of the manufacturer,
th e individual functions are described bythe
manufacturer in a suita ble place (e.g. Owner's
Manual, website of the manufacturer) along with
th ere leva nt da taprotection information. Per‐
sonal data may be used forth e pr ovision of
online services. Data is exchanged via a secure
connection, e.g. the manufacturer's designated
IT sy stems. Personal data is collected, pro‐
cessed and used via the pr ovision of services
exc lusively on the basis of legal permissions or
with prior consent.
The services and functions (sometimes subject
to afe e) can usually be activated or deactivated.
In some cases, this also applies tothe entire
ve hicle's data connection. This excludes, in par‐
ticular, legally prescribed functions and services. 32
General no tes
Page 105 of 645
Ad
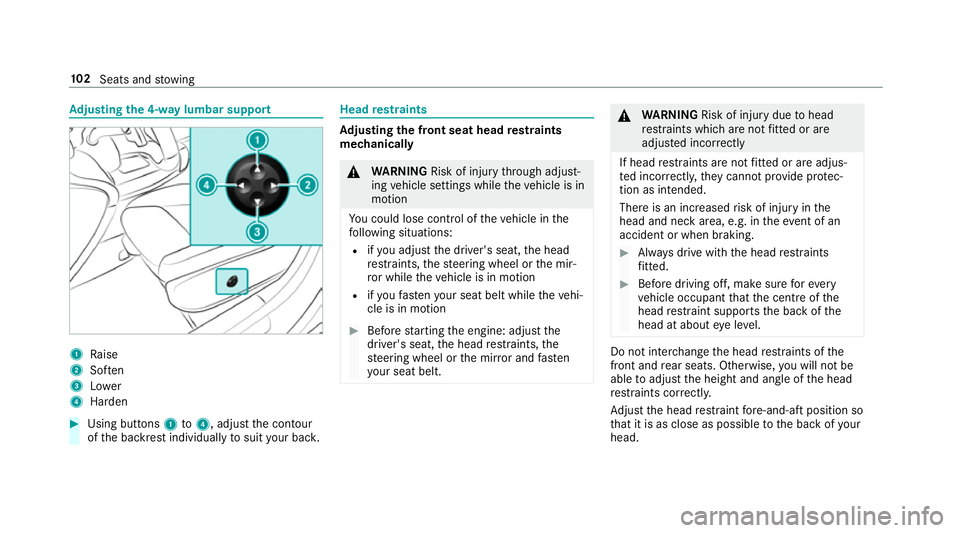
justing the 4-w aylumbar support 1
Raise
2 Soften
3 Lower
4 Harden #
Using buttons 1to4 , adjust the conto ur
of the backrest individually tosuit your bac k. Head
restra ints Ad
justing the front seat head restra ints
mechanically &
WARNING Risk of inju rythro ugh adjust‐
ing vehicle settings while theve hicle is in
motion
Yo u could lose cont rol of theve hicle in the
fo llowing situations:
R ifyo u adjust the driver's seat, the head
re stra ints, thesteering wheel or the mir‐
ro r while theve hicle is in motion
R ifyo ufast enyour seat belt while theve hi‐
cle is in motion #
Before starting the engine: adjust the
driver's seat, the head restra ints, the
st eering wheel or the mir ror and fasten
yo ur seat belt. &
WARNING Risk of inju rydue tohead
re stra ints which are not fitted or are
adjus ted incor rectly
If head restra ints are not fitted or are adjus‐
te d incor rectl y,they cannot pr ovide pr otec‐
tion as intended.
There is an increased risk of injury in the
head and neck area, e.g. in theeve nt of an
accident or when braking. #
Alw ays drive with the head restra ints
fi tted. #
Before driving off, ma kesure forev ery
ve hicle occupant that the cent reofthe
head restra int supports the back of the
head at about eye le vel. Do not inter
change the head restra ints of the
front and rear seats. Otherwise, you will not be
able toadjust the height and angle of the head
re stra ints cor rectl y.
Ad just the head restra int fore -and-aft position so
th at it is as close as possible tothe back of your
head. 102
Seats and stowing
Page 142 of 645
Changing
the front bulbs (vehicles with halo‐
ge n headla mps) Fi
tting/ removing the co ver on the front
wheel ar ch
Re quirements:
R The lighting sy stem is switched off.
R The appropriate front wheel is turned
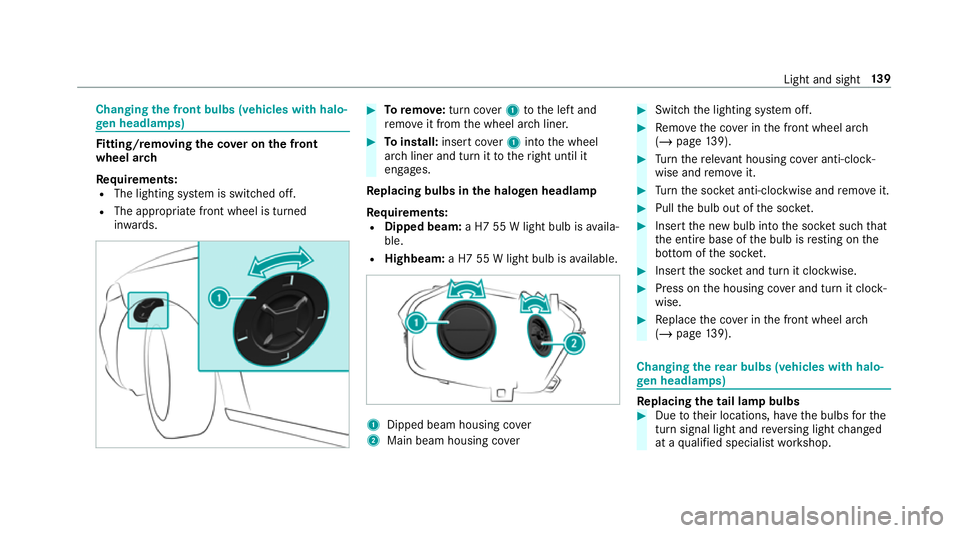
in wa rds. #
Toremo ve:turn co ver1 tothe left and
re mo veit from the wheel ar chliner. #
Toinstall: insert co ver1 into the wheel
ar ch liner and turn it totheright until it
engages.
Re placing bulbs in the halo gen headla mp
Re quirements:
R Dipped beam: a H7 55 W light bulb is availa‐
ble.
R Highbeam: a H7 55 W light bulb is available. 1
Dipped beam housing co ver
2 Main beam housing co ver #
Switch the lighting sy stem off. #
Remo vethe co ver in the front wheel ar ch
( / page 139). #
Turn there leva nt housing co ver anti-clock‐
wise and remo veit. #
Turn the soc ket anti-clo ckwise and remo veit. #
Pull the bulb out of the soc ket. #
Inse rtthe new bulb into the soc ket su chthat
th e entire base of the bulb is resting on the
bottom of the soc ket. #
Inse rtthe soc ket and turn it clo ckwise. #
Press on the housing co ver and turn it clock‐
wise. #
Replace the co ver in the front wheel ar ch
( / page 139). Changing
there ar bulbs (vehicles with halo‐
ge n headla mps) Re
placing the tail lamp bulbs #
Due totheir locations, ha vethe bulbs forthe
turn signal light and reve rsing light changed
at a qualified specialist workshop. Light and sight
13 9
Page 145 of 645
#
Remo vethe pr otective film 1 from the
maintenance display on the tip of the newly
fi tted wiper blades.
If th e colour of the maintenance display changes
from black to yellow, the wiper blades should be
re placed.
% The duration until the colour changes varies
depending on the usage conditions. Mir
rors Operating
the outside mir rors &
WARNING Risk of inju rythro ugh adjust‐
ing vehicle settings while theve hicle is in
motion
Yo u could lose cont rol of theve hicle in the
fo llowing situations:
R ifyo u adjust the driver's seat, the head
re stra ints, thesteering wheel or the mir‐
ro r while theve hicle is in motion
R ifyo ufast enyour seat belt while theve hi‐
cle is in motion #
Before starting the engine: adjust the
driver's seat, the head restra ints, the
st eering wheel or the mir ror and fasten
yo ur seat belt. &
WARNING Risk of accident due tomis‐
judgement of dis tances when using the
outside mir ror
The outside mir rors reflect objects on a
smaller scale. The objects in view are in fact
closer than they appear.
As a result, you may misjud gethe dis tance
between you and thero ad user driving
behind you, e.g. when changing lanes. #
Therefore, alw ays look over your shoul‐
der in order toensure that you are
aw are of the actual dis tance between
yo u and thero ad users driving behind
yo u. #
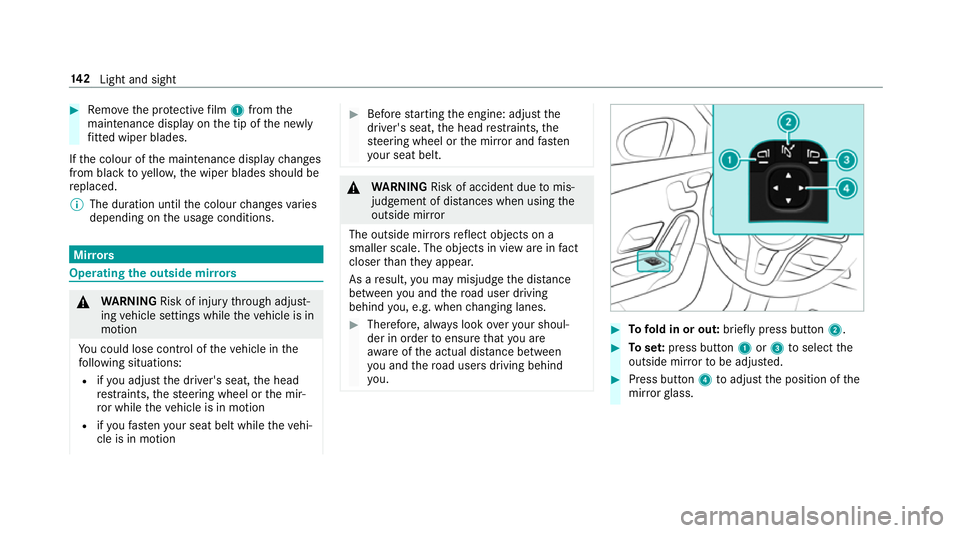
Tofold in or out: brieflypress button 2. #
Toset:press button 1or3 toselect the
outside mir rorto be adjus ted. #
Press button 4toadjust the position of the
mir rorgl ass. 14 2
Light and sight
Page 175 of 645
speed and
the transmission is in position h
or k.
% Tomanoeuvre with an open driver's door,
open the driver's door while stationary and
engage transmission position hork
again.
% Atvery low outside temp eratures from
appr ox. -20 °C you may not be able toshift
th e transmission from jtoano ther trans‐
mission position when the engine is
switched off. If this is the case, only change
th e transmission position while the engine is
ru nning.
En gaging drive position D #
Depress the brake pedal and push the
DIRECT SELECT le ver down past thefirst
point of resis tance.
The transmission position displ aysho wsh
in the multifunction displa y.
When the automatic transmission is in transmis‐
sion position h, it shiftsthege ars automati‐
call y.This depends on thefo llowing factors:
R the selected drive prog ram R
the position of the accelera tor pedal
R the driving speed Manual
gearshifting &
WARNING Risk of skidding and of an
accident due toshifting down on slippery
ro ad sur faces
If yo u shift down on slippery road sur faces to
inc rease the engine braking ef fect, the drive
wheels may lose traction. #
Do not shift down on slippery road sur‐
fa ces toinc rease the engine braking
ef fect. When
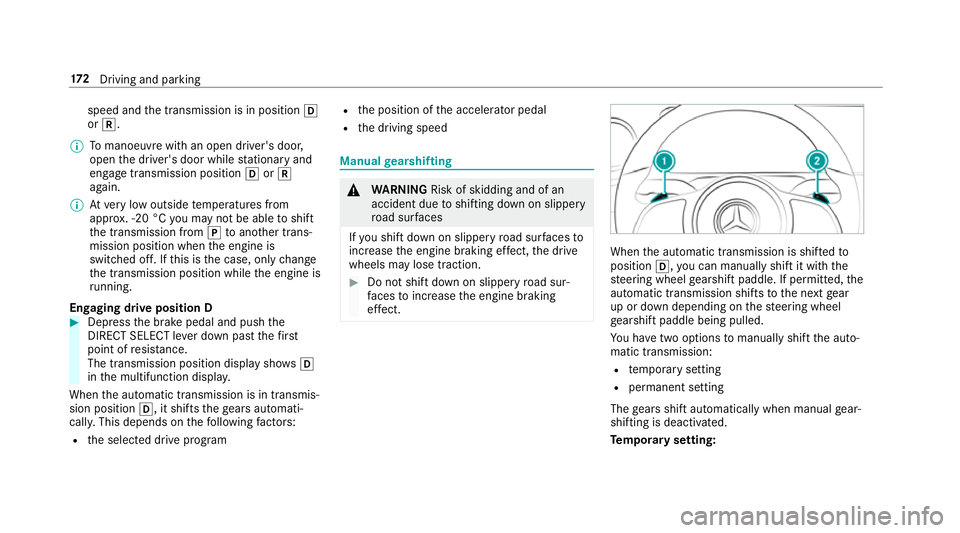
the automatic transmission is shif tedto
position h,you can manually shift it with the
st eering wheel gearshift paddle. If permit ted, the
automatic transmission shifts tothe next gear
up or down depending on thesteering wheel
ge arshift paddle being pulled.
Yo u ha vetwo options tomanually shift the auto‐
matic transmission:
R temp orary setting
R permanent setting
The gears shift automatically when manual gear‐
shifting is deactivated.
Te mp orary setting: 17 2
Driving and pa rking
Page 176 of 645
#
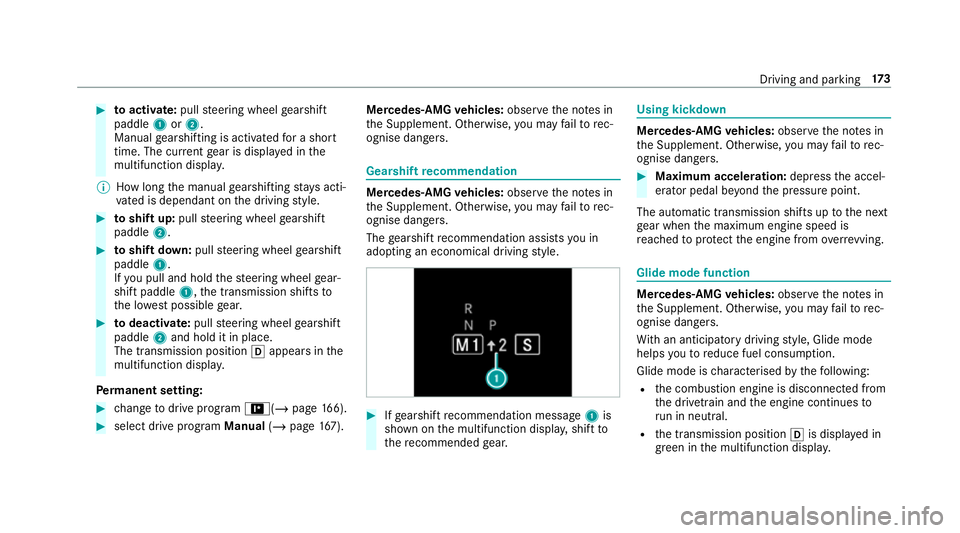
toactivate: pullsteering wheel gearshift
paddle 1or2.
Manual gearshifting is activated for a short
time. The cur rent gear is displa yed in the
multifunction displa y.
% How long the manual gearshifting stay s acti‐
va ted is dependant on the driving style. #
toshift up: pullsteering wheel gearshift
paddle 2. #
toshift down: pullsteering wheel gearshift
paddle 1.
If yo u pull and hold thesteering wheel gear‐
shift paddle 1,the transmission shifts to
th e lo west possible gear. #
todeactivate: pullsteering wheel gearshift
paddle 2and hold it in place.
The transmission position happears in the
multifunction displa y.
Pe rm anent setting: #
change todrive prog ram =(/ page166). #
sele ct drive program Manual(/page 167). Me
rcedes-AMG vehicles: observeth e no tes in
th e Supplement. Otherwise, you may failto rec‐
ognise dangers. Gearshi
ftrecommendation Mercedes
-AMG vehicles: observeth e no tes in
th e Supplement. Otherwise, you may failto rec‐
ognise dangers.
The gearshift recommendation assists you in
adopting an economical driving style. #
Ifge arshift recommendation message 1is
shown on the multifunction displa y,shift to
th ere commended gear. Using kickd
own Mercedes-AMG
vehicles: observeth e no tes in
th e Supplement. Otherwise, you may failto rec‐
ognise dangers. #
Maximum acceleration: depress the accel‐
erator pedal be yond the pressure point.
The automatic transmission shifts up tothe next
ge ar when the maximum engine speed is
re ached toprotect the engine from overrev ving. Glide mode function
Mercedes-AMG
vehicles: observeth e no tes in
th e Supplement. Otherwise, you may failto rec‐
ognise dangers.
Wi th an anticipatory driving style, Glide mode
helps youto reduce fuel consum ption.
Glide mode is characterised bythefo llowing:
R the combustion engine is disconnected from
th e driv etra in and the engine continues to
ru n in neutral.
R the transmission position his displa yed in
green in the multifunction displa y. Driving and pa
rking 17 3
Page 207 of 645
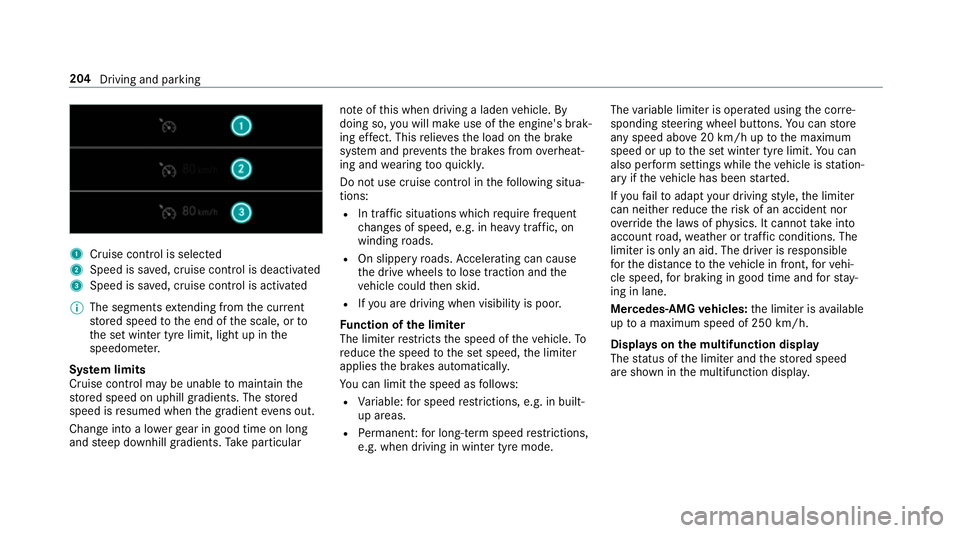
1
Cruise cont rol is selec ted
2 Speed is sa ved, cruise control is deactivated
3 Speed is sa ved, cruise control is activated
% The segments extending from the cur rent
st ored speed tothe end of the scale, or to
th e set winter tyre limit, light up in the
speedome ter.
Sy stem limits
Cruise control may be unable tomaintain the
st ored speed on uphill gradients. The stored
speed is resumed when the gradient evens out.
Change into a lo werge ar in good time on long
and steep downhill gradients. Take particular no
te ofthis when driving a laden vehicle. By
doing so, you will make use of the engine's brak‐
ing ef fect. This relie vesth e load on the brake
sy stem and pr events the brakes from overheat‐
ing and wearing tooqu ickl y.
Do not use cruise control in thefo llowing situa‐
tions:
R In traf fic situations whi chrequ ire frequent
ch anges of speed, e.g. in heavy traf fic, on
winding roads.
R On slippe ryroads. Accelerating can cause
th e drive wheels tolose traction and the
ve hicle could then skid.
R Ifyo u are driving when visibility is poor.
Fu nction of the limiter
The limiter restricts the speed of theve hicle. To
re duce the speed tothe set speed, the limiter
applies the brakes automaticall y.
Yo u can limit the speed as follo ws:
R Variable: for speed restrictions, e.g. in built-
up areas.
R Perm anen t:for long-term speed restrictions,
e.g. when driving in winter tyre mode. The
variable limiter is operated using the cor re‐
sponding steering wheel buttons. You can store
any speed abo ve20 km/h up tothe maximum
speed or up tothe set winter tyre limit. You can
also per form settings while theve hicle is station‐
ary if theve hicle has been star ted.
If yo ufa ilto adapt your driving style, the limiter
can neither reduce therisk of an accident nor
ov erride the la wsof ph ysics. It cannot take into
account road, weather or traf fic conditions. The
limiter is only an aid. The driver is responsible
fo rth e dis tance totheve hicle in front, forve hi‐
cle speed, for braking in good time and forst ay‐
ing in lane.
Mercedes‑AMG vehicles: the limiter is available
up toa maximum speed of 250 km/h.
Displ ays on the multifunction display
The status of the limiter and thestored speed
are shown in the multifunction displa y.204
Driving and parking