2019 MASERATI QUATTROPORTE door switches
[x] Cancel search: door switchesPage 29 of 396

Key fob This vehicle is provided with two
programmed key fobs.
The key fob contains a Remote Keyless
Entry (RKE) transmitter and an
emergency key that is inserted in to
the remote.
The emergency key allows you to
open the vehicle by inserting into the
lock of the opening handle on the
driver's door, in case the battery of the
vehicle or the key fob go dead. You can keep the emergency key with
you when using valet parking.
To remove the emergency key:
• hold the mechanical latch on the
back of the key fob sideways;
• simultaneously remove the
emergency key by sliding laterally
towards the end of the key fob. NOTE:
You can insert either side of the
emergency key into the lock cylinder.
Shift Ignition Device to OFF
Alert Opening the driver's door to exit the
vehicle when the ignition device is set
in ACC or RUN (engine not running), a
beep will remind you to cycle the
ignition to OFF .
In addition to the acoustic signal a
dedicated message is displayed on the
instrument cluster.
If the ignition device is left in the ACC
or RUN position, when vehicle is
locked the system will turn off the
instrument cluster and automatically
set ignition device to OFF .
With the MTC+ System, the power
window switches, radio, power
sunroof (optional), and power outlets
will remain active for up to 10 minutes
after the ignition switch is cycled to
the OFF position. Opening either front
door will cancel this feature, it is
possible to set the timing of this
feature.Before Starting
2
25
Page 32 of 396

Vehicle Security Alarm The vehicle security alarm monitors the
vehicle doors and trunk for
unauthorized entry and the
START/STOP button for unauthorized
operations.
The system includes a dual function
anti-intrusion sensor and vehicle
anti-lift sensor. The anti-intrusion
sensor monitors the vehicle interior for
motion.
The vehicle anti-lift sensor monitors
the vehicle for any lifting or tilting
actions (tow away, tire removal, ferry
transport, etc). A siren with battery
backup which senses interruptions of
power and communications is also
included.
While the vehicle security alarm is
enabled, interior door locks switches,
trunk lid and fuel filler door release
are disabled. If something triggers the
alarm, the vehicle security alarm will
provide the following audible and
visible signals: intermittent buzzer,
position lights and/or turn signals and
the vehicle security light on the
dashboard will flash.
This light will fast flash for
approximately 15 seconds, when the
vehicle security alarm is being armed, and will then flash slowly until the
vehicle is disarmed.
Rearming the System If something triggers the security
alarm, and no quick action is taken to
disarm it, the vehicle security alarm
will turn off the beeper after 29
seconds, and turn off all of the visual
signals after 31 more seconds; the
vehicle security alarm will then rearm
itself. Arming the System Follow these steps to arm the vehicle
security alarm.
• Make sure the vehicle ignition switch
is OFF .
• Perform one of the following
methods to lock the vehicle:
• Press the
lock button on the
interior power door lock switch
located on the driver door trim
panel with the driver and/or
passenger door open.Before Starting
2
28
Page 37 of 396

• If the light switch is in the “0” (OFF)
mode all switch backlights and the
front seats lighting will turn off.
• If the light switch is in the
position and the ignition switch
is in OFF position, the front low
intensity LEDs of the external
headlight and rear position light
guide LED will turn on and will turn
off automatically after 8 minutes to
preserve the battery charge.
• If the light switch is in
position
and the ignition switch is in RUN
position, no lighting feature will be
available.
• If the light switch is in
position
(Low beam mode) the front
domelight LED (if enabled), the
switches backlighting, the
instrument cluster’s display, the night
front seats lighting will turn on. The
front domelight LED and the night
lighting of the front seats will light
up with the intensity set by the
right-hand regulator. If the regulator
is in "0" (OFF) position, the night
lighting will turn off.
• If the light switch is turned in
“AUTO” position (on/off AUTO
mode) and the ignition is switched in
RUN position, as in “low beam
mode” all lights turn on either in “DAY” or “NIGHT” mode according
to the twilight sensor. In “DAY”
mode the switches backlighting will
be at 100% intensity, in “NIGHT”
mode they will be as set by the left
dimmer control switch.
NOTE:
In “DAY” mode, the switches are not
backlit, except the windows and
steering switches.
Light Dimmer Controls The light dimmer controls are part of
the headlight switch and are
positioned beside the switcher itself
(see “Lights” in section
"Understanding the Vehicle" for
further information).Unlock the Vehicle with
Key fob The RKE system allows you to unlock
the doors and the fuel filler door,
open the trunk and turn the approach
and courtesy lights on from a distance
up to approximately 33 ft (10 m). The
key fob RKE transmitter does not need
to be pointed at the vehicle to
activate the system. See “Illuminated
Entry/Exit” in this section for further
information.
NOTE:
Driving at speeds of 5 mph (8 km/h)
and above disables the system from
responding to all key fobs RKE
transmitter buttons.Before Starting
2
33
Page 44 of 396
Power Doors Locking/
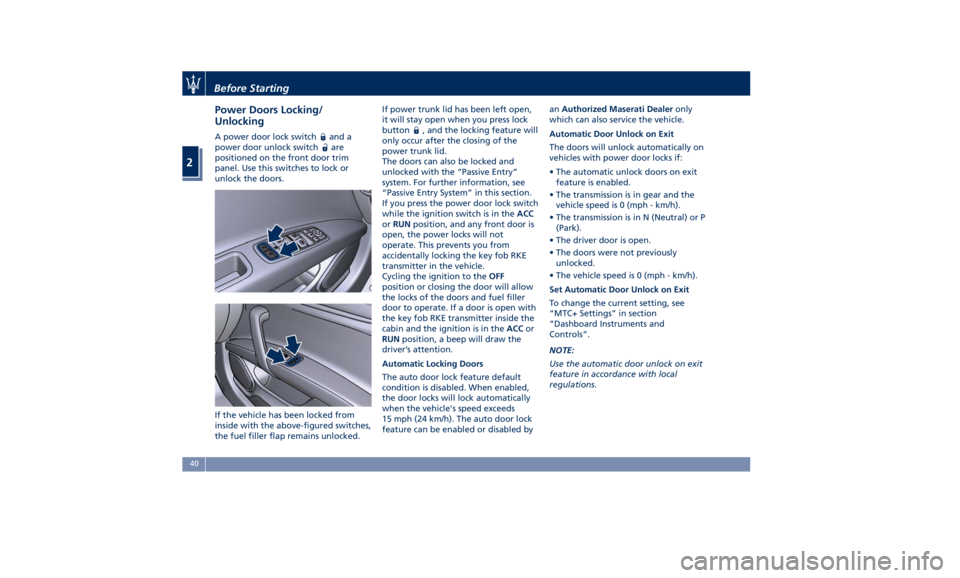
Unlocking A power door lock switch and a
power door unlock switch
are
positioned on the front door trim
panel. Use this switches to lock or
unlock the doors.
If the vehicle has been locked from
inside with the above-figured switches,
the fuel filler flap remains unlocked. If power trunk lid has been left open,
it will stay open when you press lock
button
, and the locking feature will
only occur after the closing of the
power trunk lid.
The doors can also be locked and
unlocked with the “Passive Entry”
system. For further information, see
“Passive Entry System” in this section.
If you press the power door lock switch
while the ignition switch is in the ACC
or RUN position, and any front door is
open, the power locks will not
operate. This prevents you from
accidentally locking the key fob RKE
transmitter in the vehicle.
Cycling the ignition to the OFF
position or closing the door will allow
the locks of the doors and fuel filler
door to operate. If a door is open with
the key fob RKE transmitter inside the
cabin and the ignition is in the ACC or
RUN position, a beep will draw the
driver’s attention.
Automatic Locking Doors
The auto door lock feature default
condition is disabled. When enabled,
the door locks will lock automatically
when the vehicle's speed exceeds
15 mph (24 km/h). The auto door lock
feature can be enabled or disabled by an Authorized Maserati Dealer only
which can also service the vehicle.
Automatic Door Unlock on Exit
The doors will unlock automatically on
vehicles with power door locks if:
• The automatic unlock doors on exit
feature is enabled.
• The transmission is in gear and the
vehicle speed is 0 (mph - km/h).
• The transmission is in N (Neutral) or P
(Park).
• The driver door is open.
• The doors were not previously
unlocked.
• The vehicle speed is 0 (mph - km/h).
Set Automatic Door Unlock on Exit
To change the current setting, see
“MTC+ Settings” in section
“Dashboard Instruments and
Controls”.
NOTE:
Use the automatic door unlock on exit
feature in accordance with local
regulations.Before Starting
2
40
Page 50 of 396
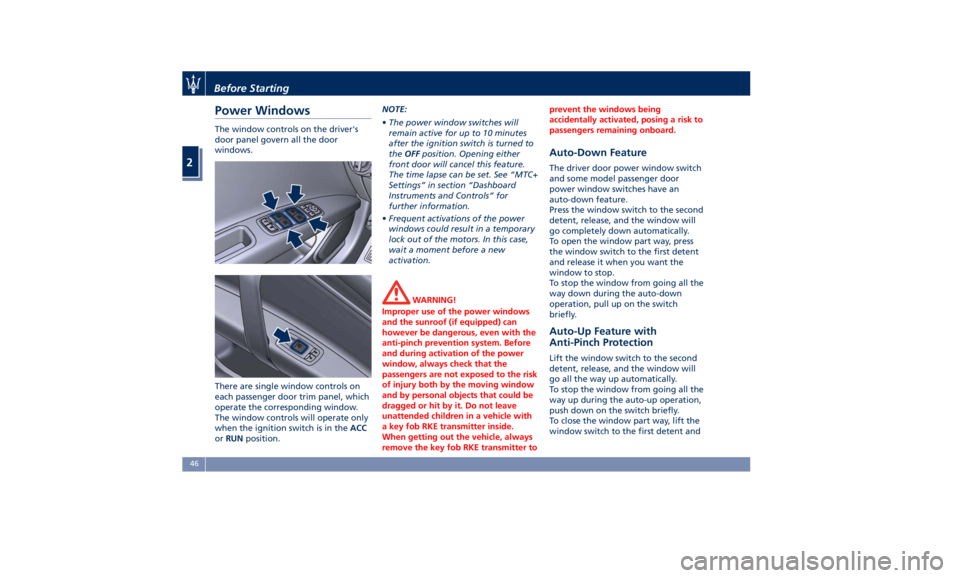
Power Windows The window controls on the driver's
door panel govern all the door
windows.
There are single window controls on
each passenger door trim panel, which
operate the corresponding window.
The window controls will operate only
when the ignition switch is in the ACC
or RUN position. NOTE:
• The power window switches will
remain active for up to 10 minutes
after the ignition switch is turned to
the OFF position. Opening either
front door will cancel this feature.
The time lapse can be set. See “MTC+
Settings” in section “Dashboard
Instruments and Controls” for
further information.
• Frequent activations of the power
windows could result in a temporary
lock out of the motors. In this case,
wait a moment before a new
activation.
WARNING!
Improper use of the power windows
and the sunroof (if equipped) can
however be dangerous, even with the
anti-pinch prevention system. Before
and during activation of the power
window, always check that the
passengers are not exposed to the risk
of injury both by the moving window
and by personal objects that could be
dragged or hit by it. Do not leave
unattended children in a vehicle with
a key fob RKE transmitter inside.
When getting out the vehicle, always
remove the key fob RKE transmitter to prevent the windows being
accidentally activated, posing a risk to
passengers remaining onboard.
Auto-Down Feature The driver door power window switch
and some model passenger door
power window switches have an
auto-down feature.
Press the window switch to the second
detent, release, and the window will
go completely down automatically.
To open the window part way, press
the window switch to the first detent
and release it when you want the
window to stop.
To stop the window from going all the
way down during the auto-down
operation, pull up on the switch
briefly.
Auto-Up Feature with
Anti-Pinch Protection Lift the window switch to the second
detent, release, and the window will
go all the way up automatically.
To stop the window from going all the
way up during the auto-up operation,
push down on the switch briefly.
To close the window part way, lift the
window switch to the first detent andBefore Starting
2
46
Page 52 of 396
Power Sunshades on the
Rear Door Windows NOTE:
• The window switches also operate
the sunshades on the rear windows.
• The rear window lock button also
operates the rear power sunshades.
• Window and sunshade controls only
operate if the ignition switch is in
ACC or RUN position.
Operation of the rear windows and
related sunshades is done by pressing
or pulling the window switch and
depends on the position of the
windows prior to the command
operation.
As described for the opening and
closing functions of the power
windows (see chapter “Power
Windows” in this section), the window
switch has two functioning modes:
press and release the switch to the first
detent to partially move the window;
press and release the switch to the
second detent to move the window all
the way up or down. Operations WARNING!
Rear seat passengers must be careful
when operating the sunshades, since
there is the risk of being pinched
between the top of the sunshade and
the headlining, during raising, and
between the top edge of the sunshade and the door panel, during
lowering.
CAUTION!
Before activating the sunshade, make
sure that no objects can interfere with
its travel.
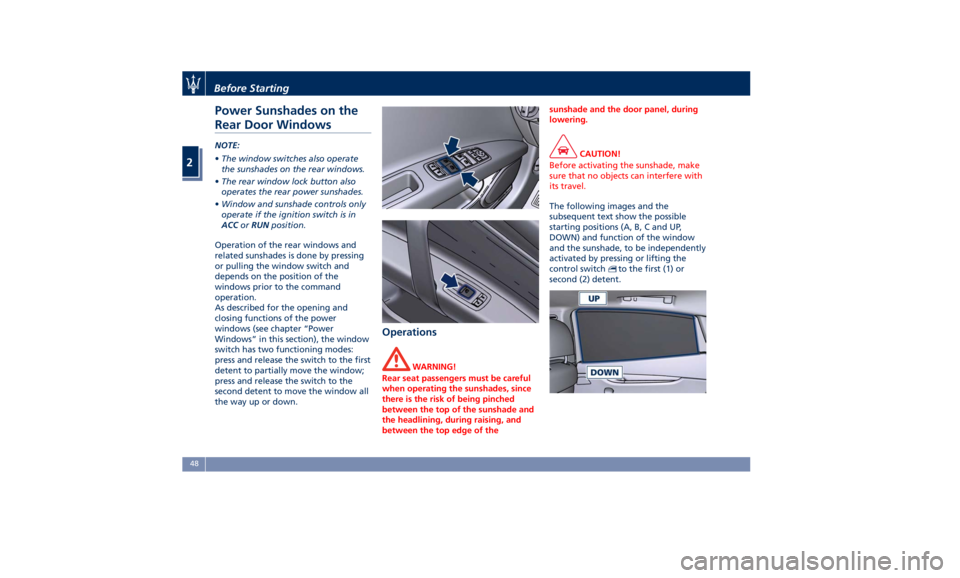
The following images and the
subsequent
text show
the possible
starting positions (A, B, C and UP,
DOWN) and function of the window
and the sunshade, to be independently
activated by pressing or lifting the
control switch
to the first (1) or
second (2) detent.Before Starting
2
48
Page 54 of 396
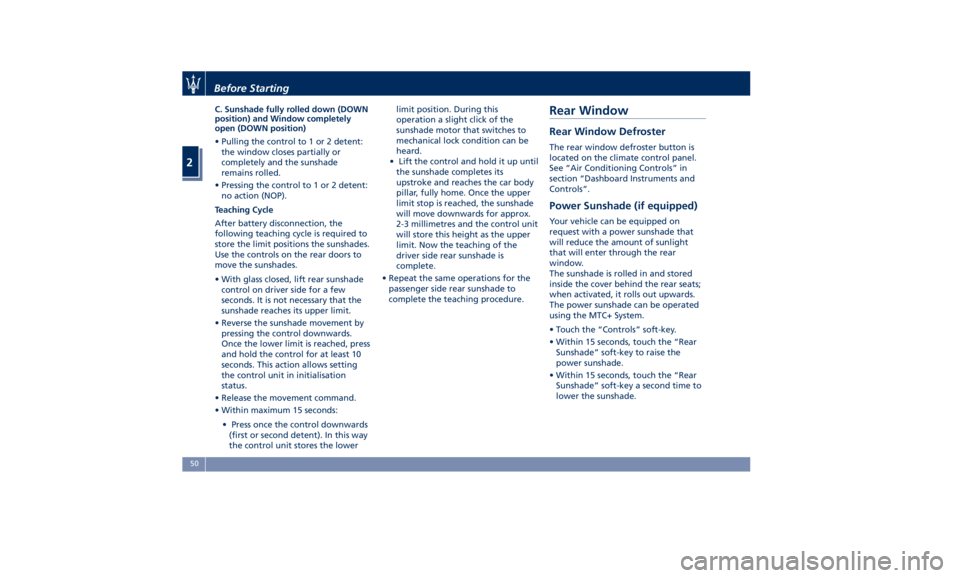
C. Sunshade fully rolled down (DOWN
position) and Window completely
open (DOWN position)
• Pulling the control to 1 or 2 detent:
the window closes partially or
completely and the sunshade
remains rolled.
• Pressing the control to 1 or 2 detent:
no action (NOP).
Teaching Cycle
After battery disconnection, the
following teaching cycle is required to
store the limit positions the sunshades.
Use the controls on the rear doors to
move the sunshades.
• With glass closed, lift rear sunshade
control on driver side for a few
seconds. It is not necessary that the
sunshade reaches its upper limit.
• Reverse the sunshade movement by
pressing the control downwards.
Once the lower limit is reached, press
and hold the control for at least 10
seconds. This action allows setting
the control unit in initialisation
status.
• Release the movement command.
• Within maximum 15 seconds:
• Press once the control downwards
(first or second detent). In this way
the control unit stores the lower limit position. During this
operation a slight click of the
sunshade motor that switches to
mechanical lock condition can be
heard.
• Lift the control and hold it up until
the sunshade completes its
upstroke and reaches the car body
pillar, fully home. Once the upper
limit stop is reached, the sunshade
will move downwards for approx.
2-3 millimetres and the control unit
will store this height as the upper
limit. Now the teaching of the
driver side rear sunshade is
complete.
• Repeat the same operations for the
passenger side rear sunshade to
complete the teaching procedure.Rear Window Rear Window Defroster The rear window defroster button is
located on the climate control panel.
See “Air Conditioning Controls” in
section “Dashboard Instruments and
Controls”.
Power Sunshade (if equipped) Your vehicle can be equipped on
request with a power sunshade that
will reduce the amount of sunlight
that will enter through the rear
window.
The sunshade is rolled in and stored
inside the cover behind the rear seats;
when activated, it rolls out upwards.
The power sunshade can be operated
using the MTC+ System.
• Touch the “Controls” soft-key.
• Within 15 seconds, touch the “Rear
Sunshade” soft-key to raise the
power sunshade.
• Within 15 seconds, touch the “Rear
Sunshade” soft-key a second time to
lower the sunshade.Before Starting
2
50
Page 55 of 396
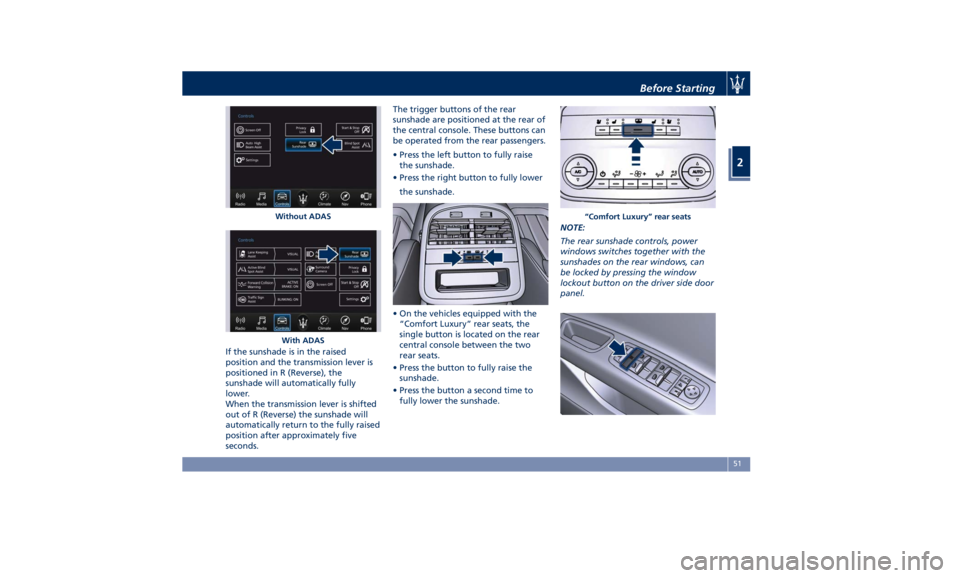
If the sunshade is in the raised
position and the transmission lever is
positioned in R (Reverse), the
sunshade will automatically fully
lower.
When the transmission lever is shifted
out of R (Reverse) the sunshade will
automatically return to the fully raised
position after approximately five
seconds. The trigger buttons of the rear
sunshade are positioned at the rear of
the central console. These buttons can
be operated from the rear passengers.
• Press the left button to fully raise
the sunshade.
• Press the right button to fully lower
the sunshade.
• On the vehicles equipped with the
“Comfort Luxury” rear seats, the
single button is located on the rear
central console between the two
rear seats.
• Press the button to fully raise the
sunshade.
• Press the button a second time to
fully lower the sunshade. NOTE:
The rear sunshade controls, power
windows switches together with the
sunshades on the rear windows, can
be locked by pressing the window
lockout button on the driver side door
panel.Without ADAS
With ADAS “Comfort Luxury” rear seatsBefore Starting
2
51