2019 MASERATI QUATTROPORTE service
[x] Cancel search: servicePage 306 of 396

The instrument cluster will also display
a screenshot reporting the pressure
values of each tire with flashing low
pressure value.
Should this occur, you should stop as
soon as possible and inflate the tire/s
with the low pressure (the one/s
flashing in the instrument cluster
graphic) to the recommended cold
pressure inflation value. Once the
system receives the updated tire
pressure value, the system will automatically update, the graphic
display in the instrument cluster will
stop flashing, and the TPMS light
will turn off. The vehicle may need
to be driven for up to 20 minutes
above 15 mph (24 km/h) in order for
the TPMS to acquire and process the
updated information.
Tire Pressure System Fault
If a system fault is detected, the TPMS
light
will flash for 75 seconds and
then remain lit followed by a beeping
sound. Therewith, the instrument
cluster will display a "Service Tire
Pressure System" message for a
minimum of five seconds and then
display dashes (--) in place of the
pressure value to indicate which sensor
is ineffective.
If the ignition switch is cycled, the
sequence will repeat, in case the
system fault still persists. If the system
fault no longer exists, the TPMS light
will no longer flash, and the
"Service Tire Pressure System" message
will no longer be displayed, and a
pressure value will be displayed in
place of the dashes.
A system fault can occur due to any of
the following:
• Signal interference due to electronic
devices or driving next to facilities emitting the same radio frequencies
as the TPMS sensors.
• Installing aftermarket window
tinting that contains materials that
may block radio wave signals.
• Accumulation of snow or ice around
the wheels or wheel housings.
• Using tire chains on the vehicle.
• Using wheels/tires not equipped with
TPMS sensors.
The instrument cluster will also display
a "Service Tire Pressure System"
message for a minimum of five
seconds when a system fault related to
an incorrect sensor location fault is
detected. In this case, the "Service Tire
Pressure System" message is then
followed by a graphic display with
pressure values still shown. This
indicates that the pressure values are
still being received from the TPMS
sensors but they may not be located in
the correct vehicle position. The system
still needs to be serviced as long as the
"Service Tire Pressure System" message
is displayed.Driving
5
302
Page 307 of 396

Vehicles with Compact Spare Tire
• The compact spare tire does not
have a TPMS sensor. Therefore, the
TPMS will not monitor the pressure
of the compact spare tire.
• If you replace a tire having pressure
below the low-pressure warning
limit, with the compact spare tire, on
the next ignition switch cycle, the
TPMS light
will illuminate
followed by a beeping sound. In addition, the graphic in the
instrument cluster will still display a
flashing pressure value
corresponding to the compact tire
position.
• After driving the vehicle for up to 20
minutes above 15 mph (24 km/h),
the TPMS light
will flash for 75
seconds and then remain lit. The
instrument cluster will then display a
"Service Tire Pressure System"
message for a minimum of five
seconds and then display dashes (--)
in place of the pressure value.
• Each subsequent ignition switch
cycle will be followed by a beeping
sound, the TPMS light
will flash
for 75 seconds and then remain lit.
The instrument cluster will then
display a "Service Tire Pressure
System" message for a minimum of
five seconds and subsequently displays dashes (--) in place of the
pressure value.
• Once you repair, replace or reinstall
a tire with the compact spare tire,
the TPMS will update automatically.
The TPMS light
will turn OFF and
the graphic in the instrument cluster
will display a new pressure value
instead of dashes (--), as long as no
tire pressure is below the
low-pressure warning limit in any of
the four tires. The vehicle may need
to be driven for up to 20 minutes
above 15 mph (24 km/h) in order for
the TPMS to acquire and process the
updated information.
TPMS Deactivation The TPMS can be deactivated if
replacing all four tire rims with wheel
and tire assemblies not using of TPMS
sensors, such as winter wheel and tireDriving
5
303
Page 308 of 396

assemblies. After replacing all four
wheel and tire assemblies (road tires)
with tires not equipped with Tire
Pressure Monitoring System sensors,
drive the vehicle for 20 minutes above
15 mph (24 km/h). The TPMS will
chime, the TPMS light
will flash on
and off for 75 seconds and then
remain on and the instrument cluster
will display the “Service Tire Pressure
System” message and then display
dashes (--) in place of the pressure
values. Beginning with the next
ignition switch cycle, the TPMS will no
longer chime or display the “Service
Tire Pressure System” message in the
instrument cluster but dashes (--) will
remain in place of the pressure values.
To reactivate the TPMS, replace all four
wheel and tire assemblies (road tires)
with tires equipped with TPMS sensors.
Then, drive the vehicle for up to 20 minutes above 15 mph (24 km/h). The
TPMS will chime, the TPMS light
will flash for 75 seconds and then
turn off. The instrument cluster will
then display the “Service Tire Pressure
System” message.
The instrument cluster will also display
pressure values in place of the dashes
(--). On the next ignition switch cycle
the “Service Tire Pressure System”
message will no longer be displayed as
long as no system fault exists.
Radio Frequency Transmitter -
Regulatory Information The “Regulatory Information” for all
the radio and radar frequency devices
can be consulted by accessing the
"Services" section on the website
www.maserati.com.Fuel Requirements The engines are designed to meet all
environmental regulations and provide
excellent fuel economy and
performance when using unleaded
premium gasoline with an AKI octane
rating of 91 or above. AKI (Anti Knock
Index) is an average on the Research
Octane Number, RON, and the Motor
Octane Number, MON (RON + MON/2
gives you the AKI).
For vehicle top performance, use
unleaded premium gasoline with no
less than 93 minimum AKI octane
rating.
Poor quality gasoline can cause
problems such as hard starting,
stalling, and hesitations. If you
experience these symptoms, try
another brand of gasoline before
considering service for the vehicle at
an Authorized Maserati Dealer .
Besides using unleaded gasoline with
the proper octane rating, gasoline that
contain detergents, anti-corrosion and
stability additives are recommended.
Using gasoline that have these
additives may help improve fuel
economy, reduce emissions, and
maintain vehicle performance.Driving
5
304
Page 310 of 396
Materials Added to Fuel All gasoline sold in the United States is
required to contain effective
detergent additives. Use of additional
detergents or other additives is not
needed under normal conditions and
they would result in additional cost.
Therefore, you should not have to add
anything to the fuel.
Fuel System Warnings WARNING!
Follow these guidelines to maintain
your vehicle's performance:
• The use of leaded gasoline is
prohibited by Federal and Provincial
law. Using leaded gasoline can
impair engine performance and
damage the emissions control
system.
• The use of fuel additives, which are
now being sold as octane enhancers,
is not recommended. Most of these
products contain high concentrations
of methanol. Fuel system damage or
vehicle performance problems
resulting from the use of such fuels
or additives is not the responsibility
of Maserati. NOTE:
Intentional
tampering with the
emissions control system can result in
civil penalties civil penalties and could
void the vehicle warranty.
Carbon Monoxide Warnings WARNING!
Carbon monoxide (CO) in exhaust
gases is deadly. Follow the precautions
below to prevent carbon monoxide
poisoning:
• Do not inhale exhaust gases. They
contain carbon monoxide, a colorless
and odorless gas, which can kill.
Never run the engine in a closed
area, such as a garage, and never sit
in a parked vehicle with the engine
running for an extended period. If
the vehicle is stopped in an open
area with the engine running for
more than a short period, adjust the
ventilation system to force fresh,
outside air into the vehicle.
• Guard against carbon monoxide
with proper maintenance. Have the
exhaust system inspected every time
the vehicle is raised. Have any
abnormal conditions repaired promptly. Until repaired, drive with
all side windows fully open.
WARNING!
California Proposition 65
Operating, servicing and maintaining
a passenger vehicle or off-road vehicle
can expose you to chemicals including
such as, engine exhaust, carbon
monoxide, phthalates and lead, that
which are known to the State of
California to cause cancer and birth
defects or other reproductive harm. To
minimize exposure, avoid breathing
exhaust, do not idle the engine except
as necessary, service your vehicle in a
well-ventilated area and wear gloves
or wash your hands frequently when
servicing your vehicle. For more
information go to:
www.P65Warnings.ca.gov/passenger-
vehicleDriving
5
306
Page 311 of 396
Refueling Fuel Filler Neck Access To access the fuel filler neck, the filler
door must be unlocked. From outside
the vehicle, this can only be done by
pressing the unlock
or the lock
button on the key fob RKE
transmitter, in the same way as if
opening or closing the doors. If any of
the door lock controls is pressed from
inside the vehicle, the filler door will
still remain open to allow refueling.
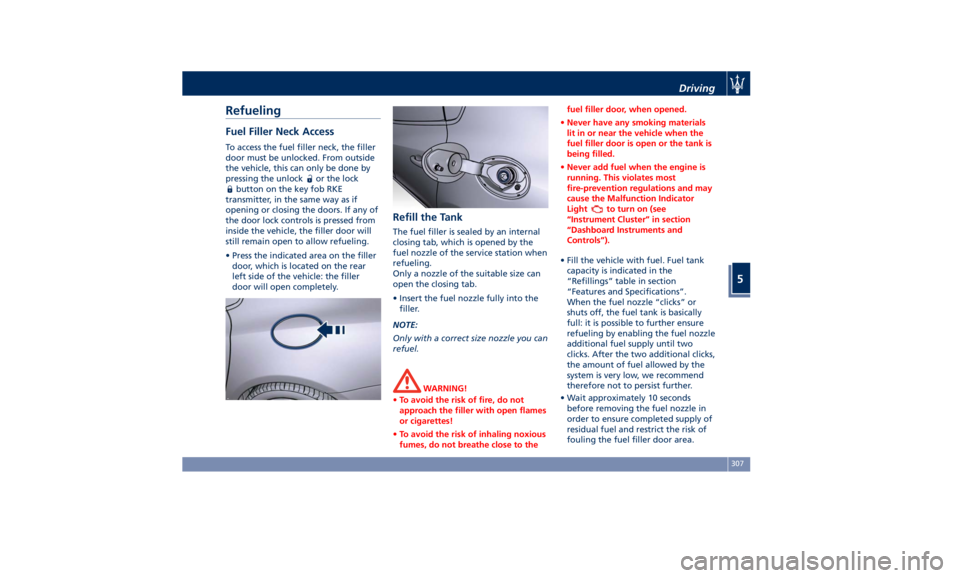
• Press the indicated area on the filler
door, which is located on the rear
left side of the vehicle: the filler
door will open completely. Refill the Tank The fuel filler is sealed by an internal
closing tab, which is opened by the
fuel nozzle of the service station when
refueling.
Only a nozzle of the suitable size can
open the closing tab.
• Insert the fuel nozzle fully into the
filler.
NOTE:
Only with a correct size nozzle you can
refuel.
WARNING!
• To avoid the risk of fire, do not
approach the filler with open flames
or cigarettes!
• To avoid the risk of inhaling noxious
fumes, do not breathe close to the fuel filler door, when opened.
• Never have any smoking materials
lit in or near the vehicle when the
fuel filler door is open or the tank is
being filled.
• Never add fuel when the engine is
running. This violates most
fire-prevention regulations and may
cause the Malfunction Indicator
Light
to turn on (see
“Instrument Cluster” in section
“Dashboard Instruments and
Controls”).
• Fill the vehicle with fuel. Fuel tank
capacity
is indicated in the
“Refillings” table in section
“Features and Specifications”.
When the fuel nozzle “clicks” or
shuts off, the fuel tank is basically
full: it is possible to further ensure
refueling by enabling the fuel nozzle
additional fuel supply until two
clicks. After the two additional clicks,
the amount of fuel allowed by the
system is very low, we recommend
therefore not to persist further.
• Wait approximately 10 seconds
before removing the fuel nozzle in
order to ensure completed supply of
residual fuel and restrict the risk of
fouling the fuel filler door area.Driving
5
307
Page 319 of 396
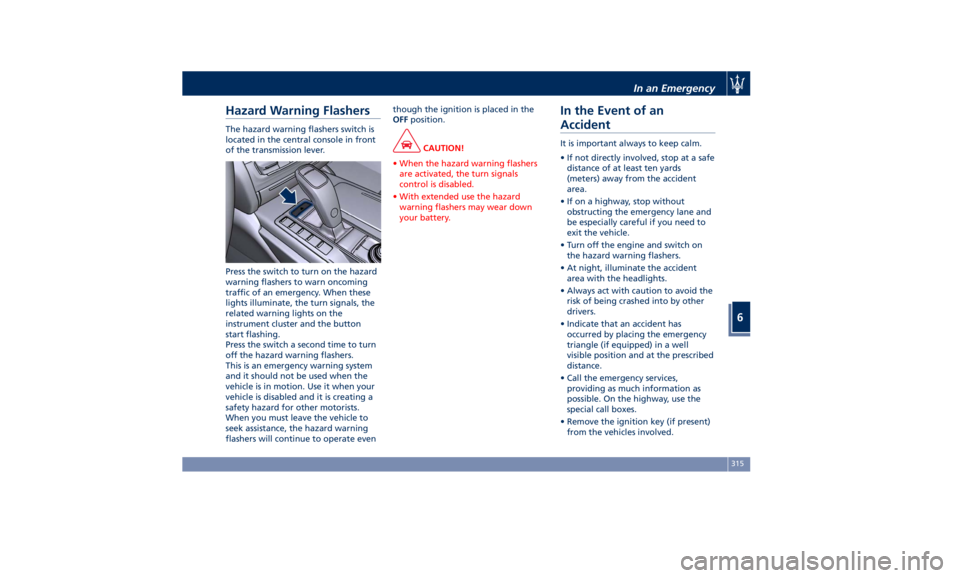
Hazard Warning Flashers The hazard warning flashers switch is
located in the central console in front
of the transmission lever.
Press the switch to turn on the hazard
warning flashers to warn oncoming
traffic of an emergency. When these
lights illuminate, the turn signals, the
related warning lights on the
instrument cluster and the button
start flashing.
Press the switch a second time to turn
off the hazard warning flashers.
This is an emergency warning system
and it should not be used when the
vehicle is in motion. Use it when your
vehicle is disabled and it is creating a
safety hazard for other motorists.
When you must leave the vehicle to
seek assistance, the hazard warning
flashers will continue to operate even though the ignition is placed in the
OFF position.
CAUTION!
• When the hazard warning flashers
are activated, the turn signals
control is disabled.
• With extended use the hazard
warning flashers may wear down
your battery.
In the Event of an
Accident It is important always to keep calm.
• If not directly involved, stop at a safe
distance of at least ten yards
(meters) away from the accident
area.
• If on a highway, stop without
obstructing the emergency lane and
be especially careful if you need to
exit the vehicle.
• Turn off the engine and switch on
the hazard warning flashers.
• At night, illuminate the accident
area with the headlights.
• Always act with caution to avoid the
risk of being crashed into by other
drivers.
• Indicate that an accident has
occurred by placing the emergency
triangle (if equipped) in a well
visible position and at the prescribed
distance.
• Call the emergency services,
providing as much information as
possible. On the highway, use the
special call boxes.
• Remove the ignition key (if present)
from the vehicles involved.In an Emergency
6
315
Page 320 of 396
• If fuel or other chemical products can
be smelled, do not smoke and ask
people around you to put their
cigarettes out.
• To extinguish fires, even small ones,
use a fire extinguisher, blankets, sand
or earth. Never use water.
• In multiple accidents occurred on
highways, particularly where visibility
is poor, there is a high risk of being
involved in other collisions. Leave the
vehicle immediately and move away
from the area.
In case of Injured Persons • Never leave the injured person alone.
Persons not directly involved in the
accident are also required to give
assistance.
• Do not crowd around injured
persons.
• Reassure the injured person that help
is on the way.
WARNING!
California Proposition 65
Operating, servicing and maintaining
a passenger vehicle or off-road vehicle
can expose you to chemicals including
such as, engine exhaust, carbon
monoxide, phthalates and lead, that which are known to the State of
California to cause cancer and birth
defects or other reproductive harm. To
minimize exposure, avoid breathing
exhaust, do not idle the engine except
as necessary, service your vehicle in a
well-ventilated area and wear gloves
or wash your hands frequently when
servicing your vehicle. For more
information go to:
www.P65Warnings.ca.gov/passenger-
vehicle
In case of a Punctured Tire If the vehicle is equipped with a
compact spare wheel.
Using the Compact Spare
Wheel NOTE:
The compact spare wheel is supplied in
aluminium or steel: the pictures show
the one in aluminium.
The compact spare wheel is stored in
the trunk and is supplied deflated in
order to limit the amount of space
occupied. An electric compressor is also
provided for inflating. In the event of
a tire puncture, proceed as follows.
• Stop the vehicle in a place that does
not constitute a danger to traffic and
where the wheel can be changed
safely.
• Select the P (Park) mode and then
engage manually the electric parking
brake and move the ignition switch
to OFF position.
• If necessary, turn the hazard warning
flashers on and place the warning
triangle (if equipped) at the required
distance.In an Emergency
6
316
Page 321 of 396
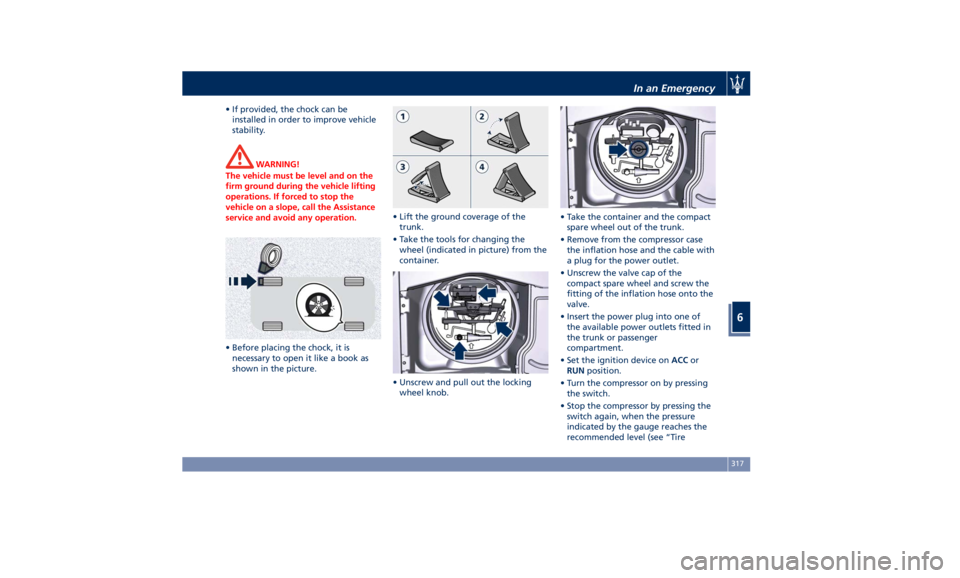
• If provided, the chock can be
installed in order to improve vehicle
stability.
WARNING!
The vehicle must be level and on the
firm ground during the vehicle lifting
operations. If forced to stop the
vehicle on a slope, call the Assistance
service and avoid any operation.
• Before placing the chock, it is
necessary
to open
it like a book as
shown in the picture. • Lift the ground coverage of the
trunk.
• Take the tools for changing the
wheel (indicated in picture) from the
container.
• Unscrew and pull out the locking
wheel knob. • Take the container and the compact
spare wheel out of the trunk.
• Remove from the compressor case
the inflation hose and the cable with
a plug for the power outlet.
• Unscrew the valve cap of the
compact spare wheel and screw the
fitting of the inflation hose onto the
valve.
• Insert the power plug into one of
the available power outlets fitted in
the trunk or passenger
compartment.
• Set the ignition device on ACC or
RUN position.
• Turn the compressor on by pressing
the switch.
• Stop the compressor by pressing the
switch again, when the pressure
indicated by the gauge reaches the
recommended level (see “TireIn an Emergency
6
317