2019 MASERATI QUATTROPORTE ESP
[x] Cancel search: ESPPage 176 of 396
the hood (see “Maintenance
Procedures” in section “Maintenance
and Care”).
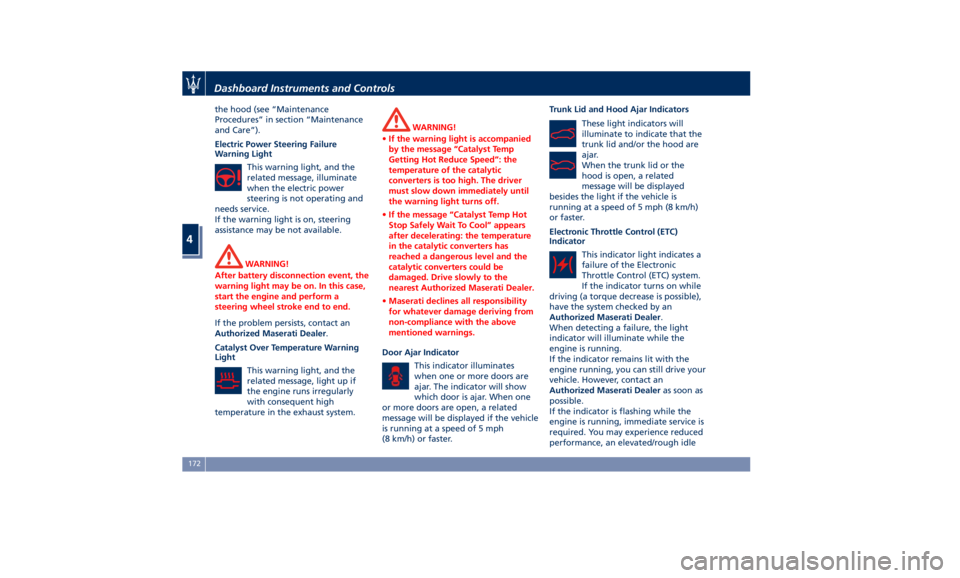
Electric Power Steering Failure
Warning Light
This warning light, and the
related message, illuminate
when the electric power
steering is not operating and
needs service.
If the warning light is on, steering
assistance may be not available.
WARNING!
After battery disconnection event, the
warning light may be on. In this case,
start the engine and perform a
steering wheel stroke end to end.
If the problem persists, contact an
Authorized
Maserati Dealer .
Catalyst Over Temperature Warning
Light
This warning light, and the
related message, light up if
the engine runs irregularly
with consequent high
temperature in the exhaust system. WARNING!
• If the warning light is accompanied
by the message “Catalyst Temp
Getting Hot Reduce Speed”: the
temperature of the catalytic
converters is too high. The driver
must slow down immediately until
the warning light turns off.
• If the message “Catalyst Temp Hot
Stop Safely Wait To Cool” appears
after decelerating: the temperature
in the catalytic converters has
reached a dangerous level and the
catalytic converters could be
damaged. Drive slowly to the
nearest Authorized Maserati Dealer.
• Maserati declines all responsibility
for whatever damage deriving from
non-compliance with the above
mentioned warnings.
Door Ajar Indicator
This
indicator illuminates
when
one or more doors are
ajar. The indicator will show
which door is ajar. When one
or more doors are open, a related
message will be displayed if the vehicle
is running at a speed of 5 mph
(8 km/h) or faster. Trunk Lid and Hood Ajar Indicators
These light indicators will
illuminate to indicate that the
trunk lid and/or the hood are
ajar.
When the trunk lid or the
hood is open, a related
message will be displayed
besides the light if the vehicle is
running at a speed of 5 mph (8 km/h)
or faster.
Electronic Throttle Control (ETC)
Indicator
This indicator light indicates a
failure of the Electronic
Throttle Control (ETC) system.
If the indicator turns on while
driving (a torque decrease is possible),
have the system checked by an
Authorized Maserati Dealer .
When detecting a failure, the light
indicator will illuminate while the
engine is running.
If the indicator remains lit with the
engine running, you can still drive your
vehicle. However, contact an
Authorized Maserati Dealer as soon as
possible.
If the indicator is flashing while the
engine is running, immediate service is
required. You may experience reduced
performance, an elevated/rough idleDashboard Instruments and Controls
4
172
Page 180 of 396
For further details, see “Lights” in
section “Understanding the Vehicle”.
Automatic High Beam On Indicator
This indicator turns on when
the “Auto High Beam Assist”
feature is set on MTC+ (see
“MTC+ Settings” in this
section).
Gear Shift Indicator Light
This indicator lights up to
indicate gear shift change in
order to optimize fuel
consumption.
See “Drive Mode” in section
“Driving” for further
information.
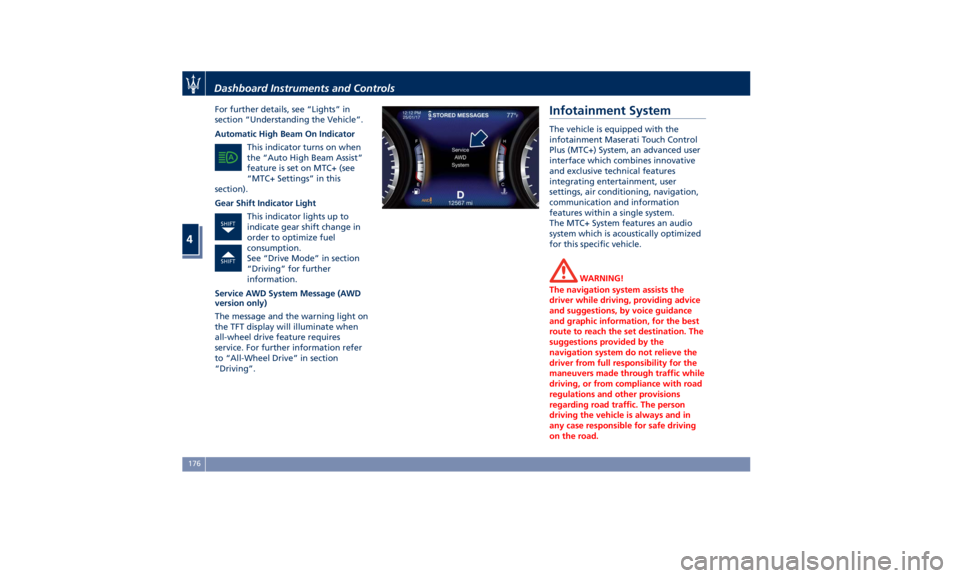
Service AWD System Message (AWD
version only)
The message and the warning light on
the TFT display will illuminate when
all-wheel drive feature requires
service. For further information refer
to “All-Wheel Drive” in section
“Driving”. Infotainment System The vehicle is equipped with the
infotainment Maserati Touch Control
Plus (MTC+) System, an advanced user
interface which combines innovative
and exclusive technical features
integrating entertainment, user
settings, air conditioning, navigation,
communication and information
features within a single system.
The MTC+ System features an audio
system which is acoustically optimized
for this specific vehicle.
WARNING!
The navigation system assists the
driver while driving, providing advice
and suggestions, by voice guidance
and graphic information, for the best
route to reach the set destination. The
suggestions provided by the
navigation system do not relieve the
driver from full responsibility for the
maneuvers made through traffic while
driving, or from compliance with road
regulations and other provisions
regarding road traffic. The person
driving the vehicle is always and in
any case responsible for safe driving
on the road.Dashboard Instruments and Controls
4
176
Page 184 of 396

easily customized to suit user's
requirements, as follows:
• touch button to open
applications/settings screen;
• hold depressed and drag the icon
corresponding to the selected
function until it overlaps the one to
be replaced on the bottom bar.
Once it is set in the menu bar, the new
connection will be immediately
operational.
Use the MTC+ Display as
Projection Device If your smartphone is properly
connected to the vehicle via the USB
port, on MTC+ screen in place of
“Phone” soft-key and in the source list
of “Media” screen you can find the
“Apple CarPlay” (example shown in
picture) or the “Android Auto” app soft-key. “Android Auto” app needs to
be downloaded on your mobile device.
These applications use the MTC+
display as projector of the functions
available on the connected device.
“Apple CarPlay” allows the best use of
your iPhone ®
in the car and perfect
integration with the MTC + display
and with the controls of the car,
including Siri voice control. You can
make phone calls, access music, send
and receive messages, get real-time
directions on traffic conditions, all
while staying focused on the road.
The “Android Auto” app lets you share
information while driving and make it
easier to access Google. The interface
is equipped with Google Maps with
voice guided navigation, traffic
information in real time, on-demand
access to millions of songs in Google
Play Music. It also offers the possibility to make phone calls or send and
receive messages without taking your
hands off the steering wheel. You can
also request Google to make any type
of research. Android Auto will give an
easier access to applications and
content from the MTC+ system display.
The following tables show the
“Screen” and “Audio” source (of
projection device
or of MTC+
System MTC+
) when a smartphone is
connected, a session is established and
the device (Table A) or the MTC+
System (Table B) is performing an
action.Dashboard Instruments and Controls
4
180
Page 189 of 396
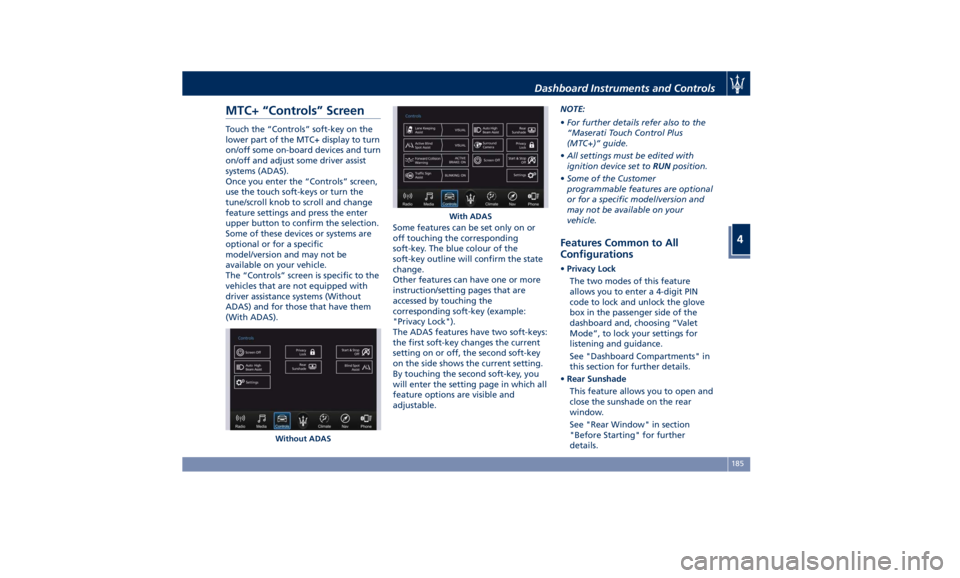
MTC+ “Controls” Screen Touch the “Controls” soft-key on the
lower part of the MTC+ display to turn
on/off some on-board devices and turn
on/off and adjust some driver assist
systems (ADAS).
Once you enter the “Controls” screen,
use the touch soft-keys or turn the
tune/scroll knob to scroll and change
feature settings and press the enter
upper button to confirm the selection.
Some of these devices or systems are
optional or for a specific
model/version and may not be
available on your vehicle.
The “Controls” screen is specific to the
vehicles that are not equipped with
driver assistance systems (Without
ADAS) and for those that have them
(With ADAS). Some features can be set only on or
off touching the corresponding
soft-key. The blue colour of the
soft-key outline will confirm the state
change.
Other features can have one or more
instruction/setting pages that are
accessed by touching the
corresponding soft-key (example:
"Privacy Lock").
The ADAS features have two soft-keys:
the first soft-key changes the current
setting on or off, the second soft-key
on the side shows the current setting.
By touching the second soft-key, you
will enter the setting page in which all
feature options are visible and
adjustable. NOTE:
• For further details refer also to the
“Maserati Touch Control Plus
(MTC+)” guide.
• All settings must be edited with
ignition device set to RUN position.
• Some of the Customer
programmable features are optional
or for a specific model/version and
may not be available on your
vehicle.
Features Common to All
Configurations • Privacy Lock
The two modes of this feature
allows you to enter a 4-digit PIN
code to lock and unlock the glove
box in the passenger side of the
dashboard and, choosing “Valet
Mode”, to lock your settings for
listening and guidance.
See "Dashboard Compartments" in
this section for further details.
• Rear Sunshade
This feature allows you to open and
close the sunshade on the rear
window.
See "Rear Window" in section
"Before Starting" for further
details.Without ADAS With ADASDashboard Instruments and Controls
4
185
Page 191 of 396
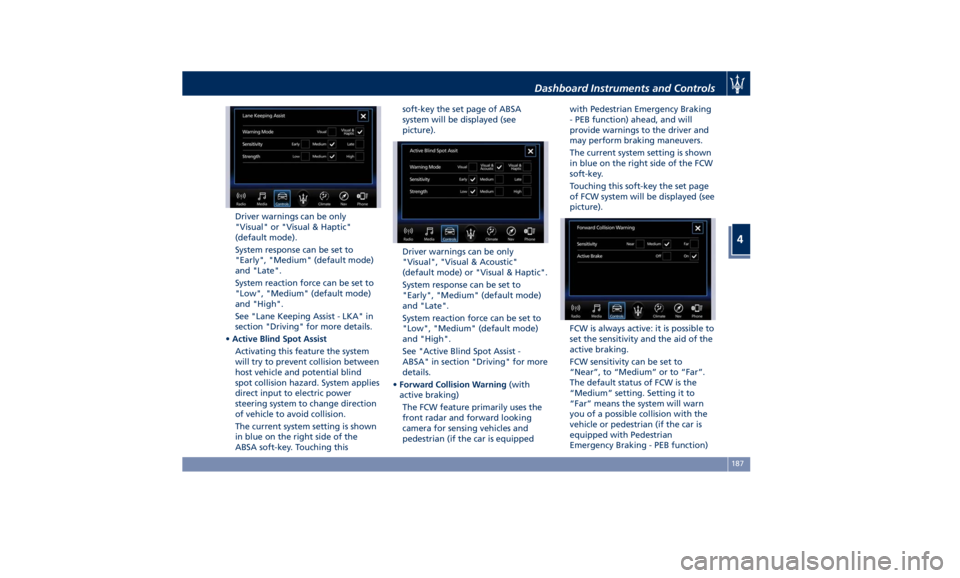
Driver warnings can be only
"Visual" or "Visual & Haptic"
(default mode).
System response can be set to
"Early", "Medium" (default mode)
and "Late".
System reaction force can be set to
"Low", "Medium" (default mode)
and "High".
See "Lane Keeping Assist - LKA" in
section "Driving" for more details.
• Active Blind Spot Assist
Activating this feature the system
will try to prevent collision between
host vehicle and potential blind
spot collision hazard. System applies
direct input to electric power
steering system to change direction
of vehicle to avoid collision.
The current system setting is shown
in blue on the right side of the
ABSA soft-key. Touching this soft-key the set page of ABSA
system will be displayed (see
picture).
Driver warnings can be only
"Visual", "Visual & Acoustic"
(default mode) or "Visual & Haptic".
System response can be set to
"Early", "Medium" (default mode)
and "Late".
System reaction force can be set to
"Low", "Medium" (default mode)
and "High".
See "Active Blind Spot Assist -
ABSA" in section "Driving" for more
details.
• Forward Collision Warning (with
active braking)
The FCW feature primarily uses the
front radar and forward looking
camera for sensing vehicles and
pedestrian (if the car is equipped with Pedestrian Emergency Braking
- PEB function) ahead, and will
provide warnings to the driver and
may perform braking maneuvers.
The current system setting is shown
in blue on the right side of the FCW
soft-key.
Touching this soft-key the set page
of FCW system will be displayed (see
picture).
FCW is always active: it is possible to
set the sensitivity and the aid of the
active braking.
FCW sensitivity can be set to
“Near”, to “Medium” or to “Far”.
The default status of FCW is the
“Medium” setting. Setting it to
“Far” means the system will warn
you of a possible collision with the
vehicle or pedestrian (if the car is
equipped with Pedestrian
Emergency Braking - PEB function)Dashboard Instruments and Controls
4
187
Page 194 of 396
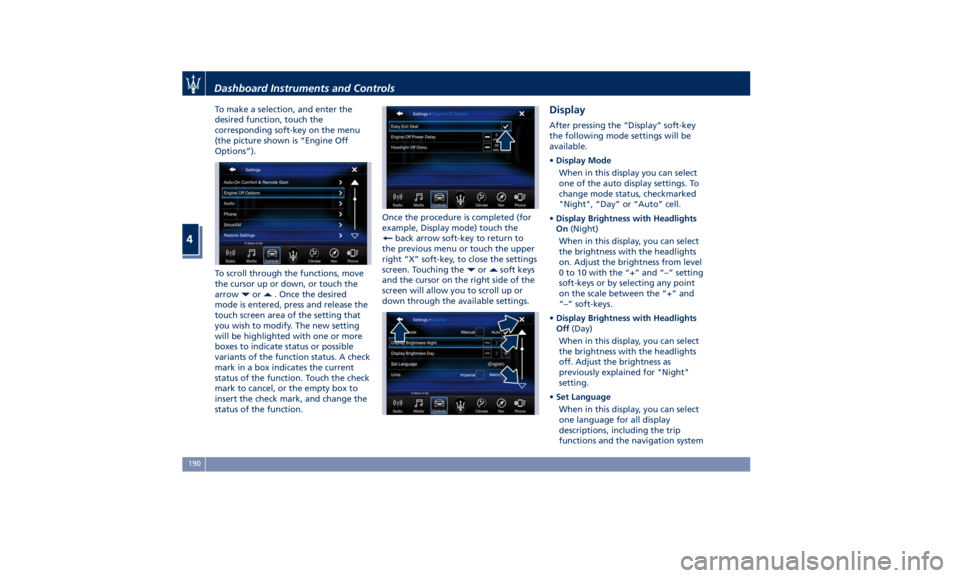
To make a selection, and enter the
desired function, touch the
corresponding soft-key on the menu
(the picture shown is “Engine Off
Options”).
To scroll through the functions, move
the cursor up or down, or touch the
arrow
or . Once the desired
mode is entered, press and release the
touch screen area of the setting that
you wish to modify. The new setting
will be highlighted with one or more
boxes to indicate status or possible
variants of the function status. A check
mark in a box indicates the current
status of the function. Touch the check
mark to cancel, or the empty box to
insert the check mark, and change the
status of the function. Once the procedure is completed (for
example, Display mode) touch the
back arrow soft-key to return to
the previous menu or touch the upper
right “X” soft-key, to close the settings
screen. Touching the
or soft keys
and the cursor on the right side of the
screen will allow you to scroll up or
down through the available settings. Display After pressing the “Display” soft-key
the following mode settings will be
available.
• Display Mode
When in this display you can select
one of the auto display settings. To
change mode status, checkmarked
"Night", “Day” or “Auto” cell.
• Display Brightness with Headlights
On (Night)
When in this display, you can select
the brightness with the headlights
on. Adjust the brightness from level
0 to 10 with the “+” and “–” setting
soft-keys or by selecting any point
on the scale between the “+” and
“–” soft-keys.
• Display Brightness with Headlights
Off (Day)
When in this display, you can select
the brightness with the headlights
off. Adjust the brightness as
previously explained for "Night"
setting.
• Set Language
When in this display, you can select
one language for all display
descriptions, including the trip
functions and the navigation systemDashboard Instruments and Controls
4
190
Page 195 of 396

(if equipped). The available
languages are specific to the target
markets.
• Touchscreen Beep
When in this display, you can turn
on or shut off the sound activated
by pressure of a touchscreen
soft-key.
• Controls Screen Time-Out
When this mode is selected, the
“Controls” screen will remain
displayed for 5 seconds. If this mode
is not selected, the screen will
remain displayed until closed
manually.
• Nav Next Turn Pop-ups in Cluster
By selecting this feature, the next
turn direction will appear on the
instrument cluster along a
programmed route until the desired
destination is reached (see picture). • AutoShow Smartphone Display
Upon Connection
This feature allows to use the MTC+
display as a projection device
connected via USB port in order to
browse the Apple CarPlay and
Android Auto apps. By setting this
feature, automatic switch from
native screen to projection device
will happen every time you connect
your smartphone. For further details
refer to the “Maserati Touch
Control Plus (MTC+)” guide.
Units After pressing the “Units” and then
“Custom” softkey on the touchscreen
you may select between “Imperial”
units and “Metric” of measure. Each
unit of measure can be independently displayed in the TFT Display and in the
navigation system. The following
selectable units of measure are listed
below:
• Distance unit :
select from: “mi” or “km”.
• Speed unit :
select from: “MPH” or “km/h”.
• Consumption unit :
select from: “MPG (US)”, “MPG
(UK)”, “L/100km” or “km/L”.
• Capacity unit :
select from: “gal (US)”, “gal (UK)”
or “L”.
• Pressure unit :
select from: “psi”, “kPa” or “bar”.
• Temperature unit :
select from: “°F” or “°C”.
• Power unit :
select from: “kW”, “hp (US)” or “hp
(UK)”.
• Torque unit :
select from: “lb-ft” or “Nm”.
Voice Commands After pressing “Voice” softkey the
following modes will be available.
• Voice Response Length
When in this display, you canDashboard Instruments and Controls
4
191
Page 196 of 396
change the voice response length
settings. To change the voice
response length, touch the “Brief”
or “Detailed” softkey.
• Show Command List
When this feature is selected, it is
possible to select options during a
voice control session. Options for
available controls are: “Always”,
“w/Help” or “Never”.
Clock Time is always visible on the dashboard
analog clock (see “Analog Clock” in
this section) and in digital format on
the instrument cluster and on the
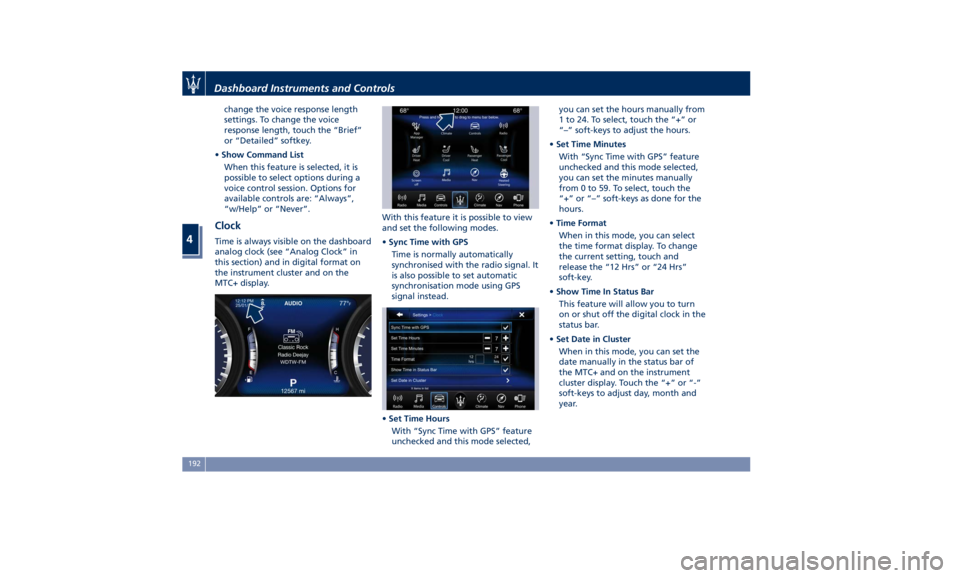
MTC+ display. With this feature it is possible to view
and set the following modes.
• Sync Time with GPS
Time is normally automatically
synchronised with the radio signal. It
is also possible to set automatic
synchronisation mode using GPS
signal instead.
• Set Time Hours
With “Sync Time with GPS” feature
unchecked and this mode selected, you can set the hours manually from
1 to 24. To select, touch the “+” or
“–” soft-keys to adjust the hours.
• Set Time Minutes
With “Sync Time with GPS” feature
unchecked and this mode selected,
you can set the minutes manually
from 0 to 59. To select, touch the
“+” or “–” soft-keys as done for the
hours.
• Time Format
When in this mode, you can select
the time format display. To change
the current setting, touch and
release the “12 Hrs” or “24 Hrs”
soft-key.
• Show Time In Status Bar
This feature will allow you to turn
on or shut off the digital clock in the
status bar.
• Set Date in Cluster
When in this mode, you can set the
date manually in the status bar of
the MTC+ and on the instrument
cluster display. Touch the “+” or “-”
soft-keys to adjust day, month and
year.Dashboard Instruments and Controls
4
192