2019 MASERATI QUATTROPORTE tow
[x] Cancel search: towPage 233 of 396
R (Reverse)
This range is used to move the vehicle
backward.
Switching to R (Reverse) starting from
N (Neutral) is only possible if the
vehicle is moving backwards.
We recommend to shift into R
(Reverse) only after the vehicle has
come to a complete stop.
• Vehicle stationary: switching
between R (Reverse) and D (Drive),
passing from N (Neutral), requires
brake pedal pressed and action on
the lever.
• Vehicle moving: the driver can switch
from R (Reverse) to N (Neutral)
acting on the shift lever without
pressing the unlock button and the
brake pedal.
N (Neutral)
• Vehicle stationary and engine
started: switching from N (Neutral)
to P (Park) requires “P” button
pressed only. Switching from N
(Neutral) to R (Reverse) and/or D
(Drive) requires brake pedal and
unlock button pressed and the
action on the shift lever.
• Vehicle moving: switching from N
(Neutral) to R (Reverse) and/or D
(Drive) requires pressing the unlock button and the action on the shift
lever. Switching to R (Reverse)
starting from N (Neutral) is only
possible if the vehicle is moving
backwards, while switching to D
(Drive) starting from N (Neutral) is
only possible if the vehicle is moving
forwards.
Set the parking brake and shift the
transmission into P (Park) if you must
leave the vehicle.
WARNING!
Do not switch to N (Neutral) and/or
never turn off the ignition to coast
downhill. These are unsafe practices
that limit driver’s response to
changing traffic or road conditions. It
is possible to lose control of the
vehicle and have a collision.
CAUTION!
Towing the vehicle, coasting, or
driving for any other reason with the
transmission in N (Neutral) can result
in severe transmission damage. See
“Towing a Disabled Vehicle” in section
“In an Emergency” for further
information. D (Drive)
This
range should
be used for most
city and highway driving. It provides
the smoothest upshifts and downshifts
and the best fuel economy. The
transmission automatically shifts up
and down through all gears. The D
(Drive) mode provides optimum
driving characteristics under all normal
operating conditions of the vehicle.
• Vehicle stationary: to switch from D
(Drive) to R (Reverse) requires brake
pedal and unlock button pressed
and the action on the shift lever: to
reach N (Neutral) starting from D
(Drive) is possible by only acting on
the shift lever.
• To enable special operations while
the car is moving at a low speed,
such as getting out of marsh or
snow, it is possible to run quickly
from D (Drive) to R (Reverse), and
vice versa, by pressing the unlock
button and acting on the shift lever
passing from N (Neutral).
• Vehicle moving: switching to N
(Neutral) from D (Drive) it is not
necessary to press brake pedal.
• From D (Drive) selected mode it is
always possible to switch to M +/-
(Manual) mode, by move the shift
lever to the left (see followingDriving
5
229
Page 234 of 396
paragraph); to return to “D”
position, move the shift lever to the
right. It is possible to shift from D
(Drive) mode to M +/- (Manual) mode
regardless of car speed.
• When in D (Drive) mode, using the
paddles behind the steering wheel (if
equipped), will cause the system to
enter a temporary function and
enable the manual shift mode. This
range is indicated with the symbols
“+/-” above and below “D” letter on
the gear range field of the display.
The system will then switch back to
automatic mode according to time
elapsed in “temporary” mode and
driving conditions.
At extremely cold temperatures (-23°F /
-30°C or below), transmission may be
affected by the low temperature of
the engine and transmission. Normal
operation will resume once the
transmission temperature has risen to
a normal level.
M +/- (Manual)
This mode is obtained by moving the
shift lever to the left in “M +/-“
position.
In this mode, the transmission interacts
with the driver in order to allow
manual shift and ensure increased
control of the vehicle. The current mode allows the transmission system
to optimise the engine brake action,
remove undesired shifting into higher
and lower gears and improve the
overall performance of the vehicle.
This mode allows you to move the shift
lever step by step forward “–“ or
backward “+” without pressing the
unlock button. The current
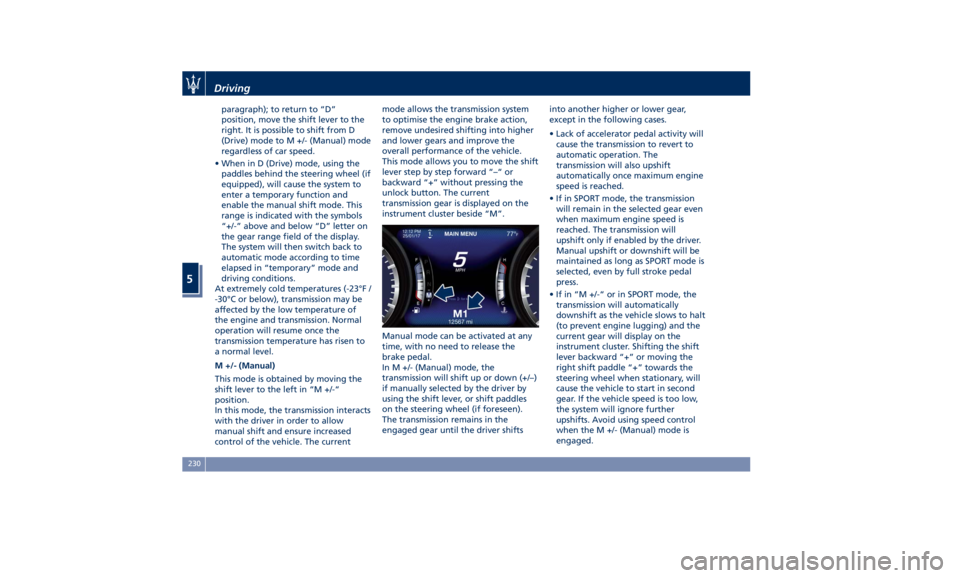
transmission gear is displayed on the
instrument cluster beside “M”.
Manual mode can be activated at any
time, with no need to release the
brake pedal.
In M +/- (Manual) mode, the
transmission will shift up or down (+/–)
if manually selected by the driver by
using the shift lever, or shift paddles
on the steering wheel (if foreseen).
The transmission remains in the
engaged gear until the driver shifts into another higher or lower gear,
except in the following cases.
• Lack of accelerator pedal activity will
cause the transmission to revert to
automatic operation. The
transmission will also upshift
automatically once maximum engine
speed is reached.
• If in SPORT mode, the transmission
will remain in the selected gear even
when maximum engine speed is
reached. The transmission will
upshift only if enabled by the driver.
Manual upshift or downshift will be
maintained as long as SPORT mode is
selected, even by full stroke pedal
press.
• If in “M +/-“ or in SPORT mode, the
transmission will automatically
downshift as the vehicle slows to halt
(to prevent engine lugging) and the
current gear will display on the
instrument cluster. Shifting the shift
lever backward “+” or moving the
right shift paddle “+” towards the
steering wheel when stationary, will
cause the vehicle to start in second
gear. If the vehicle speed is too low,
the system will ignore further
upshifts. Avoid using speed control
when the M +/- (Manual) mode is
engaged.Driving
5
230
Page 235 of 396
When the car stops in M +/- (Manual)
mode, the transmission automatically
moves the shift lever and inserts P
(Park).
If you enter the I.C.E. drive mode
when the gearshift is in “M +/-”
position, the system activates the
automatic return of the shift lever in D
(Drive) mode.
Shift Paddles
The driver can change gears with the
shift paddles behind the steering
wheel when in D (Drive) and M +/-
(Manual) mode.
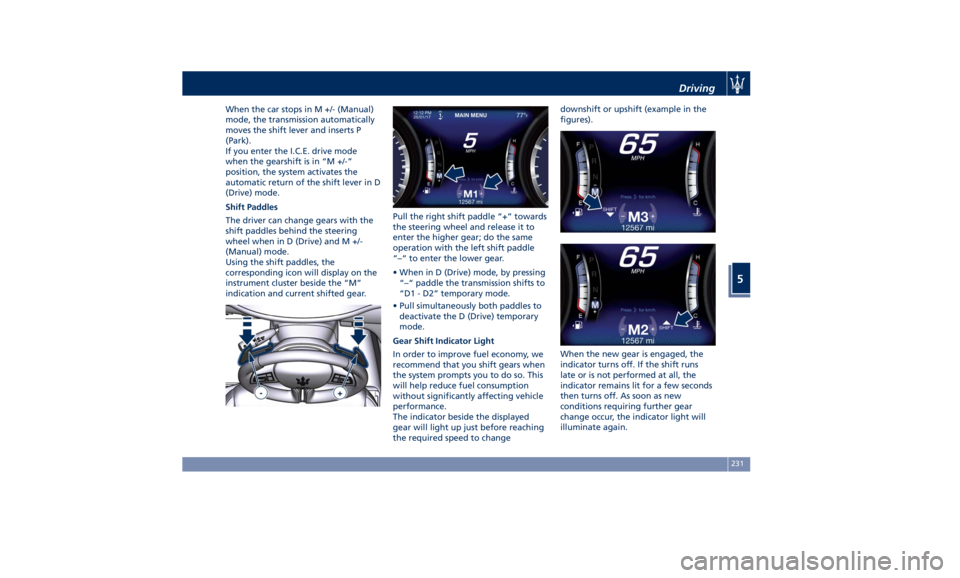
Using the shift paddles, the
corresponding icon will display on the
instrument cluster beside the “M”
indication and current shifted gear. Pull the right shift paddle “+” towards
the steering wheel and release it to
enter the higher gear; do the same
operation with the left shift paddle
“–“ to enter the lower gear.
• When in D (Drive) mode, by pressing
“–“ paddle the transmission shifts to
“D1 - D2” temporary mode.
• Pull simultaneously both paddles to
deactivate the D (Drive) temporary
mode.
Gear Shift Indicator Light
In order to improve fuel economy, we
recommend that you shift gears when
the system prompts you to do so. This
will help reduce fuel consumption
without significantly affecting vehicle
performance.
The indicator beside the displayed
gear will light up just before reaching
the required speed to change downshift or upshift (example in the
figures).
When the new gear is engaged, the
indicator turns off. If the shift runs
late or is not performed at all, the
indicator remains lit for a few seconds
then turns off. As soon as new
conditions requiring further gear
change occur, the indicator light will
illuminate again.Driving
5
231
Page 249 of 396
• It is advisable to keep the "Auto
Apply" function always active (On)
so that the vehicle is properly
secured with electric parking brake.
Deactivating Automatic
Operation The automatic engagement function
can be deactivated/reactivated by
selecting the menu item “Vehicle
settings” through the switch on the
right side of the steering wheel (refer
to “Instrument Cluster” in section
“Dashboard Instruments and
Controls”.)
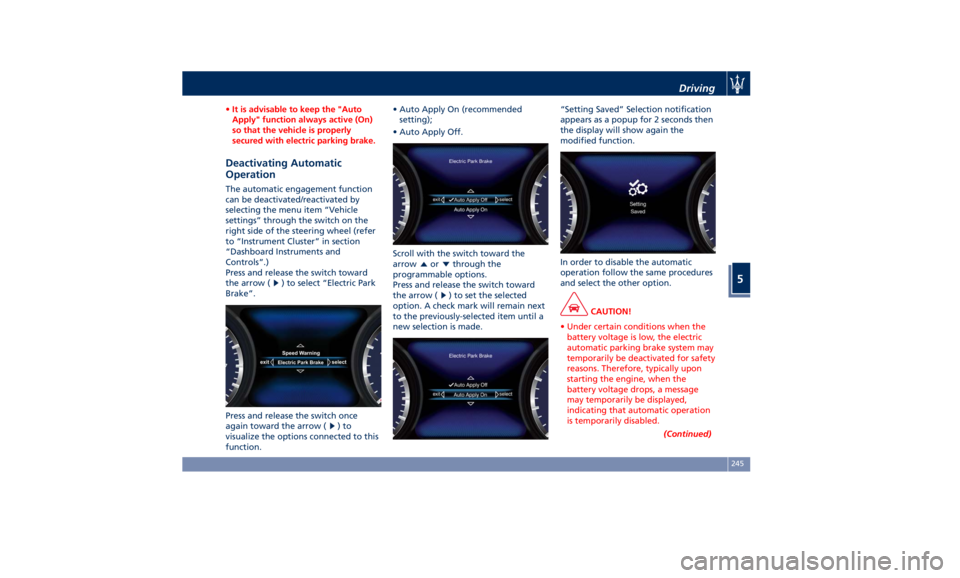
Press and release the switch toward
the arrow (
) to select “Electric Park
Brake”.
Press and release the switch once
again toward the arrow ( )to
visualize the options connected to this
function. • Auto Apply On (recommended
setting);
• Auto Apply Off.
Scroll with the switch toward the
arrow
or through the
programmable options.
Press and release the switch toward
the arrow (
) to set the selected
option. A check mark will remain next
to the previously-selected item until a
new selection is made. “Setting Saved” Selection notification
appears as a popup for 2 seconds then
the display will show again the
modified function.
In order to disable the automatic
operation follow the same procedures
and select the other option.
CAUTION!
• Under certain conditions when the
battery voltage is low, the electric
automatic parking brake system may
temporarily be deactivated for safety
reasons. Therefore, typically upon
starting the engine, when the
battery voltage drops, a message
may temporarily be displayed,
indicating that automatic operation
is temporarily disabled.
(Continued)Driving
5
245
Page 250 of 396
(Continued)
• In case of repetitive requests to reset
the EPB through the messages shown
on the TFT display, please contact an
Authorized Maserati Dealer .
Failure Indication In the event of electric parking brake
system failure, the warning light
on the display will light up and the
related message will show for 5
seconds.
WARNING!
In the event of an EPB failure, take
your vehicle to the nearest Authorized
Maserati Dealer as soon as possible.
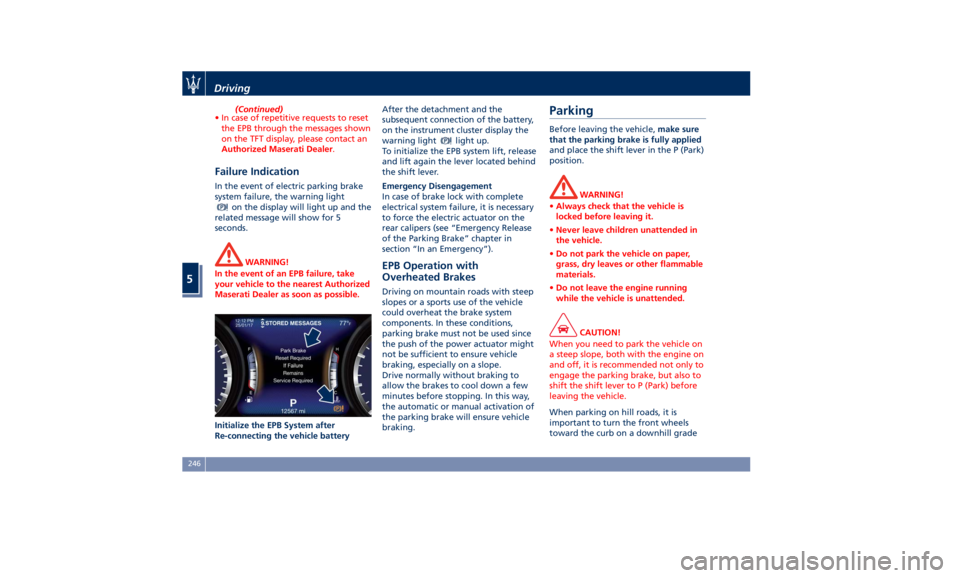
Initialize the EPB System after
Re-connecting
the vehicle battery After the detachment and the
subsequent connection of the battery,
on the instrument cluster display the
warning light
light up.
To initialize the EPB system lift, release
and lift again the lever located behind
the shift lever.
Emergency Disengagement
In case of brake lock with complete
electrical system failure, it is necessary
to force the electric actuator on the
rear calipers (see “Emergency Release
of the Parking Brake” chapter in
section “In an Emergency”).
EPB Operation with
Overheated Brakes Driving on mountain roads with steep
slopes or a sports use of the vehicle
could overheat the brake system
components. In these conditions,
parking brake must not be used since
the push of the power actuator might
not be sufficient to ensure vehicle
braking, especially on a slope.
Drive normally without braking to
allow the brakes to cool down a few
minutes before stopping. In this way,
the automatic or manual activation of
the parking brake will ensure vehicle
braking.Parking Before leaving the vehicle, make sure
that the parking brake is fully applied
and place the shift lever in the P (Park)
position.
WARNING!
• Always check that the vehicle is
locked before leaving it.
• Never leave children unattended in
the vehicle.
• Do not park the vehicle on paper,
grass, dry leaves or other flammable
materials.
• Do not leave the engine running
while the vehicle is unattended.
CAUTION!
When you need to park the vehicle on
a steep slope, both with the engine on
and off, it is recommended not only to
engage the parking brake, but also to
shift the shift lever to P (Park) before
leaving the vehicle.
When parking on hill roads, it is
important
to turn
the front wheels
toward the curb on a downhill gradeDriving
5
246
Page 257 of 396
CAUTION!
• Under normal conditions, all red
warning lights on the instrument
cluster display should be off. When
they come on, this indicates a
malfunction. Refer to “Instrument
Cluster” in section “Dashboard
Instruments and Controls”.
• Continuing to drive when a red
warning light is on could cause
serious damage to the vehicle and
affect its performance.
Onboard Diagnostic System Your vehicle is equipped with a
sophisticated onboard diagnostic
system. This system monitors the
performance of the emissions, engine,
and automatic transmission control
systems. When these systems are
operating properly, your vehicle will
provide excellent performance and
fuel economy, as well as engine
emissions well within current local
regulations of various countries.
If any of these systems require service,
the system will turn on the
Malfunction Indicator Light (MIL).
It will also store diagnostic codes and
other information, which your Authorized Maserati Dealer will use to
service your vehicle. Although the
vehicle will still be driveable and not
need towing, contact an Authorized
Maserati Dealer for service as soon as
possible.
CAUTION!
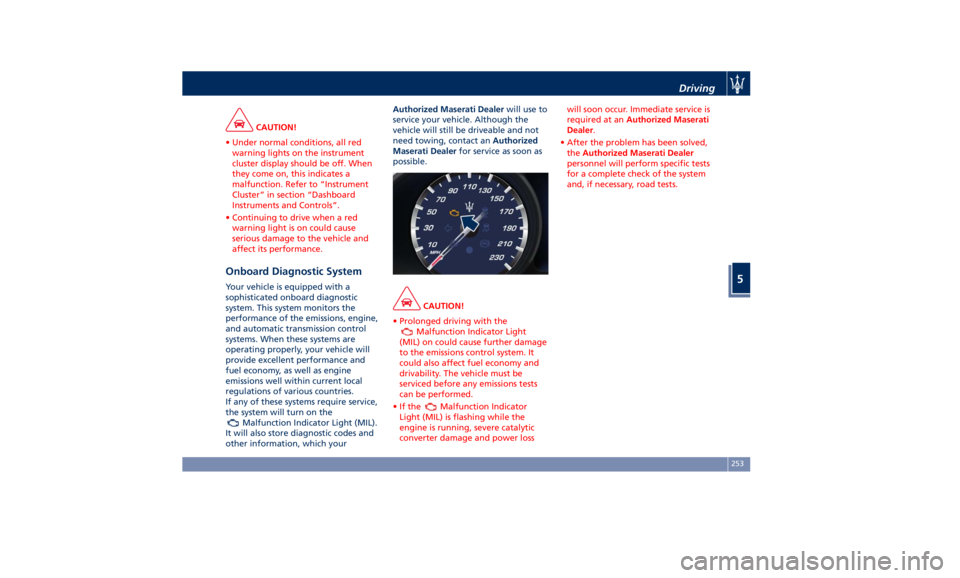
• Prolonged driving with the
Malfunction Indicator Light
(MIL) on could cause further damage
to the emissions control system. It
could also affect fuel economy and
drivability. The vehicle must be
serviced before any emissions tests
can be performed.
•Ifthe
Malfunction Indicator
Light (MIL) is flashing while the
engine is running, severe catalytic
converter damage and power loss will soon occur. Immediate service is
required at an Authorized Maserati
Dealer .
• After the problem has been solved,
the Authorized Maserati Dealer
personnel will perform specific tests
for a complete check of the system
and, if necessary, road tests.Driving
5
253
Page 267 of 396

If system does not detect the presence
of any vehicles ahead, only the bars
referred to set distance will be
displayed.
When system detects the presence of a
vehicle ahead, it is displayed in front
of the bars (see example in the figure).
To increase or decrease the number of
bars, corresponding to the gap from vehicle ahead, press and release the
distance setting button.
Each press and release of the button
changes the gap starting from 3 bars
(default distance) and moving in a
sequential way towards the minimum
distance: 3 → 2 → 1 → 4 → 3 → 2 → 1 → 4 and so
on.
If there is no vehicle ahead, the
vehicle will maintain the set speed. If a
slower moving vehicle is detected in
the same lane, the system displays the
target vehicle icon before the bars.
From that moment, the system adjusts
the vehicle speed automatically to
maintain the distance setting,
regardless of the set speed.
The vehicle will then maintain the set
distance until:
• The vehicle ahead accelerates to a
speed above the set speed. • The vehicle ahead moves out of the
lane or view of the sensor.
• The distance setting is changed.
• The driver disables the system.
The maximum braking applied by ACC
is limited; however, the driver can
always apply the brakes manually, if
necessary. Obviously, any time the ACC
system automatically operates the
brakes, the brake lights will turn on as
if the driver was braking.
A Proximity Warning on display will
alert the driver if ACC predicts that its
maximum braking level is not
sufficient to maintain the set distance.
If this occurs, a visual alert will flash
on the display and a chime will sound
while ACC continues to apply its
maximum braking capacity.Driver Assist Page
Non-Driver Assist Page Driving
5
263
Page 278 of 396
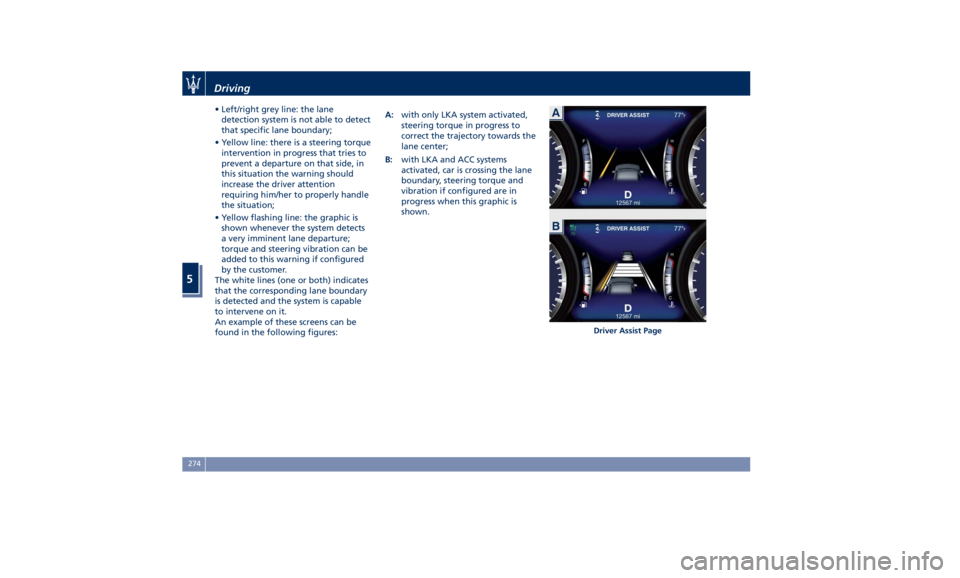
• Left/right grey line: the lane
detection system is not able to detect
that specific lane boundary;
• Yellow line: there is a steering torque
intervention in progress that tries to
prevent a departure on that side, in
this situation the warning should
increase the driver attention
requiring him/her to properly handle
the situation;
• Yellow flashing line: the graphic is
shown whenever the system detects
a very imminent lane departure;
torque and steering vibration can be
added to this warning if configured
by the customer.
The white lines (one or both) indicates
that the corresponding lane boundary
is detected and the system is capable
to intervene on it.
An example of these screens can be
found in the following figures: A: with only LKA system activated,
steering torque in progress to
correct the trajectory towards the
lane center;
B: with LKA and ACC systems
activated, car is crossing the lane
boundary, steering torque and
vibration if configured are in
progress when this graphic is
shown.
Driver Assist PageDriving
5
274