2019 MASERATI QUATTROPORTE start stop button
[x] Cancel search: start stop buttonPage 57 of 396

Automatic Opening and
Closing Movement of the
Power Trunk Lid Automatic opening and closing
movement of the power trunk lid is
driven by electric actuators and a
motorized latch ensuring lid locking
upon closing.
The
button on key fob and button
on dome console not only allows user
to completely open the power trunk
lid, but also to stop it at any
intermediate position by pressing the
button again whenever you wish to
stop and resume the opening process.
In addition to these commands, it is
possible open and close the power
trunk lid, or stop its movement, by
simply moving your foot under the
rear bumper, as specified in the
paragraph “Hands Free Power Trunk
Release and Closing”. In this latter
case, the power trunk lid will be
opened and closed only if the “Passive
Entry” system acknowledges the
presence of the key fob RKE
transmitter within 3.3 ft (1 m) of the
power trunk lid.
Power trunk lid uses the button
in-between the license plate lights,
indicated in figure, to activate the
opening once the car has been unlocked by the key fob or by the
“Passive Entry” function.
By pressing this button when the
power trunk lid is closed, you can
open it completely, or by pressing the
button again stop the opening
process, or by pressing the button
again invert the movement and close
it completely.
When the power trunk lid is open, to
move it there are two buttons
positioned on its right lower part as
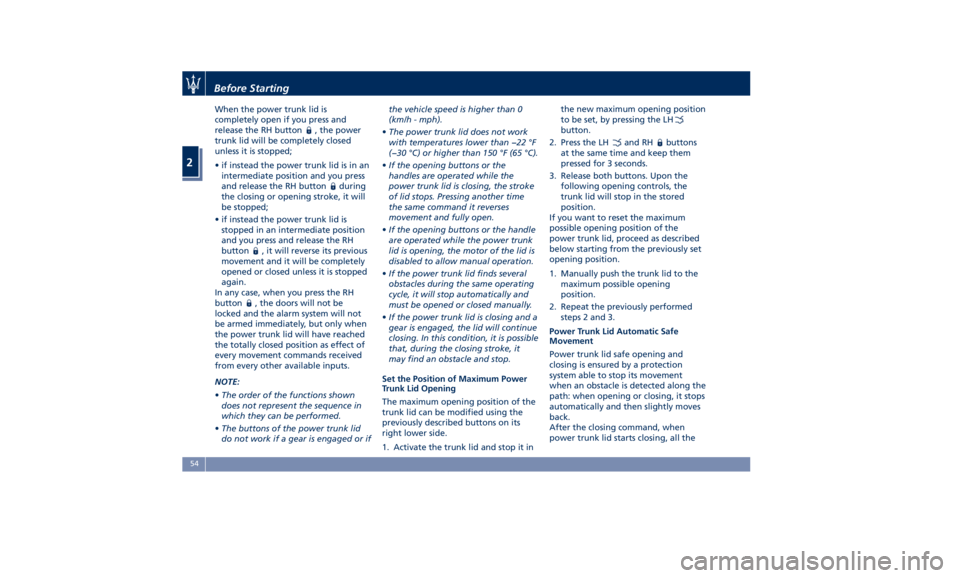
indicated in figure. When the power trunk lid is
completely open if you press and
release the LH button
, the power
trunk lid will be completely closed
unless it is stopped;
• if instead the power trunk lid is in an
intermediate position and you press
and release the LH button
during
the closing or opening stroke, it will
be stopped;
• if instead the power trunk lid is
stopped in an intermediate position
and you press and release the LH
button
, it will reverse its previous
movement and it will be completely
opened or closed unless it is stopped
again.
In any case, when you press the LH
button
, the doors will not be
locked and the alarm system will not
be armed.Before Starting
2
53
Page 58 of 396

When the power trunk lid is
completely open if you press and
release the RH button
, the power
trunk lid will be completely closed
unless it is stopped;
• if instead the power trunk lid is in an
intermediate position and you press
and release the RH button
during
the closing or opening stroke, it will
be stopped;
• if instead the power trunk lid is
stopped in an intermediate position
and you press and release the RH
button
, it will reverse its previous
movement and it will be completely
opened or closed unless it is stopped
again.
In any case, when you press the RH
button
, the doors will not be
locked and the alarm system will not
be armed immediately, but only when
the power trunk lid will have reached
the totally closed position as effect of
every movement commands received
from every other available inputs.
NOTE:
• The order of the functions shown
does not represent the sequence in
which they can be performed.
• The buttons of the power trunk lid
do not work if a gear is engaged or if the vehicle speed is higher than 0
(km/h - mph).
• The power trunk lid does not work
with temperatures lower than −22 °F
(−30 °C) or higher than 150 °F (65 °C).
• If the opening buttons or the
handles are operated while the
power trunk lid is closing, the stroke
of lid stops. Pressing another time
the same command it reverses
movement and fully open.
• If the opening buttons or the handle
are operated while the power trunk
lid is opening, the motor of the lid is
disabled to allow manual operation.
• If the power trunk lid finds several
obstacles during the same operating
cycle, it will stop automatically and
must be opened or closed manually.
• If the power trunk lid is closing and a
gear is engaged, the lid will continue
closing. In this condition, it is possible
that, during the closing stroke, it
may find an obstacle and stop.
Set the Position of Maximum Power
Trunk Lid Opening
The maximum opening position of the
trunk lid can be modified using the
previously described buttons on its
right lower side.
1. Activate the trunk lid and stop it in the new maximum opening position
to be set, by pressing the LH
button.
2. Press the LH
and RH buttons
at the same time and keep them
pressed for 3 seconds.
3. Release both buttons. Upon the
following opening controls, the
trunk lid will stop in the stored
position.
If you want to reset the maximum
possible opening position of the
power trunk lid, proceed as described
below starting from the previously set
opening position.
1. Manually push the trunk lid to the
maximum possible opening
position.
2. Repeat the previously performed
steps 2 and 3.
Power Trunk Lid Automatic Safe
Movement
Power trunk lid safe opening and
closing is ensured by a protection
system able to stop its movement
when an obstacle is detected along the
path: when opening or closing, it stops
automatically and then slightly moves
back.
After the closing command, when
power trunk lid starts closing, all theBefore Starting
2
54
Page 60 of 396

sideways and immediately pull it back:
from this moment, the power trunk lid
will activate within two seconds.
If closed, with the foot movement the
power trunk lid will:
• unlock and completely open;
• after another kick, will stop;
• after another kick, will reverse its
movement and completely close
unless stopped again.
If open, with the foot movement the
power trunk lid will:
• completely close but not lock;
• another kick before the completed
closing can stop the movement;
• if the movement was stopped
another kick operation will invert a
complete opening.
NOTE:
• If your foot movement fails to
activate the power trunk lid
movement, wiggling your foot under
the bumper will not help. Repeat the
whole kick movement.
• In particular situations, external
factors affecting the sensor area may
trigger the Hands free power trunk
lid release feature. For example,
when washing the vehicle, a water
jet aimed at the sensor area may trigger the “Hands free” power
trunk release feature. Keep the key
fob RKE transmitter away from the
sensing range of the sensors (10 ft/3
m) or disable the “Hands free”
feature from the MTC+ menu (see
“MTC+ Settings” in section
“Dashboard Instruments and
Controls”). A key fob RKE transmitter
located in the front seat passenger
area is considered out of range of
the “Hands free” trunk lid release
sensor.
• If somebody or something knocks
against the power trunk lid while it is
moving, the safety system might stop
lid opening or closing movement.
Trunk Lid Emergency Release If accessing the trunk from the rear
seats, operate the emergency release
lever (see the chapter "Trunk Safety"
in this section) in order to lower the
rear seat backrest (see "Cargo Area" in
section “Understanding the Vehicle”).
If the power release control operated
by pressing the button on the dome
console fails, which may occur when
the battery is low on voltage, it is
possible to temporarily power the
system by using the battery remote
poles located inside the engine compartment (see “Auxiliary
Jump-Start Procedure” in section “In
an Emergency”). Thus it is possible to
normally open the trunk lid by using
the key fob RKE transmitter. Have the
vehicle checked by an Authorized
Maserati Dealer in order to solve the
failure.Before Starting
2
56
Page 99 of 396

1 Adjustable side air outlets.
2 Engine START/STOP button.
3 Light switch.
4 Light dimmer controls.
5 Steering wheel controls.
6 Instrument cluster.
7* Right shift paddle +.
8* Left shift paddle –.
9 Hood release.
10 Adjustable central air outlets.
11 Analog clock.
12 MTC+ display.
13 Multifuction lever (windshield
wipers, headlight selection and
turn signals).
14 Climate controls.
15 Dashboard glove box handle.
16 Dashboard glove box.
17 Cover for compartment with
AUX, USB, SD memory card
port and slide phone drawer.
18 Storage compartment handle.
19 Storage compartment.
20 Vehicle security light and solar
sensor.
21 Internal rear view mirror. 22 Auto-dimming on/off button.
23 Front dome console.
(*) If equipped.
Central Console Components 1 Automatic transmission shift
lever.
2 Hazard lights switch.
3 Drive mode switches.
4 Electric Parking Brake lever.
5 Glove compartment.
6 Unlock button for central
console with cupholder and
power outlet.
7 Rotary selectors and buttons
foe the multimedia navigation.
8 Cover for cupholder and power
socket compartment.
9 Central console covers with
armrest function.
10 Air outlets (adjustable).
11 Rear power sunshade and rear
seats comfort controls panel.
12 Storage compartment.
13 Rear climate controls panel for
four-zone air conditioner
(optional).A/C Dual – zone
A/C Four – zone Understanding the Vehicle
3
95
Page 147 of 396

open, then adjust the sunroof opening
to minimise the buffeting.
Ignition Off Operation The power sunroof controls will
remain active for up to approximately
ten minutes after the ignition switch is
in OFF position. Opening either front
door will cancel this feature. The
ignition system timing can be set using
the MTC+ System (see “MTC+
Settings” in section “Dashboard
Instruments and Controls”).
Sunroof Maintenance Use only a nonabrasive cleaner and a
soft cloth to clean the glass panel. HomeLink ®
(optional) HomeLink ®
replaces up to three
hand-held transmitters operating the
automatic devices that open garage
doors and gates, enable/disable the
lighting or security systems. The
HomeLink ®
unit is powered by your
vehicle's 12 Volt battery. The
HomeLink ®
buttons that are located in
the overhead console designate the
three different HomeLink ®
channels.
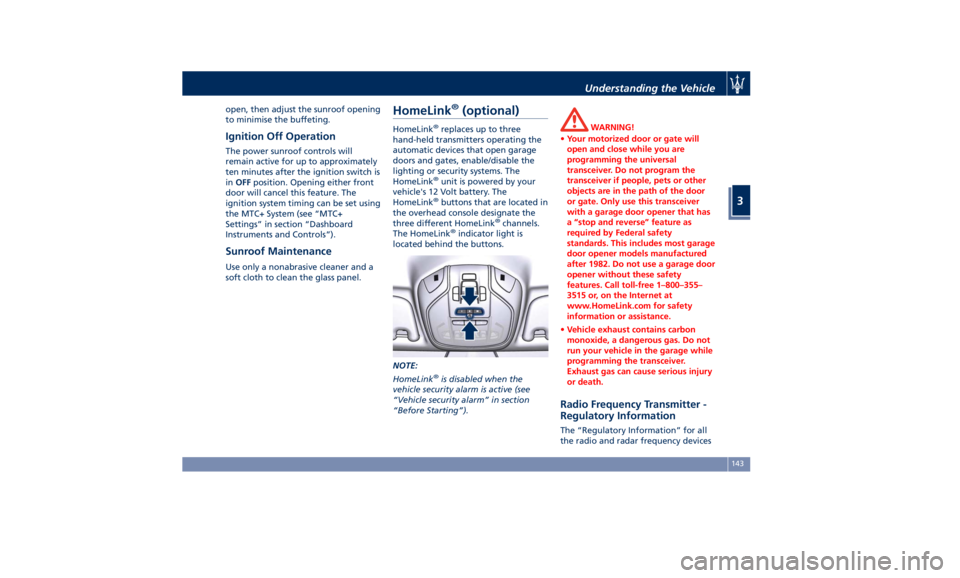
The HomeLink ®
indicator light is
located behind the buttons.
NOTE:
HomeLink ®
is disabled when the
vehicle security alarm is active (see
“Vehicle security alarm” in section
“Before Starting”). WARNING!
• Your motorized door or gate will
open and close while you are
programming the universal
transceiver. Do not program the
transceiver if people, pets or other
objects are in the path of the door
or gate. Only use this transceiver
with a garage door opener that has
a “stop and reverse” feature as
required by Federal safety
standards. This includes most garage
door opener models manufactured
after 1982. Do not use a garage door
opener without these safety
features. Call toll-free 1–800–355–
3515 or, on the Internet at
www.HomeLink.com for safety
information or assistance.
• Vehicle exhaust contains carbon
monoxide, a dangerous gas. Do not
run your vehicle in the garage while
programming the transceiver.
Exhaust gas can cause serious injury
or death.
Radio Frequency Transmitter -
Regulatory Information The “Regulatory Information” for all
the radio and radar frequency devicesUnderstanding the Vehicle
3
143
Page 160 of 396

brake pedal pulsation may be felt
during each stop of the vehicle.
Inefficiency of one of the dual brake
system cycles is indicated by the brake
indicator light, which will turn on
when the brake fluid level in the
master cylinder has dropped below a
certain level.
The light will remain lit until the
problem has been solved.
If a brake failure occurs, visit an
Authorized Maserati Dealer as soon as
possible in order to check up the brake
system.
In the event of an Electronic Brake
Force Distribution (EBD) failure, both
the brake indicator light and the ABS
light illuminate.
Immediate repair of the ABS system is
required.
Functioning of the brake indicator
light can be checked by turning the
ignition switch from OFF to RUN
position.
The light should illuminate for
approximately 2 seconds.
The light should switch off unless the
parking brake is engaged or a brake
fault is detected. If the light does not
illuminate, have the light system
repaired by an Authorized Maserati
Dealer . The light will also switch on when the
parking brake is engaged with the
ignition switch in RUN position.
This light only indicates the brake is
engaged but not the clamping force of
the parking brake to the wheels.
WARNING!
Driving a vehicle with the red brake
light on can be very dangerous and is
not recommended. Part of the brake
system may have failed, resulting in
increased braking distances and the
risk of an accident. Have the vehicle
checked as soon as possible at an
Authorized Maserati Dealer.
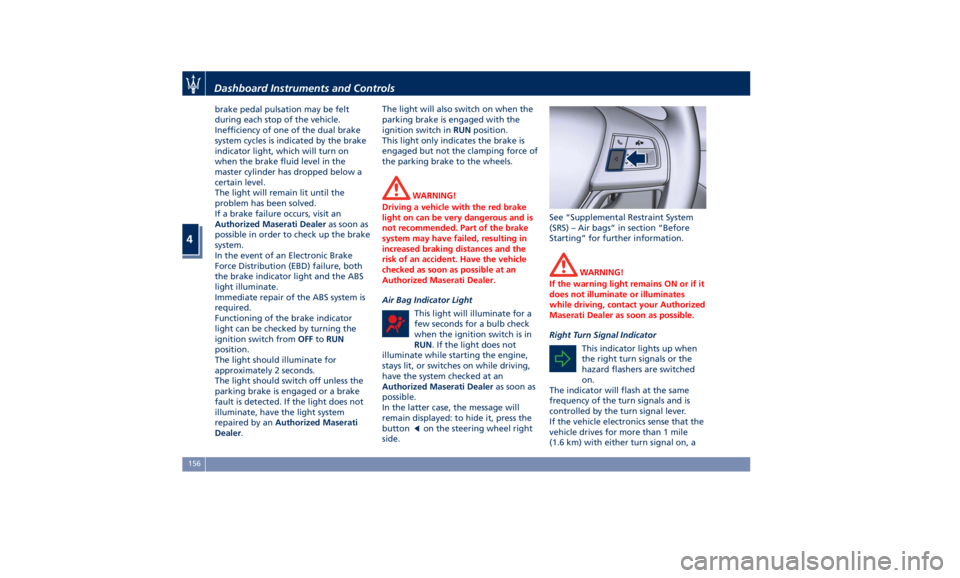
Air Bag Indicator Light
This
light will
illuminate for a
few seconds for a bulb check
when the ignition switch is in
RUN . If the light does not
illuminate while starting the engine,
stays lit, or switches on while driving,
have the system checked at an
Authorized Maserati Dealer as soon as
possible.
In the latter case, the message will
remain displayed: to hide it, press the
button
on the steering wheel right
side. See “Supplemental Restraint System
(SRS) – Air bags” in section “Before
Starting” for further information.
WARNING!
If the warning light remains ON or if it
does not illuminate or illuminates
while driving, contact your Authorized
Maserati Dealer as soon as possible.
Right Turn Signal Indicator
This
indicator lights
up when
the right turn signals or the
hazard flashers are switched
on.
The indicator will flash at the same
frequency of the turn signals and is
controlled by the turn signal lever.
If the vehicle electronics sense that the
vehicle drives for more than 1 mile
(1.6 km) with either turn signal on, aDashboard Instruments and Controls
4
156
Page 168 of 396

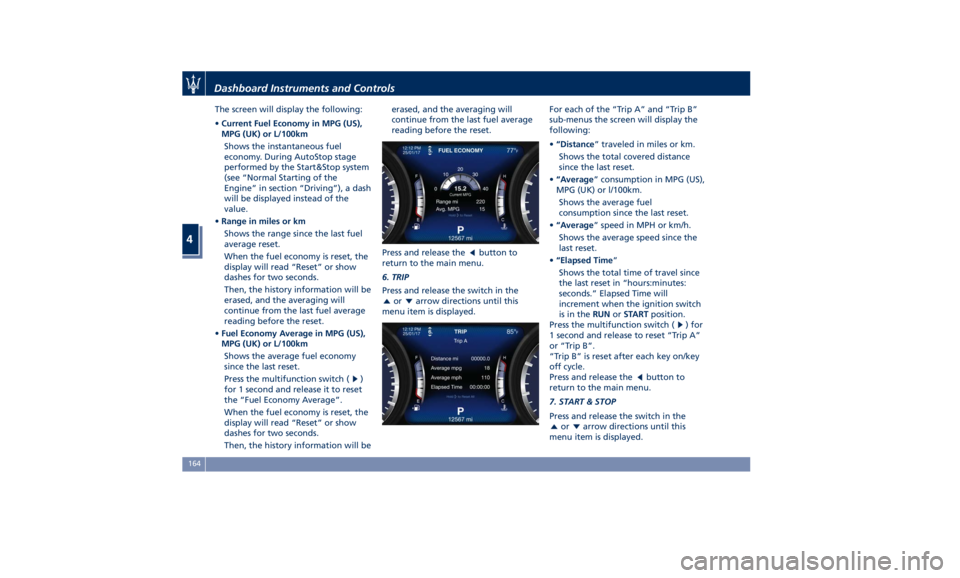
The screen will display the following:
• Current Fuel Economy in MPG (US),
MPG (UK) or L/100km
Shows the instantaneous fuel
economy. During AutoStop stage
performed by the Start&Stop system
(see “Normal Starting of the
Engine” in section “Driving”), a dash
will be displayed instead of the
value.
• Range in miles or km
Shows the range since the last fuel
average reset.
When the fuel economy is reset, the
display will read “Reset” or show
dashes for two seconds.
Then, the history information will be
erased, and the averaging will
continue from the last fuel average
reading before the reset.
• Fuel Economy Average in MPG (US),
MPG (UK) or L/100km
Shows the average fuel economy
since the last reset.
Press the multifunction switch (
)
for 1 second and release it to reset
the “Fuel Economy Average”.
When the fuel economy is reset, the
display will read “Reset” or show
dashes for two seconds.
Then, the history information will be erased, and the averaging will
continue from the last fuel average
reading before the reset.
Press and release the
button to
return to the main menu.
6. TRIP
Press and release the switch in the
or arrow directions until this
menu item is displayed. For each of the “Trip A” and “Trip B”
sub-menus the screen will display the
following:
• “Distance ” traveled in miles or km.
Shows the total covered distance
since the last reset.
• “Average ” consumption in MPG (US),
MPG (UK) or l/100km.
Shows the average fuel
consumption since the last reset.
• “Average ” speed in MPH or km/h.
Shows the average speed since the
last reset.
• “Elapsed Time ”
Shows the total time of travel since
the last reset in “hours:minutes:
seconds.” Elapsed Time will
increment when the ignition switch
is in the RUN or START position.
Press the multifunction switch (
) for
1 second and release to reset “Trip A”
or “Trip B”.
“Trip B” is reset after each key on/key
off cycle.
Press and release the
button to
return to the main menu.
7. START & STOP
Press and release the switch in the
or arrow directions until this
menu item is displayed.Dashboard Instruments and Controls
4
164
Page 178 of 396

steering wheel, or through the button
on the central console or through the
relevant soft-key of the MTC+. See
chapter “Automatic Start&Stop
System” of section “Driving” for
further information.
Start&Stop Failure Warning Light
This warning light illuminates
when there is a failure in the
Start&Stop system. Switch the
engine on or off using the
normal procedure with the ignition
device START/STOP and have the
vehicle checked at an Authorized
Maserati Dealer .
Scheduled Maintenance (Service)
Indicator
This indicator illuminates and
a message flashes on the
display for approximately 5
seconds after an acoustic
signal to indicate that the next
scheduled maintenance is due or is
already overdue.
Unless reset, the message will continue
to display each time you cycle the
ignition to the RUN position.
To turn off the message temporarily,
press and release the
button on the
steering wheel. To reset the service
indicator system, please visit an
Authorized Maserati Dealer . ADAS Status Indicators (if equipped)
When you are not viewing the
“Drive Assist” page, the
indicators at the top left-hand
side of the display indicate
status of individual ADAS system or
the combination of them (see
examples).
For further details, refer to
“Adaptive Cruise Control -
ACC”, “Lane Keeping Assist -
LKA” and “Highway Assist - HAS” in
section “Driving”.
Forward Collision Warning (FCW) Off
(if equipped)
This warning light informs the
driver that Forward Collision
Warning (FCW) is disabled.
This might occur when front
sensor and/or the ACC/FCW system
sensors are malfunctioning and need
cleaning or servicing and when
ACC/FCW system is not available due
to a system error (for further details,
refer to “Adaptive Cruise Control –
ACC” in section “Driving”). This
warning light will light even when the
activation of another driver assistance
feature or drive mode (such as “
-ESC
OFF”) disables the FCW. Forward Collision Warning (FCW) Fault
(if equipped)
This warning light informs that
FCW is in fault state. If this
light occurs together with
other specific messages, take
your vehicle to an Authorized Maserati
Dealer for service. It is nevertheless
possible to drive the vehicle without
using this function (for further details,
refer to “Forward Collision Warning -
FCW” in section “Driving”).
AWD Failure Warning Light (on AWD
version only)
This warning light turns on to
indicate a fault of the AWD
system otherwise a fault or
overheating due to excessive
wheel spin. Contact an Authorized
Maserati Dealer as soon as possible,
and avoid using the vehicle in heavy
duty conditions.
Set Passive Speed Limit
This indicator light indicates
the passive speed limit set via
the controls on the RH side of
the steering wheel (for further
details, refer to “TFT Display: Menus
and Settings” in this chapter).Dashboard Instruments and Controls
4
174