2019 MASERATI QUATTROPORTE key
[x] Cancel search: keyPage 294 of 396
Traffic Sign Assist – TSA
(optional) TSA detects traffic signs through the
use of a forward-facing digital camera
mounted on windshield, behind the
rear-view mirror. TSA assists the driver
by displaying on the instrument cluster
detected speed limits and traffic signs
with a restriction indicated by an
additional sign (e.g. in snow
conditions). TSA also uses the data of
the navigation system, in order to
provide information to the driver in all
cases in which the camera is not able
to detect the traffic signs that are
present on the road where the car is
travelling.
Some examples of these are: due to
low visibility, light reflection, damaged
traffic signs, traffic signs in wrong
position like rotated or fallen poles.
NOTE:
• Overtaking restriction signs are not
displayed by the TSA system.
• TSA provides a visual warning to the
driver when he/she unintentionally
reaches the maximum speed limit
allowed or when it exceeds the set
“Sensitivity” value. • The performance of TSA depends on
the update degree of navigation
system’s maps.
Customised Settings TSA is configurable by the customer
regarding the display mode on the
instrument cluster and the warning
sensitivity.
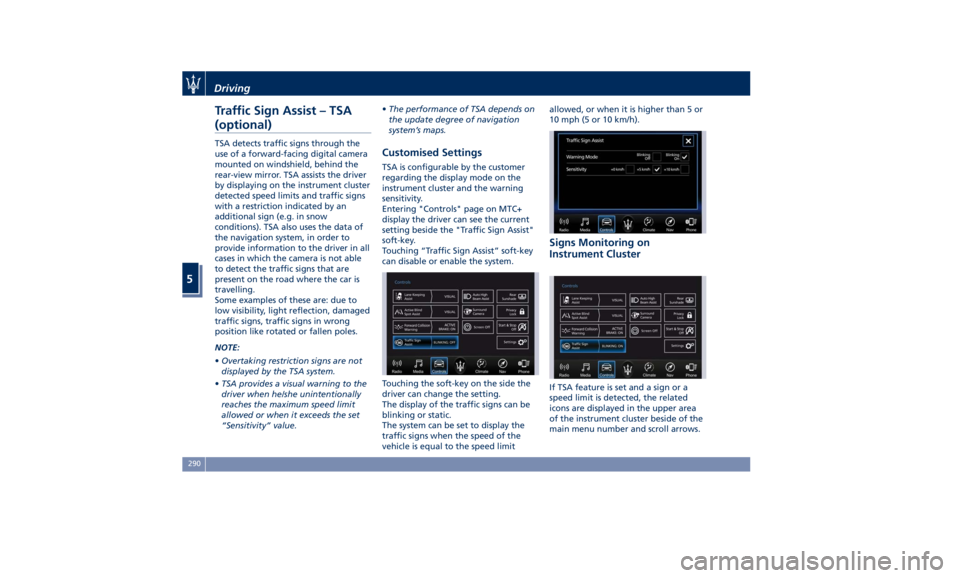
Entering "Controls" page on MTC+
display the driver can see the current
setting beside the "Traffic Sign Assist"
soft-key.
Touching “Traffic Sign Assist” soft-key
can disable or enable the system.
Touching the soft-key on the side the
driver can change the setting.
The display of the traffic signs can be
blinking or static.
The system can be set to display the
traffic signs when the speed of the
vehicle is equal to the speed limit allowed, or when it is higher than 5 or
10 mph (5 or 10 km/h).
Signs Monitoring on
Instrument Cluster
If TSA feature is set and a sign or a
speed limit is detected, the related
icons are displayed in the upper area
of the instrument cluster beside of the
main menu number and scroll arrows.Driving
5
290
Page 311 of 396
Refueling Fuel Filler Neck Access To access the fuel filler neck, the filler
door must be unlocked. From outside
the vehicle, this can only be done by
pressing the unlock
or the lock
button on the key fob RKE
transmitter, in the same way as if
opening or closing the doors. If any of
the door lock controls is pressed from
inside the vehicle, the filler door will
still remain open to allow refueling.
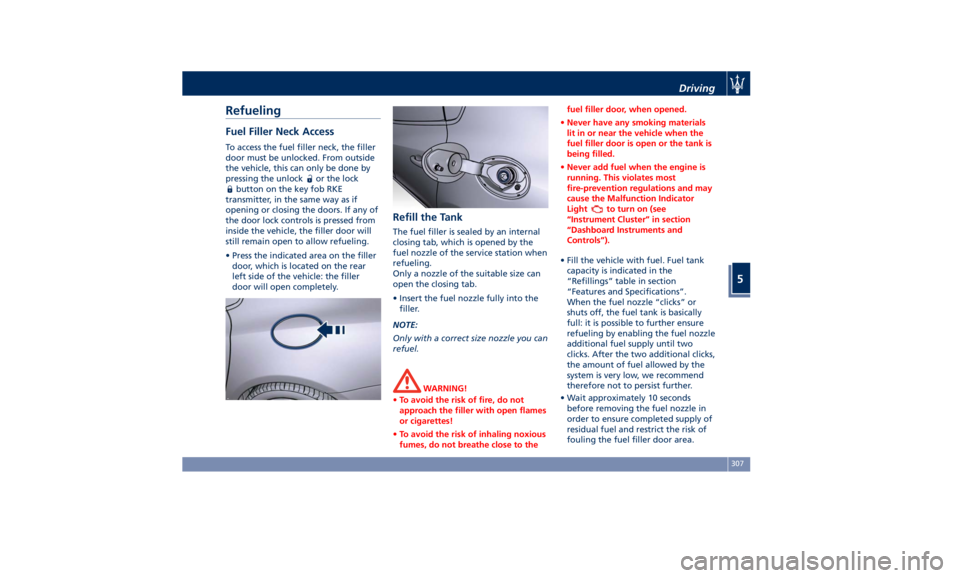
• Press the indicated area on the filler
door, which is located on the rear
left side of the vehicle: the filler
door will open completely. Refill the Tank The fuel filler is sealed by an internal
closing tab, which is opened by the
fuel nozzle of the service station when
refueling.
Only a nozzle of the suitable size can
open the closing tab.
• Insert the fuel nozzle fully into the
filler.
NOTE:
Only with a correct size nozzle you can
refuel.
WARNING!
• To avoid the risk of fire, do not
approach the filler with open flames
or cigarettes!
• To avoid the risk of inhaling noxious
fumes, do not breathe close to the fuel filler door, when opened.
• Never have any smoking materials
lit in or near the vehicle when the
fuel filler door is open or the tank is
being filled.
• Never add fuel when the engine is
running. This violates most
fire-prevention regulations and may
cause the Malfunction Indicator
Light
to turn on (see
“Instrument Cluster” in section
“Dashboard Instruments and
Controls”).
• Fill the vehicle with fuel. Fuel tank
capacity
is indicated in the
“Refillings” table in section
“Features and Specifications”.
When the fuel nozzle “clicks” or
shuts off, the fuel tank is basically
full: it is possible to further ensure
refueling by enabling the fuel nozzle
additional fuel supply until two
clicks. After the two additional clicks,
the amount of fuel allowed by the
system is very low, we recommend
therefore not to persist further.
• Wait approximately 10 seconds
before removing the fuel nozzle in
order to ensure completed supply of
residual fuel and restrict the risk of
fouling the fuel filler door area.Driving
5
307
Page 312 of 396
• Remove the fuel nozzle.
• Close the fuel filler door.
CAUTION!
To avoid fuel spillage and overfilling,
do not “top off” the fuel tank after
filling.
Emergency Refueling Funnel
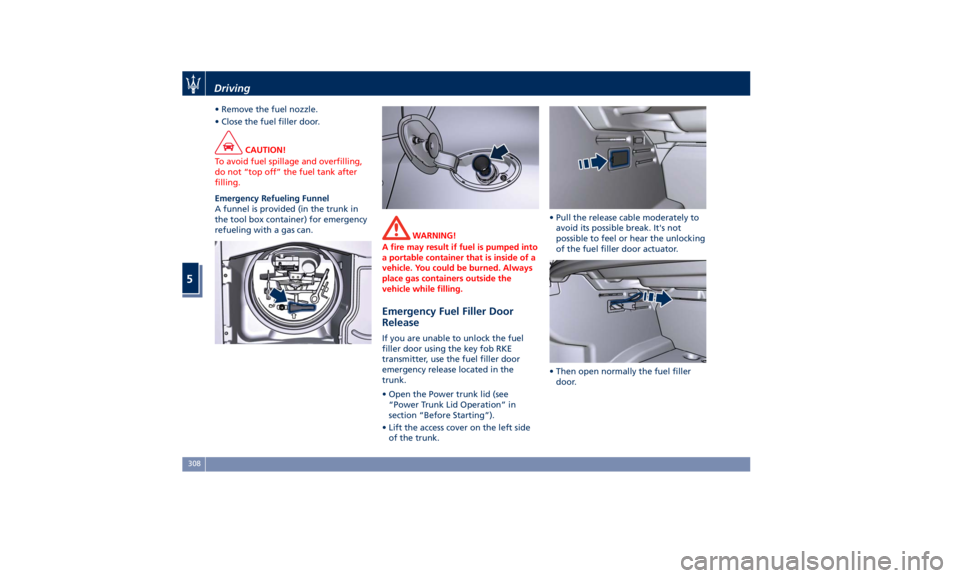
A
funnel is provided (in the trunk in
the tool box container) for emergency
refueling with a gas can.
WARNING!
A fire may result if fuel is pumped into
a portable container that is inside of a
vehicle. You could be burned. Always
place gas containers outside the
vehicle while filling.
Emergency Fuel Filler Door
Release If you are unable to unlock the fuel
filler door using the key fob RKE
transmitter, use the fuel filler door
emergency release located in the
trunk.
• Open the Power trunk lid (see
“Power Trunk Lid Operation” in
section “Before Starting”).
• Lift the access cover on the left side
of the trunk. • Pull the release cable moderately to
avoid its possible break. It's not
possible to feel or hear the unlocking
of the fuel filler door actuator.
• Then open normally the fuel filler
door.Driving
5
308
Page 319 of 396
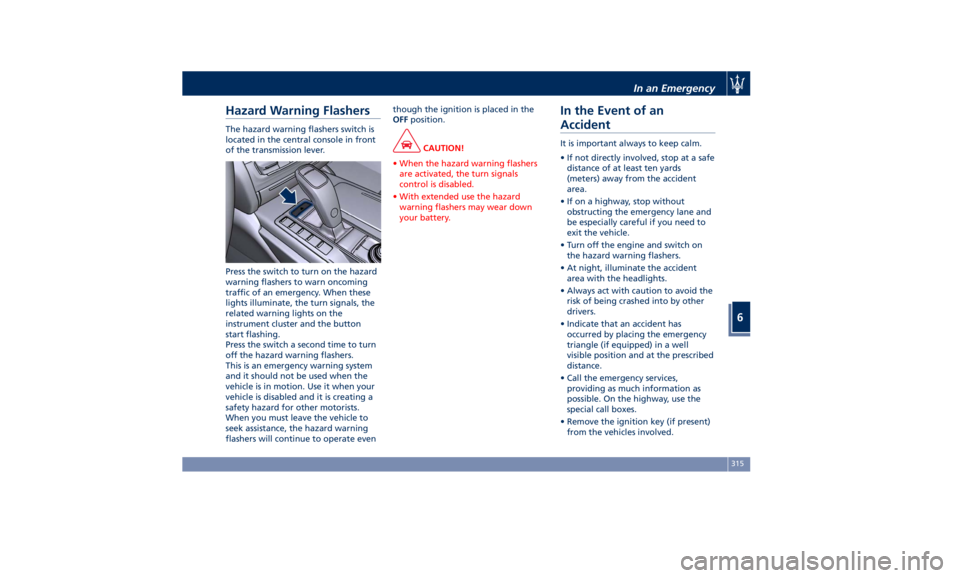
Hazard Warning Flashers The hazard warning flashers switch is
located in the central console in front
of the transmission lever.
Press the switch to turn on the hazard
warning flashers to warn oncoming
traffic of an emergency. When these
lights illuminate, the turn signals, the
related warning lights on the
instrument cluster and the button
start flashing.
Press the switch a second time to turn
off the hazard warning flashers.
This is an emergency warning system
and it should not be used when the
vehicle is in motion. Use it when your
vehicle is disabled and it is creating a
safety hazard for other motorists.
When you must leave the vehicle to
seek assistance, the hazard warning
flashers will continue to operate even though the ignition is placed in the
OFF position.
CAUTION!
• When the hazard warning flashers
are activated, the turn signals
control is disabled.
• With extended use the hazard
warning flashers may wear down
your battery.
In the Event of an
Accident It is important always to keep calm.
• If not directly involved, stop at a safe
distance of at least ten yards
(meters) away from the accident
area.
• If on a highway, stop without
obstructing the emergency lane and
be especially careful if you need to
exit the vehicle.
• Turn off the engine and switch on
the hazard warning flashers.
• At night, illuminate the accident
area with the headlights.
• Always act with caution to avoid the
risk of being crashed into by other
drivers.
• Indicate that an accident has
occurred by placing the emergency
triangle (if equipped) in a well
visible position and at the prescribed
distance.
• Call the emergency services,
providing as much information as
possible. On the highway, use the
special call boxes.
• Remove the ignition key (if present)
from the vehicles involved.In an Emergency
6
315
Page 349 of 396
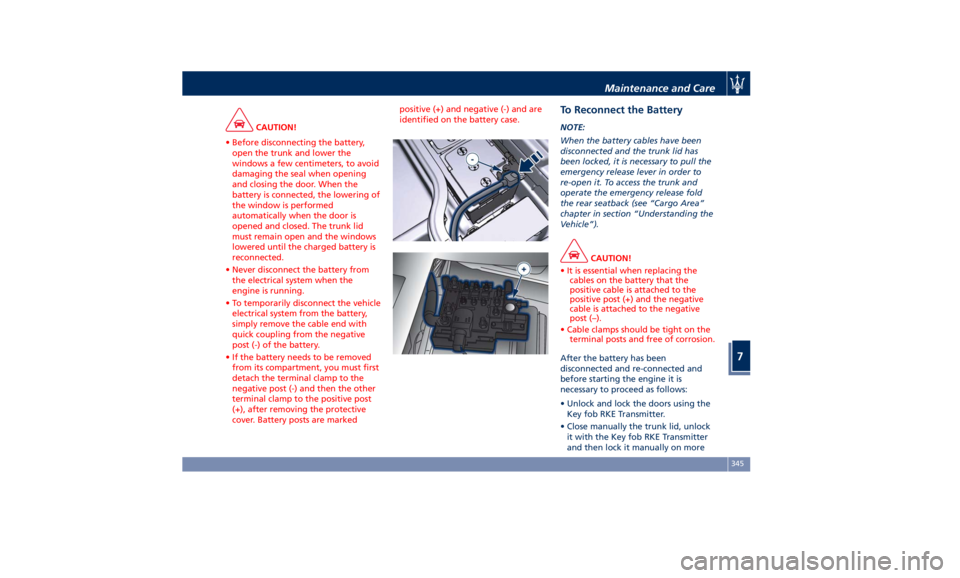
CAUTION!
• Before disconnecting the battery,
open the trunk and lower the
windows a few centimeters, to avoid
damaging the seal when opening
and closing the door. When the
battery is connected, the lowering of
the window is performed
automatically when the door is
opened and closed. The trunk lid
must remain open and the windows
lowered until the charged battery is
reconnected.
• Never disconnect the battery from
the electrical system when the
engine is running.
• To temporarily disconnect the vehicle
electrical system from the battery,
simply remove the cable end with
quick coupling from the negative
post (-) of the battery.
• If the battery needs to be removed
from its compartment, you must first
detach the terminal clamp to the
negative post (-) and then the other
terminal clamp to the positive post
(+), after removing the protective
cover. Battery posts are marked positive (+) and negative (-) and are
identified on the battery case.
To Reconnect the Battery NOTE:
When the battery cables have been
disconnected and the trunk lid has
been locked, it is necessary to pull the
emergency release lever in order to
re-open it. To access the trunk and
operate the emergency release fold
the rear seatback (see “Cargo Area”
chapter in section “Understanding the
Vehicle”).
CAUTION!
• It is essential when replacing the
cables on the battery that the
positive cable is attached to the
positive post (+) and the negative
cable is attached to the negative
post (–).
• Cable clamps should be tight on the
terminal posts and free of corrosion.
After the battery has been
disconnected
and re-connected and
before starting the engine it is
necessary to proceed as follows:
• Unlock and lock the doors using the
Key fob RKE Transmitter.
• Close manually the trunk lid, unlock
it with the Key fob RKE Transmitter
and then lock it manually on moreMaintenance and Care
7
345
Page 389 of 396

Older Children and Child
Restraints .................75
Tips on getting the most out of your
child restraint ..............76
Climate Control ............. .203
Clock, analog .............. .192
Console
Central Console Components ....95
Front Dome Console
Components ...............96
Instrument Panel on the Rear
Central Console ........... .106
Rear Console
Components/Features ....... .107
Controls Screen ............. .185
Cruise Control
Cruise Control Adaptive (ACC) . .257
Electronic Cruise Control (CC) . . .254
Cupholders ................ .132
Front Passengers Cupholders . . .132
Rear Passengers Cupholders . . .133
Dashboard Compartment ...... .200
Dashboard Components .........94
Defroster ...................50
Doors
Child Protection Door Lock
System ...................41
Doors Locking ..............39
Doors Manual Lock ...........39
Front Doors Components ......96
Lock/Unlock Door Flashlight ....34
Power Doors Locking/Unlocking . .40 Rear Doors Components .......98
Soft Door Close System ........41
Unlock Driver Door/All Doors with
Remote Key 1st Press .........34
Unlock the Doors, Fuel Filler Door
and Trunk .................34
Unlock the Vehicle ...........33
DPF System
DPF Filter Replacement ...... .340
“Drive Away Inhibit” strategy . . . .247
Drive Mode, controls ......... .234
Setting the Drive Mode ...... .234
Driving Conditions ........... .309
Before the Trip ............ .309
Driving at Night ........... .309
Driving in Fog ............ .310
Driving in the Mountains ..... .310
Driving in the Rain ......... .309
Driving on Snow or Ice ...... .311
Safe Driving .............. .309
DRL (Daytime Running Light) . . . .119
EDR (Event Data Recorder) .......73
Electronic Cruise Control
....... .254
Emergency ...................
5
Hazard W arning Lights ...... .126
In the Event of an Accident . . . .315
Jump Starting ............ .322
Trunk Lid Emergency Release ....56
Engine
Engine Coolant Level Check . . . .337
Engine Oil Level Check ...... .340
Hood Operation .............57 Normal Starting of the Engine . .218
Use of the Engine .......... .252
Entry/Exit, lights on ............30
EPB (Electric Parking Brake) ..... .243
ESC (Electronic Stability Control) . .248
Filters
A/C System Air Filter
Replacement ............. .342
Engine Air Filter Replacement . .342
Forward Collision Warning (FCW) . .268
Fuel
Carbon Monoxide Warning . . . .306
Emergency Fuel Filler Door
Release ................. .308
Emissions Inspection and
Maintenance Programs ...... .332
Fuel Consumption ......... .374
Fuel Filter Service .......... .340
Fuel Requirements ......... .304
Fuel System Warnings ....... .306
Gasoline/Oxygenate Blends . . . .305
Low Fuel Indicator ......... .173
Materials Added to Fuel ..... .306
MMT in Gasoline .......... .305
Reformulated Gasoline ...... .305
Fuses .................... .348
Fuses Position ............ .349
Fuses Replacement ......... .348
Glove Box Feature Lock (Passenger
Side) ................... .201Index
9 385
Page 390 of 396

Handholds and Cloth Hooks ..... .136
Hazard Warning Flashers ....... .315
Head Restraints ...............98
Highway Assist - HAS ......... .284
HomeLink ................. .143
Security ................. .146
Troubleshooting Tips ........ .146
Using HomeLink ........... .146
Hood
Hood Operation .............57
Trunk Lid and Hood Ajar
Indicators .................57
HSA (Hill Start Assist) ......... .250
Identification Labels ............19
Illuminated Entry/Exit ...........30
Immobilizer (Sentry Key) .........26
Indicator Lights
Air Bag Warning Light .........90
TFT Display: Menus and Settings .157
TFT Display: Warning/Indicator
Lights of Set Modes/Functions. . .170
Warning and Indicator Lights on
Analog Instrument ......... .153
Infotainment System
Main Menu Bar on MTC+
Display ................. .178
Manual Controls and Devices . . .177
Personalized the Main Menu Bar.179
Instrument Cluster ........... .152
Interior Components ...........94
Interior Maintenance and Care. . . .363
Interiors Features ............ .130 iPad Holder ................ .137
iPod Connection ............. .135
Jump Start Procedure ......... .324
KeyFob ....................25
Key Fob Battery Replacement ....35
Preventing Inadvertent Locking of
key fob RKE Transmitter Inside the
Vehicle ...................43
Replacement ...............27
Requiring and setting Additional
Key Fobs ..................34
Unlock the Vehicle with Key fob . .33
Keys .......................24
Lane Departure Warning (LDW) . . .271
Level Checks ............... .337
Adding Washer Fluid ........ .339
Brake Fluid Level Check ...... .338
Engine Coolant Level Check . . . .337
Engine Oil Level Check ....... .337
Fluid Level Check for Coolant
Transmission System ........ .341
Transmission Oil Check ....... .341
Lights
.................... .116
Automatic
Headlights ....... .118
Automatic
High Beam ....... .119
Bulb Replacement .......... .355
Cargo Lamps ............. .126
Dome Lights .............. .125
DRL, Daytime Running Lights . . .119
Fog Lights ............... .121 Full-LED Headlight with Cornering
Function ................ .119
Headlight Time Delay ....... .118
High Beam and Flashing ..... .122
Interior Lights ............. .123
Light Switch .............. .116
Multifunction Lever ......... .121
Turn Signals .............. .121
Loading the Vehicle
Loading with Rear Seatback . . . .140
Vehicle Load Carrying Capacity . .139
Main- and Submenu .......... .158
Maintenance ..................5
A/C System Maintenance ..... .357
Air Bag System Maintenance ....72
Bodywork Maintenance and
Care ................... .360
Emissions Inspection and
Maintenance Programs ...... .332
Interior Maintenance and Care . .363
Maintenance Procedures ..... .334
Periodic Maintenance ....... .331
Scheduled Maintenance Service .328
Scheduled Service Plan ....... .329
Wheels Maintenance ........ .358
Map Pockets ............... .136
Maserati Roadside Assistance
Program ...................16
Messages on Main Display Area . . .157
MIL (Malfunction Indicator Light) . .153
Mirrors ................... .113
External Mirrors ........... .113Index
9 386
Page 391 of 396

Folding Mirrors ........... .114
Integrated External Rearview Mirror
Lights .................. .126
Internal Rearview Mirror ..... .115
Mirrors Positioning ......... .113
Rearview Mirrors .......... .113
Tilt Mirrors in Reverse ....... .114
MTC+ “Controls” Screen ....... .185
MTC+ Settings - Customer
Programmable Features ...... .189
Auto-On Comfort & Remote
Start ................... .196
Clear Personal Data ........ .199
Clock & Date ............. .192
Display ................. .190
Doors & Locks ............ .194
Engine Off Options ......... .196
Lights .................. .194
Restore Settings ........... .199
Safety and Driving Assistance . . .193
Voice Commands .......... .191
Occupant Restraint System .......58
On Board Diagnostics ......... .253
ORC (Occupant Restraint
Controller) .................69
Park Assist ..................80
Enabling and Disabling Park
Assist ....................83
Parking .................. .246
Parking Brake .............. .243
Passive Entry System ...........42 Pedals, adjustable ........... .112
Pedestrian Emergency Braking
(PEB) ................... .268
Pets, transporting .............79
Phone and Voice Controls on Steering
Wheel .................. .213
Phone Mode ............. .214
Phone/Bluetooth, Customer
settings ................. .198
Power Outlets .............. .130
Power Outlet Inside the Central
Console ................. .131
Power Outlet Inside the
Cupholder ............... .130
Power Outlet Inside the Trunk . .132
Rear
Power Outlets .........
.131
Rear Parking Camera ...........85
Refueling ................. .307
Fuel Filler Neck Access ....... .307
Remote Start System ...........37
Restarting the Vehicle ........ .365
Restraint System ..............66
Child Restraint Systems ........74
RKE (Remote Keyless Entry)
Transmitter .................24
Roadside Assistance Program .....16
Roll-Over Warning .............15
Safety
Child Restraint Systems ........74
Reporting Safety Defects .......12
Safety Tips ..................58 Scheduled Maintenance Service . . .328
Scheduled Service Plan
Scheduled Maintenance
Indicator ................ .328
Seat Belt ...................58
Automatic Locking Retractor (ALR)
Mode ....................64
Enhanced Seat Belt Use Reminder
System (SBR) ...............65
Passenger Seat Belts ..........63
Seat Belt Reminder Light ..... .157
Seat Belts and Pregnant Women .65
Seat Belts Pretensioners .......64
Three-Point Seat Belts .........60
Three-Point Seat Belts Height
Adjustment ................62
Three-Point Seat Belts Untwisting
Procedure .................63
Three-Point Seat Belts Use
Instructions ................61
Using the Seat Belt in Automatic
Locking Retractor Mode (ALR) . . .64
Seats ......................98
Comfort Luxury Rear Seats .... .105
Driver Memory Seat ........ .101
Easy Entry/Exit Seats ........ .103
Front Heated Seats ...........99
Front Power Seats ...........98
Front Ventilated Seats ....... .100
Power Lumbar Seats ..........99
Rear Armrest ............. .103
Rear Seats ............... .103
Rear Side Heated Seats ...... .104Index
9 387