2019 MASERATI QUATTROPORTE key
[x] Cancel search: keyPage 211 of 396

two vents on the upper part of the
dashboard and two positioned at
the rear end of the central console.
Each of these vents can be singly
adjusted. The air grids or vanes of
the vents can be moved to adjust air
flow direction. A setting wheel,
placed near each vent, allows to
regulate or close the airflow.
• “Bi-Level” mode
Air for each zone comes from the
dashboard and central console
adjustable vents and the fixed floor
vents. A small portion of the airflow
is directed through the
defrost/demist vents to prevent
windows fogging.
NOTE:
Bi-Level mode is designed to let cooler
air come in the dashboard and rear
part of the central console vents and
warmer air from the floor vents.
• “Defrost” mode
Air for each zone comes from the
dashboard defrost/demist vents to
prevent windows fogging.
• “Mix” mode
Air for each zone comes from the
defrost/demist vent, the vent under
the dashboard and from floor vent. This mode is recommended for cold
climates, to improve comfort and
prevent windows fogging.
• “Hi-Level” mode
Air for each zone comes from the
dashboard defrost/demist vents and
from the dashboard adjustable
vents, the central console adjustable
vent and the fixed floor vent.
• “Tri-Level” mode
Air for each zone comes from all the
adjustable/fixed and defrost/demist
vents.
14. “SYNC” mode
Touch the “SYNC” soft-key on the
MTC+ to switch the Sync feature
on/off. The “SYNC” soft-key
illuminates when this feature is
selected. This function is used to
synchronise the passenger
temperature setting with the driver
temperature setting.
Changing the passenger temperature
setting while in “SYNC” will
automatically exit this feature.
15. “REAR” mode
This soft-key is present only if the
vehicle is equipped with the
additional dual-zone air conditioning
system for rear passengers. Touching "REAR" soft-key you enter
the screen where the settings
available for rear seat passengers are
displayed. For the description of these
controls, see paragraph "Four-Zone
Climate Controls (optional)" of this
chapter.
Dual Zone Climate Control
Functions Air Conditioning (A/C)
The “A/C” soft-key allows to manually
activate or deactivate the air
conditioning system. When the air
conditioning system is turned on, cool
dehumidified air will flow through the
vents into the cabin. For improved fuel
economy, touch the “A/C” soft-key to
turn off the air conditioning and
manually adjust the blower and
airflow mode settings.
When the “A/C” and “AUTO”
functions are switched off it is not
possible to have air at a lower
temperature than the outside.
Recirculation
and Air Quality
Sensor
When outside air contains smoke,
odours, or high humidity, or if rapid
cooling is desired, you may wish to
recirculate interior air by pressing the
recirculation control button or theDashboard Instruments and Controls
4
207
Page 212 of 396

relevant soft-key button to activate
the two different functionalities.
The recirculation function, that allows
to open/close the A/C air inlet by
operating the
button on the
climate control panel or the MTC+ soft
key, is integrated with the Air Quality
Sensor.
This sensor, positioned upstream of the
A/C filter, in front of the air intake of
the A/C system, detects the presence of
polluting substances and submits an
electric signal to the A/C control unit,
that closes the intake of the external
air by activating the air recirculation.
The
button or the MTC+ soft-key
can therefore enable three operating
modes, switchable in sequence.
Starting from the outside air condition
with LED on the button off and MTC+
soft-key not highlighted, in which the
external air is aspirated by the A/C
system and treated to be introduced
into the passenger compartment,
subsequent actuations of the
button or the MTC+ soft-key
change the state as follows.
• First press: the A/C system activates
the automatic recirculation control
by using the signal transmitted from
the AQS. The symbol “A” on the
button and the MTC+ soft-key
lights up. • Second press: the A/C system
activates the recirculation, the LED
on the button or the MTC+ soft-key
light up. The A/C system will stay this
way up to a new actuation, or until
the increased humidity could lead to
windshield fogging: in this case the
recirculation automatically switches
to external air.
• Third press: the A/C system switches
back to external air (default
operating mode).
The next press of the
button or
the MTC+ soft-key restarts the
operating cycle just described.
NOTE:
To avoid the risk of fogging, the AQS is
disabled when the external
temperature falls below 35 °F (2 °C). NOTE:
In cold weather, use of recirculation
mode may lead to window fogging.
Select the MIX mode and increase
the blower speed to prevent fogging.
MAX A/C
Activating this function, the system
switches to exit “AUTO”, enter “A/C”
and recirculation. The minimum
temperature (LO) in both zones, the
maximum blower speed and the
“Dashboard” air distribution mode
are also selected.
The blower speed can be adjusted and
the air distribution can be modified
without exiting “MAX A/C”. To exit
“MAX A/C” touch the relevant MTC+
soft-key or exit A/C or recirculation.Dashboard Instruments and Controls
4
208
Page 213 of 396
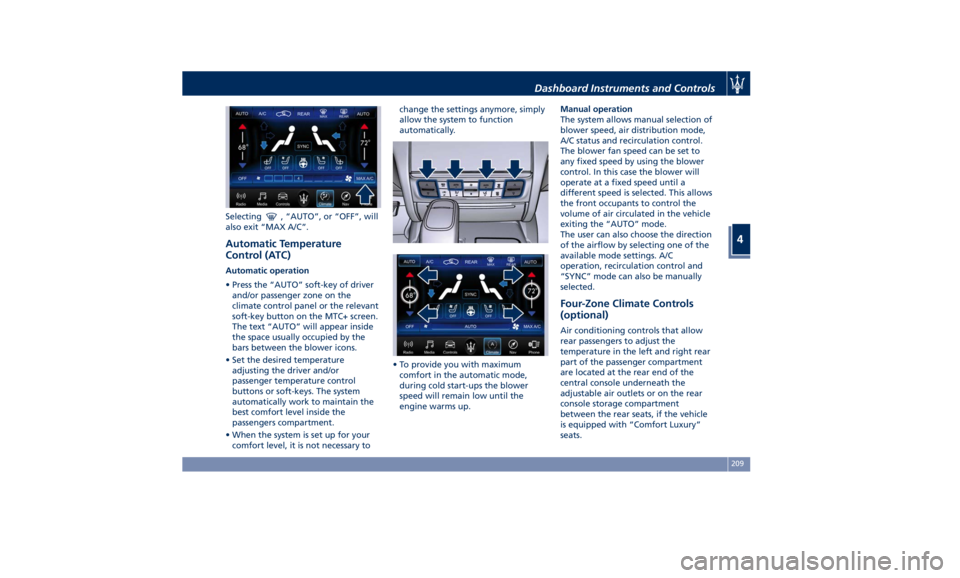
Selecting , “AUTO”, or “OFF”, will
also exit “MAX A/C”.
Automatic Temperature
Control (ATC) Automatic operation
• Press the “AUTO” soft-key of driver
and/or passenger zone on the
climate control panel or the relevant
soft-key button on the MTC+ screen.
The text “AUTO” will appear inside
the space usually occupied by the
bars between the blower icons.
• Set the desired temperature
adjusting the driver and/or
passenger temperature control
buttons or soft-keys. The system
automatically work to maintain the
best comfort level inside the
passengers compartment.
• When the system is set up for your
comfort level, it is not necessary to change the settings anymore, simply
allow the system to function
automatically.
• To provide you with maximum
comfort in the automatic mode,
during cold start-ups the blower
speed will remain low until the
engine warms up. Manual operation
The system allows manual selection of
blower speed, air distribution mode,
A/C status and recirculation control.
The blower fan speed can be set to
any fixed speed by using the blower
control. In this case the blower will
operate at a fixed speed until a
different speed is selected. This allows
the front occupants to control the
volume of air circulated in the vehicle
exiting the “AUTO” mode.
The user can also choose the direction
of the airflow by selecting one of the
available mode settings. A/C
operation, recirculation control and
“SYNC” mode can also be manually
selected.
Four-Zone Climate Controls
(optional) Air conditioning controls that allow
rear passengers to adjust the
temperature in the left and right rear
part of the passenger compartment
are located at the rear end of the
central console underneath the
adjustable air outlets or on the rear
console storage compartment
between the rear seats, if the vehicle
is equipped with “Comfort Luxury”
seats.Dashboard Instruments and Controls
4
209
Page 215 of 396
NOTE:
The Bi-Level mode is designed to
provide comfort by sending cooler air
out of the central console and side
pillars vents and warmer air from the
floor vents.
7. “Floor” mode
Air comes from the floor vents under
the front seats.
8. “Torso” mode
Air comes from the adjustable vents
on the central console and the ones
on the pillars between the doors. Each
of these vents can be singly adjusted.
The air grids of the vents can be
moved up/down and right/left to
adjust the airflow direction. A setting
wheel, placed near each vent, allows
to regulate the airflow or to close the
vent.
9. AUTO
This function automatically controls
the interior temperature by adjusting
the air flow rate and the air
distribution.
• Press the AUTO button: the
automatic rear climate control
switches from manual to automatic
mode and vice-versa. The AUTO
symbol on the button illuminates
when this function is activated. • Adjust then the temperature you
wish to maintain by regulating the
left and/or right side temperature
control buttons. Once the desired
temperature is set, the system will
achieve and automatically maintain
that comfort level.
• When the system is set up for your
comfort level, it is not necessary to
change the settings anymore: simply
allow the system to function
automatically.
To provide you with maximum
comfort in the automatic mode,
during cold start-ups the blower speed
will remain low until the engine
warms up.
Four-Zone Climate Control by the
Driver
By operating the MTC+ display
controls the driver can adjust the
settings of the rear climate zones by
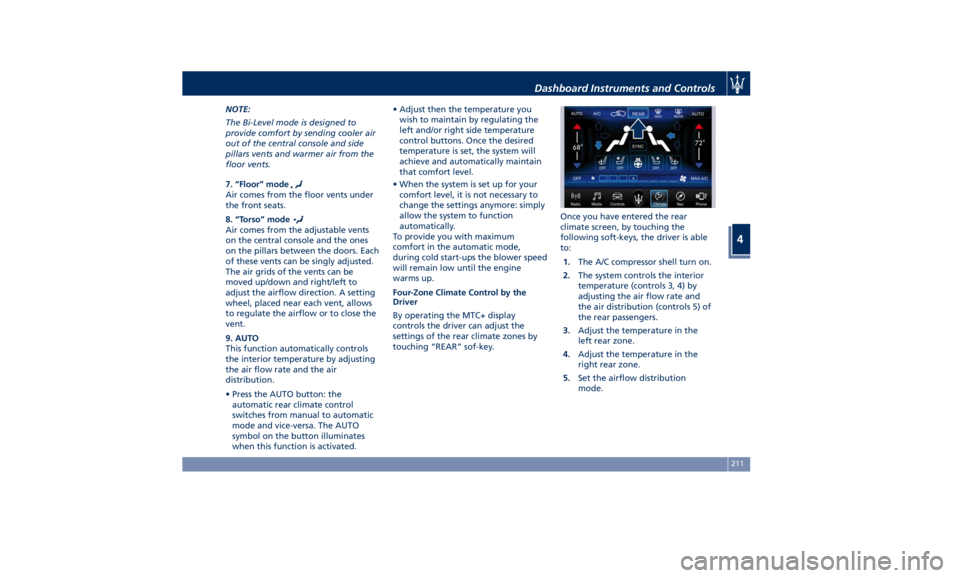
touching “REAR” sof-key. Once you have entered the rear
climate screen, by touching the
following soft-keys, the driver is able
to:
1. The A/C compressor shell turn on.
2. The system controls the interior
temperature (controls 3, 4) by
adjusting the air flow rate and
the air distribution (controls 5) of
the rear passengers.
3. Adjust the temperature in the
left rear zone.
4. Adjust the temperature in the
right rear zone.
5. Set the airflow distribution
mode.Dashboard Instruments and Controls
4
211
Page 216 of 396
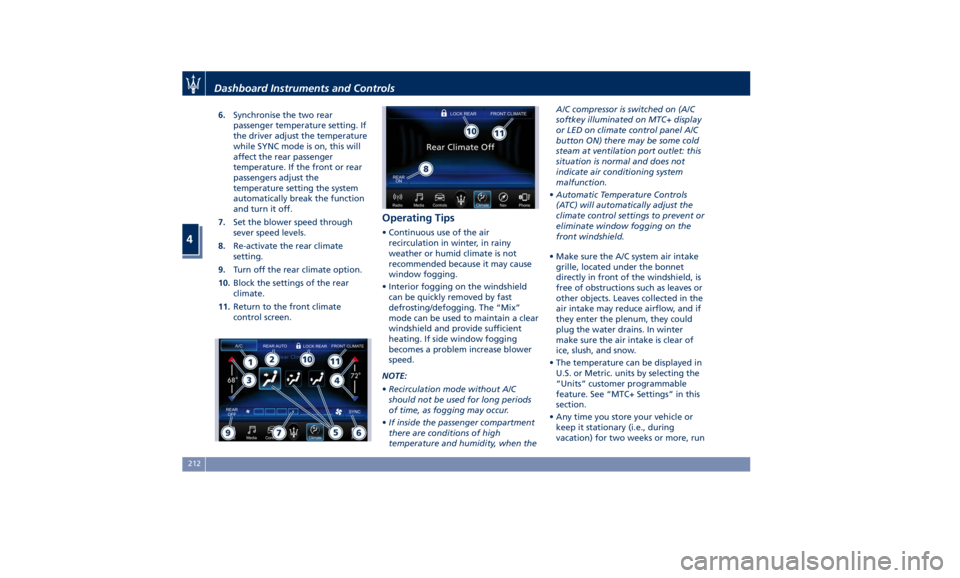
6. Synchronise the two rear
passenger temperature setting. If
the driver adjust the temperature
while SYNC mode is on, this will
affect the rear passenger
temperature. If the front or rear
passengers adjust the
temperature setting the system
automatically break the function
and turn it off.
7. Set the blower speed through
sever speed levels.
8. Re-activate the rear climate
setting.
9. Turn off the rear climate option.
10. Block the settings of the rear
climate.
11. Return to the front climate
control screen. Operating Tips • Continuous use of the air
recirculation in winter, in rainy
weather or humid climate is not
recommended because it may cause
window fogging.
• Interior fogging on the windshield
can be quickly removed by fast
defrosting/defogging. The “Mix”
mode can be used to maintain a clear
windshield and provide sufficient
heating. If side window fogging
becomes a problem increase blower
speed.
NOTE:
• Recirculation mode without A/C
should not be used for long periods
of time, as fogging may occur.
• If inside the passenger compartment
there are conditions of high
temperature and humidity, when the A/C compressor is switched on (A/C
softkey illuminated on MTC+ display
or LED on climate control panel A/C
button ON) there may be some cold
steam at ventilation port outlet: this
situation is normal and does not
indicate air conditioning system
malfunction.
• Automatic Temperature Controls
(ATC) will automatically adjust the
climate control settings to prevent or
eliminate window fogging on the
front windshield.
• Make sure the A/C system air intake
grille, located under the bonnet
directly in front of the windshield, is
free of obstructions such as leaves or
other objects. Leaves collected in the
air intake may reduce airflow, and if
they enter the plenum, they could
plug the water drains. In winter
make sure the air intake is clear of
ice, slush, and snow.
• The temperature can be displayed in
U.S. or Metric. units by selecting the
“Units” customer programmable
feature. See “MTC+ Settings” in this
section.
• Any time you store your vehicle or
keep it stationary (i.e., during
vacation) for two weeks or more, runDashboard Instruments and Controls
4
212
Page 222 of 396
Normal Starting of the
Engine WARNING!
It is dangerous to run the engine in an
enclosed area. The engine consumes
oxygen and discharges carbon
dioxide, carbon monoxide and other
toxic gases in the atmosphere.
WARNING!
California Proposition 65
Operating, servicing and maintaining
a passenger vehicle or off-road vehicle
can expose you to chemicals including
such as, engine exhaust, carbon
monoxide, phthalates and lead, that
which are known to the State of
California to cause cancer and birth
defects or other reproductive harm. To
minimize exposure, avoid breathing
exhaust, do not idle the engine except
as necessary, service your vehicle in a
well-ventilated area and wear gloves
or wash your hands frequently when
servicing your vehicle. For more
information go to: www.P65Warnings.ca.gov/passenger-
vehicle
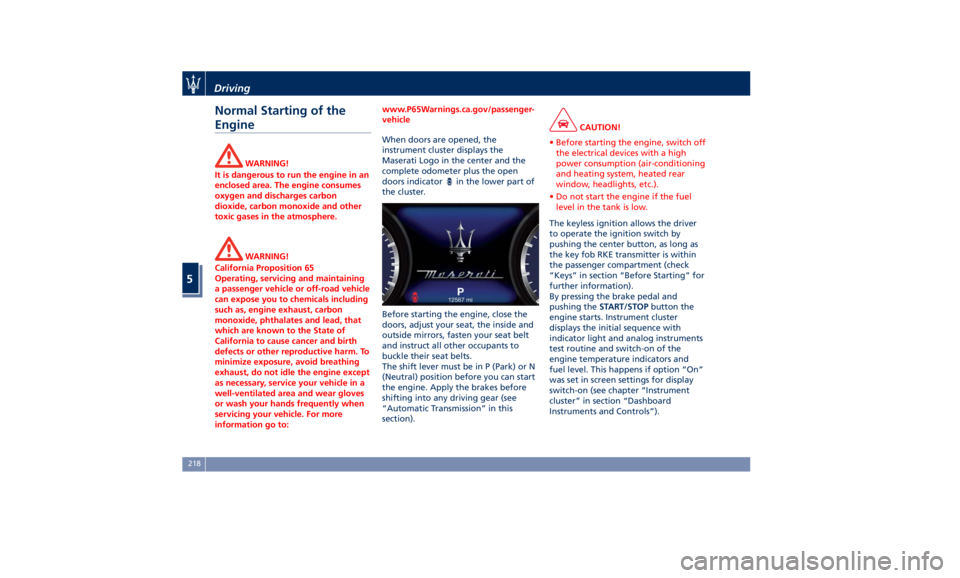
When doors are opened, the
instrument
cluster displays
the
Maserati Logo in the center and the
complete odometer plus the open
doors indicator
in the lower part of
the cluster.
Before starting the engine, close the
doors, adjust your seat, the inside and
outside mirrors, fasten your seat belt
and instruct all other occupants to
buckle their seat belts.
The shift lever must be in P (Park) or N
(Neutral) position before you can start
the engine. Apply the brakes before
shifting into any driving gear (see
“Automatic Transmission” in this
section). CAUTION!
• Before starting the engine, switch off
the electrical devices with a high
power consumption (air-conditioning
and heating system, heated rear
window, headlights, etc.).
• Do not start the engine if the fuel
level in the tank is low.
The keyless ignition allows the driver
to
operate the
ignition switch by
pushing the center button, as long as
the key fob RKE transmitter is within
the passenger compartment (check
“Keys” in section “Before Starting” for
further information).
By pressing the brake pedal and
pushing the START/STOP button the
engine starts. Instrument cluster
displays the initial sequence with
indicator light and analog instruments
test routine and switch-on of the
engine temperature indicators and
fuel level. This happens if option “On”
was set in screen settings for display
switch-on (see chapter “Instrument
cluster” in section “Dashboard
Instruments and Controls”).Driving
5
218
Page 223 of 396
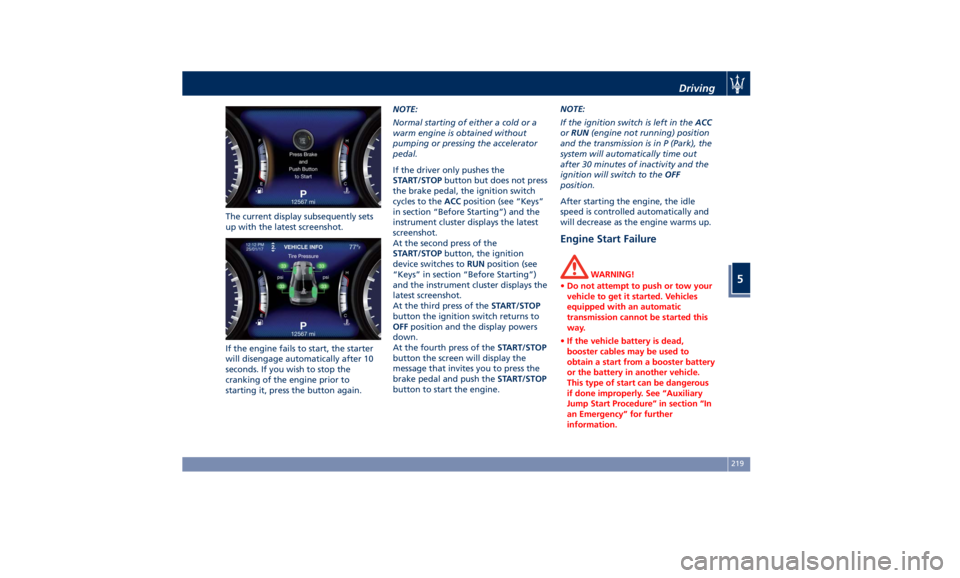
The current display subsequently sets
up with the latest screenshot.
If the engine fails to start, the starter
will disengage automatically after 10
seconds. If you wish to stop the
cranking of the engine prior to
starting it, press the button again. NOTE:
Normal starting of either a cold or a
warm engine is obtained without
pumping or pressing the accelerator
pedal.
If the driver only pushes the
START/STOP button but does not press
the brake pedal, the ignition switch
cycles to the ACC position (see “Keys”
in section “Before Starting”) and the
instrument cluster displays the latest
screenshot.
At the second press of the
START/STOP button, the ignition
device switches to RUN position (see
“Keys” in section “Before Starting”)
and the instrument cluster displays the
latest screenshot.
At the third press of the START/STOP
button the ignition switch returns to
OFF position and the display powers
down.
At the fourth press of the START/STOP
button the screen will display the
message that invites you to press the
brake pedal and push the START/STOP
button to start the engine. NOTE:
If the ignition switch is left in the ACC
or RUN (engine not running) position
and the transmission is in P (Park), the
system will automatically time out
after 30 minutes of inactivity and the
ignition will switch to the OFF
position.
After starting the engine, the idle
speed is controlled automatically and
will decrease as the engine warms up.
Engine Start Failure WARNING!
• Do not attempt to push or tow your
vehicle to get it started. Vehicles
equipped with an automatic
transmission cannot be started this
way.
• If the vehicle battery is dead,
booster cables may be used to
obtain a start from a booster battery
or the battery in another vehicle.
This type of start can be dangerous
if done improperly. See “Auxiliary
Jump Start Procedure” in section “In
an Emergency” for further
information.Driving
5
219
Page 227 of 396
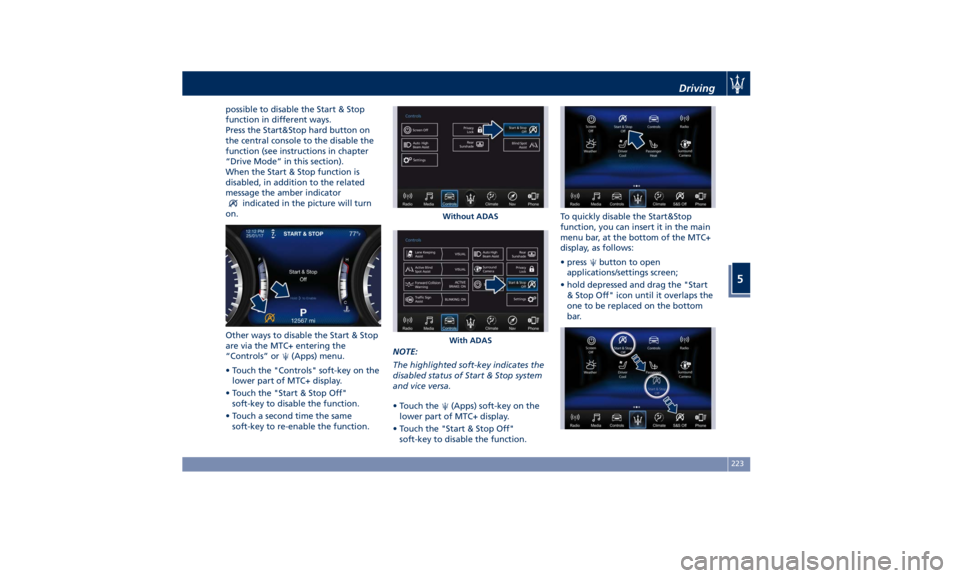
possible to disable the Start & Stop
function in different ways.
Press the Start&Stop hard button on
the central console to the disable the
function (see instructions in chapter
“Drive Mode” in this section).
When the Start & Stop function is
disabled, in addition to the related
message the amber indicator
indicated in the picture will turn
on.
Other ways to disable the Start & Stop
are via the MTC+ entering the
“Controls” or
(Apps) menu.
• Touch the "Controls" soft-key on the
lower part of MTC+ display.
• Touch the "Start & Stop Off"
soft-key to disable the function.
• Touch a second time the same
soft-key to re-enable the function. NOTE:
The highlighted soft-key indicates the
disabled status of Start & Stop system
and vice versa.
• Touch the
(Apps) soft-key on the
lower part of MTC+ display.
• Touch the "Start & Stop Off"
soft-key to disable the function. To quickly disable the Start&Stop
function, you can insert it in the main
menu bar, at the bottom of the MTC+
display, as follows:
• press
button to open
applications/settings screen;
• hold depressed and drag the "Start
& Stop Off" icon until it overlaps the
one to be replaced on the bottom
bar.Without ADAS
With ADAS Driving
5
223